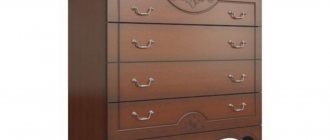
Almost all novice furniture makers try to be the first to assemble a chest of drawers.
Since this furniture is an important attribute of any home. It is small in size, has good capacity, and is a fairly simple item to make yourself.
After assembling a chest of drawers, amateur craftsmen can begin assembling more complex items
How to assemble a chest of drawers
Before moving on to a precise sequential instruction circuit, it is necessary to consider general principles.
First assemble the base body of the item, and then the remaining parts.
It is better to start assembling any furniture, especially large-sized ones, from the largest parts, continuing downwards.
In our case, first the main body, then the fastening of the drawers and other small aspects. Work exclusively on a flat surface to avoid problems with the relationship of the body parts to each other. Cover the floor with a protective material to protect both the furniture and the work surface from scratches. Some materials may be fragile, which is why you need to perform all actions carefully - slowly tighten the bolts, do not drop components, etc. You need to tighten the bolts tightly, but not too much
The bolts need to be tightened tightly, but not too much.
Inspect parts for defects
The path that furniture takes from production to the end user is usually multi-stage, and therefore no one is immune from defects. It is better to check the furniture for the latter immediately before purchasing.
First, examine all the parts of the dresser before assembling.
Sometimes the case may be scratched or slightly damaged, and sometimes the damage may be significant. The chest of drawers comes with an assembly diagram, so don't be lazy to check the package before starting work.
In addition, the instructions should have a picture of this chest of drawers.
Step-by-step instructions for installing a drawer
Before installing the drawer slides, you must determine the correct position of the fasteners. Calculations are the first step in installation.
Step 1 - determining the position of the drawers inside the cabinet
I recommend starting to mark the position of the guide fasteners from the bottom drawer. Depending on the height of the facade, the gap between the bottom of the cabinet and the drawer can be 10-30 mm.
The greater the difference between the height of the front and the height of the sides of the drawer, the larger the gap should be. This is done for reasons of stability of fastening: after all, the facade is attached to the sides of the box itself and the fastening points should be close to the center.
The remaining distance is evenly distributed between the remaining boxes. Moreover, it is customary to leave the same amount on the bottom of the box as was given on the bottom.
Such calculations are simple. Distances can be calculated using a calculator or drawn to scale. Many assemblers estimate directly on the body, measuring from point to point with a tape measure.
When the position of the boxes is determined, the attachment points for the runners are drawn. Depending on the drawer system, this may be the center, bottom or top edge of the drawer side.
After the calculations, begin installing the drawer guides. This will be the second step in installation.
Step 2 - attaching drawer guides inside the cabinet
Strictly opposite each other, the outer part of the runners is attached to the sides of the cabinet, and the inner part is attached to the drawers themselves (the exception is metaboxes, in which the internal guides are already built into the assembled drawers).
Then they try to push the boxes of drawers inside the cabinet and adjust them so as to achieve smooth and uniform movement.
Step 3 - adjusting the smooth movement of the drawer guides inside the cabinet
Then they begin to install the facades. But first, uniform gaps between them are measured using available material - various linings of the required thickness.
Step 4 - setting uniform gaps on the facades
Next, fix them with double-sided tape.
Step 5 - preliminary fixation of the facades with double-sided tape
And they are pulled from the inside using self-tapping screws.
Step 6 - fastening the drawer facade with self-tapping screws
Now you can move on to the finish line - installing the handles. That's all you need to know about how to install drawer slides yourself. I also recommend that you familiarize yourself with how to calculate the dimensions of a drawer for making your own.
The most popular today, as before, remain telescopic (ball) full extension guides.
They look like this:
Their advantages include:
- Relatively inexpensive price
- Smooth and quiet running throughout its entire service life
- Able to withstand certain loads
- Wear resistance and strength
- Ease of installation
These mechanisms are very often used for drawers of chests of drawers, kitchen sections, wardrobes and other similar mechanisms, with the operation of which they do not want to have problems in the future.
Important
- Try to tighten the screws so that all the parts are well fastened together and the furniture does not wobble in the future.
- Maintain clarity in everything and make sure that all parts are parallel to each other and symmetrical. If you make a small error in even one place, then the entire chest of drawers will look uneven.
To find out information on the topic of furniture and everything that may be connected with it, refer to the section.
The chest of drawers is not a defining, but significant element of the interior. In a variety of styles of its design, from bourgeois haberdashery rococo and impressively solid classics to fusion and high-tech, it is the chest of drawers that completes the composition and gives the appearance of the room completeness, see fig. In some ways, a chest of drawers is to furniture what i's dotted and t's crossed.
Types of chests of drawers
After choosing the material for work, you also need to decide on the type of chest of drawers, because there are many different models, and they all differ from each other in design features, functional purpose and appearance. Below are the main models of chests of drawers that you can make yourself.
Table. Popular models of chests of drawers.
| Model name, photo | Description |
| Changing chest | A unique product that combines the functions of a chest of drawers and a changing table for babies. For convenience, such designs are equipped with small wheels to make them easier to move around the house. |
| Children's chest of drawers | These chests of drawers are designed for use in a children's room. The upper part of the structure is a pull-out shelf on which you can store items or carry out various activities. |
| Chest of drawers | Another type of chest of drawers that looks more like a wardrobe. These models are tall and have many drawers for storage. As a rule, a chest of drawers is made for a hallway where usable space is limited. |
| Chest of drawers | The design consists of fittings, legs or wheels, drawers and a small table top. This product simultaneously serves as a table and functions as a small cabinet in which you can store your things. |
| Classic version | A popular type of chest of drawers, it looks like a small cabinet with drawers that slide out. A classic chest of drawers can be used to store bed linen, clothing or small items. |
Regardless of the chosen model, the manufacturing technology of the product is practically no different. Therefore, if you are finished with the choice of material and type of product, all that remains is to choose the method of fastening the wooden elements. Only after this can you start working.
Constructions
According to the models, all chests of drawers are divided into:
Standard linen.
This is a classic version of a piece of furniture for storing linen and clothing. Their advantages include compactness and ergonomics, as well as aesthetics. This type of furniture is considered the most common today . They can have any number of drawers from two to eight different sizes, which allows you to replace even a wardrobe.You can place various decorative items on the wide tabletop.
- Chests of drawers. They differ in height and shape. Such structures are installed mainly in hallways or corridors. You can store shoes, things, and various accessories in them.
- Dressers for children's rooms. They store children's supplies and soft toys. The most convenient design is considered to be one with a hinged lid . As a rule, children's chests of drawers have a changing table on top, on which you can conveniently change the baby's clothes.
- Dressers for bedrooms and living rooms with open shelves. You can install a TV on such a piece of furniture, and you can store books in open cabinets. In bedrooms, such models can be used instead of bedside tables, on which bedside lamps are installed and pastel accessories are stored.
Important : the division according to functional criteria is somewhat arbitrary. You should not strictly follow these requirements.
Required Tools
Some models involve “seamless” installation of all elements, which greatly simplifies the work. However, for reliability it is worth using fastenings such as nails and screws.
Use professional tools to assemble furniture.
To do the job well, we will need the following set of tools:
- A tape measure is a mandatory attribute; it is necessary for correct assembly and accurate measurements.
- We will also need a Phillips screwdriver that fits the size of the screws.
- It is most convenient to assemble the entire structure using a screwdriver. Since the self-tapping screws in the kit are of medium size, the drill chuck should not be less than 10 mm.
- A hammer will also come in handy.
Use professional tools carefully.
If possible, also use a level to assemble the structure perfectly accurately.
Decor
It is not enough to make a wooden chest of drawers; you also need to decorate it so that the finished product is immediately noticed by guests. This can be done using some painting techniques. First of all, for decoration you need to prepare brushes and acrylic paints, the color of which everyone can choose to their taste. The product can be completely repainted in one color or decorated with several patterns that add charm.
Retro chest of drawers, stylized at the beginning of the twentieth century
The process of decorating a chest of drawers is not as complicated as it might seem at first glance. First you need to apply a base layer of acrylic paint, and after it dries, decorate the surface of the product with special patterns. It is not necessary to draw the patterns yourself, because for this you can use ready-made stencils that are sold in stores . As soon as the patterns are dry, the entire chest of drawers needs to be varnished. That's it, the wooden chest of drawers is ready!
Decoupage of a chest of drawers with fabric with delicate pastoral motifs
What you need to know before you start installing drawers
The principle of attaching the runners to the sides of the cabinet is the same for almost all retractable systems. As a rule, 2 mm are removed from the front edge and then screwed along the outer mounting holes and several central ones, depending on the size of the guides themselves.
The only difference is the calculation of the height at which the skids are mounted.
There are three main types of drawer slides, with different slide positions:
- Along the bottom edge (bottom). The simplest and most cost-effective roller guides are installed strictly under the bottom of the drawer frame itself, overlapping on the fiberboard. As in fact, the most expensive options for equipping drawers are tandem boxes. They are also installed on the lower level of the drawer frame.
- In the center of the side of the box. Ball telescopic ones give greater freedom during installation - they can be mounted at any level of the sidewall of the box box. But it’s still better to stay at the central one. As practice shows, installation and adjustment are greatly simplified.
- With top mount. For metaboxes (metalboxes), the roller guide runners are located along the upper level.
In each case, the box will “sit” completely differently. Let's look at the example of a drawing of a regular chest of drawers with three drawers. To make the task easier, let’s assume that the boxes begin to be installed from the bottom of the side of the cabinet itself, without deduction for the base box and bottom. This is possible in the following option.
- The height of the sides of the cabinet is 668 mm (with the height of the chest of drawers without legs being 700 mm).
- The height of the drawers is 150 mm with the height of the facades being 221 mm.
How to install roller guides
The bottom is captured by part of the runners that are attached to the box at a height of 8-10 mm, depending on the thickness of the bottom (fibreboard).
Let's take the distance from the bottom to the lower edge of the facade to be 20 mm (usually it ranges from 10-30 mm).
The installation diagram of the roller guides will look like this.
There will be no harm in rounding the values. Take not the height level 32/255/478, but round for convenience to 40/260/280. The main thing is to secure the roller guides equally on both sides.
How to install ball guides
With a similar tolerance under the bottom of 20 mm, the installation diagram of the ball guides will look like this.
The difference is that it is customary to install ball guides in the center of the sidewall. Since they come in different widths, it's easier not to move them higher or lower.
Also, the values 99/322/545 can be rounded and made, say, 100/330/550.
How to install metaboxes on a drawer
A distinctive feature of a drawer with metal sides is its fastening along the top edge. The main thing here is to choose the right height of the metaboxes relative to the vertical of the facade. It can be 54 mm (optimal for installation in a narrow niche under the built-in oven in the kitchen), 86, 118 or 150 mm. If a deeper drawer is required, it can be “expanded” using one or two rows of special rails.
In our case, it is optimal to take a 150 mm metabox; the installation diagram will look like this.
As in previous options, rounding is acceptable for convenience: instead of 134/357/580, it is quite possible to take 130/360/580.
How to install fronts on a drawer
Fronts on drawers are always installed after “testing” and alignment of the inner box.
First you need to make sure that the box moves freely and smoothly, does not warp during movement and does not jam.
Only then, with the help of special linings (chipboard scraps, a wooden or plastic ruler will do), is the uniform position of the facades pretended.
Then, using double-sided tape, the facade is fixed and attached from the inside using 4x30 self-tapping screws. The through fastening of the handle also “holds” the facade. But it is worth drilling for the handle only after the facade is securely fixed.
Wooden classic
For example in Fig. Drawings of a classic wooden chest of drawers “for eternity” are provided. When using modern metal guides, 1 drawer apron is sufficient for 350-450 mm of the body height, i.e. box aprons turn into stiffening belts installed through 2-3 rows of boxes. In this case, the drawer aprons marked in red can be omitted, but 2 of them will still remain.
Peculiarities
The features of this piece of furniture include:
- Reliability. Products made from natural solid wood last for many years and do not require special care. They do not lose their technical characteristics, functionality and original color.
- Comfort. The presence of numerous drawers allows people to intelligently organize personal items so that they are always at hand.
- Wide range of models, sizes and configurations. Depending on the needs, people can make a chest of drawers of any height, width and length. For owners of small-sized housing, it is worth choosing compact and ergonomic models. And owners of spacious mansions can build a spacious and large chest of drawers with a huge number of drawers.
- Eco-friendly and natural. Wooden items do not emit toxins and do not harm consumers. They emit a pleasant woody aroma and fit harmoniously into various stylistic trends.
Valle Alisa
Characteristics
General characteristics
- Type: transformer
- Material: chipboard
- Color options: white, dark wood (ivory)
- Shape: rectangular
- For mattress size: 60×120 cm
- Swing: pendulum mechanism
- Dimensions (WxDxH): 68x175x107 cm
Design
- Backs: solid
- Walls: solid/slatted
- Bottom: slatted
- Front wall: descending
- Removable slats: no
- Number of bottom height levels: 2
- Drawer: yes (two)
- Chest of drawers included: yes (two drawers)
- Changing table included: yes
Additional Information
- Water-based paint: yes
- Silicone pads: yes
- Mattress included: no
- Features: changing table size – 60x49 cm
Price
Price from 10,980 to 11,240 (Average price: RUB 10,989)
Up
Reviews
Minuses
functional baby crib - everything is thought out for the convenience of the child and his parents - you can adjust the height of the crib so as not to bend over too much, a pendulum mechanism, drawers, a changing table and it looks very good in the interior.
Minuses
We saw this crib at a friend's house. I was very pleased with the price/quality ratio. In addition, space is saved significantly. It doesn’t look bulky, the bed is a standard size for a child. The bottom is slatted and has two positions. In general, a very well thought out crib, we ordered the same one for ourselves.
pros
Comfortable for child and parents
Space saving
Functionality
Minuses
Installation of ball telescopic guides
On the side of the drawer, horizontally, strictly in the center, mark a line and screw one half of the guide along it.
Now we need to mark a similar horizontal line on the inside wall of the chest of drawers.
I took the exact distances and dimensions from the drawing of my chest of drawers; you can use the drawing of your furniture product, approximately as shown in the figure:
That is, we mark 417 mm from the floor on the sidewall and mount the telescope at this height.
This completes the hardest part of the work; now we screw the two halves of the guides strictly along the line to the drawer and to the side and move it into place.
Photo
Ideas for the final decoration of the resulting result can be gleaned from the following photos:
How to assemble a chest of drawers yourself
When assembling cabinet furniture, it is recommended to use recommendations from professionals in this matter. Thanks to this, it will be possible to keep the furniture stylish and of high quality for many years:
- Furniture must be assembled from small parts. It is gradually possible to increase their size or connect them together.
- Assembling the chest of drawers on a flat surface will prevent distortion.
- Parts may suffer from any mechanical damage. That is why you should first cover the work area with a soft cloth. Cardboard can also be used as a protective element.
- When tightening the bolts, do not use too much force. Otherwise, dents or other damage may occur on the chipboard or MDF.
Assembling the chest of drawers on a flat surface will prevent distortion
Required materials and tools
You can assemble individual parts of cabinet furniture if you first stock up on the following tools:
- Roulette
- Phillips screwdriver
- Drill or automatic screwdriver
- Hammer
Today, to assemble some furniture samples you will also need to use special Euroscrews. Only they are suitable for connecting parts together reliably.
As a rule, manufacturers initially include Euroscrews in their tools. The product has a convenient structure and will last for a long time.
As a rule, manufacturers initially include euroscrews in the composition of the tools
Scheme and drawing
The guides can be installed inside the housing only after the side surfaces have been aligned. However, the preliminary marking is done with a pencil. It is recommended to use a tape measure to measure.
Self-tapping screws should be used to secure the guides. They will fit securely into the surface when using a screwdriver.
The drawers will only slide in smoothly if the guides are positioned correctly. Otherwise, during operation they may cling to each other. At the last stage of assembly, the horizontal cover is secured. To do this, you will need to organize reliable connections with the corps.
Drawers will only slide in smoothly if the guides are positioned correctly.
Frame
Before starting manipulations, it is recommended to check the presence of all parts. Without them, it is impossible to assemble furniture quickly and efficiently.
The chest of drawers will include:
- Bottom
- Lateral and horizontal parts
- Some models must also have a plinth strip
- Rear wall
Some mobile models also include wheels. In stationary chests of drawers they are replaced with legs. They will need to be secured first. Only after this is it possible to proceed to further actions.
The last stage of assembly is fixing the back wall. For ease of further use, it is made of isorgalite or chipboard. Reliable fixation is achieved by using self-tapping screws or furniture nails.
After completing these manipulations, the assembly process can be considered complete.
Example of frame assembly diagram
Drawers
The model quite often includes drawers. They will need to be collected separately. The boxes consist of the following spare parts:
- Side wall
- Bottom
- Front end
Before starting the upcoming manipulations, specialists are recommended to arrange the parts of each box into piles. This will reduce the likelihood of confusion to a minimum.
When assembling each drawer, it is recommended to use the diagram that is applied to the body. It is recommended to use confirmats to connect the side walls to each other. It is also possible to take another type of fastener that will fit directly to the selected model.
It is recommended to use self-tapping screws to secure the bottom.
The walls of the boxes are assembled with screws or cones class=”aligncenter” width=”1024″ height=”587″[/img]The bottom is secured with nails or self-tapping screws
When assembled correctly, the drawers should slide easily along the guides.
The handle is secured with bolts
At the last stage of assembly, the facades and handles are secured. To do this, it is allowed to use self-tapping screws of short length.
This indicator will require attention. Otherwise, careless movements may damage the front part.
Manufacturers, as a rule, leave ready-made holes for handles. That is why there is no need to use a drill to form them.
A chest of drawers is a stylish and fashionable addition to the interior. The furniture has a simple structure, so you can assemble it yourself
However, you will first need to pay attention to studying the process instructions
Tools and materials required for assembly
Before you begin assembling furniture, in order to avoid surprises, you should check the complete set of purchased materials and fasteners contained in the box. The name and quantity are indicated in the attached instructions. Typically, the kit contains the following parts.
- Wood plywood slabs, cut to required sizes. Walls, lid, base of the product, as well as front, side and back parts of drawers. The bottom of the drawers and the back wall of the bedside table are often made of thinner material.
- Legs or wheels for the base.
- Elements for fastening parts together: wooden dowels, special screws for wood, self-tapping screws and small nails.
- Accessories (handles and guide rails).
Tool you will need
- Phillips screwdriver for screws. If the manufacturer suggested using a special Euroscrew for fastening, then the kit should include a hex key.
- Hammer.
- Screwdriver.
Furniture design
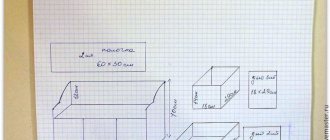
The initial stage in the manufacture of any thing is the diagram depicted on paper. This allows you to determine the desired appearance of the object, its dimensions, the number of drawers and the possibility of installing furniture in a specific location. Assembly drawings will help you calculate the number of dresser parts, consumption of materials and accessories. When drawing up a diagram, it is possible to take into account all the necessary gaps and allowances so that the drawers move freely along the guides.
Lorem ipsum dolor sit amet, consectetur adipiscing elit, sed do eiusmod tempor incididunt ut labore et dolore magna aliqua. Ut enim ad minim veniam, quis nostrud exercitation ullamco laboris nisi ut aliquip ex ea commodo consequat…
Figure 1. Schemes of a chest of drawers made of rectangles of different sizes.
At the stage of developing drawings of a chest of drawers, you will need to take into account the following important points:
- the thickness of the MDF and chipboard panels is at least 1.6 cm;
- the thickness of the guides is about 1.3 cm;
- the minimum gap between the back walls of the drawer and the chest of drawers is 1 cm;
- the depth of the case is calculated based on the required width of the box, taking into account the gap between the rear walls;
- the dimensions of the facade are determined arbitrarily, taking into account gaps on all sides of 3 mm and an additional 1 mm if the edge is glued;
- in some cases, the ends of the facade overlap the edge of the sidewalls, then double the thickness of the body wall and guides should be added to the length of the facade;
- the number of drawers and the height of each, taking into account the gap between them;
- The gap between the bottom of the bottom drawer and the chest of drawers is about 1 cm.
All necessary dimensions are transferred to paper and a drawing is made in two projections: frontal and lateral. Dresser diagrams consist of rectangles of different sizes; examples can be seen in Fig. 1. According to personal needs, it is easy to change the size and number of drawers on the chest of drawers drawings.
Lorem ipsum dolor sit amet, consectetur adipiscing elit, sed do eiusmod tempor incididunt ut labore et dolore magna aliqua. Ut enim ad minim veniam, quis nostrud exercitation ullamco laboris nisi ut aliquip ex ea commodo consequat…
Figure 2. Drawing of the chest of drawers.
In accordance with the number of drawers in the drawing, the number of fittings (1-2 handles for each drawer) and the number of sets of guides for them are calculated. When purchasing the latter, you must remember that the runners for the left and right sides are different. Each drawer will require 2 guides.
In addition, you will need to purchase the following materials and prepare tools:
- sheets of laminated chipboard, fiberboard, furniture facade;
- confirmations 5x70 mm;
- self-tapping screws;
- edge material, quantity determined by the total perimeter of all parts;
- furniture legs;
- jigsaw;
- drill, screwdriver and set of bits;
- construction corner, tape measure, pencil.
Return to contents
Making a chest of drawers
Step 1. Prepare the boards for work. They don't have to be new. For example, this project uses boards from an old dismantled structure.
Preparing the boards
Step 2. Using a jigsaw or a regular hacksaw, cut the boards into the required pieces, the number and dimensions of which must correspond to the project drawing.
The details of the future chest of drawers have been cut
Step 3. Sand the surface of the boards to eliminate even the most minor defects and irregularities. As a result, the boards should be as even and smooth as possible.
Sanding boards
Prices for popular models of eccentric sanders
Random orbital sander
Step 4. Assemble two side frames from the cut boards.
Assembled side frames
Step 5: Start assembling the panels. To do this, install planks in previously made frames. It is advisable to use self-tapping screws as fasteners.
Boards are installed in the frames
Step 6. Select the width of the boards so that they can completely cover the wall without forming any gaps.
There should be no gaps
Step 7: Attach the boards to the back of the finished frame, creating the back wall. Here the boards should be used much wider than for the side parts.
The back wall is created
Step 8. This is what the half-finished chest of drawers will look like from the front.
Finished chest of drawers without drawers
Step 9. Start assembling the drawers for the future chest of drawers. First, prepare the boards.
Boards for boxes
Step 10. To assemble the drawers, you must use wood glue, such as PVA. It will be enough.
Drawer assembly
Step 11. After installing the bottom, the surfaces of the boxes must be treated with a special waterproof material that will protect the wood from negative factors.
Processing the finished box
Prices for wood preservatives
Impregnation for wood
Step 12. Repeat all procedures with the remaining drawers. Once all the boxes are ready, sand them down using sandpaper.
Ready-made chest drawers
Step 13. All elements of the wooden chest of drawers are ready. Now you can start assembling.
You can begin the final assembly of the chest of drawers
Step 14. This is what the almost finished structure will look like. All that remains is to add drawer opening mechanisms and handles.
The chest of drawers is ready
Step 15: As a final step, coat the chest of drawers with tung oil. It will make the product attractive.
Product after treatment with tung oil
Step 16. Even though we used old wood for the work, the chest of drawers turned out to be truly beautiful and original. You can now enjoy the fruits of your work every day.
It turned out to be a really attractive chest of drawers
Fairy 1400
Characteristics
General characteristics
- Type: transformer
- Material: chipboard
- Color options: white, blue, green, pink, light wood, dark wood, multi-colored (white-blue, sunny-blue, white-rose, walnut-lemon, lemon, walnut, white-lime, white-sunny)
- Shape: rectangular
- For mattress size: 60×170 cm
- Dimensions (WxDxH): 67x180x103 cm
- Weight: 86 kg
Design
- Backs: solid
- Walls: rack
- Bottom: slatted
- Front wall: descending
- Removable slats: no
- Number of bottom height levels: 2
- Drawer: yes (two)
- Chest of drawers included: yes (three drawers)
- Changing table included: yes
Additional Information
- Water-based paint: yes
- Silicone pads: yes
- Mattress included: no
- Features: internal size of the crib 120*60 cm
Price
Price from 7,720 to 10,270 (Average price: 9,720 rub.)
Up
Reviews
pros
Quite easy to assemble, my husband assembled it according to the instructions. The floor drawers are closed (unlike other transformable cribs), and there is a convenient changing board. I found this crib in an online store for 5600! I'm delighted with the price;) All the drawers are very roomy, everything is convenient, beautiful and the color is just right for a child's room. I consider it the best of the other transforming beds (I chose between “Chunga-Changa” and “Mozhga-Kiryusha”.
Minuses
There is no pendulum mechanism (I didn’t need it), one level of the bed, but the upper part of the partition is removed (does not create inconvenience)
Up
11th place
Materials
Having decided to make a chest of drawers with drawers with your own hands, you will need to select materials for its manufacture in advance, make a preliminary drawing of the project, select tools and stock up on free time. As for manufacturing materials, the chest of drawers can be made from:
- Natural wood. This is a popular and sought-after material with high technical characteristics.
Its advantages include: durability, environmental friendliness, pleasant aroma of wood, resistance to mechanical damage, strength and reliability.The list of advantages of solid wood furniture can be endless. It fits harmoniously into different interiors and becomes their main decoration.
But, in addition to all of the above, wood has a high cost and is difficult to work with. Therefore, most craftsmen prefer simpler materials.
- Chipboard. It is an alternative to natural wood. The main features of laminated chipboard are its affordable cost, wide selection of textures and color palettes, simplicity and ease of manufacture. The presence of a melamine film on chipboard increases its resistance to moisture, chips and scratches. Manufacturers produce products with imitation of different types of wood, with prints and geometric patterns. This allows you to select material to suit any stylistic direction.
- MDF. This material is made from wood waste. It is natural and safe, as it does not emit harmful and toxic substances. The main advantage of MDF is its resistance to high moisture. A chest of drawers made from this material can even be installed in the bathroom.
- Fiberboard. A feature of the material is its low cost. As a rule, fiberboard is used in the manufacture of back walls of furniture items. With proper use, the material will retain its technical characteristics and original appearance for a long time. It is easy to cut and saw with various tools and lends itself well to various processing methods.
- Furniture board. It produces original works. This material goes on sale in the form of sawn, even lamellas. It is quite expensive and is made from different types of wood (pine, beech, oak, ash). Thanks to its structure, it does not crack or dry out over time.
Advice: beginners are recommended to try their hand at laminated chipboard.
Results
The cost of a handmade chest of drawers is much lower than the cost of a finished product from a furniture store. But this requires some skills. In addition, if you compare handmade furniture and purchased products, the first one is much superior in quality. Thus, if you buy a chest of drawers in a store, there is a risk of not only overpaying, but also getting a low-quality product.
Original solid wood chests of drawers will look luxurious in a bedroom with a suitable interior
A durable chest of drawers made of oak or other types of wood can last for many years without losing its attractiveness. Therefore, all the money spent and efforts made will not be in vain. You just need to follow the instructions exactly and anyone can do the job.
Wooden chest of drawers
