From an old wardrobe to a new wardrobe in the hallway.
author: Lyudmila Timaeva. Penza. (Satellite)
Good day to all!
Before moving on to the main topic, I want to bring you up to speed a little. This is my daughter’s apartment and I decided to tidy up the hallway myself. First, the walls were covered with wallpaper and the ceiling too. New insulated linoleum was laid on the floor and floor skirting boards were screwed in. Initially it was like this.
and it became like this.
I bought this ceiling rosette and painted it with mother of pearl and varnish.
I glued it to the ceiling, ran an electrical wire through the hole, and hung a chandelier.
I added butterflies and it became bright and fun for the kids.
And now about the very essence of my publication.
I will share the “masterpiece”, as my loved ones called it.
The old wardrobe looked like this before restoration.
I removed the doors on the mezzanine and on the wardrobe part. I placed the mezzanine level in the hallway, placed it under it and screwed the legs in the form of polished and painted bars. The mezzanine will now serve as a shoe cabinet. I placed a wardrobe on the mezzanine.
Fortunately, the world is not without good people. neighbors gave me old furniture to throw away and I put it to use.
I cut out additional shelves and partitions with a jigsaw. I cut out the side of the cabinet in relief (I don’t know what to call it correctly.) and during the restoration process it began to look like this so far
When all the shelves were ready, I covered them with self-adhesive tape (but it would be better to paint them white)
I painted the entire wardrobe white with acrylic paint three times, allowing it to dry, then with acrylic varnish, as usual. The sawn edges were sanded, primed, sanded again and covered with white paint.
I decided to fill the upper left edge near the door with an additional mezzanine. I measured all the dimensions, cut out the necessary parts from gift leftover furniture, assembled the mezzanine, and painted it white.
I added vintage decoupage “Rose” and varnished it. After drying, with the help of my daughter, I hung the mezzanine in its place. During this time, my doors dried after painting and I cut out figures for them and screwed in new handles. I added magnets to the doors for a tight fit.
I did the same with the rest of the doors. I painted the parts to look gilded and attached them in place using small nails without heads and additional glue.
And this is what I got. you be the judge. On the shelves you can see some of my works: drawers for small items (at the very top), further down, a “Summer version” bottle, bottle design with tights. “Charm”. There is a chandelier design on the ceiling.
In photo No. 9, where the reverse decoupage “Rose” is, the decor of the socket for the chandelier is slightly visible on the ceiling. accidentally got into the frame.
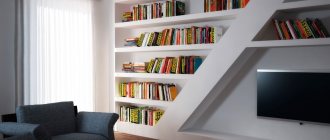
What furniture is needed for the hallway
The main rule for furniture in the hallway is that it should be roomy, compact, and have a neat appearance. There is no need to decorate it excessively.
In addition to decoration, it has the function of storing things. You should carefully consider the size, the presence of drawers and cabinets.
It’s better if there are more of them, but you need to start from the area of the corridor; there’s no need to overload.
The unusually shaped hooks on the wall, plus the shoe rack, look beautiful.
In the presence of a large hallway, a wooden bench looks original; it will add zest to the interior. A win-win wardrobe option, it will fit into any interior. And a wardrobe, if space permits, is an ideal solution; it is comfortable and roomy.
For small sizes, it is worth using:
- built-in wardrobes - take up minimal space,
- mirrors and light finishes will visually expand the space.
Required materials and tools
- saw or jigsaw,
- screwdriver,
- sandpaper,
- construction knife,
- furniture screws,
- roulette,
- corners,
- loops.
Expert opinion
Mikhailov Ivan Maksimovich
Furniture maker. Work experience 3 years.
You will also need material for making a hallway . We recommend that you give preference to furniture board , since it is made from natural components without the use of synthetic resins.
Such a shield is completely safe for the health of people living in the house. However, this material has a high cost.
common laminated chipboard is popular . It contains bonding resins, which can negatively affect the occupants of the house if the edges of the laminated board are not covered with edging. But at the same time, the material has a relatively low price and excellent characteristics (it is easy to work with).
Compact types of chipboard for a children's room
Scattered books and toys are a common occurrence in an apartment with small children. Constantly sorting things into chests of drawers and drawers can irritate even the calmest parent, so many fathers decide to install a temporary shelving unit made of chipboard with open shelves so that the baby can put his things in place himself, while his favorite toys will always be in sight and in open access.
First, we take measurements and plan the design of the future shelving without drawers, then we need to draw drawings and calculate the required amount of material.
A shelf in a children's room can not only serve as a cabinet for toys, but also divide the room into functional zones - a bedroom and a playroom.
For a homemade cabinet you will need:
- Chipboard or MDF sheets;
- Sheets of plywood;
- Reiki;
- Fastening elements;
- Screwdriver or screwdriver;
- Jigsaw;
- Roulette;
- Building level.
Materials can be purchased at a furniture depot, where you can also order wood to be cut according to a prepared drawing or photo. Depending on what things the structure is intended for, the height and width of the shelves are made in different sizes. The width of the shelves for books is 30-40 cm, the length does not exceed 100 cm. For light objects, the length of the shelf can reach 150 cm.
How to assemble a metal rack for a balcony
On the balcony, most housewives store canned food and other supplies for the winter, so a rack made from scrap materials is simply necessary there. You can assemble such a cabinet alone.
What you need for work:
- 4 metal corners 140 cm long;
- 2 metal corners 60 cm long;
- 4 bolts;
- 16 dowels measuring 0.6 x 6 cm;
- Boards 2 cm thick.
Metal corners are attached to the walls of the balcony, so to work you will need a hammer drill to make holes in the brick wall.
As shelves, you can use ordinary wooden boards or sheets of chipboard or plywood - depending on the weight of the things placed on the shelves.
The advantage of such racks is that, if desired, you can add shelves on top or between two finished crossbars.
DIY cabinet assembly:
- On the front wall, draw two horizontal lines along which to attach the corner for the shelf. The distance between the lines is 50 cm.
- Use a puncher to make holes in the wall with a diameter of 0.6 cm, and make the same holes in the metal corner.
- On the side wall, draw a vertical line to which you need to attach a short metal corner. Subsequently, I will bolt long corners for shelves to it.
- Assemble the frame completely, lay the shelves on the corners.
- Metal parts can be painted, and wooden crossbars can be covered with oilcloth.
This kind of rack can be placed in the garage for tools. Using a similar principle, you can make a glass trade cabinet.
How to make a furniture project in the hallway
Before you start work, you need to draw up a furniture layout plan and calculate its parameters. It is better to draw up a design project with color visualization and a technical part, which will contain information about dimensions, content and materials.
Calculations
The room is measured and its plan is drawn to scale. You will need an image of the floor and walls. In the diagram, cabinets, shelves, cabinets, wall furniture, and wall mirrors are drawn using a ruler.
Expert opinion
Mikhailov Ivan Maksimovich
Furniture maker. Work experience 3 years.
The filling is chosen after zoning. You can make shelves and drawers yourself. Metal parts - hooks, rods, nets - are bought or made to order.
You should consider the location and power supply of cabinet furniture spotlights. They must have switches. When laying wiring, it is forbidden to tap load-bearing walls and ceilings. Channels may be laid in finishing.
Layout options
The arrangement and dimensions of the elements depend on the area and shape of the room. As a rule, the hallway includes a wardrobe, a shoe cabinet, a seat - it is often combined with a cabinet, shelves and hangers, table tops or a chest of drawers.
The basis is the cabinet. The remaining elements only complement it. They can be moved and repositioned, but the huge enclosure is designed for a specific location where it will most likely remain forever.
Wardrobes can be linear and corner, hinged, compartment and open. The latter option is suitable for small rooms; in such models there are no doors or housing.
The filling is fixed on the back panel. Clothes are stored on shelves and hangers - floor or wall.
At the bottom you can make a tabletop, under it there are drawers or drawers. The mirror is hung on the wall or placed above a chest of drawers or a table.
Wardrobes allow you to save space - you don’t need to clear the passage to open the doors. On their front side there can be wide mirrors that visually expand the room, but now such a move is not entirely relevant.
If there is little space, you can put one narrow column, taking up the remaining meters with hooks, shelves and cabinets. This is exactly the solution we will now consider.
Material selection
The materials differ in appearance and technical parameters.
What to consider when choosing
- Moisture resistance - parts should not lose their properties when in contact with a wet raincoat or umbrella. Special requirements are placed on feet that come into contact with puddles from outdoor shoes, because in winter, when snow gets into the raised sole, it is not always possible to remove it by tapping the shoe on the floor. Shelves on which things are constantly placed quickly get dirty and have to be wiped frequently with a wet cloth. It is desirable that their outer layer is completely impermeable to water - otherwise it will begin to warp and the inner base will collapse.
- Abrasion resistance. Doors and shelves are constantly used. They place bags with metal fasteners and decorations, and heavy bags of groceries. A sharp buckle may cause scratches on the surface. To prevent this from happening, the coating must be highly resistant to mechanical damage.
- Durability - often not only clothes are stored on shelves, but also metal tools, or spare parts from a car are left, so they should not bend. If marks remain on the outer covering when pressed lightly, it is best used for clothing or items that do not create stress.
- Resistance to aggressive environments - shoe sprays, cleaning products and other household chemicals are often stored in the hallway. When they get on the surface, they should not corrode the outer coating or leave permanent stains on it. Shelves and walls should be made of materials that can withstand cleaning using chemicals.
Material options
- Natural solid wood - the blanks do not have good performance characteristics. Their advantage is their appearance, but it is perfectly imitated by veneer. Natural pine or beech is used only when it is a matter of principle. The array is characterized by low resistance to temperature and humidity deformations. Large parts bend and shrink even under normal conditions. This is due to the fact that the moisture content in their fibers changes, evaporating in hot, dry weather, or absorbing from the atmosphere saturated with steam. The fibers are susceptible to rotting. They must be dried for several days, and then impregnated with antiseptics and covered with a layer of varnish that protects them from damp air and direct contact with water. Unlike factory products, natural ones have many defects. The quality is affected by the presence of knots and resin stains. To assemble a hallway with your own hands from wood, it is better to use ready-made panels that have undergone the necessary processing.
- Chipboard - boards made of glue and sawdust. They do not have defects characteristic of an array. The products do not change their shape with changes in temperature and humidity and do not differ in strength from natural ones. They are inferior in durability and hardness to oak and wenge, but such varieties are rarely used. Products covered with veneer or melamine paper are of good quality. They are not afraid of dampness and are resistant to chemically active substances. The blanks do not require additional processing.
- LDSP - chipboards with a laminated coating. They are distinguished by higher performance characteristics. They are often used to decorate walls, floors and ceilings in wet areas. Laminate is a paper-polymer film. It provides a high level of protection against moisture and abrasion.
- MDF - panels made of finely dried sawdust and a binder. They are laid in layers and formed by hot pressing. The products are stronger than their analogues. They are more resistant to stress and dampness, but they are much more difficult to process. Cutting the workpiece will require much more effort and time. The blanks are covered with melamine paper and veneer.
- Fiberboard (hardboard) - thin sheets for back walls that do not experience mechanical stress. It is easy to cut and adjust to the desired size. It tolerates wet cleaning well, and if it gets wet it does not lose its properties. Appearance does not matter when creating an interior design. The back walls are usually hidden from view.
Chipboard finishing options
- Lamination is a varnished paper coating glued to a chipboard base. It quickly becomes unusable in rooms with high humidity. Does not tolerate mechanical loads well.
- Melamine paper (artificial veneer) - it is placed under a layer of transparent melamine resin, through which the design on the outside is clearly visible. The resin tolerates moisture and chemically active substances well. It is highly resistant to abrasion and is perfect for creating furniture.
- Lamination is the application of a film of melamine resins, which increases wear resistance several times. There are two classes of coatings. CPL class - smooth surface, HPL class - imitation of natural stone or wood fibers.
- Postforming - finishing with multilayer plastic. Often used for walls and countertops with rounded corners. Essentially it is lamination in several layers.
- Veneering is gluing a thin sheet cut from solid wood onto the surface of a panel. The products do not differ in appearance from their natural analogues, while they are devoid of their main disadvantages. They are not susceptible to mold and retain their shape in any environment.
We make the hallway ourselves: choosing the material
The choice of material is important; you should not choose too expensive one. In addition, it should be easy to process and safe for health.
Suitable: plywood, chipboard, fiberboard, MDF, furniture board, edged board, wooden block, drywall - they have a long service life and good quality.
- Tree. Wood is an environmentally friendly material, so it is perfect for an apartment. It never goes out of fashion, and furniture made from it speaks of the wealth and excellent taste of the owners. A wooden hallway will harmoniously fit into any style. You can carve it, thereby adding individuality. Different species are used to make furniture: oak, birch, pine, beech, walnut. The only negative is the high price, but given the long service life, this cost will be well worth it.
- Furniture board. Made from natural materials, therefore safe for health. Looks elegant and lasts a long time. The cost is high, but below the tree.
- Chipboard. Chipboard is a common and convenient material for making a hallway yourself. It is simply cut and processed, weighs little, and there is no need for reinforced fasteners. With all the advantages, it is affordable.
- Plywood...Has the same qualities as chipboard, but is denser and more durable. From it you can make not only parts with curved lines, but also a slotted pattern.
- MDF. Slightly less durable than plywood. But it has limitless processing possibilities: painting, tinting, applying stain.
- Fiberboard. It is used only for making the back wall of cabinets.
- Wooden beam. Designed for assembling frame structures.
- Edged boards. Relatively expensive material; pine boards are the most affordable.
- Drywall. Built-in niches are equipped with plasterboard.
- Mirror or glass. Glass or mirror inserts will decorate any room, and you can’t do without a mirror in the hallway. However, they are heavy and cannot be handled alone.
Instructions for making an open set with a column
Tools for work
- Tape measure and pencil.
- Jigsaw and hacksaw.
- Screwdriver and screwdrivers.
- Sandpaper or grinder with a sanding disc.
- Carpenter's knife.
Necessary materials
We will make the body from laminated chipboard - this solution is used quite often. We will cut out the back wall from hardboard.
We will use ordinary furniture screws as fasteners. Professional carpenters cut grooves at the ends of the connecting parts and place them on glue.
The connection is stronger and more accurate. This requires skill.
The work can be done, but it will take a lot of time.
Accessories:
- Corners.
- Loops.
- Pen.
- Door closer.
- Bar for hangers.
- Adjustable legs.
- Drawer runners.
- Holder for basket or bottom drawer.
Before you make a hallway with your own hands, you should collect everything you need for the work. Searching during assembly is very inconvenient.
Contents
Sometimes the assortment in stores is striking in its monotony. Many apartment owners know that choosing furniture for the hallway is very difficult.
If the room is small, then the cabinets simply do not fit into it or fill all the free space. But owners of spacious hallways also find themselves in a difficult situation - the presented models do not always meet the owners’ needs and often look ridiculous in a large room.
If you cannot choose a suitable cabinet, then do not be upset and think about creating the ideal furniture for the hallway with your own hands. This approach will help you save money and also get a model that suits you in all respects.
Will a novice “home master” be able to cope with such a task? Yes, the desire and availability of all the necessary tools and materials will lead you to a positive result. Of course, inexperienced craftsmen are better off sticking to the simplest models.
But those who have made furniture more than once can create a real work of art.
To make it easier for you to understand complex work, we have prepared special instructions, drawings and diagrams.