Types and types of self-tapping screws
Depending on the type of thread, there are self-tapping screws: with a universal thread, with a rare thread pitch, and with a frequent one.
Self-tapping screws with a frequent thread pitch are designed for screwing into metal sheets. For example, if you need to hang a heavy picture on a plasterboard wall. Use a powerful magnet to find the place where the profile to which the sheets are screwed is located, and screw the self-tapping screw through the drywall into the profile. If the screw does not have a drill at the end, then you must first drill a hole in the metal with a diameter equal to the internal diameter of the screw thread. For fastening sheets of roofing iron, there are special galvanized self-tapping screws of two sizes: 4.8×16 and 4.8×19 with a hex head. A type of self-tapping screws with a rare thread pitch are designed specifically for screwing into soft materials, such as plastic, plaster, asbestos, wooden boards and the like. Universal – designed for screwing into any materials. Of course, it is better to use specially designed ones, but any will hold securely.
| List of popular types of screws, their purpose and sizes | ||||
| Appearance of the self-tapping screw | Self-tapping thread pitch | Scope of application of self-tapping screws | Self-tapping screw diameter, mm | Range of screw lengths, mm |
| Average | Universal screws, designed for all types of fastening, are the most popular | 3,0; 3,5; 4,0; 4,5; 5,0; 6,0 | 12; 16; 20; 25; 30; 35: 40; 45; 50; 60; 70; 80; 90; 100: 120; 140; 160; 180; 200; 220 | |
| Frequent, two-pass carving | Self-tapping screws for fastening to metal sheets up to 0.9 mm thick without a dowel; pre-drilling a hole is required. self-tapping screws come with a drill at the tip, but are more expensive | |||
| Rare | Self-tapping screws for fastening to soft materials without dowels - soft wood, plastic, gypsum, asbestos, and the like | 3,5; 4,0; 4,5; 5,0 | 16; 20; 25; 30; 35: 40; 45; 50; 55; 60; 70; 75; 90; 100: 125; 150 | |
| Medium, herringbone profile | Self-tapping screws for fastening to concrete or brick walls by driving into a dowel | 3,0; 3,5; 4,0; 4,5; 5,0; 6,0; 8,0 | 12; 16; 20; 25; 30; 35: 40; 45; 50; 60; 70; 80; 90; 100: 120; 140; 160; 180; 200 | |
| Asymmetric | Self-tapping screws for fastening elements of modern furniture made of wood, chipboard, plywood, etc. Requires pre-drilling of a hole with a diameter of 4.5 or 7 mm respectively | 5,0; 7,5 | 40; 50; 60; 70 | |
| Variable with notch | Self-tapping screws for fastening to concrete or brick walls without dowels (dowels), screwed into a hole, 15 mm deep than the length of the self-tapping screw, 6 mm in diameter | 7,5 | 70; 90; 110: 130; 150; 180; 200 |
A separate line worth noting is the self-tapping screw - a confirmat, specially created for the manufacture of furniture from wood and chipboard. The confirmat type self-tapping screw, with a clean surface and a large area of the lateral surface of the thread, allows you to obtain a high-strength and precise connection of elements. The most popular confirmat size is 7×50. Before screwing the confirmat, a hole with a diameter of 4.5 or 7 mm is required, respectively. The confirmation head is made for a hex key.
To hide the head of a tightened self-tapping screw, Confirmat produces decorative plastic buttons - plugs of any color. The plug with its protrusion is tightly inserted into the hexagonal hole of the confirmation head and disguises it to match the color of the furniture.
It should also be noted that there are self-tapping screws for concrete, which are screwed without a dowel directly into the drilled hole. When screwing into porous material and with cavities, drilling holes with a hammer drill is not allowed. To make it easier to screw, a little bit of any machine oil should be injected into the hole before screwing. Used for permanent fastening. I don’t use them because they are difficult to tighten and even more difficult to unscrew.
There are also self-tapping screws that have a herringbone thread profile. They are driven into the hole at the same time as the dowel with a hammer and are also intended for fastening “forever”. Their use is justified, for example, when attaching a baguette for a suspended ceiling or when installing plastic window frames. Their advantage is the speed of installation.
Roofing screws
Self-tapping screws with a hexagonal head have a wide range of applications, but most of all they are used for fastening roofing coverings such as metal tiles and corrugated sheets, as well as components for them, for which they received the general name “roofing”.
- The length of self-tapping screws with a hexagonal head varies from 19 to 100 mm.
- Rod diameter 4.8 and 6.3 mm.
They are equipped with a washer with a rubber gasket, which is responsible for the tightness of the connection, which is important for installing a roof (to prevent leaks).
In terms of color diversity, caps can be of very different colors: red, brown, green, white and others. The color of the cap is matched to the color of the material being fixed and is marked according to the Ral and RR color standards.
There are also self-tapping screws without painting - just with a galvanized head and washer.
To fasten (tighten) these screws, bits with an internal hexagon are used.
Bit size:
- for self-tapping screws with a core diameter of 4.8 mm - 8 mm bit
- with a rod diameter of 6.3 mm - 10 mm bit
Confirmat - furniture screw
.
Confirmats are used when assembling furniture.
The most used ones are 50 mm long with a hex head.
This type of fastener requires mandatory pre-drilling. There is a special confirmation drill for this.
To tighten the confirmations, use hexagons or bits for HEX 4 brand screwdrivers.
Construction wood grouse
A capercaillie is a thick-rod self-tapping screw with a hex head.
Capercaillie are widely used in fastening various units of heavy structures, where special strength and reliability of the connection is required.
When constructing pitched roofs, wood grouse are used for wooden rafter systems and interfloor ceilings.
- The thickness of the wood grouse's rod is from 6 to 10 mm.
- The size of the hexagonal head of wood grouse varies from 10 to 19 mm.
They are tightened manually with wrenches of the appropriate size, or with attachments using ratchets or power tools. Pre-drilling may be necessary.
For fastening to bases made of concrete, brick, foam block, etc., they are used together with a plastic dowel.
Classification of mesite wood by color
Manufacturers produce many varieties of fasteners used for working with wooden workpieces. The main characteristic feature of such products is the wide thread. However, there are self-tapping screws with fine threads, and most often they are used for working with hardwood.
Depending on the color, hardware is:
- Black, used primarily for rough work. This is mainly due to the fact that these products have a rather low resistance to corrosion processes, and with high environmental humidity, rust forms on them quite quickly;
- Yellow and white. Products in this group are coated with brass or zinc, which increases the service life of the fasteners. Both options are quite expensive.
Rules for choosing the length of the self-tapping screw
When choosing hardware for working with wooden parts, you must follow a simple rule. The self-tapping screw must enter the main workpiece to a depth of up to 1/3 of the thickness of the attached part. If two wooden blanks are additionally secured with corner elements, then the hardware should go to a depth of up to 1/4 of the part being attached.
Based on this, certain conclusions can be drawn:
- Self-tapping screws up to 35 mm long are ideal for fastening plasterboard structures to a wooden base, and in addition, they are perfect for working with wooden frame cladding and OSB;
- The hardware, the length of which is 51 mm, is ideal for working on two-layer cladding of a wooden frame with plasterboard slabs. It is recommended to carry out such an operation in places where there is increased traffic;
- If you use hardware with a length of 75 mm or more, then you must first drill a small hole in the wooden base. Otherwise, microcracks may occur and the fibers will be damaged;
- If there is a need to use self-tapping screws with a length of 100 mm or more, then additional difficulties may arise. And therefore, to avoid them, it is enough to drop a little machine oil into the pre-drilled hole.
cooperates directly with leading manufacturers of fasteners, and therefore guarantees that all products presented in the catalog fully comply with GOST requirements. By contacting us, you will have the opportunity to purchase self-tapping screws at affordable prices. And if during the work you have any questions, our managers are ready to give you recommendations. Call us or write, and we will help you not only save money, but also save your time.
This is only half the battle. To complete the fastening task, you need to screw more screws, directly into the drilled hole or into the dowels.
A self-tapping screw is a type of fastener, which is a rod with a sharp thread and a head designed to transmit torque when screwing while simultaneously cutting threads in the elements being connected.
The range of self-tapping screws for wall mounting on sale tends to be infinite. The task of selecting hardware (from the phrase “metal products”) for fastening to the wall seems insoluble. But if you put everything into detail, it becomes clear what kind of screw is required for each specific case.
Self-tapping screws are made of brass, carbon and stainless steel (the metal contains more than 13% chromium). The most widely used self-tapping screws are made of carbon steel with a protective coating. They are the cheapest.
Carbon steel self-tapping screws are available with the following types of protective coatings. Oxidized, black - for fastening in rooms with normal humidity. Galvanized silver - for indoor and outdoor use. Galvanized, yellow – for indoor and outdoor use. They have a golden decorative appearance. Look good on gold-plated door locks and hinges.
Self-tapping screws for metal with a pointed end
The appearance of pointed self-tapping screws for metal strongly resembles the classic screws of the USSR era. They are made of good (high-quality) metal and have frequent threaded turns - the inter-ridge distance is small. This is done specifically to improve the adhesion of the screw to hard material.
Manufacturers produce such fasteners with the following parameters:
— length from 10.0 to 50.0 mm with a thread pitch of 5.0 mm;
- from 60.0 to 100.0 mm in increments of 10.0 millimeters;
- from 110.0 to 120.0 mm with a 15 mm thread - a rather rare variety;
Paving rubber tiles: characteristics, scope, advantages and disadvantages, features and stages of installation on concrete and soil base
- from 125.0 to 220.0 mm with a 20.0 mm thread.
However, the given data are approximate, since there are many places for the production of self-tapping screws and each manufacturer independently regulates the parameters of the products. For example, you can find the 4.0x150.0 mm option.
To fix 2 mm metal (of course, taking into account the component composition of the sheet), there is no need to first create a hole; the sharp end of a self-tapping screw will make it itself. However, with greater thickness, you need to drill a passage with a diameter smaller than that of a self-tapping screw by 2.4–3.3 mm. This technique will give a tighter adhesion of the fastener to the part.
The color of pointed self-tapping screws for metal is predominantly black, metallic or gold.
How to prepare for installation?
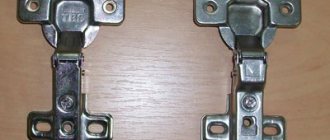
Installing hinges is a simple job and does not require much effort and time, but provided that the person has all the necessary tools at hand and also has certain work skills. For those new to the project, the task of installing a hinge can be very challenging. You can't just screw it on.
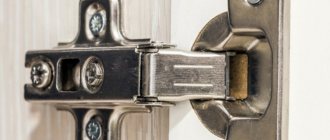
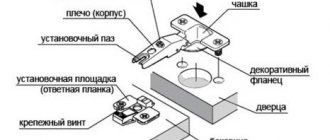
So, the most important tool you will need is a Forstner drill. It has a special working part with the same diameter as the hinge bowl (35 or 26 mm). Using this drill, you need to make special holes in a clearly marked place. The hinge bowl will be inserted into it, and the structure will be secured using screws screwed into special ears.
Forstner drill
Forstner drill price
Forstner drill
To install the hinges you will also need:
- screwdriver;
- ruler and square;
- a simple pencil;
- drill with various attachments;
- level;
- self-tapping screws and self-tapping screws.
Cordless screwdriver
How to choose - recommendations from the editors of HomeMyHome.ru
Due to the fact that the range of fasteners is quite extensive, it is sometimes difficult to choose the right product the first time
In this case, you should contact professionals who can tell you what to look for when choosing, so as not to make a mistake.
Installation of a self-tapping screw using a screwdriver
Our editorial specialists formulated their recommendations as follows:
The geometric dimensions of the fasteners must correspond to the dimensions of the mounted products and their weight. For use in damp and other aggressive environments, self-tapping screws with a protective layer should be used, and its presence can be determined by the color of the product. The thread pitch must correspond to the strength of the material being mounted, which should be taken into account before choosing fasteners. The notch on the head of the self-tapping screw is also a condition of choice, because the ease of installation work and the type of tool used depend on its type. The quality of self-tapping screws is guaranteed by their manufacturer, so it is better to choose a product manufactured by a well-known company that has proven itself only on the good side.
Installing a self-tapping screw using a screwdriver
Fastener categories
If half a century ago the main elements for assembling furniture components were wooden dowels, and installation of various pieces on site was carried out using nails or screws, today the range of accessories for connecting individual parts and furniture elements has expanded significantly.
Modern fastening and connecting parts can be divided into several categories, including both highly specialized products and universal fittings:
- threaded furniture fasteners are a classic combination of two parts - a screw-nut, which are sometimes supplemented with washers to reduce specific loads;
- a confirmat (euroscrew) is a screw fastener whose threads are similar to screws or self-tapping screws, which can significantly speed up the assembly process;
- eccentric couplers are used to speed up adjustment and in cases where it is necessary to avoid the visibility of individual fastening elements;
- Traditional dowels and corners, which have long been used to connect individual panels of furniture, have also not lost their popularity.
mebelnye-ugolki mebelnyj-jekscentrik konfirmat rezbovoy-mebelnyiy-krepezh
The most common types of furniture fasteners
Let's consider the most common groups of connecting and fastening fittings for furniture, the features of their installation and operation.
Screws with a semicircular or decorative head and bolts with a fixing mustache or square head are the main types used for fastening individual panels of frame furniture. Thanks to the fixing mustache or square head, the bolt (screw) is fixed in the hole of the particle board, which prevents it from turning. Due to this design feature, the assembler has the ability to tighten the nut without additional fixation of the screw.
Universal screws with a countersunk or semi-countersunk head have slots of various shapes (cross, hexagon socket, straight slot and others) and are intended for fastening individual assembly parts inside furniture structures. They are used for:
- installation of facades, rear walls,
- fastening of drawer guides;
- installation of mounting angles;
- fastening of any furniture fittings, from roller supports to locks and drawer handles;
- manufacturing combined parts - for example, countertops from two sheets of MDF boards.
On a note!
When using universal screws, either screwdrivers with replaceable bits or sets of screwdrivers with replaceable tips are used. Confirmats (Euroscrews) in modern furniture production are the most popular type of fastening and fixing devices. This type is used for fastening any parts made of chipboard or MDF panels.
Before screwing in the Euroscrews, holes are pre-drilled in the parts using a special confirmatory drill, the diameter of which depends on the diameter of the fixing element. To screw this type of fastener, either a screwdriver with special bits or screwdrivers with seed attachments are used. The type of bit or attachment depends on the type of slot.
Eccentrics are another fitting, bearing the somewhat exotic name of rasteks and minifixes, which allow you to connect and attract panels located at right angles to each other. Despite the obvious advantages of this category of fasteners, their main disadvantages are:
- the need for additional milling of furniture panels to install individual fasteners;
- relatively high cost.
- high precision of marking and difficulty in installing individual fasteners;
On a note! To install individual minifix parts, you will need three different types of woodworking tools - one end mill and two drills of different diameters.
Furniture corners have proven themselves to be a reliable, easy-to-install element. Today they can be made either of metal or of special, high-strength plastic. In the industrial production of cabinet furniture, the color of the plastic corner is matched to the color of the furniture.
Modern furniture dowels are made of wood, plastic or metal. Their main advantages are the low cost and ease of connecting furniture parts together. To increase the reliability of the connection, there is a corrugation on the surface of the dowels.
Suspension height
The height of hanging cabinets will depend on the height of the person. Therefore, there are certain recommendations regarding these two values: height and suspension height.
- If a person’s height is 160 centimeters, then the cabinets are hung at a height of 175 centimeters.
- Height 170-175 centimeters – height 185 centimeters.
- Height 180-190 centimeters, hanging height 200 centimeters.
Consequently, taking these ratios into account, the required height is measured on the wall: the required distance is set aside from the floor, which is marked on the wall with a horizontal line. The horizon is drawn according to the building level.
Other types of loops
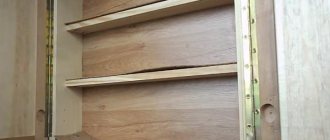
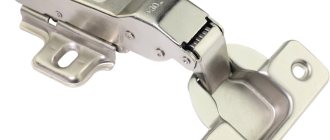
So, all types of loops can be classified in different ways. Thus, there are different types according to design, purpose, method of fixation and application. In general, there are several dozen types of furniture hinges, some are more common, some are less common, but almost all find application in various types of furniture designs. In addition to four-hinged hinges, let's look at a few more variations of hinges that may be encountered by furniture assemblers or people who have bought new interior items and decided to assemble them themselves.
Card loop
Card loops are considered the oldest. Their ancestor is a forged hinged hinge with a long overlay. Outwardly, they resemble an ordinary door hinge, only slightly smaller in size. The design consists of two metal strips connected in parallel using a thin rod that acts as a hinge. Nowadays they are rarely used, but are indispensable in the manufacture of retro-style furniture.
Butterfly door hinges
Pendulum type hinges or bar hinges make it possible to open the door 180 degrees. What happens is something similar to how the doors open at the entrance to a saloon in old westerns.
Bar loop
Mezzanine hinge structures are designed to attach horizontally oriented doors that will open upward. The hinges have a spring mechanism and also allow you to fix the door when open. They resemble ordinary overhead variations of loops.
Mezzanine hinge MK01
Ombre structures are used for so-called hinged doors. They will be mounted on both ends of the cabinet and do not require insertion, but may require minor milling (up to 2 mm). Then the sash can be opened 180 degrees. This is an ideal hinge for a folding table.
Hinge for folding elements
Secretory structures are similar to the card ones described above; they have an axial hinge and plates. They make it possible to open the façade downwards and keep it in a horizontal position. They can be accompanied by a special bracket that provides a supporting function. Usually installed in those cabinets where a bar is provided.
Secretory loops
Blind hinges, otherwise called adit hinges, are used for doors on the side of the cabinet that is adjacent to the wall. They can be used to attach the door to the false panel.
Gallery hinges
Heel products are extremely rarely used because they are designed only for lightweight doors. But they can be installed on facades with any type of opening. Installation is carried out in the lower and upper parts of the sash.
Heel loops for furniture
There are special hinges for glass sashes. They also come in different types, but their advantage is that they can withstand significant loads, and they look very beautiful.
Glass hinge
And relatively recently, hinges with 8 hinges, eight-hinged, appeared on sale. To install them, you do not need to resort to milling or cutting. This is an improved variation of the usual four-joint hinge. True, they are more difficult to install, and therefore, despite the absence of the need to carry out any preparation, such loops are rarely used.
8-joint hinge
Installation methods
A variety of fittings for hanging kitchen cabinets allows you to choose the most optimal installation method for you. Fasteners can be selected in such a way as to make the work of the home craftsman as easy as possible. In this case, the structure will hold securely and firmly.
Methods for installing cabinets:
- On a bar with a hinge. Using a specially prepared strip with hooks greatly simplifies the work, allowing you to install cabinets accurately and without assistance.
- For hanging corners and furniture hinges. This option is much cheaper, but you can’t handle hanging cabinets alone.
Table of screw sizes for plywood, furniture board, fiberboard, chipboard, MDF, OSB
| L length, mm | |||||||||||
| D diameter, mm | 30 | 35 | 40 | 45 | 50 | 55 | 60 | 70 | 80 | 90 | 100 |
| 4 | + | + | + | + | + | + | + | + | |||
| 4,5 | + | + | + | + | + | + | + | + | + | ||
| 5 | + | + | + | + | + | + | + | + | + | + | + |
Taking into account the peculiarities of the operation of wood-based materials, a table is presented below that allows you to select the required self-tapping screw size.
Recommendations for choosing the size of self-tapping screws for fastening wood-based materials
| Plate thickness, mm | Plate material | Self-tapping length, mm | Self-tapping screw diameter, mm |
| OSB | |||
| 3 | pine, spruce | 30 | 4 — 4,5 |
| 6 | pine, spruce | 40 | 4 — 4,5 |
| 9 | pine, spruce | 45 | 4 — 4,5 |
| 12 | pine, spruce | 50 | 4 — 4,5 |
| 15 | pine, spruce | 55 | 4 — 4,5 |
| 18 | pine, spruce | 60 | 4 — 4,5 |
| Plywood FC, FSF, FBV, FBV-1, FBS, FBS-1A and FBS-1 | |||
| 3 | birch, pine, spruce | 30 | 4,5 |
| 6 | birch, pine, spruce | 35 | 4,5 |
| 9 | birch, pine, spruce | 40 | 4,5 |
| 12 | birch, pine, spruce | 45 | 4,5 |
| 15 | birch, pine, spruce | 50 | 4,5 |
| 18 | birch, pine, spruce | 60 | 4,5 |
| 21 | birch, pine, spruce | 70 | 4,5 |
| 24 | birch, pine, spruce | 80 | 5,0 |
| 27 | birch, pine, spruce | 70 | 5,0 |
| 30 | birch, pine, spruce | 90 | 5,0 |
| 36 | birch, pine, spruce | 100 | 5,0 |
| 40 | birch, pine, spruce | 100 | 5,0 |
| MDF, fibreboard, chipboard, furniture board | |||
| 3 | wood chips, shavings, cellulose | 30 | 4,5 |
| 6 | wood chips, shavings, cellulose | 35 | 4,5 |
| 9 | wood chips, shavings, cellulose | 40 | 4,5 |
| 12 | wood chips, shavings, cellulose | 45 | 4,5 |
| 15 | wood chips, shavings, cellulose | 50 | 4,5 |
| 18 | wood chips, shavings, cellulose | 60 | 5,0 |
| 21 | wood chips, shavings, cellulose | 70 | 5,0 |
| 24 | wood chips, shavings, cellulose | 80 | 5,0 |
| 27 | wood chips, shavings, cellulose | 80 | 5,0 |
| 30 | wood chips, shavings, cellulose | 90 | 5,0 |
| 36 | wood chips, shavings, cellulose | 100 | 5,0 |
| 40 | wood chips, shavings, cellulose | 100 | 5,0 |
When choosing self-tapping screws for Plywood, OSB, chipboard, you should take into account that the dimensions of the board of finishing material may vary depending on the humidity of the environment, therefore the most loaded points of fastening of wood-based board materials are the points located along the perimeter of the board.
The number of attachment points (the number of screws) is determined by the size and thickness of the slab and in most cases is at least 20 per square meter, provided that the screw size is selected correctly. In the middle of the slab, a lower density of fastening points is allowed than along the perimeter.
Self-tapping screws for plywood, OSB, chipboard and board materials
When laying between the slabs, it is necessary to leave a compensation gap to prevent their contact even when swelling.
Virtually all slab materials have a density equal to or higher than the density of the base. When the size of the slab changes under the influence of humidity, the fasteners (screws) become looser to a greater extent in the base and to a lesser extent in the slab.
Therefore, when fastening slab materials that do not have transverse layers (chipboard, fiberboard, MDF, solid wood furniture panels), it is necessary to use slabs of the smallest dimensions. For the open fastening method, it is necessary to select self-tapping screws that have a threadless part equal to or greater than the thickness of the slab.
Determining the hanging height
The aesthetic component of the interior and the ease of use of the kitchen as a whole depend on the height at which the kitchen cabinet hangs. There are certain standards according to which wall cabinets are installed at a height of 550 to 600 mm from the level of the countertop. This distance is quite enough so that the hostess does not touch them with her head and does not reach for the top shelf on tiptoe.
Much depends on the height of the housewife herself and the height of the floor modules. According to the standard, the worktop is located at a distance of 850 mm from the floor. This parameter can be adjusted by the height of the base, the standard of which is 100 mm.
On a note. The height of hanging the upper cabinets is dictated by the distance between the worktop and the floor level.
Also, the height of the working area from the floor is affected by the thickness of the tabletop, which varies from 20 to 50 mm depending on the material of its manufacture. The front edge of the working surface protrudes from the facade by 30-40 mm, and the rear edge by 50-100 mm. This supply of hidden space is often useful for placing communications.
detailed instructions
Step 1. You need to indent approximately 7-12 cm from the upper and lower edges of the door. In this case, the indentation in the instructions is made at a distance of 8 cm. You need to draw two lines strictly perpendicular to the edge of the door.
An indentation of 8 cm is made
Lines are drawn perpendicular to the edge
Step 2. Next, from the edge of the door to the center of the place where the hole will be drilled, you need to make an indent of 22 mm. This is the standard distance. And you also need to draw lines through the marked point, perpendicular to those drawn earlier.
Bottom space - 2.2 cm
Perpendicular lines are drawn
Step 3. Next you need to take a special drill with a standard diameter of 35 mm.
Take a drill with a diameter of 35 mm
Step 4. To make drilling easier and the drill clearly positioned, you need to make small notches using an awl at the intersections of the lines on the markings.
Using an awl to make indentations
Step 5. Now you can drill the holes. You can do this with a drill, or you can use a special router.
You can start drilling holes
Prices for a linear series of milling cutters
Fraser
Result of work
Step 6. Once the holes have been drilled, you can try on the hinge bowl, and also, by aligning the holes for the screws on the ears of the bowl along the line drawn earlier, mark where the drilling will be done, but with a thin drill. Moreover, the points will not be on the line itself, but slightly to the side, with the ears aligned along the line.
Fitting the hinge bowl
Markings have been applied for future holes
Step 7. Now, using an awl, you need to make notches at the designated points to position the drill.
Notches are made to position the drill
Step 8. Next you need to drill holes for self-tapping screws measuring 4x16 mm.
Holes are drilled
Step 9. It is necessary to attach the canopy to the door again, placing the bowl in the hole, and screw it to the facade with self-tapping screws.
Screwing with self-tapping screws
Step 10. Now you can attach the door to the cabinet wall. This is done like this - first you need to attach the door to the wall, choosing the position in which it should stand.
Now you can attach the door
Step 11. When applying markings, you need to ensure that the upper hinge screw, which will be attached to the wall, is in a position close to the door itself.
You need to mark carefully
Step 12
Next, it is important, after taking simple measurements, to set aside 17 mm from the center line on which this part of the canopy lay.
From the center line you need to set aside 17 mm
Step 13. After this, you need to attach the door again and make marks with a marker through the holes in the hinge, aligning them with the lines drawn at a distance of 17 mm.
Markers are used to make marks through the holes in the loop.
Step 14. Now you need to drill holes for Euro screws with a drill.
Holes for Euroscrews are drilled
Step 15. Next you need to screw part of the loop to the wall.
Part of the loop is screwed to the wall
Step 16. Then you can attach the door to the wall
It is important to get the front part of the hinge attached to the door onto the screw located on the part of the hinge that is fixed to the wall. Also, under the hinge that is attached to the door, there is a screw with a “heel”, which is important to get into the groove located on the other side of the part of the hinge that is attached to the wall
This part needs to get onto the screw
The door is attached to the wall
It is important to do everything according to the instructions
Another photo of the process
Step 17. To prevent the hinges from coming apart, the outermost screws need to be tightened a little. There is no need to wrap them all the way yet.
The outer screws are tightened a little
Step 18. Now you need to adjust the door. To begin with, you should move it away from the cabinet wall by about 1-2 mm; you do not need to fix it tightly to it. Once the gap has been maintained, the screws can be tightened.
Door adjustment
Step 19. There is another screw that will help you move the door left or right if necessary. In this case, there was no need to adjust it.
This screw in our example did not need adjustment
Video - Attaching hinges
It is important to remember that after some time the hinges will have to be adjusted again - the doors may sag under their own weight. So you still need to tighten the screws the first time
Sometimes you should also lubricate the hinges - then they will definitely not begin to creak or rust over time. If the furniture is in a damp room, the service life of the canopies is greatly reduced, and this is important to take into account.
Mounting options for kitchen cabinets
Wall mounted modules are mounted on walls in two variations. The choice depends on the size and number of hanging modules, their depth and proportionality.
Mounting ideas:
- Installation on one level means placing the modules at the same height, in a line.
- Fastening cabinets at different levels. The modules are mounted at different heights, and the tops of the underlying cabinets are used as additional shelves.
The latter implies the presence of cabinets of different heights. They are hung so that their lower part forms one line.
Varieties
The more popular and popular samples used in the production, assembly, and installation of furniture include:
Also in the furniture industry, a number of characteristic screws are used that have blunt ends, large threads adapted for chipboard, and specific heads. One such product is a galvanized steel screw that allows you to attach chipboard sheets at a 90-degree angle.
Universal screw
The product is presented in the form of a cylinder-shaped rod with various types of heads and external threads. Its main task is to fasten individual assembly elements inside furniture structures. The upper part of this screw can have different shapes:
- the countersunk head of the product, which, after screwing, is completely recessed and does not protrude above the materials being fastened, its scope of application is the installation of shelves, handles, hinges, guide runners for drawers;
- the semi-countersunk head, due to the smooth transition from the rod to the thread, at the moment of twisting, goes into the material, as well as the mating part;
- semicircular head, the horizontal plane and the inner base of the surface of the semicircular head of which, during installation, additionally creates pressure on the material being fastened, increasing the strength of the structural unit, thereby eliminating its deformation.
The presence of a special thread makes it possible to easily attach the screw even to the hardest types of wood. Hardware splines can be simple or cross-shaped. Products with a cross-shaped slot have a number of irrefutable advantages:
- a screwdriver or drill is instantly fixed in the head;
- You only need one screwdriver;
- The installation process in hard-to-reach places is carried out without much effort.
When using universal screws, you must equip yourself with a screwdriver and screwdrivers with replaceable bits. To ensure a high-quality connection of materials, you should drill holes during the process of screwing in the screws, the diameter of which will be 70% of the thickness of the hardware, and also choose the right drill.
How are self-tapping screws fixed?
Usually, self-tapping screws, thanks to their sharp ends and threads, drill themselves a hole in which they are perfectly fixed. All modern fasteners have a special lubricant that melts during friction. This allows the screw to enter the wood more easily. To tighten the self-tapping screw, you need to perform several steps:
mark a point on the material with an awl or small drill; install the sharp tip of the self-tapping screw there; begin to carefully tighten until the self-tapping screw fits tightly into the material; quickly screw in the self-tapping screw with maximum force; Slow down at the end to avoid damaging the material or the fastener head.
Correct depth of fixation of self-tapping screws
For confirmation, you must pre-drill a hole of the diameter you need.
Eccentric coupler
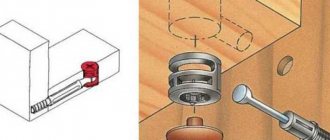
One of the most popular types of fasteners today. All high-quality furniture is assembled on an eccentric screed (minifix). Its operating principle is as follows: an eccentric rod is screwed into the face of the part to which another panel will be attached at the end, into which the eccentric itself is screwed through the end of the other shelf, and then the eccentric turns the rod into itself.
An eccentric tie is always used in conjunction with a wooden dowel, which was described earlier. The dowel provides additional rigidity to the assembly and prevents the fixed panels from moving relative to each other.
Furniture assembled on this screed can be disassembled and assembled an unlimited number of times! There are different diameters of the eccentric itself: 25, 15, 12 mm. More common is an eccentric with a diameter of 15 mm.
Since the eccentric itself is visible on the side panel, plugs are provided for it to match the color of the panel. One of the disadvantages is the weakening of the tie in the event of spontaneous rotation of the eccentric.
To avoid this, some hardware manufacturers have provided notches directed in the opposite direction from its rotation during installation, which enhances adhesion.
Types of eccentric couplers
As practice shows, furniture is assembled and disassembled with great difficulty if all the fasteners in it are metal ties, described above. Let’s say that in order to remove one shelf, you practically need to disassemble half the cabinet. For horizontal parts (shelves), it is more convenient to use eccentrics, which allow you to place horizontal parts in an already assembled furniture box. Their operating principle is the same as that of the previously described eccentric coupler.
The only difference is that the eccentric, located in the shelf, fits onto the rod screwed into the face of the sidewall from above and there is no need to disassemble half the cabinet for this. In some factories, this type of fastener is called a shelf holder, since it is intended only for horizontal parts. Horizontal shelves assembled using these ties further tighten the joint, which increases the rigidity of the entire furniture frame.
Repeated dismantling and installation of furniture on such fasteners does not lead to wear of the connections.
Source: dd-space.com
