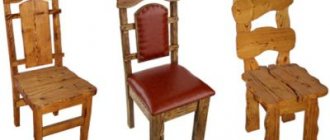
There are stools in every home.
They are sold in stores in a large assortment. But most buyers notice that the price of a piece of furniture does not always correspond to its quality. A rather primitive stool made from the simplest materials can have a high cost. In this case, you can try to make it yourself from simple chipboard, which is sold in any hardware store.
Features of the material
The features of chipboard include its low cost and good technical characteristics. This material is easy and simple to work with . It is characterized by high strength, resistance to negative factors, a wide variety of textures, textures and colors.
All chipboard sheets are divided into:
Regular.
They are characterized by high density and high bending strength. When choosing chipboard for making a kitchen stool, it is better to choose a moisture-resistant material. During its production, special additives are added to the chip mass, thanks to which the material is not afraid of high humidity.- Laminated. This material is more popular and widespread in furniture making. Laminated boards have a decorative and protective layer that improves the technical qualities of the material. Manufacturers provide chipboard in a wide range of colors and various textures.
When choosing chipboard for making furniture at home, you should pay attention to such indicators as:
- Thickness. Chipboard sheets go on sale in 8, 9 and 10, 16, 18.19 mm thicknesses. For the manufacture of furniture, 16 and 18 mm chipboard is used .
- Texture and color scheme. Furniture should be in harmony with the surrounding environment.
- Strength and reliability of the material. A hand-made stool must be able to withstand the weight of a person, be stable and practical.
- The degree of edge processing and environmental friendliness of the material. All cuts on the parts must be carefully trimmed so that the plates do not release toxins and harmful substances.
Tip : It is not necessary to purchase new chipboard sheets at a hardware store. In order to save money, you can safely use old material from unnecessary furniture.
The order of work taking into account the type of model
When the drawings with dimensions are completely ready, you can start cutting out the parts. Place a pattern on the beams or boards, trace the contours with a pencil, then cut out the workpiece. Experts recommend treating wood with antiseptics to protect it from water, fungi and other negative factors.
With soft seat
To create a chair from solid wood, you will need 15 mm boards, timber with a section of 40 x 40 mm, a piece of plywood 45 x 45 cm, foam rubber for a soft seat 45 x 45 cm, upholstery fabric 55 x 55 cm. The work is carried out in stages:
- The tree is cut to produce a pair of legs, transverse slats, 4 drawers. A seat is cut out of plywood.
- Markings are applied to connect the back, drawer, and legs in accordance with the drawing.
- Make the necessary holes and clean them with a chisel. On the slats and prongs, mark the dimensions for the tenons and carefully cut them out.
- The edges of the backrest, necessary for joining, are treated with glue and inserted into the grooves of the rear legs of the chair. The element is secured with clamps.
- The front drawer is glued to the legs and dried.
- The frame is assembled without the use of glue; if there are no defects, the product is glued and finished assembled.
- To create soft seats, plywood is used, foam rubber is glued to it with an allowance of 1.5 cm around the entire perimeter. Upholstery fabric is fixed on top.
- After the parts have completely dried, the legs are screwed on, the slats are secured, and the seat is mounted.
- The caps of the tenons are cut off and the holes left from the screws are filled with putty. The surface of the entire chair is carefully polished.
Chairs with an upholstered seat are often produced without a back. To do this, you can use the presented description, having previously removed this element from the drawing. The result is a stool that is convenient to use in the kitchen.
Cut wood
Make holes
Fasten elements
Glue the front part
Assemble the frame
Glue connections
Assemble the structure
Make a soft seat
Secure the seat
Folding
Simple chairs are suitable for use at home and outside the city. To create a folding model, you will need short and long legs, crossbars, wooden slats for the backrest, and a seat. The work process is carried out according to the instructions:
- The bars that are used to support the seat are drilled to install a metal rod.
- The slats are fixed to the bars using self-tapping screws.
- At the upper end of the blanks for long legs, holes are drilled with an indentation of 110 mm, and cuts are made in them for the backrest. When performing, use a drawing of a chair.
- A metal rod is installed in a specially designated hole, the edges are secured in the grooves of the legs.
- In the center of the block of small legs, holes are drilled to connect with the long ones. The crossbars are fixed slightly above and below the middle.
- The manufacture of the structure is completed by assembling all the elements, which are fixed with screws.
A beautiful chair needs finishing and decoration. Today, decoupage techniques, carved elements, leggings, and various capes are increasingly used to decorate wooden furniture.
Before making a chair, you need to determine the appropriate dimensions. Only in this case the furniture will turn out to be truly useful and practical. Thanks to the wide variety of designs and finishing options, you can create exclusive things with your own hands.
Drawing, standard dimensions
Despite the fact that a stool is the simplest piece of furniture, to make it yourself it is better to make a preliminary drawing. It is necessary to indicate not only the general appearance of the stool, but also the number of all parts and their clear dimensions .
You can make a drawing in different ways. Experienced craftsmen draw diagrams by hand on a piece of paper. Some people prefer to use ready-made options available on the Internet, while others like to use special computer programs.
Attention: when creating a drawing of a stool, you should maintain a strict balance between its upper and lower parts. Otherwise, failure to comply with these dimensions will lead to instability of the furniture item.
After you decide on the model of the future stool, you can start creating a drawing. And after that - to marking the chipboard. Since people usually need several stools at once, it is recommended to make patterns for individual parts of a piece of furniture so that all the chairs are identical. A template is made on thick cardboard .
To make a stool you will need:
- two pieces of chipboard measuring 40 by 30 cm for making stands;
- one sheet measuring 30 by 30 cm for sitting;
- one piece measuring 20 by 12 for jumpers.
The standard dimensions of the stool are:
- height - 40 cm;
- width - 30 cm;
- the distance between the posts is 22 cm.
Decoration methods
Ordinary wooden and plywood stools look boring and faceless. The original design is suitable only for a summer house, balcony, or outdoor gatherings. The simplest methods of decoration are plain painting, painting, varnishing. You can create a stylish interior object using the decoupage technique. The method cannot be called simple, but the result will be worth it. Stools can also be decorated with textured wallpaper to match the color of the room’s surfaces or sewn or knitted into soft textile covers.
You can turn a simple stool into an exclusive piece of furniture by decorating its seat with concrete. Such options will look great in a modern, loft, or high-tech kitchen. You can work with a lid of any shape. Pour the solution into a plastic bucket, a suitable container, place the stool with the seat down, distribute the concrete evenly. To prevent the mixture from sticking to the bottom and side walls, they must first be lubricated with oil or soap solution.
Tools
To make your own stool from chipboard, you will need the following tools:
jigsaw;- screwdriver;
- drills for confirmations;
- furniture stapler;
- construction hair dryer (for trimming cuts);
- ruler and simple pencil.
Materials you will need:
- chipboard sheet;
- self-tapping screws;
- confirmations;
- plastic corners;
- foam;
- upholstery fabric.
Easy to make chairs
The tools and devices available to the home craftsman, burdened with a main job and puzzled by a family, are not so diverse. Making chairs with your own hands should not interfere with normal life in the apartment, so there is no need to set up a branch of the paint shop. It also makes sense to take into account that the chair is not needed for the silver anniversary of the wedding, in a couple of days - that is, there is no time to steam bend the boards and dry them to condition.
Assembly diagram of a basic chair
The simplest solution is to attach a back to the stool and be proud. But only graduates of the British Naval Academy, with their rectangular bearing, will be able to sit comfortably on such a thing. If you really ask the question: How to make chairs with your own hands? – you need to optimally balance your capabilities and needs.
You will still have to do the sawing, so we offer a choice of two options for chairs, the manufacture of which can be done by a man with hands, a head and at least some set of tools. On the left is an urban version, on the right is a country version, designed to last for centuries.
Next, we will take a closer look at how to make a chair from laminated chipboard (in the picture on the left)
It is easy to see that to create a solid, slightly exotic chair of the “Master of the Taiga” model, you only need a medium-format gas or electric saw, a sander and a large amount of varnish. No detailing is required - this is a masterpiece from the “your own designer and constructor” series. Take care of your hands.
But we will look at the option on the left in more detail, because it is cheap, easy to manufacture and durable enough to last four to five years.
How to do it yourself?
The manufacture of a stool begins with preparing the material and cutting it. Sketches of the racks, seats and lintels are drawn with a pencil. Next, using a jigsaw, the parts are cut out along the contour .
Attention : you must put a file with fine teeth on the jigsaw and cut at maximum speed. Then the edges of the parts will be smooth, neat, and most importantly, without chips or nicks.
When cutting out the seat, it is recommended to round the corners. This will make the product more aesthetically pleasing and as convenient to use as possible.
After all the parts are cut out according to the existing drawing, you can proceed directly to assembling the product. But before assembly, all chipboard sections must be trimmed with PVC edges. To do this you will need a hair dryer.
First, thoroughly heat the trim with a hairdryer so that the glue applied to it melts, apply it to the ends of the parts and press well with a dry cloth. After a few minutes, the protruding edges of the edge are carefully cut off with a sharp stationery knife .
The stool is assembled in the following sequence:
Two holes are drilled on the racks for mounting jumpers.- Plastic corners are screwed to the posts using small self-tapping screws at a distance of 3 cm from the edge.
- Next, we attach the jumper to the rack and make holes in it for the screws. The structure is screwed with confirmations. We do the same with the second rack.
- After assembling the legs (stands), we screw the seat to them. If you are planning to make a soft stool, then first glue a thin layer of foam rubber onto the cut-out seat and cover it with dermantine or any other upholstery fabric. The upholstery is fastened with a furniture stapler to the underside of the seat. For our fabric model, you will need to cut the upholstery measuring 41 by 41 cm.
- After installing the seat, we nail the thrust bearings with small nails. This is done so that the furniture does not scratch the laminate or linoleum.
Advice : if chipboard is not at hand, then the stool can be made of wood or plywood.
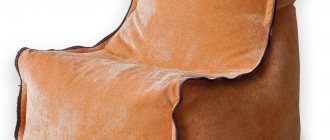
An alternative could be a wooden chair or a bean bag.
Assembling the stool
When starting the final assembly of parts, it is necessary to pre-treat all cut edges with a special tape. The tape must be chosen to match the color of the sheet or, conversely, contrasting shades.
The tape is applied to the cut of the legs and seat and glued with a hot iron. The iron must be applied with quick and short movements. The warm tape should be pressed down with a clean cloth. The glue, which is on the back of the tape, sets very quickly and does not require long heating or cooling.
The parts of the stool are assembled using confirmations and self-tapping screws. To simplify the assembly task, you can first glue the parts together and then secure them with self-tapping screws.
The seat of the resulting chair can be made soft using foam rubber and upholstery material.
For further ease of use of the manufactured furniture, the corners of the parts should be rounded.
It is better to make even curves using a compass.
Photo
Ideas for decorating the resulting furniture can be seen in the following photos:
The simplest design
The best way to figure out how to make chairs from chipboard with your own hands is to use the example of a simple stool, which even a child can build in a quarter of an hour under the supervision of an adult. You will need 4 pieces of chipboard, 2 for the legs (200x250 mm), one for the seat (250x300 mm), one for the spacer (90x200 mm).
The process itself is traditional: gluing the workpieces with an edge (quickly, in a few seconds, but carefully so as not to get burned), rubbing the adhesive base with a piece of fabric, passing sandpaper along the ends. Then the first leg is screwed 2 confirmats to the crossbar, after which the second leg is screwed.
5 secret holes are drilled in the bottom of the lid, into which dowels are driven with glue. 5 holes are marked in the base, filled with glue, both parts are connected into a whole, the heads of the confirmations are sealed with circles to match the color of the chipboard, furniture thrust bearings are nailed. The process itself will take a little time, but you need to wait a few hours for the glue to dry.
Source: xn--80ablblfabphhr5bri1n.xn--p1ai
Choosing chipboard
First you need to prepare tools and materials so that you don’t frantically search for some kind of screw or piece of wood later. You should choose in advance the design of the stool, its shape, color, and decide whether the seat will be soft. It is advisable to draw a drawing or at least a sketch in which to indicate all the dimensions of the product.
It is recommended to use chipboard for manufacturing, but it is better to give preference to the more expensive option - laminated chipboard. The first material has one advantage - it can be processed as you wish. But laminated chipboard is the same material, only covered with a film of paper and resin (laminate). In order to make such a film, paper with a certain color, texture, and sometimes ornament is used. Melamine resin is used to make the paper tougher.
Do-it-yourself solid wood stool solid wood Option 2
At the time when we begin to arrange the territory or interior around us. In general, with everything that surrounds us, we try to choose for it things that are pleasing to the eye, made from natural materials, and at the same time made with soul. Yes, we agree that this is an overly complex and biased attitude towards surrounding objects, but there is always a hunt for the best. So even ordinary seating, even if it is a country chair or stool, can look exactly like this. As we just described. We take a solid piece of wood, a chainsaw, a little time, skill and effort and we get a wonderful thing - an object for decorating your interior, and if you need a landscape for your site, it’s up to anyone as you please. Solid wood furniture has always looked decent, beautiful and practical, perhaps a little heavy, but as they say, everyone has their shortcomings. Well, if you have an idea to make a stool, and what’s more, to make it from a single piece of wood, then this article is just about that.
Let's talk about finished products
Walk around the stores and see what they offer to customers. The assortment is very large, the designs of stools are varied - for every taste and color. Some have soft seats, others have hard ones. Some are made of metal, others are made of chipboard, plywood, and wood. Some types are sold separately, while others come complete with furniture corners. The shapes of the stools are also different - from simple rectangular to complex figured ones.
A huge number of colors - you can choose furniture for any interior. Poufs can be found for use in hallways. These are chipboard boxes with a soft seat. You can put some things inside. But all the pieces of furniture that you find in the store have one drawback - cost. It is too high, so not everyone can afford such a purchase. But there is a lot of cheap and accessible material. And the design of the stools is simple; it’s very easy to make it yourself.


