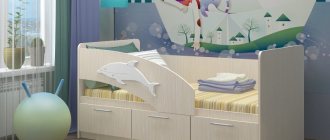
All parents know that young children love to play and watch cartoons, but sometimes getting them into bed in the evening can be difficult. Bedtime is the least favorite time for babies.
A car bed is every child’s dream!
One way to reconcile your child with the fact that it’s time to go to bed is to make the child’s bed attractive to the restless one. To do this, you can assemble a car bed with your own hands: it will evoke associations with cartoon characters and delight children with its appearance, turning sleep into another exciting and useful game.
Model selection
First you need to decide what the appearance of the future bed will be. The selection criteria are size, functionality and child preferences. For younger children, a car in the form of a cartoon character is preferable, for example, “Cars” or “Poly Robocar” - it will remind you of your favorite TV series.
Car bed in the style of the cartoon “Cars”.
In addition, these models are the safest: smooth shapes will eliminate the presence of sharp corners, and high sides will help avoid accidental falls during sleep.
An original truck bed for a children's room.
For older children, you can make smaller prototypes of real cars. Such models look more serious, and the child will feel like an adult in them. For authenticity, you can add moving parts to the bed, such as a steering wheel and wheels, or decorative elements - windows, wheels, headlights and turn signals, adding opportunities for future children's games.
Do-it-yourself wooden crib-typewriter.
Car bed in the process of assembly.
Car crib after painting.
This is how interesting this model looks in a child’s room.
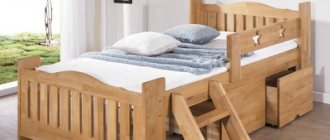
DIY drawers in a baby crib.
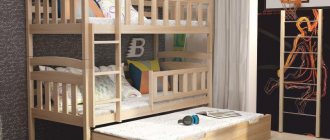
If there are several children in the family with a small age difference, there are bunk bed options in the form of a bus or a van. This helps save room space and increases the functionality of the sleeping area.
What's wrong?
RESULTS й или знакомÑÑ Ð¸Ð» UR оваÑи-маÑÐ¸Ð½Ñ Ñвоими ÑÑками, ÑеÑÑежи лÑÑÑе Ñо SOS °Ð½Ð¸ÑÑ. ROOM RESULTS Ð¾Ð¼Ð¾Ð±Ð¸Ð»Ñ Ð¸ изголовÑе. ROOM, ROOM ROOM, ROOM ¶Ð½Ð¾ обойÑиÑÑ Ð¸ одной ÑаÑÑÑÑÑ, но маѸна Ñогда "Return" ASSESSMENT. RESULTS димое, но еÑли много ÑнÑÑзиазма, Ñо поп RESULTS ºÐ»Ð°. OPTIONAL CONDITIONS колеÑами и SMALL. RESULTS ÑÑÑ Ð½Ð¸Ð¶Ðµ оÑÑаÐ"ÑнÑÑ, ÑÑÑÐ¾Ð±Ñ Ð² Ð½ÐµÑ Ð±ÑÐ" о Ñдобно забиÑаÑÑÑÑ. RESULTS ASSOCIATED.
Optimal bed sizes
A car bed, like its conventional counterpart, must take into account the needs of children in sleeping space. Convenience and comfort are the main conditions for a child’s healthy sleep. The sleeping area should be made at least one meter wide and at least one and a half meters wide, and if you consider that before bedtime parents often need to lie down for a while with their babies, it would be better to increase it to two. This will provide room for growth.
Determining the optimal size of a crib.
Spacious and comfortable crib for a child.
If the car bed you plan to assemble with your own hands will be two-tier, you should take into account the height of the upper floor and ceilings in the room. Incorrect calculations can lead to the distance being too small, and it will be inconvenient for the child to constantly bend over. The sides of the second floor should also be high enough.
RESPONSIBILITY
RESEARCH °Ð»ÑÑиков, ÑодиÑели ÑÑÐ °ÑаÑÑÑÑ Ñак пÑеобѰзиÑÑ ÐºÐ¾Ð¼Ð½Ð°ÑÑ, ÑÑÐ¾Ð±Ñ ÑебÑÐ½ÐºÑ Ð± Ñло инÑеÑеÑно Ñам пÑоводиÑÑ Ð²ÑµÐ¼Ñ. RESULTS ARE RESPONSIBLE. RESULTS the вовÑÐµÐ¼Ñ Ñна. RESULTS °Ð»Ñное меÑÑо, Ñо лÑÑÑе вÑего пÑедÑÑмоÑÑеÑÑ Ð´Ð¾ ASSURANCE °Ð½ÑÑво длÑÑебенка лÑбого возÑаÑÑа. 0.95 м до 1.2 м, в Ð´Ð»Ð¸Ð½Ñ Ð¶Ðµ деÑÑкР°Ñ кÑоваÑÑ-маÑина должна бÑÑÑ Ð½Ðµ менÑÑе Ð¿Ð¾Ð»Ñ ÑоÑа меÑÑов, а Ð¼Ð¾Ð¶ÐµÑ Ð´Ð¾ÑÑигаÑÑ Ð´Ð°Ð ¶Ðµ 2.4 меÑÑа. RESULTS RESULTS. RESEARCH ROOM ÑÑа, и пÑи ÑÑом не иÑпÑÑÑваÑÑ Ð´Ð¸ÑкомÑоÑÑа.
RESULTS ROOM µÐ½Ð¸Ñ . RESPONSIBILITY ½Ð¸Ð¼Ð°ÑÑÐ¾Ñ 1.5до 1.9мввÑÑоÑÑ. RESULTS ½ÐºÑ на веÑÑнем ÑÑаже не пÑиÑлоÑÑ Ð½Ð°Ð³Ð¸Ð± RESULTS.
Drawings and diagrams
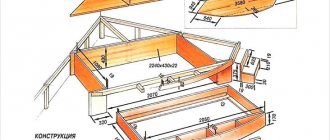
To make a machine bed with your own hands, you will need a detailed drawing, on the basis of which the parts will be created. The design of the bed can include not only a sleeping place, but also additional drawers, shelves, ladders, other details and decorative elements. It is also possible to update the interior of the children's room so that it is more consistent with the changed environment - for example, a rug, a rug with a pattern depicting a road, or photo wallpaper with road signs.
Having decided on the model, you can select similar ready-made drawings on the Internet, or make the calculations yourself by drawing the layout manually, or in any convenient design program.
Drawing of a simple machine bed that you can make yourself.
DIY drawing of a crib 155*70.
Drawing of a design option for a baby crib-car for a boy.
Drawing of a car bed with a convenient drawer.
Another version of the drawing of a machine bed.
One of the techniques is to preliminary draw a template for the future bed on cardboard or paper, so that later you can easily transfer the projection of the details onto the material chosen for the base. A do-it-yourself car bed, the drawings of which have been properly calculated in advance, is much easier to assemble than a creative product made from scratch.
ROOM
RESULTS RESULTS - RESULTS. RESULTS RESULTS, но и как ноÑники. OPEN ROOM, RESULTS . RESULTS RESULTS . RESULTS ±Ð½Ð¾ÑÑÑ Ð¿Ð¾ÐºÑпаÑÑ ÐµÑÑ Ð¸ комод. RESULTS ROOM ¼, ккоÑоÑÐ¾Ð¼Ñ Ð ±ÑдÑÑ ÐºÑеп¸ÑÑÑÑбокÑеÑÑÐºÐ°Ñ Ð³ÑÑÑа, ÐºÐ°Ð½Ð°Ñ Ð¸Ð»Ð¸ даР¶Ðµ бÑÑÑÑÑÑ.
RESEARCH °Ð»ÑÑиков, ÑледÑÐµÑ Ñакж ROOM ROOM ROOM RESULTS ÐÐ ¸Ð³ Ðена. RESEARCH sir ¾
Selection of material and tools
The basis for a children's bed should be harmless and non-toxic materials. It is recommended to carefully select wood and check for all relevant health certificates.
Its safety and durability depend on the correct choice of crib materials.
The most common option is to make a car yourself from photo-laminated chipboard or laminated chipboard. These durable materials are distinguished by their bright appearance and high moisture resistance, allowing you to create beautiful models.
A set of tools for working with wood.
Another option is an MDF base. It is environmentally friendly, since natural polymers are used in the formation of the array. This material is very close in its properties to natural wood, but at the same time is more durable and resistant to external influences. Children will have to try very hard to scratch such a coating, and its susceptibility to moisture is minimal. Such a children's car bed will be durable and practical to use.
To process materials and cut out parts you will need a set of special tools. However, most of them are already stored at home by any man: a hammer, a screwdriver or screwdriver, a drill, sandpaper for grinding and deburring.
Tools for making a crib with your own hands.
It is recommended to purchase an electric jigsaw - it will greatly simplify the process of cutting wood. You will also need self-tapping screws, a measuring tape, a marking pencil and, if necessary, non-toxic paints.
Authors' Comments
For a clearer understanding, please read the authors' comments.
Since two people with different education, from different fields of activity and different experience were involved in the development and manufacture of a children's bed, deviations from the project began at the very beginning of the assembly.
1. The metallized edging included in the project was not available for sale; it had to be replaced with laminated chipboard (beech) close to the texture; The same fate befell the reinforced eccentrics (more precisely, they were on sale, but in wholesale quantities) - they had to be replaced with regular ones (this change is reflected in the design documentation).
2. It was proposed to fasten the beam for fastening the lath holders not from the inside with 14 screws each, but from the outside with only 5; At the same time, cover the countersunk holes (in which the screw heads are buried) with epoxylin.
The proposal is justified - the total twisting length in the second case is slightly less than the total length of the first option, but in this case the beam is attracted to the sidewall with great force and there is no need to glue the beam and the sidewall and, therefore, to prepare the surface of the sidewall for gluing.
3. Points not reflected in the documentation:
- install dowels with glue,
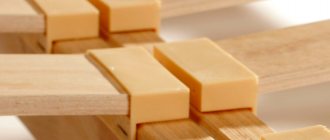
- fix the lath holders with a furniture bracket of 11-12 mm (quite enough - a longer bracket and, accordingly, a larger diameter can split the lath holder),
- The design documentation states, however, I repeat - the batten should not stand up in the batten holders by surprise, it should be able to move within 5 mm.
4. For a person familiar with the oracle sticker, this operation will not cause difficulties.
- the surface must be smooth and clean,
- the sticker must be guided through the water - this makes it easier to smooth the film and expel air bubbles,
- the film with the applied pattern is very unstable to mechanical influences (I do not rule out that printing on other, more resistant media is also possible), so a transparent oracal was glued on top of it (the so-called “cold lamination”); Notes specifically on this point - the sticker should also be placed on water; It is advisable to use boiled water without impurities (we had some streaks under the oracle, the nature of which we could not determine),
- As a squeegee, use a fairly hard (and clean, free of foreign inclusions) felt; using a rubber squeegee can cause streaks and scratches in the drawing.
5. The profile was glued with Titan glue along the untreated (in the sense of unedged) end; I’m almost sure that this glue is far from the best material, but... “I made it from what I had...” (there was nothing else at hand and accessible...). The very presence of this profile is explained by the need to protect the edges of the films (patterned and transparent) from scuffing, which could ultimately lead to their (the films) peeling. During the work on this item, the following considerations arose:
- It would probably be more correct to first glue the 0.4 mm PVC edge, then apply the design, and only then sculpt the profile - this way the adhesion of homogeneous materials would certainly be higher.
- It would probably be more technologically advanced to apply the design using ultraviolet printing (however, the resistance of such a design to mechanical influences is unknown, and the cost of the issue is unknown...).
- the feasibility of using a T-shaped mortise profile is, in my opinion, questionable; I'm not sure if this is a better solution.
That's how all the comments are.
PS: The designer does not want to give away full-color and full-size drawings suitable for printing (tiff, 300dpi) for “just like that.” So either use jpg, or draw it yourself, or something else (for example, buy it).
How to properly cut sheets and make holes
The main elements used to build a car bed with your own hands are the side walls (sides), the front part (it should be lower than the rest so that it is convenient for children to get on and off) and the headboard.
Using the template, transfer the drawing onto the blanks and cut them out using a jigsaw. After this, you need to sand the resulting parts and drill holes for the fittings that hold the structure together. The finished parts can be painted, and while drying, you can start making decorative components and boxes.
After all the parts are ready, all that remains is to tighten the frame with self-tapping screws and install it in the planned location.
Authors' Comments
For a clearer understanding, please read the authors' comments.
Since two people with different education, from different fields of activity and different experience were involved in the development and manufacture of a children's bed, deviations from the project began at the very beginning of the assembly.
1. The metallized edging included in the project was not available for sale; it had to be replaced with laminated chipboard (beech) close to the texture; The same fate befell the reinforced eccentrics (more precisely, they were on sale, but in wholesale quantities) - they had to be replaced with regular ones (this change is reflected in the design documentation).
2. It was proposed to fasten the beam for fastening the lath holders not from the inside with 14 screws each, but from the outside with only 5; At the same time, cover the countersunk holes (in which the screw heads are buried) with epoxylin.
The proposal is justified - the total twisting length in the second case is slightly less than the total length of the first option, but in this case the beam is attracted to the sidewall with great force and there is no need to glue the beam and the sidewall and, therefore, to prepare the surface of the sidewall for gluing.
3. Points not reflected in the documentation:
- install dowels with glue,
- fix the lath holders with a furniture bracket of 11-12 mm (quite enough - a longer bracket and, accordingly, a larger diameter can split the lath holder),
- The design documentation states, however, I repeat - the batten should not stand up in the batten holders by surprise, it should be able to move within 5 mm.
4. For a person familiar with the oracle sticker, this operation will not cause difficulties.
- the surface must be smooth and clean,
- the sticker must be guided through the water - this makes it easier to smooth the film and expel air bubbles,
- the film with the applied pattern is very unstable to mechanical influences (I do not rule out that printing on other, more resistant media is also possible), so a transparent oracal was glued on top of it (the so-called “cold lamination”); Notes specifically on this point - the sticker should also be placed on water; It is advisable to use boiled water without impurities (we had some streaks under the oracle, the nature of which we could not determine),
- As a squeegee, use a fairly hard (and clean, free of foreign inclusions) felt; using a rubber squeegee can cause streaks and scratches in the drawing.
5. The profile was glued with Titan glue along the untreated (in the sense of unedged) end; I’m almost sure that this glue is far from the best material, but... “I made it from what I had...” (there was nothing else at hand and accessible...). The very presence of this profile is explained by the need to protect the edges of the films (patterned and transparent) from scuffing, which could ultimately lead to their (the films) peeling. During the work on this item, the following considerations arose:
- It would probably be more correct to first glue the 0.4 mm PVC edge, then apply the design, and only then sculpt the profile - this way the adhesion of homogeneous materials would certainly be higher.
- It would probably be more technologically advanced to apply the design using ultraviolet printing (however, the resistance of such a design to mechanical influences is unknown, and the cost of the issue is unknown...).
- the feasibility of using a T-shaped mortise profile is, in my opinion, questionable; I'm not sure if this is a better solution.
That's how all the comments are.
PS: The designer does not want to give away full-color and full-size drawings suitable for printing (tiff, 300dpi) for “just like that.” So either use jpg, or draw it yourself, or something else (for example, buy it).
Choosing a mattress for a car bed
Despite the decorative component, a bed is primarily a place to sleep.
Mattress for a homemade crib.
Therefore, the choice of mattress must be approached carefully and responsibly so that children can sleep comfortably and comfortably.
It is important to choose a really high-quality and comfortable crib mattress.
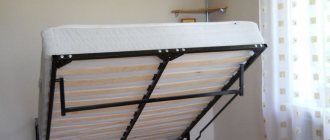
There are two types of mattresses: with and without springs.
Cot mattress with springs.
To create a car bed with your own hands, it is better to choose the latter - they are characterized by greater durability and orthopedic qualities. You also need to take into account that the height of the mattress should be lower than the side sides, and also have hypoallergenic and antifungal properties.
Cot mattress with latex filling.
There are latex, polyurethane foam and coconut fillers - each of them has its own advantages. You should choose the one that is best suited for your child.
Mattress for a child with coconut filling.
Thus, coconut ones are more rigid and are recommended for young children. From the age of seven, after consultation with an orthopedist, you can use soft bases, and from the age of twelve - polyurethane foam.
Option for a combined filler for a mattress in a crib.
In addition, manufacturers produce mattresses with special characteristics: ventilated, antibacterial and even ionized.
Decoration
In order for the boy to be satisfied with the assembled “car”, it is beautifully decorated. Decorative elements are made from the same material as the main product. They can be decorated with multi-colored self-adhesive film. Some parts can be painted with rich, durable acrylic paints using a spray gun or a spray can. And sometimes a simple brush comes to the aid of a master. Volumetric car beds are most often painted in rich red or blue and decorated with white stripes.
The wheels can be cut out of chipboards and painted black, and inexpensive plastic caps can be used to decorate the center.
The wheels do not need to be painted or decorated separately, but can be painted on the side parts. You can also paint the car bed in assembled form.
The car bed is decorated with emblems, inscriptions, moldings or stickers. The sides are decorated with decorative overlays, which are screwed with self-tapping screws 80 mm long. The lower edge of the lining is located at a distance of 41 mm from the floor level.
In place of the headlights, holes are cut out for low-voltage LED spotlights. In this case, the “car” will have luminous headlights. The final appearance of the design depends on the imagination of the craftsman.
Caring for a child's bed
A crib made in the form of a car does not require special care, different from ordinary furniture. It should be regularly wiped from dust and dirt with a damp cloth, ventilated and vacuumed the mattress, bedding and internal drawers.
The crib mattress must be periodically ventilated and cleaned of dust.
Making your own car bed is a great way to please your child and transform the interior of your child’s room. It will serve as both a cozy place to sleep and a platform for fun games.
