Category: furniture Published 04/05/2018 · Comments: · Reading time: 4 min · Views: Post Views: 11,366
Assembling furniture for the living room is an extremely interesting and exciting activity. If you have to assemble the wall according to instructions printed on newsprint with slightly vague text, the task becomes doubly exciting. It's a bit like solving a crossword puzzle. Intuition and ingenuity play an important role here. Possessing these qualities, even an amateur can handle assembling furniture. This article is designed to make life easier for the novice furniture assembler.
When starting work, you should not rely only on your intuition. However, you should first read the instructions to understand the sequence in which the assembly is performed. And so that the process begins successfully and ends just as successfully, the dry lines of instructions will be supplemented with illustrations. So, let’s look at how to assemble a wall of the “Alexandra-16” series from a bunch of parts.
Let's look at assembling living room furniture step by step.
First, let's prepare a place to work, read the instructions and sort the parts into parts.
Assembling a pencil case with a rotating bar
Legs are installed on the bottom.
Having placed the sides, they are secured with Euroscrews.
Four eccentric tie rods are screwed into the lid, and an eccentric is inserted into the holes in the sides.
The lid is placed on the sides and secured with eccentric ties.
Having aligned the sides and checked the diagonals, nail the back wall.
Place the base of the pencil case on the legs, screw the four studs of the eccentric tie into the lid.
The sides are placed on the lid and secured with eccentric ties. Three planks are placed into the resulting opening between the sides and secured with Euroscrews. A cap is screwed onto the top of the pencil case. Align the sides, check the diagonals and nail the back wall.
Four MDF strips are secured with euroscrews between the bases of the rotating element of the bar. Carefully install bent glass into the grooves of the MDF planks and fix it along its entire length using a sealant.
Assembling bedroom furniture
A set of bedroom furniture can be very diverse, but the main element will definitely be a bed, a wardrobe and bedside tables.
Each piece of furniture is also packed in a separate box, which contains instructions for assembling bedroom furniture.
After unpacking and checking the presence of fasteners and parts of the bed, begin its assembly:
- installation of the base - connect transverse and longitudinal metal frames (tsars) with special slats (base for a mattress) into a frame with euroscrews, bolts, brackets or corner ties;
- in the center, in special grooves, a transverse frame is installed;
- the legs are attached, they are fixed with bolts and aligned vertically and horizontally;
- a lifting mechanism is attached to the headboard on the side frames;
- the headboard is attached to the frame;
- the mattress is laid.
You can assemble the purchased furniture without the help of a specialist; the main thing is to take your time and strictly follow the attached instructions and assembly diagrams.
Assembling a TV stand
Legs are installed on the bottom. Guides for drawers are attached to the sides and center. Place the sides and the middle on the bottom and secure them with Euroscrews. Then a horizontal wall is installed.
Check the diagonals and secure the back wall.
The decorative element is installed on a dowel. Four eccentric tie rods are screwed into the lid. Then it is installed and secured with eccentric ties. Euroscrews are closed with plugs.
Assembly features for different types of furniture
The process of assembling cabinet furniture with your own hands may vary depending on the product. Tall cabinets are best assembled horizontally. To find out whether it is possible to fasten the elements in this position, you need to lean the side against the wall of the room. If the part does not reach the ceiling at an angle, then the work will be much simpler.
When assembling a furniture set, it is necessary to check the module bodies using a building level. The side elements should not deviate from the vertical, and the top parts from the horizontal. Otherwise, gaps will appear, due to which the appearance of the product will suffer.
Dresser
These pieces of furniture have approximately the same assembly pattern. First, the frame is assembled. Next they move on to working with boxes. First, the side parts are fastened, then the front and back walls. At the very end, the bottom is installed. The next stage is attaching the guides. One part, which must slide, is attached to the bottom of the box, and the second to the wall of the frame.
What is modern furniture made of, an overview of the main materials
To choose the correct mounting location, you should use a tape measure and a pencil. Having marked identical segments on all sides of the frame, you can safely attach the guides. If the chest of drawers has additional elements (mirror, changing surface), then they must be installed on a fully assembled product.
Bed
Standard models consist of a frame, base and headboard. Assembly in each specific case occurs according to the instructions. The process consists of the following steps:
- Installation of the base. Having connected the three frames and the headboard, attach the legs to the frames.
- Attaching corners and shelves to the base. Everything should be laid out evenly and only then secured with screws.
- Attaching the central backrest to the frames. This should be done only after the frame has been completely assembled.
Instructions for making furniture from chipboard with your own hands for beginners
All that remains is to lay an additional beam for the mattress pad on the frame, then the assembled product is tightened with furniture screws. This action allows you to adjust the firmness of the bed. All wooden elements are varnished and the work can be considered complete.
If the bed is equipped with a lifting device, the assembly will be different. The main difference is the non-standard connection of parts using a wedge-shaped method. When assembling the lifting mechanism, you need to fasten all the elements with screws and tighten them well. The frame is attached to the body only by the lower part of the mechanism, which should already be installed. This design is very bulky, so it should be assembled by two or even three people.
Closet
This cabinet furniture is the easiest to assemble. First, connect the shelves to the side walls using confirmats and a screwdriver. Then comes the fastening of the back part, where you will need special nails for furniture and a repair stapler with staples. After assembling the box, you need to make sure that the diagonals and right angles between the structural elements are equal. Next comes hanging and adjusting the facades, after which the shelves are installed. If there are pull-out drawers, they are inserted at the very beginning.
Closet
Assembling the body should begin with the work of attaching the base to the bottom with dowels and minifixes (eccentric couplers), after which the support nails are driven in. The presence of opposite holes on the side walls is very important; attention must be paid to this. After fixing the rear part, you need to check the corners and diagonals. Next, the fastening parts for the shelves, the shelves themselves, the bar and, if any, the drawers are installed. The plinth can be dismantled provided that the cabinet does not have a base and trim at the bottom.
The main feature of any wardrobe is its sliding door system. They are installed on furniture last. First, the limiters are attached, only then the upper guide rail is attached (it is too early to install the lower one). The door panel is inserted into the far grooves of both guides, and the leaf into the near ones. The adjustment is now made. Only now can you fix the bottom rail and stick on the brushes for sealing.
Kitchen set
Self-assembly of such cabinet furniture is a very difficult task, which requires a variety of fasteners and special fittings. Everyone starts by preparing the lower sections. Using Euroscrews, they are fastened to the sidewalls, slats for the table top are inserted, and the back part is attached. Additionally, when assembling the parts, you will need a stapler, nails with a head perimeter of 1 cm and a self-tapping screw for adjusting the legs. Then the hinges are installed in the landing slots, the facades are hung and tightened.
The main stages of making cabinet furniture with your own hands, tips
The upper cabinets are assembled in a similar way. However, there is some heavy installation involved. High sections are hung on a mounting bar, massive bolts, hinges or dowels. Suitable height is 55-60 cm from the bottom tier.
The corner set begins with the installation of a radius cabinet.
Drawer assembly
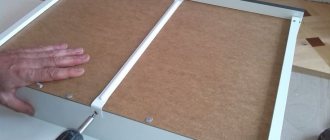
The parts of the box are connected to each other with euroscrews. After checking the diagonals, nail the bottom to the bottom cavity of the box frame. The guides are screwed to the bottom of the box with screws, and the cover is screwed to the front wall of the box with four screws. The handles are screwed to the front of the drawer. The second box is assembled in the same way.
Assembling a section with shelves
Assembly begins with the cabinet. It is assembled by analogy with a cabinet for a rotating bar. Then they begin to assemble the top of the section. Place the bottom edge down on a clean, flat surface and, placing the sides, secure it with Euroscrews. The lid is placed on the sides and secured with eccentric ties.
The mullions are secured to the sides and horizontal walls with Euroscrews.
The sides are attached to the assembled structure and secured with Euroscrews. The cap is placed on the sides and secured with Euroscrews. After checking the diagonals, nail the back wall.
The assembled structure is installed on the lid of the cabinet so that the sides sit on the dowels of the lid. The lower mullion and the cover are connected with Euroscrews. Strikers are installed on the side, and glass hinges are installed on the glass door. They hang the door and screw on the handle.
Assembly technology
To make the work process easier, you should read some popular manual on assembling a cabinet or cabinet-type bed, or watch a video. To save time, we will describe how cabinet furniture is assembled on our own and without the help of an experienced furniture maker.
Today you can use several types of assembly of a piece of furniture:
- An eccentric coupler is an assembly method with high reliability of connections and the absence of caps from hardware on the outer sides of the surfaces of a piece of furniture. The technology is also very popular because the product design remains neat. Although it is worth admitting that the assembly process using this method can take quite a lot of time. Especially if there is not much experience in such matters;
- a furniture corner is considered an outdated method, so it is done extremely rarely today. And all because such connections look somewhat sloppy. The use of a furniture corner is considered justified only in the case of creating a piece of economy class furniture;
- furniture dowel is used for pieces of furniture that are not expected to bear significant loads. To create such connections, you will need to arrange holes for the diameter of the dowel, located at the ends of the product. Next, using an adhesive composition, the parts are combined into a single piece of furniture. Obviously, it will not be possible to disassemble the assembled structure;
- Confirmat is an assembly of a Euroscrew or furniture screw, characterized by simplicity, efficiency, and economy. To complete the job, you will need screws and plugs with which you can veil the cap.
Final assembly
The assembled part of the pencil case, the TV stand and the section with shelves are installed along the wall and leveled. The stiffening rib between the sides of the pencil case and the section with shelves is secured with Euroscrews. Then install the shelf on the dowels of the stiffening ribs and secure it between the sides.
Fix the decorative horizontal shelf on the side of the pencil case with euroscrews, having previously installed it on the dowel of the decorative element.
Double-sided tape is glued to the mirror at the location of the horizontal slats of the pencil case and installed, pressing it against the slats.
The assembled structure of the rotating bar is carefully installed on the lid of the cabinet so that the intersection tie connects the base of the rotating element, the plastic separator and the lid. Similarly, an intersection tie connects the upper part of the bar and the cap.
Install drawers and doors at the place of use.
Glass shelves are installed on the shelf holders.
All Euroscrews are closed with plugs. Through holes are sealed with adhesive plugs.
Common mistakes while working
When a person who has no experience in this takes on the task of assembling furniture, mistakes are not easy to avoid. Especially if the necessary tools for assembling furniture are missing. Let's look at the most common mistakes that novice masters most often make.
Refusal to study the instructions. Some people believe that reading the instructions is completely unnecessary. But manufacturers provide this manual for a reason. Therefore, before you start assembling a piece of furniture, you need to familiarize yourself with its contents.
Incorrect installation sequence of structural parts. For some reason, craftsmen without experience believe that it is first necessary to secure all the large elements, and only then begin installing smaller ones. However, this is the wrong approach. First, small elements are fixed, and then larger ones.
Incorrect product specification. Oddly enough, experienced professionals sometimes make this mistake. Without studying the instructions, it is simply impossible to determine which parts are left and which are right. This causes confusion.
The surface for assembling furniture is dirty or uneven. Before starting work, you must clean the surface and check whether it is level.
Refusal to measure the diagonal of furniture. This makes it more difficult to avoid distortions. It is imperative to use a level to prevent this.
Complicating the work process due to confusion. By violating the order of work, you can complicate your task.
Refusal to verify the length of holes for fasteners. Schemes for assembling furniture with your own hands must contain information regarding all important quantities. And they need to be checked to avoid errors during the assembly process.
Pros and cons of the Alexandra-16 living room furniture set
This set of furniture attracts with its unusual shapes and successful color scheme - wenge with milky oak. The wall will fit well into both a small living room and a spacious room. No adjustments are required during assembly, as sometimes happens with some furniture manufacturers. All holes are made exactly according to the markings. Overall, the wall leaves a pleasant impression.
But I would like to note some disadvantages that the buyer needs to pay attention to. The curved cut on the top decorative shelf is made unevenly, which is clearly visible in reflected light. Since the top shelf is made of loose chipboard and does not have a stiffener, its purpose is a purely decorative function. It will sag under any object. As noted above, it is difficult for a beginner to understand the included instructions. In the picture it is simply impossible to see the numbers of some positions.
Post Views: 11,366
Tags: living room furniture, furniture assembly
VIDEO: Assembling a unique wall with your own hands in 3 minutes for a 4K TV
Assembling furniture for the living room is an extremely interesting and exciting activity. If you have to assemble the wall according to instructions printed on newsprint with slightly vague text, the task becomes doubly exciting. It's a bit like solving a crossword puzzle. Intuition and ingenuity play an important role here. Possessing these qualities, even an amateur can handle assembling furniture. This article is designed to make life easier for the novice furniture assembler.
When starting work, you should not rely only on your intuition. However, you should first read the instructions to understand the sequence in which the assembly is performed. And so that the process begins successfully and ends just as successfully, the dry lines of instructions will be supplemented with illustrations. So, let’s look at how to assemble a wall of the “Alexandra-16” series from a bunch of parts.
Let's look at assembling living room furniture step by step.
First, let's prepare a place to work, read the instructions and sort the parts into parts.

