You have decided to create the bumpers for your crib with your own hands – where to start?
Still, the creative side of the mind took over, and you decided not to buy something that can be found in everyone, but to make a bumper with your own hands? Then let's take a closer look at all the upcoming actions.
First, let's assume that pillows will be used as a side, in other words, the classic version. In this case, you need to decide on the number of bumpers. It all depends on the desired size of the future product, but the most common volume is 2 pads on the small side and 4 on the large side. Therefore, if you plan to cover 2 sides of the rods, you will need 6 pieces, three - 8.
Next you need to select a filler. Doctors prefer certified synthetic material in order to avoid allergic reactions in the baby, as is often the case with wool fibers. Typically, dense fiber is used to help soften impacts. In addition, it is suitable for children of any age and does not deform when washed. An alternative is padding polyester as a softer option.
Now let’s calculate the fabric format for sewing a bumper for a baby’s crib. As a basis for further calculations, we will take the standard crib size – 120*x60. The sides of the pads are 30*30, and taking into account the allowance - 34*34. A regular piece of fabric is about 160 cm in length. That is, from a single piece of this kind 4 squares will come out. The remaining material can be used to make plain ties, which will later be used to attach the bumpers to the rods.
On a note! By the way, it’s better to buy several different colors, because it will be even more original!
Once you have decided on the size and filling, buy the fabric. It's time to think about one of the main points - its quality. The main thing is naturalness, i.e. the material must be environmentally friendly, without dyes. Softness and hypoallergenicity are also important. Preference should be given to flannel, flannel and chintz fabrics.
What is a baby bed limiter?
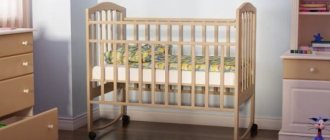
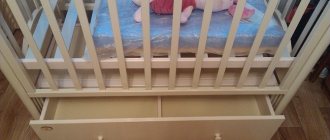
A child bed restraint is a holder for a bed to prevent a child from falling, mounted separately or installed at the manufacturer's factory. This element helps to protect the child's sleep and prevent accidental falls from the bed in the middle of the night and subsequent injuries. Bed restraints are relevant both for small children sleeping separately from their parents, and for babies sleeping with their mother, because the part can also be installed on an adult bed.
Bed restraints can significantly reduce the risk of falls.
Note! Built-in barriers are necessary for children sleeping on the second floor of a bunk bed to avoid falls, regardless of the child's age, because the resulting injuries can be extremely dangerous. They can be purchased in furniture stores, purchased to order, or you can make them yourself from scrap materials, and they will not be inferior in efficiency to purchased ones.
A bed restraint is a protective barrier that prevents the person on the bed from falling.
We sew bumpers for the crib in different ways
Pay attention to interesting ways of sewing bumpers. So let's get started.
Classic side - step by step instructions
Using the patterns made in advance, we cut off a certain piece of fabric, not forgetting to add 1 -1.5 cm for the margin that will be required when sewing. Next, fold the material used for lining the cover with the outer side inward and stitch around the entire perimeter, providing a hole for the filler and the lock. This can be done using a zipper or buttons, which is best sewn with a hidden seam yourself for neatness.
Now let's move on to making the ties. Ribbons or ribbon (in the form of lace, for example) are suitable as a simple option, and for Velcro you can buy blanks at any fabric store. Both methods will be quite simple.
At the final stage, you need to sew the upper covers, which will make cleaning the bumper easier. They can be washed, ironed and simply removed if necessary. Before sewing, be sure to mark places for ribbons or Velcro, a piece for the hole (according to the size of your preferred fastener) and process the upper edges.
Advice! It is better to take wide and long material for fastening elements, so you can decorate the crib on the outside with a beautiful bow.
Step-by-step sewing of a high bumper
This process is almost completely similar to the previous one, however, one of the sides will be larger: instead of the previously taken 30x30, take 40-45 cm by 30. Otherwise, we repeat the same thing and make the baby happy. But it should be remembered that the height of the bumper should depend on the width of the bars of the crib.
Unusual low protection especially for girls
Let's take 30x30 calculations as a basis, as discussed earlier. We make the pattern as calculated in the first point, right up to sewing the cover. Next, between two squares of fabric we insert the desired ruffles (this can be lace braid or a wide ribbon) and sew them together, not forgetting to mark the place for the future lock. We continue the actions as in the standard version.
By the way, newborns up to the second month perfectly perceive and react to colors and bright cartoon characters. So don’t be afraid to experiment, because your baby’s smile is worth it!
Pillows as bumpers
Here you need to sew pads from the initial calculation of 30x30 cm - one piece. The length of the crib will require 4, and the width - 2, colors may vary, as well as the pictures on them. In the future, you need to sew exactly the same as in classic tailoring.
Velcro for a practical border
If you have not yet decided what kind of ties to make for the bumper (ribbons or others), then consider the option with Velcro. It's quite simple, and the material can be found at any craft or fabric store.
Types of limiters
Limiters are different; they can either completely or partially cover the side of the bed. Full coverage is important for young children; partial coverage will be sufficient for older children to limit falls.
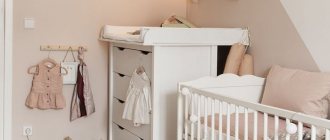
Such devices can be built-in, that is, the design of the bed provides for the presence of such a barrier in advance.
Bed barriers can be either removable or built-in. Removable ones are especially convenient because you can take them with you on trips, so that you can protect your baby on the road.
There are also limiters:
- Factory;
- Made to order according to individual measurements;
- Homemade.
You can also buy a limiter separately if you need it.
By material type
Sides are divided into several types, depending on the material from which they are made.
Soft
It is the simplest model of a limiter; it includes: foam rubber, padding polyester, which is rolled into a tube and, if necessary, several rollers are connected one on top of the other to achieve the desired height. Covers can be placed on top; they are usually attached to the mattress using laces or Velcro.
You can choose the material from which the product is made based on your tastes and preferences.
Reticulate
An effective solution to prevent your baby from falling at night while sleeping. Most often, nets are installed in a frame made of wood, metal or durable plastic.
The color variations of such sides are also varied.
Important! Check the strength of the mesh before installing the barrier on the bed. The restraint must be able to withstand the weight of the baby without being damaged.
Plastic
A rather convenient and practical side, despite its lightness, is durable and reliable. It is easy to use, warms up quickly, is easy to clean from dirt, and will not damage the baby’s skin if accidentally broken. Easy to make, you can make it yourself from plastic tubes at home.
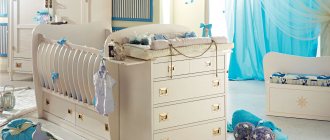
As a rule, children's beds designed for very young children are always equipped with a built-in barrier.
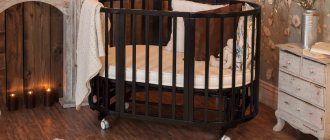
Wood
A classic version of a barrier for a children's bed. Strong, reliable, durable. Fits perfectly into the bedroom interior, looks aesthetically pleasing and expensive. There are many variations in appearance and shape, it all depends on the owner’s imagination.
The minimum height can be selected if the child is constantly in a lying position, that is, for infants.
By mounting method
There are several ways to attach the holders to the crib:
- To the base of the bed;
- To the side walls of the bedroom;
- To the side of the crib;
- Under the mattress using a metal frame;
In this case, the side is held down by the weight of the child, suitable for children over two years old;
- To the mattress using Velcro and laces;
- Universal, for mounting on both horizontal and vertical planes.
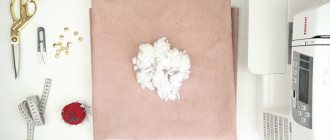
We select the necessary tools and materials
Having prepared a complete list of necessary tools in advance, you can sew the bumpers for your baby’s crib in one day.
What will be required in the work:
- long ruler, scissors and pencil (or tailor's chalk);
- centimeter or tailor's meter;
- textile;
- filler;
- needles, threads;
- decorative tape, braid.
The pattern for future sides can be drawn in advance on tracing paper and then transferred to fabric. But if the sides are of a regular rectangular shape, then the cutting can be done directly on the fabric.
How to install a baby bumper on an adult bed
If a child sleeps with parents who are concerned about his safety while sleeping, bumpers on an adult bed for the child will be a way out of this situation.
It is advisable to choose restraints with removable fastenings, because the child will grow up and move to sleep on his own bed after some time.
Universal removable restraints are an ideal solution for arranging a sleeping area in any bed; they are easy to attach and just as easy to remove.
It is necessary to choose the appropriate size, either for the entire length of the bed, or a partially retaining side, depending on the age and sleeping behavior of the child.
Otherwise, the manufacturing recommendations are the same as for the previous options.
The presence of special racks in the design allows them to be adjusted in height.
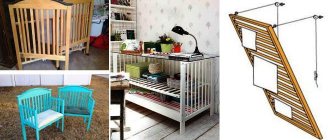
Sides for a children's bed are a useful and necessary device that does not have to be purchased in a store, but can be made independently by involving an older child in the process, giving the opportunity to choose materials and decorative elements according to their preferences.
Most parents who purchased crib restraints for their children were satisfied with this purchase.
Selecting material for sides
Of course, when choosing fabric and tailoring the sides, preference should be given to natural fabrics . The fabric should be quite dense (the sides are often washed) and pleasant to the touch (not cause irritation when it comes into contact with a delicate baby’s skin).
The color of the fabric is of no small importance. The ideal option is neutral basic pastel shades: gray, milky, beige . Fun prints on the fabric and embroidery will help diversify the monochromatic color of the sides.
Attention: in order to maintain a restful sleep for your child, you should avoid bright or too dark colors of fabric for the sides of a baby crib.
Protection on the bed against falling of a child
The presence of small children in the family requires maximum care and attention from parents. Ensuring safety is an integral part of interaction with your child, even at night. To protect the child while sleeping, many parents resort to installing a protective barrier on the crib. Details below.
According to statistics, a large number of injuries in children in the first year of life are associated with falling out of bed.
Choosing the right filler
The choice of filler for the sides of a newborn’s crib should be approached with special attention:
- Foam rubber is a universal filler, suitable for any type of product. The main advantage of foam rubber is its resistance to frequent washing. But when washing a product with foam rubber, it is very important to dry it well, since foam rubber, retaining moisture well, becomes an ideal environment for the development of fungi.
- Sintepon is a plastic, quick-drying material. When sewing the sides, the padding polyester filling must be quilted together with the fabric. Otherwise, after the first wash, the filler will clump together.
- Holofiber is a modern filler, ideal for use as a filler for the sides of a baby crib . Holofiber dries very quickly, pathogens do not multiply in it, and the filler holds its shape well even after frequent washing.
Making a barrier from plastic pipes
A barrier-limiter for a children's bed can also be made from plastic plumbing pipes. You will need a special tool to cut such products, pipes of small diameter and connecting corners of the same cross-section.
Using this scheme, take from 5 to 7 straight tubes of the same size, cut small connecting ones up to 20 cm, and assemble the structure using corners of different configurations. Straight sections of the barrier are secured with T-shaped corners, the edges with L-shaped corners. To attach the holder of the future barrier, choose them with 4 holes.
The result is a smooth and rounded product. It is easy to wash and easy to make.
We sew the sides of the crib with our own hands
Before you start cutting and sewing the bumpers, you need to measure the length and width and height of the crib (future parameters of the pillows for the bumpers).
Let's take a closer look at the sequence of steps for sewing bumpers for a standard size crib (120*60):
- We cut out four pieces of fabric 60 cm wide, 40 cm high, and four pieces 120 cm wide and 40 cm high. Important: when cutting, do not forget about a 2 cm seam allowance.
- Using the same parameters, it is necessary to cut out the filling for four pillows (parameters without allowances).
- Having laid out the fabric in two parts with the right side inward (you should get four pillows), we sew the blanks around the perimeter, leaving a small cut in the corner.
- Turn the pieces right side out. Fill the pillow with the prepared filling through the open edge.
- The incision is stitched up, and braid ties are sewn into the corners of the pillow (fixing the sides on the baby’s crib).
Having basic sewing skills, you can easily sew a bumper for a baby’s crib, putting your soul, mother’s love and care into the product.
What size of sides should I choose?
For babies under 5 months, choose bumpers no more than 30 cm in height
This will allow you to see the baby without looking into the crib every time.
But after the child begins to sit down and try to stand up, the bumpers should be higher. So that the child cannot stand on them and try to get out of a crib of any size.
The length of the side for a standard bed 120*60 will be 360cm.