The layout of individual apartments is always different, as is the area, and often this applies specifically to the kitchen. The size of the kitchen may be familiar (several squares), but often this room is converted into a studio. Be that as it may, a bar counter is installed in such kitchens; it not only looks stylish, but is also practical - today, few families find themselves together at the table. And if there is a counter, then you also need bar stools. How to make a bar stool with your own hands?
Making a bar stool with your own hands
How to make a bar stool with your own hands
Why on your own?
Of course, we are not saying that you should forget about furniture stores and instead make all your furniture yourself. But if you look at the photographs of bar stools that can be found in numerous catalogs of furniture stores, you can conclude: you can actually make such a chair yourself !
Bar stools are easy to make with your own hands
In addition, pieces of furniture made by yourself can become a true decoration of the home, pleasing not only the eye, but also the soul.
On a note! In this case, there are also more possibilities, since you decide for yourself which option is best suited for the interior of the room. There is no need to mention once again about people who like to work with their hands.
Original bar stools
We decide on the structure and design
First of all, decide on the size of the chair. Its height, for example, will depend on the height of the bar counter itself. Also remember that your bar stool should not only be attractive, but also comfortable in all aspects. Once you have decided on all this, proceed directly to the design.
Bar stool with adjustable seat height
To be honest, you can start with the appearance, but then it may turn out that due to ergonomic features some adjustments are required.
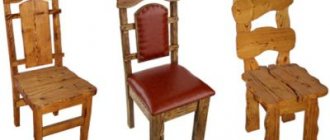
Simple wooden chairs without backs
As for the design, first of all, decide how many legs the chair will have and whether there will be any at all. The best option is a product with four legs . It is easy to manufacture, convenient and reliable.
A chair with four legs is more reliable and easier to make
Important! A chair with a back will be even more comfortable, especially if you add armrests to it. If you plan to sit on such a chair during meals, then think about the backrest in advance.
Chairs with backs are more comfortable
Pay special attention to the upholstery (if it is planned). A chair made entirely of wood will fit perfectly into almost any interior, and after varnishing/painting it will also look good in other cases.
Dimensions and drawing
Before you start making a bar stool, you need to arm yourself with its drawing. This will allow you to determine the list of necessary tools, accurately calculate the amount of material and avoid errors in work. The easiest and fastest way is to download the ready-made version. But since no one can give a 100% guarantee for the accuracy of the information, it is necessary to play it safe and personally check all the indicated dimensions.
The next option is to draw your own future bar stool using special computer programs. This process takes more time, but guarantees the creation of a unique product of its kind. If there is no opportunity or skills to work with a computer, then the drawings can be sketched manually. To do this, you only need a sheet of paper, a pencil, a ruler and excellent imagination.
How the drawing appears is not of fundamental importance. The most important thing is the correct sizes. The quality production of a bar stool depends on them. The following dimensions must be accurately measured and marked on the drawing:
- height of the product from the floor to the seat (equal to the distance to the table top minus 25-30 cm); standard – about 75-85 cm;
- backrest height (if available) – about 20 cm;
- seat length and width – at least 35 cm;
- The distance between the legs at floor level is approximately 44 cm.
The above standard sizes may vary according to individual preferences and the dimensions of the bar counter. A folding chair with an adjustable backrest height and sliding legs will look interesting. For it, the drawing takes into account all the parameters in the retractable state.
More details about bar stool height
Nothing is known about the creator of the first bar stool. One can only guess that it first appeared around the time when, instead of the usual partitions between visitors and the seller, high (1.1-1.3 m) counter tables with comfortable tabletops began to be used. Visitors to drinking establishments no longer had to leave such counters.
As a result, an ordinary “tripod” chair was transformed into a bar stool. For more noble bars, they were made from valuable wood, trimmed with leather and fabric; the poor public was content with cheap options. But even despite their practicality and high “stature”, all types of bar stools remained in the shadows for a long time due to their lackluster design.
Standard height of bar stool and counter according to GOST
GOST 17524.2-93. Furniture for catering establishments. Functional dimensions of seating furniture .
Downloadable file (click the link to open the PDF in a new window). GOST 17524.2-93
Everything changed in the fifties and sixties of the last century, when high chairs became fashionable and attracted the attention of large enterprises. Much has changed since then, today the designs are very diverse: there are models with and without armrests, with backs, rotating and static, soft, with removable pillows and without upholstery... Changes have also affected the material of manufacture - now they use not only wood, but also chrome, aluminum, plastic. And the variety of decor allows you to use it for all possible stylistic solutions!
Despite all this, when choosing a bar stool, its convenience is of great importance. Due to the center of gravity, which is shifted forward (the visitor rests his elbows on the counter), the support is not the back, but the footrest. For this reason, the backrest is more a tribute to tradition than an ergonomic condition.
As for the seating height, it, as noted earlier, depends on the height of the bar counter, and therefore modern chairs are either produced in two sizes (Th and Bh), or are equipped with a gas-lift mechanism , thanks to which you can easily adjust the height seats (within 54-85 cm).
What happens if you choose the wrong bar stools?
From the array
Now let's take a closer look at an example of how to make a chair from solid wood. As for wood, the most affordable materials are pine and birch. They are available for free sale. When choosing, make sure that they are free of knots and other damage. This is important, because the product should ultimately be quite durable.
So, for manufacturing you will need to prepare the following blanks:
- Circle Ø360 mm and thickness 30 mm 1 pc.
- Circle Ø260 mm and thickness 20 mm 1 pc.
- 4 things. legs 30 mm thick.
- 4 things. stiffening ribs 30 mm thick.
Part 1 and 2
Part No. 1 will serve as a seat. As for part No. 2, it will play the role of a backing under the seat.
When cutting the legs, make sure that the wood structure is vertical, i.e. the cuts are not made against the grain.
Detail 3
You should also cut out the stiffeners, as indicated in the schematic diagram:
Detail 4
To assemble this you will need 3 types of screws:
- 5x80 mm – necessary for screwing the legs to a small circle.
- 5x40 mm - will be required to secure the main seat to the small circle.
- 5×20 mm – for fixing stiffeners.
Below is a step-by-step assembly process:
Build process
To prevent cracking of the workpieces, pre-drill holes for them.
At the end of the work, painting is carried out.
Ready-made wooden bar stool
Which tree to choose?
If you are planning to make a wooden bar stool, then remember: it will require about 10 ready-made elements. The same applies to structures made from other materials.
To make your own chairs, it is better to use wood.
When choosing a material, give preference to hardwood (such as oak, maple, beech). In principle, wood is best suited for self-production (although there may be exceptions, which we will talk about later) in terms of the “effort-to-result” ratio. Moreover, wooden chairs will look great in an apartment/house.
The wood for the chairs must be hardwood
Having chosen a suitable drawing or drawn it up yourself, get the materials. Everything you need is sold in construction supermarkets or hardware stores, while you can order the chair parts ready-made in the workshop. If you indicate the required dimensions, they will quickly and inexpensively cut out all the required parts of the structure.
You can order ready-made parts for bar stools in the workshop
On a note! There may be more details - it all depends on the chosen design. In addition, upholstery materials can be added. Also, after assembling the chair, it is recommended to impregnate it with a primer (if it was not covered with paint/varnish) to protect it from moisture.
The design of bar stools may vary
Chairs require additional processing after assembly
But when making a metal bar stool, some difficulties will arise. This option is suitable for craftsmen who are accustomed to working with metal, have all the necessary tools and are able to make all the parts themselves. Additionally, you will need to do some welding if there are no connectors for fasteners.
Making metal bar stools harder
A wooden product, unlike a metal one, is easier to assemble - for this you will need a hacksaw, a screwdriver, self-tapping screws and sandpaper. Of course, the description is very superficial, but it shows the difference well.
Country style bar stools
DIY making
Do-it-yourself bar stools are made for home use and for sale. Having decided on the materials, dimensions and tools, you can begin to develop the drawing. Then they begin to prepare the parts and assemble the structure. Additionally, you can create a cover or decorate pieces of furniture with pillows.
Wood
Wooden furniture fits into any interior. Aesthetic appeal, pliable material, durability are only part of the advantages of wooden chairs. Prepare in advance several boards up to 3 cm thick, a jigsaw, a pencil, a plane, a screwdriver or screwdriver, self-tapping screws, sandpaper, stain and brushes. Follow the instructions:
- Prepare a drawing. They compare dimensions, check the availability of tools and materials.
- The boards are marked with a pencil.
- The main parts are cut out with a jigsaw. For the seat you need a circle with a diameter of 35 cm, a backing - 25 cm. You will need four legs with a thickness of 3 cm and four footrests.
- The legs are planed with a plane so that the thickness at the bottom is reduced by half a centimeter.
- A screwdriver or screwdriver will help you assemble all the parts. Self-tapping screws 5 x 80 are suitable for connecting the legs to each other and the substrate. Self-tapping screws 5 x 40 are suitable for screwing the seat to the base.
- Lastly, the stiffeners are attached to the supports using 5 x 20 self-tapping screws.
- Sand the entire product with sandpaper until smooth.
- Cover with stain or varnish.
Generally accepted standards for bar stool height, rules for its selection
In the same way, you can assemble a chair from plywood or natural wood. A wooden bar stool can be left in its natural color and texture or painted in the desired shade. Non-flammable paint is selected.
With soft seat and back
Upholstered chairs are more comfortable, but making them yourself is more difficult. The upholstery material used is genuine leather or a substitute, textiles, velor, denim and any material that can withstand frequent use. Dimensions are selected with allowance for the connection.
Fabrics impregnated with acrylic or Teflon are ideal. They are easy to clean and do not absorb liquids.
To create such a piece of furniture you will need a jigsaw, pencil, wood or boards, sandpaper, hacksaw, drill, chisel, screwdriver, brushes, varnish or stain. The following details are marked in advance:
- seat – 34 x 34 x 3 cm;
- front legs – 2 x 44 x 74 cm – 2 pieces;
- hind legs – 2 x 44 x 99 cm – 2 pieces;
- front drawer - 2 x 44 x 27 cm;
- back drawer – 2 x 44 x 32 cm;
- side connecting strips – 2 x 44 x 30 cm;
- leggings – 2 pieces, 1.5 x 22 cm;
- legs 4 pieces – 15 x 30 cm;
- crossbars for the back – 2 pieces, 2 x 44 x 38 cm.
Cut out all the parts with a jigsaw; a chisel may be required. The elements are cleaned with sandpaper. The details of the front part are cut out in an arc. In the back part, using a drill or chisel, punch out connecting grooves 2 x 2 cm. Using a hacksaw, make tenons on the sides, and use a drill to drill holes on the side planks.
Nests are made on the legs for the spikes made. They go over the entire structure with sandpaper and assemble the remaining parts using self-tapping screws and a drill. Finally, the product is opened with varnish or stain. The upholstery is secured with a construction stapler. For the backing, use batting, furniture foam rubber (cut to the shape of the back and seat). For convenience, you can use furniture glue. The seat is assembled separately and then fixed to the finished structure.
Designing and assembling a stool with your own hands, decor options
From a profile pipe
The simplest option for those who want to get quick results. It looks authentic and fits under any bar table. A frame is assembled from the profile, then added with decor. Stainless steel is durable and easy to use. Numerous master classes provide information on how to make a bar stool with your own hands from a profile pipe:
- Prepare materials and tools. You will need plywood or a sheet of chipboard, pipe benders, a drill, a screwdriver, a construction stapler, foam rubber, textiles (any suitable upholstery).
- The workpieces are cut so that they correspond to the working drawing.
- The upper parts of the pipes are bent with a pipe bender, giving them a semicircular shape.
- Connect the bent parts using a screwdriver and fasteners.
- They cut out the seat with a jigsaw, prepare furniture foam for it, and cut off the upholstery. Glue the foam rubber with glue, cover it with fabric and fasten it from below with a construction stapler. Attached to the finished frame with bolts.
- Plastic plugs are placed on the legs from below to prevent damage to the floor.
You can assemble the structure without a pipe bender. Instead, a frame is assembled from pipes of different lengths, connecting with metal corners. Such a chair will be more durable and stronger than a wooden one.
Features of making a bar stool
Despite the huge number of ideas (both in specialized magazines and on the Internet), the most important thing in all cases is the correct measurements.
The most important thing is the correct measurements
First, decide what the height of the chair will be. It is recommended that the height from the seat to the tabletop be approximately 35-40 cm. Having determined the height, draw up a drawing or use a ready-made one (choose the appropriate option).
What determines the height of a bar stool?
On a note! To make the simplest bar stool, you will need 4 legs, the same number (preferably) of legs and, in fact, a seat. If a backrest is planned, then the back legs should be about 30-35 cm longer (they will serve as the basis for the backrest).
Bar stools, their features
It is easy to make a mistake at any stage of manufacturing - both when preparing parts of the structure and during measurements. Therefore, it is recommended to double-check all measurements several times before entering them into the drawing or cutting off an unnecessary part.
Check measurements several times when making chairs
The ready-made drawings already mentioned above will help with this, which is more important for people who have not designed anything before. Don’t rush, try not “for show”, but for the result!
You can make a bar stool using ready-made drawings
Photo example of making a bar stool (master class)
Drawing up a drawing
You cannot create products blindly. A drawing with precisely indicated dimensions is required. The standard sizes of bar stools are as follows:
- height to seat – up to 85 cm;
- seat width – from 30 cm;
- The minimum distance between the legs is 40–45 cm.
Shapes, materials and designs of stool covers, methods of attaching them.
Some models require a backrest. Its height should not exceed 25 cm. All measurements are included in the drawing. Dimensions cannot be changed during the assembly and preparation of parts.
The height can also be adjusted based on the height of the stand itself. The distance from the floor to the seat is equal to the height from the floor to the table top minus 30 cm.
Working drawings record the main dimensions and components. If you plan to make a sliding product, all parameters are indicated already in extended form. The diagram itself can be obtained in several ways:
- Download from the Internet. No one guarantees the correctness of such calculations. There is a risk of wasting materials and getting low-quality results.
- Create in a computer program. The software allows you to create an accurate drawing of the product. Skills in working with such software are required.
- Draw it yourself. The easiest way. You will need a sheet of paper and a pencil. But it is advisable to check all calculations several times.
A correct drawing is a guarantee of a good result. Therefore, you should not take the first one that catches your eye. If the choice fell on an option posted on the Internet, it is useful to familiarize yourself with the results of those who have already used this option in their work.
Option No1. Simple wooden bar stool
The first thing you have to think about is how will the seat be, hard or soft? If you don't know which option to choose, do a firm sit like the example below. In the future, you can upholster it with any available material (fabric, leather, etc.) at any time. The diagram below shows the design and dimensions.
Scheme of a wooden bar stool with dimensions
Step 1. For the legs, use wood 5x5x71 cm (in our example it is poplar). Reduce the chamfers/angles at both ends by about 5 degrees so that the legs are angled relative to each other. For connections, drill pocket holes.
Making chair legs
Step 2. Attach the bottom/middle strips by chamfering in the same way (all at the same 5 degree angle).
Installation of cross bars
Step 3. Having fastened all the parts that are parallel, start screwing the transverse partitions to one of these sides. Do one side first, then the other.
Fastening perpendicular partitions
Step 4. When attaching the partitions, take into account the fact that it should be comfortable to place your feet on them while using the bar stool. This is a must.
The process of attaching partitions
Step 5. The seat will have a special shape, which will make the chair even more comfortable. Mark the end of the board that will be used for seating. To get the desired shape, use a circular saw, adjusting it to different cutting depths; although it is quite possible to use a regular saw. First, cut the recesses, and then remove the excess wood with a chisel.
Excess wood is removed along the recesses
On a note! The process, of course, is quite complicated, and therefore, if you have something better at hand, you can refuse the chisel. Once done, thoroughly sand all surfaces with a sander.
Step 6. In the end, all that remains is to connect the legs to the seat. For this purpose, drill holes in the upper part of the legs, make the same ones at the bottom of the seat, and then, using glue, place all the parts on the pins.
Connecting the legs and installing the seat
Sand the surfaces of the finished bar stool using sandpaper. If necessary, seal the holes with putty. Next, you can paint the chair or, alternatively, varnish it.
Step 7. That's it, a simple bar stool is ready (and in our example there are three of them). This design - thanks to the proper placement of perpendicular crossbars, comfortable seating and selected height - may well become the most favorite and comfortable place in the house! Would you like to make the same chair? Feel free to get to work, because nothing could be easier!
This is what finished wooden bar stools will look like
Step-by-step instructions for assembling a bar stool with your own hands
How to make a bar stool with your own hands and the stages of the manufacturing process depend on the material for the furniture frame.
All work is divided into cutting blanks with subsequent grinding, connecting the legs together with the installation of transverse partitions that will strengthen the structure and serve as a footrest, manufacturing the seat and securing it to the frame.
Made from solid wood
Making a standard backless wooden bar stool from wooden blocks and a plywood seat is quite simple.
To begin with, 2 blanks for a seat with a diameter of 35 and 25 cm are cut out of a piece of plywood, which are glued or twisted with self-tapping screws, centering them relative to each other. The larger part will serve as a seat, and the smaller one will serve as an additional support for the legs.
For the legs of the chair, use beams measuring 5x5 cm, from which 4 legs are cut. Then, using a plane or milling machine, the parts in the lower part are narrowed to 2.5 cm. 4 leg supports are made of square timber 2.5 cm thick, with a length equal to the distance between them.
The next stage is the creation of connecting tenons by installing dowels. To do this, first drill 4 holes of 6-8 mm in the lower part of the seat part, then one at the upper end of each leg and on both sides of the interlegal partitions.
At a height of about 30 cm from the floor, marks are made on each support. They are applied on 2 adjacent sidewalls - the junction with the footrests. According to the marks, holes are drilled.
READ MORE: Bark beetle plaster photo of houses outside - finishing the house with a ready-made composition from Ceresit and other manufacturers, technology for carrying out external work on cladding a private house
The frame is assembled simultaneously with the insertion of spikes, pre-lubricated with glue. First, the legs and partitions are connected. Then a seat is put on the finished structure, additionally strengthening the chair with metal corners between the supports and its lower circle.
- I cleaned the oak board on all sides with a sander. I finally brought the seat plane to an ideal state with sandpaper.
- From the bottom side in the corners of the board I drilled 20 mm recesses with a drill.
- I decided to make the legs from pine beams 50 × 50 mm. It was sawn into 4 parts 77 cm long.
- I drilled 20 mm recesses in the upper ends of the supports.
- I cut the wooden plank with a hacksaw into 8 pieces 28 cm long.
- All manufactured parts were treated with stain. Impregnation favorably emphasized the structure of the wood.
- The dried wood was covered with furniture varnish 2 times.
- The upper seat base and lower belt were assembled by connecting the legs to the transverse strips with screws.
- The screw heads were covered with plastic plugs using PVA glue.
- I filled the holes in the upper ends of the legs with glue and inserted wooden dowels into them.
- I filled the recesses in the back of the seat with glue.
- The seat was “dressed” on dowel legs. Place a small weight on the board until the glue dries completely.
- I glued felt circles to the lower ends of the legs. Furniture will not scratch the floor covering.
After I made a wooden bar stool with my own hands, I calculated the labor costs and financial expenses.
Option No2. Backless bar stool with metal legs
Let's look at the process of making a simple chair made of walnut (seat) and metal. An old bed frame was used for the legs. The height of the structure is approximately 64 cm.
A simple bar stool that we will make
A distinctive feature of this option is its shape, which makes it easy to weld and strengthen pieces of metal. If you are planning to use a welding machine for the first time, then in the process of making such a chair you will definitely gain valuable experience and learn how to cook well.
The wooden part is made of walnut
Step 1. Start by creating the shape of the future structure. Cut a suitable material (for example, chipboard) into four parts of 54.5x23.2 cm. All elements are fixed with a side joint using screws, resulting in a square “pipe” 58.5 cm high and sides 20 cm long.
You need to cut 4 identical parts
The result is a square “pipe”
Step 2. Make an angled base for the mold using a piece of 9.5 cm thick board. You will need to cut the pieces at an angle so that they all fit. To do this, find a suitable angle using a tape measure and set it so that everything fits. As a result, after cutting you will get beveled edges.
First, a suitable angle is found
The desired angle is set
You can start cutting
Step 3. Fit the pieces with the edges cut at an angle of 45 degrees around the perimeter of the base part. Attach the beveled base using plywood and small nails, as in the photo below. You do not connect this part to the “pipe”, and therefore it can be easily removed if necessary.
The segments are adjusted around the perimeter
Everything needs to be carefully controlled
The parts are attached with pieces of plywood
Step 4. Thanks to the made shape, you can easily determine the location of the legs. No changes are required, just attach and mark.
Future legs just need to be applied
The first leg is applied
First, mark and cut the legs from the bottom. To make the process easier, you can hang a corner of the base over the edge of the table and then secure the iron piece in place. Then cut off the bottom ends.
The corner of the base can be hung over the edge of the table
The lower end of the leg is cut off
The cut leg is attached
After this, place everything in the mold and begin marking the upper ends of the future legs.
Next, mark the upper ends of the legs
Step 5. For the top of the structure, use 4 corners. Mark everything you need using the square you made earlier. Glue the pieces together, then remove them from the mold in order to fit the weld on each side.
4 corners are used for the top part
The parts are glued together
The parts are now welded together
Important! It is better not to place a vice, as in the photo, on wood. Because the bolts that hold everything together can fly out, and everything will have to be redone.
It’s better not to put a vice on wood
Step 6: Cut some more pieces of metal to make the footrest. In our example, the length was approximately 30 cm and the angle was 45 degrees.
Let's start making the footrest
Ready-made footrest
Step 7. The support with footrest was held with the top of the structure and blocks for the supports. Weld everything together. Weld a metal pad on the bottom of each leg. Upon completion of the work, sand everything with sandpaper (recommended grit - 40).
The support is welded to the legs of the future chair
Metal pads are welded at the bottom
Next, everything is processed with sandpaper.
Step 8. Now it's time for the walnuts. Cut the main part into 2 thick boards and sand them with sandpaper. To sand beveled edges, use sandpaper with a grit size of 100-220.
We begin to make a seat for a chair
Wood cut into 2 parts
The boards are sanded
The wood also needs additional processing.
Step 9. Treat the frame of the future structure with a primer, then with black paint. Finally, attach the wooden seat to the pre-drilled holes using screws.
The seat is installed, the bar stool is ready for use
Video - DIY wooden bar stool
Assembling bar stools
So, you have decided what material you will use. Let's look step by step at how you can make several types of chairs yourself.
Made from solid wood
When choosing wood for a product, pay attention to the most accessible species - pine and birch. They are great for this kind of work; solid wood can be bought in the store in the form of furniture panels. The required thickness is 20 and 30 mm. You can borrow some details from old chairs.
Cut out 10 pieces:
- part 1 – one circle with a diameter of 36 cm and a thickness of 30 mm;
- part 2 – one circle with a diameter of 26 cm and a thickness of 20 mm;
- part 3 – four legs 30 mm thick;
- part 4 – four stiffening ribs 30 mm thick.
READ MORE: Do-it-yourself disc hiller for walk-behind tractor, photos and drawings
The first part will serve as a seat, the second (small circle) will serve as a backing for the seat.
Chair seat and backing
When cutting out the legs of the future chair, make sure that the structure of the wood in the solid wood is vertical.
The leg of the future chair and a visual drawing for it
Cut out stiffening ribs from 20 mm thick solid wood - they will serve as a footrest.
Stiffening rib
Now start assembling the chair. To do this you will need 3 types of screws:
- 5 X 80 – to screw the legs to the small circle and to each other;
- 5 X 40 – for attaching the seat to a small circle;
- 5 X 20 – for securing the stiffeners.
The ribs are attached to the legs using corners that are placed below, on the floor side.
Bar stool assembly process
The diameter of the holes for self-tapping screws in the plane should be 6 mm, at the end - 3 mm.
All you have to do is tint the chair with stain, dry it and paint it with varnish in 2-3 layers. The bar stool is ready!
Ready bar stool
These bar stools are very simple to make and easy to use. Their peculiarity is that the seat can be made straight or bent, and subsequently, if desired, upholstered with fabric.
Solid wood bar stools
Chair drawing
- Look carefully at the second drawing: for simplicity of the image, it does not indicate the two upper crossbars under the seat. Don't forget to add them when assembling;
More visual and detailed drawing
- for chair legs, use beams measuring 38 x 38 mm. You can take poplar wood if there is no pine or birch. The length of the legs will be 71 cm. Make cuts at their ends at an angle of 5 degrees;
Chair legs
- Attach a short crossbar, the so-called chair apron, to the top part. Secure the middle and bottom crossbars in the same way;
Securing the crossbars to the chair legs
- Attach a second crossbar of greater length to the top of the rack on the right side. Also install the lower one - it will act as a step;
Fastening the crossbars
- do the same on the left side. To make it comfortable, set the height of the footrest according to the height of the people who will sit on these chairs;
Fastening the footrests on the other side
- fasten the halves of the chair together.
Assembling the chair body
How to make a recess in a seat? There is a way to do this, although it is not easy. Make several cuts of different depths along the surface and plan out the recess with a chisel.
Recess in the seat
Sand the surface of the seat and attach it to the legs. Fill the holes for the skew screws, sand the entire chair and paint.
The chair is ready, all that remains is to paint it
This chair will become a real exclusive, so you won’t have to regret the time spent and efforts made.
A metal bar stool will become a truly exclusive piece
Surely you have the remains of sheet iron, metal profiles and scraps. All this will come into play.
Sketch with a pencil the shape of the future seat on a flat asbestos sheet for welding. In the photo it is indicated by red lines.
Seat sketch
According to the sketch, cut out blanks from a 25 mm strip. Weld them together.
Workpieces welded together
For the internal layout, cut blanks from the same strip.
Blanks for internal layout
Weld the workpieces and clean them. Round the corners.
Cleaned seat blank
Weld the legs from a 30 X 20 mm profile to the seat. During welding, grab the legs onto one welding point and carefully move them to the desired position.
Weld the legs from the profile
Mark the levels of the foot rest, for example 45 cm from the seat. Be guided by how comfortable this height is for your height.
Footrest level mark
Also make the foot rests from a 30 X 20 profile.
The footrests are made from the same profile
Instead of plastic or rubber plugs for legs made of metal profiles, you can use wooden “heels”. They do not scratch the floor, and you can always sharpen them to the desired size.
Wooden cork blank for metal profile
These plugs do not need to be fastened with screws or fixed with glue - they adhere perfectly to friction. The main thing is to sand them to the size of the legs.
Installed wooden plugs
The chair is ready, all that remains is to paint it. First apply a layer of primer.
Chair primer
After the primer has dried, paint everything below the seat with black paint. Wait for it to dry.
Painting chair legs
Wrap surfaces painted black with film so as not to stain them during further work. Paint the seat red.
Painting the seat
After the chair is dry, you can use it for your pleasure!
Pipe bar stool
Ordinary metal pipes can also serve you as a body for a bar stool. The most suitable material is chrome-plated stainless steel. It is better not to use plastic or PVC pipes: compared to metal, their strength is very low.
You will need:
- plywood or chipboard;
- construction stapler and staples for it;
- metal pipe blanks;
- several pipe benders;
- screwdriver or drill;
- mounting bolts;
- upholstery fabric, seat foam.
Bar stool made of metal pipes
- Decide what model you will make. The relevant magazines will help you with this.
- Measure the height of the bar counter to know the size of the future chair. Pre-prepare blanks from metal pipes for the base of the chair by cutting them into pieces of the required length.
- To select the appropriate pipe diameter, consider the maximum load on the chair.
Carefully select the dimensions of the workpiece: diameter and length - Bend each workpiece at the top with a pipe bender in the form of a semicircle. Fasten the blanks together with fastening bolts - this way you will provide the future chair with greater stability.
- Make a seat from chipboard or plywood. When determining the required diameter, take into account the weight of the person who will sit on the chair. Attach foam rubber to the manufactured seat frame with a stapler and cover it with upholstery fabric. Use stain-resistant material that is easy to clean wet and dry.
- Attach the finished seat to the junction of the metal blanks. Do this using a screwdriver (or drill) and fasteners.
- If you want to make footrests, mark the required height on the chair legs and secure at this level pieces of metal pipe equal in length to the distance between the legs.
READ MORE: Do-it-yourself wooden bricks, wood products, production technology and reviews
Source
Option No3. Wooden bar stool with round seat
Another great option, but, compared to the first, much more difficult to implement. But first things first.
We are considering another option for making a bar stool
Step 1. First, prepare the necessary lumber. It is better to use a block with a section of 30x30, although in our example we use 30x40 due to the lack of a suitable one on sale. All this will cost a very reasonable amount.
First you need to buy all the necessary materials
Step 2 : Start cutting. Prepare 4 bars 45 cm long, another 4 - 57 cm.
First of all, the bars are cut
Step 3. First of all, make 2 blanks from bars of the “long-short-long” type, then glue 2 more short ones between them. By the way, in our example, in addition to clamps, clamps from a circular saw and a grinder are also used.
A pair of short bars are glued between the blanks
Step 4. Make a milling box from the leftover boards and plywood. It is necessary that the 8-gauge stud goes through the entire rack (although it is better to use larger diameter bolts to minimize vibration). In the example, the stud is tightened with nuts; the workpiece rotates inside the box when the nut is constantly tightened. Ideally, it is better to make a cutter for this, which rotates the blank by 10-15 degrees.
Stages of manufacturing a milling box
Step 5. In the end, you will carve a stand like this.
Turned stand
Step 6. Start making the seat and footrest. They will be round, their diameter will be 31 cm. For greater strength, you can glue them together from two panels, placing the lamellas across each other.
These parts are glued together from two panels
Step 7. Cut a ring from plywood using a router. With this ring you will process the outer edges of the footrest and seat, as well as the inside of the latter.
Using a plywood ring
Step 8. Something like this. The inside was milled using a copy sleeve, and the outside was done using a milling cutter with a bearing.
Photo of the manufacturing process of the seat and footrest
Step 9. Mark the footrest - place the central post in the right place, then trace the outline.
Footrest markings
Step 10. Mark in the corner where exactly the vias need to be made. By the way, a feather drill can “tear” wood; if this happens, you will be forced to putty a lot.
The locations for drilling via holes are outlined.
Step 11. Using a thin drill, mark the point where the pen tip will pass. Next, use a feather drill to make holes of the required diameter, cut out sections with a jigsaw, and then level everything with sandpaper on a block.
Stages of making a footrest for a bar stool
Advice! Experts recommend first making a plywood template and milling out the holes - in this case, you can get a higher quality cut and reduce the amount of work with sandpaper.
Step 12: This is what the wood will look like after filling the gaps left by the feather drill.
Photos of wood before and after treatment
Step 13. Glue the leg blanks from the bars.
Gluing leg blanks
Step 14: Shape them using a plywood template. Be careful and securely fasten the template with nails, otherwise it may be torn off the workpiece.
Plywood template torn from the workpiece
Step 15. Glue the crosspiece, assembled on the grooves, into the seat.
Gluing the cross into the seat
Step 16. Make similar grooves in the legs to assemble them.
Grooves are formed in the legs of the chair
Step 17: After routing the edge, begin assembly.
Finished legs of the future chair
Step 18 Sand the seat with extreme care.
Polished seat
Step 19. Pre-assemble the bar stool (without glue) to try on the parts.
The structure is assembled without glue
Step 20. Connect all the parts together.
Connecting chair parts
Step 21. After final assembly, apply stain and varnish to the glue. The result you get will definitely please you!
This is what the finished chair looks like
Table. The cost of making such a bar stool.
| Expense item | Amount, in rubles |
| Lumber (we still have some) | 500 |
| Emery block (180) | 70 |
| Stain, 2 types | 300 |
| Varnish | About 350 |
| Glue | It was spent a little, you can’t count it |
On a note! In general, making such a chair will cost about 1,400 rubles.
Bar stool - high stool
Since an ordinary bar stool is a very “grown up” stool that has footrests (legs), you can create a simple design that strongly resembles this type of furniture.
What do you need for work?
In this case, the master needs to prepare the following details:
- one seat;
- 4 tsars - small bars that are located directly under it;
- 4 legs and the same number of prongs connecting them in the middle or lower part.
The only necessary condition is the same dimensions of the paired parts. In order to ultimately get stable furniture, you need to ensure that the cut occurs strictly at an angle of 90 degrees. After making all the parts, they are processed with sandpaper: first with coarse grain, then with fine grain.
Now about connecting the elements. Nowadays, more and more furniture is appearing, for the assembly of which they use a bolted connection. This is not the best option because after a while the chair, which is a frequently used item, begins to become loose. Sometimes this happens after a few weeks. For this reason, craftsmen recommend using the most reliable option - assembling parts using the tongue-and-groove method. The connection requires compliance with the rules: its width is at least a third of the thickness of the workpiece. Length - at least 80% of the width of the part.
For owners who have a milling machine, creating fasteners will not take much time, especially for a regular stool. However, this step can be completed without equipment. To remove wood from the grooves, a chisel is used - a steel cutter; cleaning is done using a regular chisel. A jigsaw or saw with fine teeth, as well as a rasp, will help.
Creation of bar furniture
The location of the legs is determined arbitrarily, because it is influenced by the size of the seat, the length of the legs, etc. To ensure maximum reliability of the product, thinner crossbars are added closer to the seat.
The operation starts with the creation of grooves, because in this case the adjustment of the tenons will be simplified - the groove will become a ready-made template. First, use a pencil to mark the groove lines. A series of small holes are drilled along the perimeter with a drill. Then, “armed” with a chisel, they select the excess. The tenon is cut out with a jigsaw or hacksaw. Before the operation, the workpieces must be fixed.
An alternative to the tongue-and-groove connection is wooden dowels, or dowels. In this case, holes are drilled at the connection points, the depth of which is a couple of millimeters greater than the length of half the dowel. A small amount of glue is poured into the space remaining free.
The assembly goes like this:
- The first stage is checking the structural elements. It consists of assembling blanks without using glue. First, the first pair of legs is assembled, which are connected by drawers and legs (or one step).
- Then the second frame is prepared in the same way, then both racks are assembled together. All angles are checked using a square. If there are even the slightest defects, they are immediately eliminated. After inspection, the bar stool is disassembled.
- Pour a little glue into the hole of the blanks, spread it inside with a thin brush, then carefully push the part onto the tenon, helping yourself with a hammer (rubber mallet). When dowels are used, they are also lubricated.
- The seat is attached to the drawers in one of the following ways: either with self-tapping screws or glue. After the composition has dried, the product is degreased with a solvent, and then treated as intended by the author - stain, varnish. Or paint it in the chosen color.
If a soft seat is needed, then foam rubber (sintepon, holofiber) and upholstery fabric (leather) are added to the list. They are attached to the seat using a furniture stapler. One solution for a bare seat is paint in a contrasting color.
Option No4. Chic metal bar stool
Let's consider another interesting option for making a bar stool. It looks attractive and original.
Metal bar stool - decoration for your kitchen
Step 1. Draw a pre-prepared shape on a piece of thick asbestos sheet that is used for welding (red lines in the photo).
Applying markings to an asbestos sheet
Step 2. Cut according to the sketch of the workpiece, using a 2.5 cm strip.
Blanks are cut according to the sketch
Step 3. Weld the parts together, as shown in the photo below.
The parts are welded together
Step 4. Select the internal layout. Let’s be clear right away that this stage can take a lot of time. Use the same strip for shredding.
Internal layout is selected
Step 5. Weld the parts and clean them. Also, round the corners.
All elements are connected
Step 6. Proceed to the most important task - start welding the legs. Use a 3x2 cm profile for this.
The legs are welded
Step 7. In our example, the author did everything by eye, that is, he did not make a drawing, did not measure angles, etc.
Leg welding process
Step 8. First, grab the legs at 1 weld point, then gradually move them apart to the required positions.
First, the legs are welded to one weld point
Step 9. This is what you will get as a result.
This is what should happen
Step 10. Mark the level at which the footrest will be located. Try it on yourself, you need to feel comfortable. In our example, this is 45 cm from the seat.
Indicates the level of the footrest
Step 11. To make stops, use the same 3x2 cm profile.
The same profile is used for the stops
Step 12. Make tricky slant cuts for them, then weld them.
The stops are welded
Another photo of the process
Result of work
Step 13. Place special plastic plugs designed for steel profiles on the legs. Although you can, as in the example, make special “heels” from wood: they will also not scratch the floor, but they can be sharpened if necessary to ensure stability for the bar stool.
Making wooden plugs for legs
Step 14. The part of the cork that will fit inside the profile should taper.
Narrowing of the inner part of the plug
Step 15. Such plugs will be held in place only by friction. No glue or screws are needed. Sand the corks to fit the legs.
Ready-made wooden plugs for legs
Step 16. The rough version of the bar stool is almost ready.
Draft version of the chair
Same, top view
This is how the chair will look in the interior.
Draft version of a bar stool in the interior
Step 17. Start painting the product. First, apply a coat of primer.
Primer is applied first
Step 18: Paint everything below the seat black.
Legs painted black
Step 19. Protect the black parts of the structure with something. This way they will not get dirty during subsequent painting.
The black parts of our stool need to be protected.
Legs are wrapped in film
Step 20. In our example, such a cardinal color was chosen for the seat.
Painting the seat red
Step 21. That's it, your DIY metal bar stool is ready for use!
That's it, the metal chair is ready for use.
Video - Another option for a metal bar stool
Video - Original do-it-yourself stool
Photos of DIY bar stools
Decor options
A simple bar stool looks attractive. Additionally, you can decorate it using the decoupage technique. To do this, you will need special glue, ready-made patterns on a thin base and varnish as a finishing coat. The method is suitable for wood products.
Wood goes well with jute rope. It is used to wrap individual parts of the structure or the entire seat and legs to the crossbars. Fabric upholstery, covers, any decor serves to ensure that the chair blends well with the interior and the bar counter. The easiest way to decorate is to paint in one tone, apply patterns using stencils, or apply your own designs.
When choosing a decoration method, you should take into account the material of manufacture and frequency of use.
A bar stool is easy to make with your own hands. It is enough to stock up on materials and tools, prepare a drawing and begin the creative process. The piece of furniture can be left in its original form or decorated. A counter complemented by several of these chairs will become a real decoration for the interior of a kitchen or living room in a studio apartment.
Painting
Varnish coating Decoupage Artistic painting Upholstery
Sewing covers