December 16, 2020
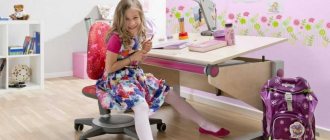
Doctors warn about the early formation of posture and the need to provide your baby with a good transforming chair from a very young age. This design, unlike other models, performs an orthopedic function and allows you to keep the child’s back in the desired position.
Many responsible parents think about the need for a “smart” chair with adjustments. When studying the market, some begin to doubt whether it is worth spending money. But high-quality certified products cannot be too cheap. Fathers with carpentry skills set a goal to make a chair themselves and are looking for information on how to assemble a growing chair at home.
In the process of work, as our personal experience of communicating with parents shows, common annoying mistakes are made, which is why the growing plywood chair does not turn out to be of high quality. Moreover, such a handicraft product often leads to incorrect posture and scoliosis. In order not to harm the health of children, you should carefully study all available information and try to make a growing chair (the drawing is created in advance) at home.
How to decorate a chair
New furniture, even the highest quality, made by your own hands, is unlikely to attract the attention of a child without an interesting design. There are many options for decorating a children's highchair made of wood.
To perform some decorating
you might even
attract
the future owner of the chair.
For example, you can paint a chair with
your child at his discretion.
Most common ideas
staining:
- Using several bright
shades; - Imitation rainbow;
- Application of patterns;
- Images of your favorite characters
from fairy tales, cartoons, etc.
The second option for decorating a chair is a special cover,
which you can purchase or also make yourself.
There are no restrictions in this regard either. The cover can be the most ordinary - made of plain fabric
or
with drawings
and other decorative elements.
You can imagine in the form of a bird, animal,
flower, car, and also make original ones.
Another idea is gluing
on the sides of the seat are bright strips of fabric,
decorating
the back with all kinds of elements (
ribbons,
artificial flowers, beads, etc.).
Use your imagination,
and most importantly, don’t forget to ask your child’s opinion
.
For inspiration, here are some design
children's chairs:
For more information on how to make a children's chair out of wood with your own hands, watch the video:
A stool-chair for a children's room in the form of puzzles.
These chairs are perfect for children and can go to a playroom or children's room, and would be an excellent solution for a kindergarten. The seats of the chairs are made in the form of puzzles, and therefore, if necessary, these chairs can be combined into a single bench , which in certain cases can be very convenient. You can learn how to make such chairs with your own hands from the step-by-step photos below.
Photo source: instructables.com/id/HomeMade-Modern-DIY-Puzzle-Stool Author: homemademodern
How to make it yourself
You can make a growing little humpbacked horse chair with your own hands. First of all, you will need drawings. If the design is calculated incorrectly, then orthopedic furniture will not work. Plywood is suitable for a home folding chair, since natural wood requires the use of highly specialized tools.
After carefully studying the instructions and all the diagrams, the master will need:
- Plywood for racks - 22 mm;
- Plywood for the seat and footrests can be thinner - 16 mm;
- There are 4 hex bolts in total. 2 measuring 0.6x7 cm and 2 measuring 0.6x5 cm;
- Countersunk nuts measuring 1x2 cm and 1x1.2 cm;
- You will also need materials for decoration - stain, varnish, primer, paint;
- If you wish, you can upholster the chair with leatherette or oilcloth.
In addition to the basic ones, you will need related materials: pencil, drawing paper, jigsaw, wood glue, milling machine and cutters for it, sandpaper and brushes.
Assembly steps:
- A pattern is created, and the legs of the chair are cut out of plywood;
- In total, we cut out 2 pairs of legs with a reserve;
- Using a cutter, we bring all the legs to the optimal size;
- Recesses are made on the inside of the legs using a cutter: depth - 1 cm, width - 2.4 cm;
- In the middle of the recess, holes are made for the seat and footrest;
- Then a slider is produced, which is responsible for securing the footrest in the required position;
- A groove is constructed in the center of the runner into which the strip is glued;
- The slider and the rail need to be glued and dried;
- You need to make 2 bolts in the slider, they are responsible for the selected position;
- The backrest and footrest are designed, they can be of any shape, both oval and square;
- Be sure to make a crossbar that secures the legs from below;
- As a result, we clean everything with sandpaper, then apply paint and varnish;
- We assemble the remaining parts after drying.
The master must provide his work with armrests, since the child will not fall. The parts must be removable in order to get rid of them at the right time. It will not be difficult for an experienced furniture maker to make such a chair with his own hands, and the result of the work will delight you for a long time.
The growing chair will serve the little one for a long time, maintaining a straight back and creating comfortable conditions for children to study. Orthopedic doctors consider such furniture to be the only right choice. A real, high-quality chair is expensive, but if you have the necessary materials and the right drawing, you can make it yourself. The main thing is to use a safe material, and when painting, avoid toxic compounds and use a special varnish.
Distinctive properties of orthopedic chairs
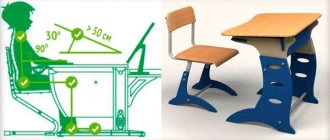
The direct scope of orthopedic products is not just comfort, but a positive effect on the human body and its overall health. Scientists have been working on the design of such an orthopedic chair for decades. And only at the end of the last century it was possible to discover the fact that when placing the seat at an angle of 15 degrees, it is possible to relieve tension from the spinal regions, and also redirect it to the legs.
By using chairs with inclined seats, you can keep your back vertical and also keep your shoulders straight. With such a position, it is possible to prevent the appearance of such an unpleasant feature of the spine as scoliosis, and correct posture will also be maintained. But introducing only an inclined seat, it turned out that it was completely uncomfortable to sit on it, since as a result of gravity, the body began to gradually shift downward. I had to change my body position very often.
To eliminate this defect, it was necessary to make minor changes to the design of the orthopedic chair. It was decided to add a special footrest, and when sitting on this case, the legs in a half-bent state retain heat, and the knees themselves rest against the stand. A little later, they tried to refine and improve the design more than once, presenting consumers with more and more new models of orthopedic chairs.
The work process consists of the following steps:
Advantages and disadvantages of children's growing chairs
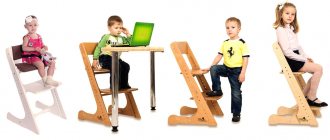
The main advantage of the discussed achievement of furniture production is versatility. Some models are suitable for use from 5 to 18 years. Some variations are suitable for very young children. Children can be seated in these starting from six months of age. Another plus is unpretentiousness and versatility. The chair doesn’t care at all in which zone of the living space it serves: the work area, the play area or the dining room.
A quality product, if treated properly, will last a long time. For many years it may not require replacement. The maximum is preventive maintenance. This is facilitated by following the manufacturer’s recommendations on maximum weight, care and other nuances.
Sitting on such a chair, the child gets less tired. The chair supports the ideal position of his back. In the most advanced designs, every detail is adjustable. Even very small and, at first glance, insignificant. This furniture is ergonomic.
This whole bouquet of advantages determines the characteristic, which is one of the main disadvantages - the price. High quality chairs made from environmentally friendly materials are expensive. Another drawback is the assortment. Due to the fact that products are manufactured according to certain rules, taking into account established standards, variations in their appearance are limited in quantity. They are similar to each other. However, they can fit into any interior.
Related article:
Basic design
The design principle of all growing chairs is the same. The design includes a seat, the position of which can be changed, and a footrest on a reliable support. The advantages of furniture include:
- Strength, durability. Chairs that grow with the child are designed for 8-10 years of use. For production, materials are used that can maintain performance properties for a long period of time.
- Convenience. Children can sit comfortably on these chairs due to the presence of back and leg support. The parameters of the models are adjusted according to the height of the users.
- Safety. High-quality furniture is made from environmentally friendly materials. The design is characterized by excellent stability, which eliminates falls and overturns.
- Joint dinners with family. The children's chair can be installed next to a standard kitchen table, which makes kids very happy.
Among the disadvantages of “growing” furniture are high cost, limited range of modifications, and bulkiness.
Office-type children's chairs are considered one of the varieties of “growing” interior items. The products are equipped with a set of fasteners to change the position of the elements in depth and height. If necessary, the angle of the backrest can be changed, providing the most comfortable conditions.
Dimensions and drawing
For the manufacture of
chair according to this drawing, it is necessary to prepare the following
elements
:
- 1 – top crossbar
(1.9 x 4.1 x 16.5 cm); - 2 – two rear
legs (3 x 3 x 55 cm); - 3 – carved
(1.4 x 4.1 x 16.5 cm); - 4, 6 – strips
located in the middle and bottom (1.4 x 2.9 x 16.5 cm); - 5 – seat
made of two boards (1.4 x 10.5 x 26.3 cm); - 7 – two drawers
and two slats located
on the sides
(1.4 x 2.9 x 17.7 cm); - 8 – two front
legs (3 x 3 x 30.5 cm); - 9 – two drawers and two strips
located in front (1.4 x 2.9 x 19.5 cm).
The legs of the chair should gradually become narrower: back legs - up to 1.9 cm,
starting from the middle of the chair to the top,
the front ones - up to 2.4 cm,
starting from the middle of the chair to the bottom.
Advice:
To make it as easy as possible to mount the strips and drawers, only the outer edges of the parts should be reduced. Thus, the internal edges will be parallel to each other.
Build process
When the preparation is completed, you can begin to assemble your product. The work stage consists of the following sequence:
- Processing with a router the first part - the footrest, after cutting it out from the pattern. It is necessary to make a reserve of approximately 3mm;
- the remaining parts are prepared in a similar manner. They can be stacked on top of each other to ensure order;
- process each with a milling cutter;
- Glue all the parts of the legs together with glue. As a result, the finished rack stand should come out;
- wait until the glue dries completely. The duration may be indicated on the packaging;
- You need to use a router to make grooves inside the legs, on top. The size of the grooves should be 1 cm deep, 2.4 cm wide;
- Drill a through hole inside the resulting grooves. It will serve to strengthen the child’s footrest;
- Next, you need to cut out the runners, which will secure the stand. You will need four identical pieces;
- the resulting parts are glued to the slats;
- you need to wait until they dry;
- a hole is made in each runner for a bolt, with its help it will be possible to adjust the position of the seat;
- All that remains is to cut out (in any possible shape, with any angles) the following details: for the back,
- seats;
The final stage is a strength test; if it is successful, you can use the chair. This design will allow you to do this for many years, until the child becomes an adult.
Children's health depends on many different factors
For the younger generation, it is important not only to have proper nutrition, exercise and develop thinking. An important factor is correct posture when sitting at the table.
Correct posture shapes the child’s skeleton and provides balanced development to the entire body.
Decorating elements are chosen at the discretion of the master.
For very small children, it is better to upholster with leatherette or oilcloth to be able to clean the surfaces.
When working independently, you must also focus on this figure.
The growing chair copes with several tasks simultaneously.
- Is orthopedic furniture.
- Allows you to use it from 6 months.
- Saves the family budget.
To decorate the finished product you will need putty, primer, varnish or stain, and paint of the required color.
A properly made chair allows you to adjust the stand, seat and back in various combinations.
Preparation for work begins with creating a drawing of the chair.
Experienced craftsmen who have some experience in assembling furniture with their own hands will not find it difficult to complete this model themselves. For those for whom the growing chair will be the first independent product, we advise you to carefully read the instructions. It is also necessary to first assess not only your capabilities, but also the availability of tools that you cannot do without during the work process.
For the younger generation, it is important not only to have proper nutrition, exercise and develop thinking
Regardless of the source of the drawing, the pattern should only be made in full size.
Not all materials are suitable for making a folding chair that grows with the child. The product can be made from either plywood or treated wood. It is also possible to make a chair from solid wood, but it will be very bulky and heavy, which is inconvenient for the child. Therefore, plywood is still considered the best material.
For the racks you will need plywood of at least 22 millimeters, on the basis that each rack will use two blanks, which will subsequently be glued together. The seats, footrest and backrest can be made of 22 or 16 mm plywood.
The little humpbacked horse chair has only one significant defect - the high cost when purchasing a finished product.
A preliminary pattern of all elements is made on paper or thick cardboard.
It is important to consider that some elements of a chair for a child should be right and left, that is, “mirror” each other
Measurements and diagrams
The work will begin with the creation of drawings. It is necessary to calculate the dimensions of the structural parts and their angle of inclination.
To create racks, you need plywood more than 2 cm. According to calculations, for each plywood there are 2 blanks (then they will be glued together). The main parts of the chair (seat and back) are made from 1.5 or 2 cm plywood.
Attention! The dimensions of the backrest depend on the size of the person’s back (this should also include the shoulders). Same with the armrests and seat. But perhaps a person wants the back to be at the level of the head or neck. Then calculations are made according to wishes.
Homemade children's chair "grow out"
Hello to all DIY lovers.
Most of the things that the manufacturer offers us can be done with your own hands if you wish, and if you have the experience accumulated over many years, you can invent something better than the factory one. This homemade product was made by the author because it had a place to be, because it was intended for a child, and its creation was the first experience, which is also interesting in such endeavors. In this article we will talk about the “grow out” chair, the creation of which I will now talk about. In order to make a homemade chair, you will need:
* Sheet of fiberboard * Ruler, pencil * Jigsaw * Screws * Screwdriver or screwdriver * Sheet of plywood 15 mm thick * Paint of any color * Hand router with 16mm cutter
As can be seen from the above, this chair does not require many parts, and almost everyone should have such a tool.
Step one.
For an accurate product, it is better to make a template, and then make parts based on it. We apply the template drawing to a sheet of fiberboard using a pencil and a ruler; the appearance should look approximately the same as in the photo.
All dimensions of the parts, as well as the dimensions of the chair, are indicated in the drawing, which is convenient when creating components.
Step two.
We cut out the template from fiberboard using a jigsaw.
When working with power tools, be careful and remember to wear safety glasses and gloves. Step three.
Using the template, we cut out two side parts with the same jigsaw from a sheet of plywood.
The parts should be identical to each other. On each of them, we make several grooves on the inside using a hand router with a 16 mm cutter, in order to adjust the height of the seat. After this, according to the previously presented drawing, we cut out the remaining components of the chair, these are the back, two rectangles as a seat and a footrest, as well as two transverse beams for structural strength.
Step four.
Each of the parts must be painted in the color you like, but if the child chooses the color of his chair, it will be even better. After the paint has dried, you can move on to the finish line, namely assembling all the parts into one whole. Armed with a screwdriver and a small number of screws, we assemble the chair from ready-made parts; to prevent the seat and legs from rotating, you need to tighten them with two screws.
At this point, the homemade “grow out” chair is ready, now you can try it out, and as the child grows, you can unscrew the screws and move the seat to the desired, and most importantly, comfortable level.
Thank you all for your attention and more useful ideas for homemade crafts. Source
Source
Become the author of the site, publish your own articles, descriptions of homemade products and pay for the text. Read more here.
Step-by-step instruction
So, the model has been chosen, let's start manufacturing.
Step 1. Making drawings. To do this, we depict furniture parts on plywood. Since there are many of them in pairs, you can first draw them on paper, newspaper or tracing paper and transfer them twice to plywood to accurately maintain symmetry.
Step 2. Cut out each piece with an electric jigsaw. You can, of course, do it manually, but it will take more effort and time.
Step 3. We make a radius template to make the corners of the tabletop rounded. The easiest way is to use a round object, such as a jar lid, or cut out a template circle of the desired size from cardboard yourself.
Step 4. Then we apply the form to the corner of the part, outline it and use a jigsaw to cut off the sharp part of the corner along the contour.
Step 5. Remove smaller irregularities with a milling cutter.
The tabletop should look something like this:
Similarly, we cut out other parts of the table.
And we do the same with the parts of the chair.
Step 6. Take a wood moulder for the router and remove the edges of all parts. It is very convenient in this type of work to use part clamps to keep them immovable, as in the photo below. But it is quite possible to cope without them.
This is what we got using our diagrams.
Step 7. Use a screwdriver to make filler holes for the ties (confirmations).
Step 8. Create a selection for eccentric couplers. This can also be done with a screwdriver using a Forstner bit.
Step 9. We pre-assemble the kit items to make sure that everything is done correctly.
Assembled chair.
Step 10. We begin to assemble the table from the bottom.
Assembled table.
Then we disassemble the furniture and sand each piece well with sandpaper inserted into the holder. We first use sandpaper size 120, then 180, and finally the finest sandpaper - 240.
Popular models of growing chairs from leading manufacturers
Leading manufacturers therefore have such status. They always know exactly what their client needs
In a situation with a transformable chair, it is important for their client to grow up healthy, strong and smart. To do this you need to sit correctly
This postulate is the starting point for those who make furniture for children, which serves them for many years as an assistant monitoring the health of the owner. Among the most recognizable models of fairly high quality, several can be distinguished.
Related article:
Loft bed for adults and children. In the review, we will look at the features of making furniture with your own hands, popular models from different manufacturers and their advantages and disadvantages, average prices, recommendations and advice from experts on the right choice.
"The Little Humpbacked Horse"
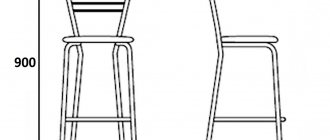
A chair that grows with the child, capable of adjusting the posture position in terms of height and depth of the seat, is equipped with a footrest.
High chair for children “The Little Humpbacked Horse”
The reliability of the design is guaranteed by the use of fittings and fasteners from European manufacturers. The back has an anatomical curve. Teflon pads are installed on the supports in order to reduce the ability to slide.
Recommended for ages 36 months and older. up to 15 years, with a maximum user weight of up to 100 kg. There are 4 positions in total, but the footrest has 11, due to which the child can choose the most comfortable sitting position. The weight of the chair itself is 6.4 kg, dimensions are 84x50x47 cm.
You can also purchase a soft insert for babies. You can buy a growing chair for a child “The Little Humpbacked Horse” to order in various colors from 5,000 rubles. Removable table - from 500 rubles. Here are a few reviews about this model.
More details on Yandex.Market: https://market.yandex.ru/product/1718483159/reviews?track=tabs
More details on Yandex.Market: https://market.yandex.ru/product/1718483159/reviews?track=tabs
More details on Yandex.Market: https://market.yandex.ru/product/1718483159/reviews?track=tabs
"Kid-Fix"
Made from natural solid wood, most often birch. Designed for a child from a very early age until he reaches adulthood.
Easy to care for, reliable. Available in a wide range of colors. Intended for children from 6 months. up to 16 years old. The model weighs 7 kg. It’s practically weightless for an adult, and even a child over 5 years old can move it independently.
High chair covers
The seat, like the previous model, is hard. But purchasing a special soft pad can solve this problem. However, models of this brand are presented in a higher price category. You can buy it from 6,700 rubles, with additional paint coating - from 7,200 rubles, a set of pads - from 950 rubles, an organizer - from 1,200 rubles.
More details on Otzovik: https://otzovik.com/review_3298641.html
More details on Otzovik: https://otzovik.com/review_2303381.html
"Stokke"
An ergonomic product that grows with the baby almost from birth, made in a classic design. A special insert allows you to place even babies on it. But such accessories are purchased separately from the chair itself.
Inlay for babies from 6 months.
This must be taken into account when purchasing it. The cost of a model from this brand starts from 2,700 rubles. However, such a price from this manufacturer is extremely rare and not in all stores. Typically, a model can be purchased from 10,000 rubles. An insert for sitting babies costs from 6,500 rubles, a removable tray from 3,000 rubles, cushion pads from 2,300 rubles.
What should a chair and table be like for feeding a baby?
The main requirement that applies to all children's furniture is safety. Materials must be environmentally friendly. Chairs and tables are made without sharp edges or dangerous joints. In addition, small children are very active, so stability and reliability of the structure are of particular importance.
When making a high chair that will help you comfortably feed your baby, consider the following wishes:
- the product must have a comfortable, preferably soft seat;
- a comfortable chair back cannot be higher than the child’s shoulders, it should be soft and comfortable;
- It is advisable to equip a children's chair with comfortable leg support;
- Caring for the high chair will be easier if its surfaces can be washed, and the upholstery material dries quickly or has water-repellent properties.
The simplest and most economical option for creating a high chair with a table is to retrofit a regular children's high chair with a shelf-footrest and attach a small table to the armrests, on which you can place a plate of food, a cup of juice or tea. Increasing safety, such products are often equipped with harnesses (with carabiner clasps) that securely secure the child.
Multifunctional models are popular among parents. For example, a transformable children's chair helps to comfortably place the child during feeding. It consists of two parts: a small children's high chair itself with a small table-overlay and a structure that is at the same time a high-slung base and a separate children's table.
The first use option is more suitable for a child from 6 months to 2 years. On such a chair you can simply feed your baby by placing his plate on a small table mounted on the railing of the chair, or you can move the entire structure to a large adult table. The second method is recommended to be used from 2 to 5 years. It is a separate arrangement of children's chairs with a table. At this age, girls and boys can already do a lot on their own. Sitting at such furniture, you can eat, draw, play, even learn to write.
Accessories
Each manufacturer produces a large number of accessories for its furniture:
- Stokke - infant seat with lying position, seat cushion, plastic tray and seat belts;
- Kid-Fix - high chair cushion and seat belts, as well as a table;
- The Little Humpbacked Horse - a large number of accessories, including a pocket for toys, a table with limiters;
- Kotokota - the only additions are limiters and a table.
Some are sold complete with growing chairs, others are purchased separately. The cost varies depending on the brand and material of manufacture. All accessories are also certified and meet safety requirements.
Stokke
The Stokke brand is made in Norway. In addition to high chairs, this brand produces a full range of furniture for children, as well as strollers. As for growing chairs, consumers, in addition to high quality, will be interested in their bright appearance.
There are models for boys and girls, for every taste, in total 15 colors. The main material is natural beech, the coating is varnish. Since the Norwegian company has been producing its furniture for a long time, from natural materials and guarantees quality, the cost of the chair is correspondingly high.
How to choose
When choosing a growing chair, take your baby with you to the store. This way you can try on the chair and make sure your little one is sitting comfortably. Be sure to ask the seller to show a safety and quality certificate, check the environmental friendliness of the materials from which the furniture is made.
A good quality orthopedic chair should not have a slippery base and have a transformation mechanism so that as the child ages, right up to graduation, the furniture can be adjusted to suit the growing body. Parents should also check the strength of the mechanisms and their quality so as not to be disappointed in the future.
Recommendations for selection
You can only choose a suitable chair together with your child. To do this, you need to sit the baby on the seat so that the feet are completely on the stand. Ideally, the backrest provides reliable support for the spine, and the knees do not touch the tabletop. Other criteria deserve attention:
- Availability of documents confirming the safety and quality of products.
- Purpose. The age of the children who will use the furniture is taken into account. For babies, restraining elements and limiters are provided.
- Stability of the structure. Prevents tipping and falling.
- Material. The most popular are wooden chairs that grow with the child. The plastic is not reliable, and the metal is cold and looks strict.
- Safe covering. Water-based varnishes and paints without a strong unpleasant odor are acceptable.
- Type of fastening. Furniture bolts provide optimal reliability and safety of the structure.
- Smooth surface. The corners are rounded, the seat and back do not slip.
- Weight of furniture. Products should be characterized by mobility for quick movement around the room or the entire apartment.
- Price. Orthopedic models cannot be called budgetary, but they contribute to the correct development of the spine and the formation of correct posture.
- Manufacturer. You can only trust well-known, proven brands that have proven themselves in the market on the positive side.
A chair intended for children should be of high quality, comfortable, and attractive in appearance. It is recommended to select models with a curved back, which supports the spine in the correct position. Thanks to the foot support in the form of a stand, an optimal fit is formed. If the element is made of wood, you can stand on it with bare feet.
Sources- https://foto-designa.ru/vidy-mebeli/stulya/stul-vyrastajka-31-foto-vybiraem-rastushhij-detskij-stulchik-po-razmeru
- https://mebel-sovet.ru/stulya/1248-rastusij-stul
- https://oxko.ru/top-7-luchshih-rastushchih-stulev/
- https://o-krohe.ru/detskaya-komnata-mebel/stul-vyrastajka/
- https://sovetmarka.ru/reyting-luchshih-rastushchih-stulev
- https://markakachestva.ru/rating-of/4000-luchshie-rastuschie-stulja-dlja-rebenka.html
- https://stroy-podskazka.ru/stulya/vyrastajka/
- https://severdv.ru/mebel/kak-sdelat-stul-konek-gorbunok-svoimi-rukami/
[collapse]
Making a project for the growing chair “The Little Humpbacked Horse”
When making a drawing, it is important to observe the measurements and angles of the inclined elements, otherwise the resulting furniture will not have an orthopedic effect. When designing a product, use the document GOST 19301.2–94
In it you can find the parameters that must be observed when making children's furniture, in particular chairs
When designing a product, use the document GOST 19301.2–94. In it you can find the parameters that must be observed in the manufacture of children's furniture, in particular chairs.
All details should be drawn on cardboard only in real size, so that later they can be conveniently transferred to plywood. And don’t forget that some parts of the chair (side legs) should be mirrored.
UPD:
As promised, I am posting drawings of the chair parts with dimensions. I also post:
- links to chair drawings in DWG (I exported from Sketchup and collected everything on one sheet);
- drawings of a chair with dimensions in Sketchup (switch views “Front” and “Right”);
- model in Sketchup in version 2013, if someone does not open the original file;
Sketchup model of a kneeling chair (v.2013) Drawing of a chair in Sketchup Drawing of a chair in DWG
Folding fishing chair
When fishing, sitting on the cold, sometimes wet ground is not only uncomfortable, but also unhealthy. Professional fishermen often use folding chairs. This is much more convenient and less harmful to your back and overall health. In addition, with such a chair it is convenient to quickly change the fishing location.
- DIY cornice: a detailed description of how to design and decorate a stylish interior element (80 photos)
- Do-it-yourself pouf: step-by-step instructions on how to build a stylish and original interior element with your own hands (105 photos)
- Do-it-yourself folding table - step-by-step instructions for building and decorating a stylish design (80 photos)
Since fishing chairs often get wet, the wooden base of such a chair is inferior to plastic and metal. Therefore, it is better to use plastic or metal pipes.
We will consider the option of assembling from plastic pipes.
We will need:
- plastic pipe 50cm long. - 4 things.
- plastic pipe 35cm long. - 4 things.
- plastic corners
- piece of tarpaulin for sitting
- piece of tarpaulin
- bolts, nuts
Let's move on to the collection. Connect the long tubes with bolts so that you get two identical crosses. Connect the opposite ends of the long tubes to the short ones using corners. This gives us the perfect frame for your new fishing chair. But we still have a piece of tarpaulin left, use it to cover the top of the structure and create a kind of seat.
- DIY gates - 120 photos, drawings and sketches of simple modern and classic gate options
- Shelf for a phone - 100 photos of different models and tips for choosing a functional shelf
- Decoupage furniture: the best ideas for decorating old furniture with your own hands. 130 photos of modern jewelry options
Using the same instructions, you can make folding chairs for fishing from metal tubes.
That's all! The chair is ready. As you can see, it’s very easy to do everything and old, unnecessary materials that have probably been gathering dust on your balcony or in the garage for a long time will have a use! Good luck in job!
Chair with back
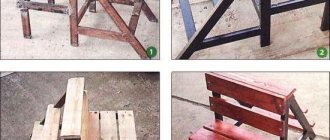
Having familiarized ourselves with the intricacies of choosing wood, let's see how you can make your own wooden chair with a backrest. The manufacturing principle is similar to assembling a stool. Only in this case the back is still made. In addition to lumber, you will need the following materials and tools:
- Screws.
- Wood glue.
- Milling cutter.
- Chisel.
- Hammer and other carpentry tools.
Now you can look at the list of names of parts for creating a chair, as well as an explanatory drawing:
Name of chair parts and drawing
Although there are quite a lot of parts, in general it will be possible to assemble a high-quality and durable wooden chair.
The work process consists of the following steps:
Once again, it is worth recalling that every detail should be carefully sanded. It should be free of sharp corners and all kinds of irregularities. The assembled chair is covered with stain and varnish (up to three layers). In this case, each layer of varnish is applied after the previous one has completely dried.
Finally, the seat is covered with soft leather, leatherette or other suitable material.
To avoid damaging the floors, it is recommended to attach rubber or felt pads to the back of the legs.
The dimensions of the bars that will be needed when making a kneeling chair are indicated in the drawing (click on the picture to enlarge).
For those who saw a kneeling chair for the first time, the words most likely flashed through their heads: what the…. how to sit on it? However, I thought something similar, but before I put this invention labeled nonsense out of my head, I still decided to find out in more detail what it was.
As it turns out, this invention is not so ridiculous, and if you believe the manufacturers, the orthopedic knee chair allows you to maintain your posture while working at your desk. You may ask, “there are all kinds of orthopedic chairs of standard design, what is the advantage of a kneeling chair?”
The fact is that no matter what kind of chair you use (standard design), you can only maintain your posture by leaning on the back of the chair. But as soon as you tear yourself away from the back, for most people, it’s no longer possible to keep your back straight. As a result, we get curvature of the spine, especially teenagers and people who work a lot at the computer are susceptible to this.
So what is the advantage of a kneeling chair? As it turns out, everything is very simple, the greater the angle of the seat, the straighter the person’s back. And this is connected with the center of gravity of the spine, since when sitting on an inclined surface, a person involuntarily keeps his back straight, since it is more comfortable, but he will no longer be able to slouch even if he wants to.
Despite the fact that the design of the kneeling chair is very simple, its prices are quite impressive. But if desired, you can make a kneeling chair with your own hands, using wooden blocks or a profile metal pipe.
The dimensions of the bars that will be needed when making a kneeling chair are indicated in the drawing (click on the picture to enlarge).
Higher resolution drawings are attached to this post.
The 3D model of the future kneeling chair looks like this:
Now let's move from theory to practice. According to the drawing, we need to prepare wooden blocks. Wood should be used without knots, preferably hardwood.
If you don’t want the chair to start creaking in a month, then use furniture dowels and wood glue to connect the beams.
The procedure for making a chair will take a little longer due to the long drying time of the glue. For reliability, additionally, the connections can be fastened with self-tapping screws or confirmations.
We cut out the seat and knee rest from 20mm thick plywood. And we attach it to the frame of the chair using confirmations and furniture dowels.
Of course, without soft upholstery it will be completely uncomfortable to sit on such a chair, so the plywood will need to be covered with foam rubber.
It is advisable to use several types of foam rubber, hard at the bottom and softer at the top. This is done so that the knees do not press through the soft foam rubber and do not rest against the hard plywood.
We cover the foam rubber with elastic decorative fabric.
For ease of movement, we attach wheels to the base of the chair.
Since we use a square beam at the base of the chair, and when unfolded the chair stands on its edges, to attach the wheels it is necessary to make a recess in the lower beam. To ensure that the wheels are installed strictly vertically, we place the chair in the unfolded state on the floor. We put a ruler on the side (a block 15-20mm thick), and from the end of the base of the chair, with a pencil we mark where exactly to make a selection for the wheels.
Kneeling chair ready for use
When folded, it does not take up much space, and it can easily be stored in the pantry.
Some recommendations shared by one of our readers (Igor) when building this chair.
Having no workshop, he was forced to make crafts in an apartment. There is a tool, but something was seriously missing. Especially racks for a drill or drilling machine, because precise drilling perpendicular to the planes of the parts is very important in principle, and this is especially true in this chair, because more than 100 mm must be drilled under the seat, and curvature is unacceptable.
I will point out important points regarding technology. 1. Drilling with a drill. I drilled from both sides using a jig. You can drill by eye, but always from both sides and very carefully watching the angle, trying to maintain as right an angle as possible.
2. It is better to make the adjustment bar from thick plywood. 20 mm or glue together several pieces of thinner plywood, if thicker ones are not available.
3. I made the cut for the wheels according to the level.
Now about the improvements. 1. After upholstering the knee pads, the thought immediately came to me that making three rectangular pads would be much easier
2. I cut the planks into the support bars by 20 mm, plus glue and confirmations. On the first pine chair we had to put corners, because my daughter somehow managed to loosen the glue.
3. I strengthened the part of the support bar that comes from the seat. That is, I have not 2 strips there, but 5. And they are also embedded into the beam by 20 mm.
4. Made the seat and knee pads composite. There is a supporting part, and there is the seat itself and knee pads already with foam rubber and covered. To connect the seat and knee pads, I inserted M8 bolts (M6 is also possible), the heads of which were filled with epoxy (you can use liquid nails or other reliable glue with filler).
5. Seat angle adjustment system. Already tried it and am satisfied. The chair became a little higher than before, and I had to change the height for my daughter using a bar. It was so easy to set a comfortable angle, which could not be done in the basic model. You can supplement the system with a series of holes along a different radius and thereby obtain an almost perfectly smooth adjustment of the seat tilt.
Well, I’ll just share where I found the beech. It’s easier for those who have such boards, but I couldn’t find them in my region. And I found beech steps in a large store and right there in the store they gave me one meter (1000*400*40, it seems) step on 40*22 slats and several 40*45 bars and I happily went home to make chair No. 2. And now I want to make chair No. 3, making the parts not prefabricated, but solid.
My daughter went to first grade and I see that the child’s seat in such a chair is really different than in a traditional one. The child has a straight back without any effort. For an adult, IMHO, you need to make a chair out of iron. I (100 kg) carefully sat down on the first pine chair, but there are still doubts that it would have supported me for a long time.
And further. My daughter likes the first chair better. ??
The uniqueness of the Kentucky chair is that the elements are folded alternately, arranged in a checkerboard pattern. This makes it possible to move the components relative to each other.
Children's chair table - two in one
A functional children's chair that can also serve as a table. There is a position in the form of a chair, the height can be changed at your discretion, and a position in the form of a table. This design is really very easy to make, look at the step-by-step photos and you will be convinced of this. Surely your children will really like it.
So, let's begin !
Dimensions. Cube 400 mm x 400 mm x 400 mm. Very simple;)
What you will need:
- 2 sides 400 mm x 400 mm
- Rear wall 400 mm x 364 mm
- Seat sheet 364mm x 382mm
– measure and cut the material. Give the edges the correct shape, the author did this with a router with a chamfer. If you don’t have a router, regular sandpaper will do, but you’ll have to work hard. Basically, you sand the edges and surface. Now you can glue all the parts. Take several clamps to make the structure strong.
Blueprints. Dimensions. Scheme
You can make such a chair and table for feeding children with your own hands from 24 mm plywood, as the author advises. Look at the drawings, dimensions and step-by-step master class for making such a chair below. We advise you to order cutting of parts according to the specified drawings at the nearest furniture factory, which will save a lot of time. Don’t forget to sand everything thoroughly and cover the countertop with an environmentally friendly material.
Master Class
Photo source: instructables.com/id/Toddlers-High-Chair/. Author: Larsollerichter
Description of work stages
When making a highchair, it is important to pay attention to its safety: avoid the formation of sharp corners, cracks, crevices, gaps between structural elements, as well as roughness and other defects. To give an attractive appearance to the top rail, it can be rounded. The carved crossbar can be decorated in any way with all kinds of patterns, but without sharp corners
The carved crossbar can be decorated in any way with all kinds of patterns, but without sharp corners
To give an attractive
appearance of the top crossbar, it can be rounded.
The carved
crossbar can be decorated in any way with all kinds of
patterns,
but without sharp corners.
Fastening
In this case, the parts will be made using wooden
tenons
and glue, but you can use other methods, using nails, furniture
dowels
or self-tapping screws.
In the case of spikes, the most durable hidden ones
rectangular elements that are inserted into holes pre-treated with glue.
To further secure the studs, you can use through pins (6–35 mm in diameter).
Chair assembly:
Step 1.
First of all, you need to fasten the back
legs
of the chair and the adjacent crossbars using the chosen method.
Step 2.
Attach the front legs, remaining
crossbars
and drawers to the structure.
Step 3.
Attach the top,
carved
and middle crossbars to the rear legs (attached at the same level as the seat).
Step 4.
To ensure that all the places where the parts are connected are glued together as
firmly as possible,
use a special tool - a carpentry
clamp.
It is designed to press the parts tightly against each other.
Step 5.
When all the lower slats and legs are firmly
connected
to each other, attach
a seat
consisting of two planks to the base of the chair.
For additional reliability and strength, after the glue has dried, secure the boards with dowels,
having previously drilled holes for them.
If the seat boards partially protrude beyond the base, the excess ends must be removed using a chisel.
Important! Using a clamp, be careful to ensure that the parts are connected at right angles. You can control this moment using a carpenter's square
Selecting a method for fastening parts
Before directly assembling all the parts, you must choose the method by which they will be attached to each other. There are several such methods:
- with spikes;
- using glue;
- using nails;
- wedge method.
The last method is the most popular. To do this, you need to make a cut on the tenons that are located on the crossbars along the entire length, 5 mm wide. The wedges should be about 5 mm shorter than the grooves, but it is recommended to make their width 0.5 mm larger. Before inserting the crossbars into the grooves, the wedge must be mounted into the resulting cut, and then assemble all the parts with a mallet. This will cause the wedge to expand the tenon and the chair will not be in danger of loosening.
Preparation of materials and tools
Orthopedic furniture is sold in many retail establishments. However, its cost may be so high that not everyone can afford to buy such a chair.
You can take advantage of the alternative offer and build an orthopedic chair yourself.
First you need to prepare what you have to work with. The manufacturing process will not be interrupted or delayed if all materials are prepared in advance. The workshop always has tools, but it is still useful to check in advance whether everything is available.
To build an orthopedic chair yourself, you need to prepare:
- plywood sheet;
- wooden blocks (preference should be given to hard wood);
- upholstery fabric;
- soft filler.
It is also necessary to prepare fastening materials. The finished product will look as attractive as possible if you prepare the varnish in advance, which covers the surface of all wooden elements.
In addition to materials, you will need tools:
- pencil for marking;
- electric jigsaw;
- drill;
- a screwdriver (if you can’t get one, a screwdriver will do);
- grinding machine (the grinding process can be carried out manually with sandpaper).
Kid-Fix
Kid-Fix is a domestic manufacturer. It specializes in chairs that are suitable for six-month-old babies and can perform their functions up to the first grade of school. The frame is designed in such a way that it can easily support a weight of more than 100 kg.
There are fewer color options than Norwegian competitors, only 8. The material of manufacture is birch. The material is also natural and safe, the company has sufficient experience, and the quality of the products is excellent.
Toys that grow in water: dinosaurs from eggs
One of the most popular types of figurines that swell in water are animals hatching from eggs. These are all kinds of birds and reptiles, as well as dinosaurs. Yes, yes, you heard right - today you can buy a toy egg, from which, when soaked, a real prehistoric lizard will hatch right in your home. Children like these toys that grow in water more due to the specific nature of the surprise. You can never say with certainty exactly who will hatch from an egg. The outer shell is most often made opaque and cracks only when soaked. Among the egg toys you can find a full range of animals that are born this way in the natural environment. These are chickens and other birds, snakes, turtles, crocodiles and many other animals.
The Little Humpbacked Horse
The Russian-made Little Humpbacked Horse chairs are made of natural wood (walnut, birch and other species), and the covering is made of German varnish. The material is safe for children, the fastenings are reliable, and the transformation mechanisms are varied. The manufacturer gives its products a 10-year warranty.
The buyer will be surprised by the colors. There are single-color models, as well as two-color ones, for example, white and pink, white and blue, or white and orange.
On the company's official website www.kon-gor.com you can evaluate the full range of products.
In addition to high chairs, this company produces transformable cribs, desks for growing children and a huge number of accessories. All furniture has a variety of adjustments, which allows it to be used for more than one year.
Universal tables
– jpg 37.7 Mb (stol2.zip)
Wardrobes and kitchens Wardrobes Eighteen types of wardrobes. Book, kitchen, wall, TV, wall mounted. Download from depositfiles – pdf 88.9Mb (shkaf2.zip) Dressers, chests and chests Eight types. Linen chest of drawers, shaker, chest. Download from depositfiles... Sofas, beds Children's bed Bed for a schoolchild made of pine in country style for a standard mattress 990 x 1905 mm. A bookshelf is attached to the headboard, and there are four large drawers below. download – jpg 9…
Interior decoration Clocks Eight types of clocks. Tabletop, fireplace, console, art deco style. Download from depositfiles – pdf 18 Mb (klok.zip) Doors Several door designs. Sliding, arch. Download from depositfiles – pdf…