MesterulManole
5443 0 0
MesterulManole August 4, 2018Specialization: many years of experience in finishing works of residential and office premises, summer houses, country cottages, etc. Hobby: cycling in all its forms
Many people got rid of such furniture at one time, but in vain, because it can be brought back to life
Do you have an old bed at home that you are planning to get rid of? Do not rush to replace old furniture with new ones, because it can be restored. I offer simple and effective instructions for restoring beds with your own hands at home. Check out the recommendations in this article and bring time-worn furniture back to life.
Methods for restoring an old wooden stock
Sometimes it's hard to part with an old wooden bed, whether because of its convenience or its value as a memento. You can use several methods to restore, decorate furniture and give it new life.
Updating the backrest (headboard)
You can update the backrest in the following ways:
- Restore a damaged area of varnish: If there are no bubbles or deep cracks, wipe the surface with a rag soaked in gasoline to remove grease stains.
- Wait until the product dries, treat it with conditioner, and then wipe it with a wooden furniture polish.
- From the dried back, wipe off the top thin varnish layer with a steel wool. You can't cut through it all the way through!
- Remove dust with a dry cloth and apply a varnish similar to the previous one in several thin layers.
- Allow the product to dry.
- In the first case, the wooden back is sanded and craquelure varnish is applied. After it has dried, the surface is coated with basic varnish. When the varnish layer cracks, cracks form, giving the furniture an antique look.
Advice
The aging effect is achieved by washing off the stain with a sponge dipped in water. Most often, the middle parts are lightened, while the edges and recesses remain darkened.
The dried surface is sanded, and a new layer of stain is applied to the parts that are planned to be left darker, having a different base than the composition when first used. After the product dries, the wood pores are filled with shellac primer. When the back is dry, wipe it with antique wax along the fibers. After it dries, sand with a soft cloth.
The owner of an old bed can update the headboard by covering it with different types of materials. We wrote about the most popular methods of reupholstery in
this article
, and you will find detailed master classes
Here
.
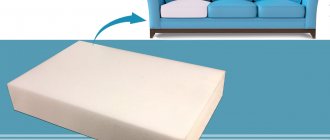
Mattress restoration
To reupholster a spring mattress you will need the following tools and consumables:
- new fabric for upholstery;
- hammer, construction stapler;
- nails or staples for fastening.
Depending on the structure of the mattress and any damage inside it, the following may be required:
- cord for tying;
- wooden slats;
- foam;
- items without defects.
- The mattress is placed on a flat plane in a horizontal position, and the old textile covering is removed. Using any tool, remove the parts that attach the worn fabric to the base. If the mattress is covered with stitched fabric, it is cut at the seams and carefully removed.
- The mattress structure is inspected for damage, cleaned of dust, small debris shaken out, and the frame is wiped.
- After making sure that the internal parts are in good condition, they begin the sheathing: laying a fresh gasket layer and top covering material, securing with nails or staples. To avoid wrinkles in the fabric, stretch it slightly with your free hand.
How to restore a mattress in the video:
We use self-adhesive film
Self-adhesive film will help quickly renew shabby tables and worn-out kitchen units made of chipboard. The variety of textures and colors of the material will allow you to create a new style of furniture and fit it into the modern interior of your home.
For work you need to prepare: self-adhesive film, knife, soft rag.
Algorithm of actions:
- furniture unwinds into its component parts;
- surfaces are thoroughly cleaned and degreased.
- Secret: water with the addition of liquid dishwashing detergent will help clean surfaces. A solution with vinegar will help degrease furniture;
- the prepared surfaces are covered with self-adhesive film.
- Important: film cutting is carried out taking into account 10 mm allowances. Before pasting, the furniture is lightly moistened with water from a spray bottle. This will help you easily correct folds and distortions during operation;
- The pasted surfaces are smoothed with a soft cloth. If a bubble remains under the film, puncturing it with a needle will help remove it.
What are the most common defects in wooden beds?
During use, wooden beds are subject to various deformations. But how quickly they arise, and what scale they will be, depends on the type and quality of the wood. Some products serve flawlessly for decades, while others already show serious flaws after 3-5 years of operation. To understand how much work you have to do, we suggest you familiarize yourself with the most common defects of wooden beds.
- Dents, chips, scratches on the surface of the product. Frequent companions of softwood: pine, spruce, alder, linden, aspen. They appear after 2-3 years of service and do not affect the strength of the structure, but because of them the bed loses its former attractiveness and aesthetics.
- Drying of wood: cracks, gaps, deformations. Quite serious defects that require immediate elimination, since they affect the integrity of the entire structure. There are several reasons for this: the use of unseasoned wood by the manufacturer, the lack of a stable microclimate in the room, and the long service life of the wood.
- Creaks and broken bases. They arise due to improper use (excessive loads, active games of children), installation of weak fastenings, and expiration of the permissible service life. They have little effect on the overall condition of the structure, but cause significant discomfort to the owners. An orthopedic base with defects needs to be repaired, since cracked lamellas no longer perform the function of supporting the spine.
- Frame damage. The most serious of the defects listed here. Failure to repair them in a timely manner can lead to bending and breakdown of the entire structure. It is almost impossible to restore a broken frame, and if you undertake repairs, you should be prepared for significant expenses.
- Malfunctions of functional mechanisms. Sometimes they occur on beds equipped with a lifting mechanism or a storage system in the form of drawers. They affect the quality of operation of the stock and require urgent repairs.
We have finished our review of common defects in wooden beds, and we propose to move on to ways to eliminate them. When is partial or complete restoration of a product necessary?
Elimination of defects in wooden bedroom furniture, depending on the root cause, can be partial or complete. Thus, single scratches and dents can be treated locally, while multiple scratches require updating the entire surface. There are several ways to do this.
- Covering minor flaws with polishing or special markers.
Minor damage to furniture can be repaired using tinting agents. For example, for a varnish surface, car markers are used to match, and for a matte surface, wax is used. It is rubbed into the damage, softened with a stream of warm air (hairdryer), and then polished. - Removing dents and chips using putty and repainting the surface.
Deep dents and scratches cannot be polished. You can smooth them out by applying wood putty, after which you can paint the entire product. - Renewing color using impregnating oils, stains, and re-varnishing.
Natural impregnating oils restore the tarnished color of wood, protect it from unfavorable external factors (excessive dryness or humidity), but they can only be used on solid wood. If the bed is made from cut wood, it can be treated with stain. This impregnation protects the wood from fungus, masks cosmetic defects, and gives it a spectacular, translucent coating of a dark shade. You can also hide visible scratches by re-varnishing the surface of the bed. However, the wood must first undergo a sanding procedure.
Regarding the drying out of wood and the resulting malfunctions, the following repair methods are used:
If the damage is inside the structure, it must be opened. To get to the defects you will need special keys and screwdrivers (hexagons, sockets, etc.). Disassembling the bed will allow you to assess the extent of the damage, make sure that it is not the mattress that is creaking, and strengthen the deformed parts. If the frame cannot be repaired, it can be rebuilt from fresh wood, enlarged, or converted into a podium, as desired.
Malfunctions of the functional mechanisms of the bed require deeper specialization; they cannot always be repaired at home. So, in some situations, it is enough to lubricate the mechanism for normal functioning, while in others, it requires complete disassembly and replacement of parts. It’s up to you to decide what to do: call a specialist or carry out repairs yourself, but in any case, we recommend that you first study the features of the mechanism and then start repairing it.
Briefly about materials
The most commonly used are hard and soft wax, special retouching and shading felt-tip pens or markers, furniture touches, PVA glue, laminating edge.
Soft wax differs from hard wax in that in its original form it is immediately ready for use (it does not need to be melted), but it is applicable only on those surfaces that are not subject to mechanical stress.
Soft wax is more convenient to use, while hard wax is more reliable.
The stroke is used to cover minor damage (scratches, small chips, abrasions). It must be applied to the surface, allowed to dry slightly, and then sanded with a felt cloth.
Laminating edges are glued to the worn end surface of the board, having previously removed and sanded the old edge.
The edge is placed on the end and a heated iron is passed over it, causing it to stick.
Restoration of wooden surfaces
No matter how carefully you handle the furniture, abrasions, scratches, and stains still appear. They are easy to eliminate. The main thing is to know how and with what.
- If the wooden surface has simply lost its shine, find a wood care product that contains orange oil. Take a clean sponge, dampen it slightly and microwave for 20-30 seconds. Spray the product from a spray bottle, then wipe with a hot sponge (hands should be wearing rubber gloves with a coating on the inside).
A hot sponge and orange oil will restore the shine of wooden furniture - If there are scuffs or stains on the wood, you can try to get rid of them by rubbing it with a banana skin. It works well for minor injuries.
- More serious stains require serious measures. These are retouching markers (available in furniture stores), denatured alcohol and wax. First, clean the surface (dishwashing detergent diluted in water is the best solution). After cleaning, dry the wood with alcohol: use a moistened swab to rub the lightened areas well. In most cases, the color is restored. In deep scratches, alcohol does not restore the color; they are painted over with a marker of a suitable color. To add shine, the top surface is covered with wax and polished with a soft cloth.
Such transformations are possible using a marker, alcohol and wax. - If you need to smooth out small unevenness, you can use a nail file. For meticulous work, it is easier to use than sandpaper.
- If the wood is locally swollen from moisture: place a leaking vessel, you can quickly get rid of the defect and neutralize its consequences by mixing salt and olive oil. The paste is applied to the damage and rubbed in a circular motion. Leave for 20-30 minutes. The salt will draw out the water, and the olive oil will restore elasticity to the fibers.
- If there are chips, you cannot do without putty. Suitable for both wood and automotive applications. The best way is to buy a light one and add color to it as needed. The chip is covered, a little putty is spread on the adjacent surface. After drying, everything is smoothed out well with fine-grain sandpaper.
You might be interested in reading what types of wall shelves there are (with drawings).
Folk remedies
Various products have become popular among people that also effectively eliminate damage to furniture. Most of the methods described do not require any special costs and are easy to use.
Walnut kernel
When rubbing scratches with a walnut kernel, the damaged area is gradually filled with mass and becomes almost invisible. The procedure can be performed several times in a row to achieve a better effect. It is possible to replace the kernel with nut oil and wipe the scratches by applying the substance to a napkin.
Mayonnaise
The effectiveness of mayonnaise is ensured by its strong penetration into the wood structure. Mayonnaise should be applied to the damaged area several times with an interval of 2 hours. After treatment, the wood will swell and the crack will fill on its own. This method can eliminate defects on any wooden furniture.
Vinegar with vegetable oil
It is recommended to treat light furniture with a mixture of olive oil and vinegar, using the components in a ratio of 5:2. The damaged area is wiped with the mixture and left for a day for complete absorption. Then the furniture is polished with a rag.
Sandpaper
Fine-grained sandpaper helps remove defects on steel furniture elements. The damage is smoothed over with sandpaper and, if necessary, treated with putty. After the material has dried, paint is applied to match the color of the product to mask the area.
Mastic
You can paint over small scratches on wooden products with mastic. The material is distributed on the surface and rubbed with a napkin. To make your own mastic, you need to melt 40 g of wax, add 30 g of turpentine and a teaspoon of alcohol, and then mix thoroughly.
Colored crayons
Colored crayons contain wax, which allows you to paint over scratches. To achieve the desired effect, you just need to choose the right color crayons.
Paraffin
Candle paraffin is kneaded, applied to the damaged area and rubbed until the defect is eliminated. When processing glossy furniture, you need to wipe the surface with a soft cloth after completing the restoration. It is enough to remove the remaining paraffin from the matte surface.
Eyebrow pencil
Applying an eyebrow pencil to scratches can visually hide them.
The disadvantage of using this method is that the pencil wears out quickly, which is why you have to constantly touch up defects on the furniture.
By mixing ground coffee beans with a small amount of liquid, you get a semi-thick substance to remove scratches. Apply the substance to the scratches using a cotton swab or disk. You can eliminate defects with coffee only on dark furniture.
Lemon juice and oil
A mixture of lemon juice with vegetable or olive oil in equal proportions is also suitable for treating damaged furniture. The mixed components are applied to a clean, lint-free cloth and the surface is polished, making movements in the direction of the scratch.
Advantages of do-it-yourself restoration
Wooden household items are not difficult to update at home if you want to refresh them and give them a more presentable look. Over time, cabinets, tables, chests of drawers, chairs may lose their original color (fade), become stained, have abrasions, chips and cracks.
Renewing wooden items begins with a thorough inspection of them.
Do-it-yourself furniture restoration is a reason to reduce the cost of purchasing new products. Strong, good-quality things can still serve you for a long time. In addition, the workshop will charge a high price for antique wooden furniture, which may not be profitable.
Restoring old furniture is suitable for those who save the family budget.
When doing home restoration, you can use available materials, especially if the repair is minor or cosmetic. The missing fabric, wooden boards, panels, bars are purchased in addition, and this is cheaper than purchasing a new chair or cabinet.
How to restore old furniture yourself: simple, accessible methods and advice from FORUMHOUSE experts
“Imagine a picture: an elegant woman with makeup, in a tight skirt and very high heels, stands by a garbage dump in work gloves and, with an ax in her hand, breaks out the top of the bed,” this is how a user of our portal with the nickname ELIZA describes one of her successful hunts for old furniture. Restoring old furniture is an amazing hobby that allows you to create real masterpieces from scrap finds and cheap furniture panels. In this article we will cover:
- How to restore old furniture with your own hands
- Stages of restoration of wooden furniture
- Furniture restoration at home with an aging effect
What is a lamella
Before you begin, you need to familiarize yourself with the description of the features of the lamellas in more detail. Lamels are wooden structures that have a curved shape. Their characteristic features include a high level of elasticity and elasticity. It is thanks to these features that the mattress can be securely fixed.
The slats are made from high quality wood. The most commonly used wood is birch, maple, ash or beech. They are cut from solid wood, after which they are processed and given a curved shape.
Such wood products are laid out at a distance of 2-5 centimeters. This allows slatted beds to be used by both thin and overweight people. The thickness of one plank reaches ten millimeters, and the width does not exceed thirty. However, cheap beds can use boards 4-5 millimeters thick.
Cleaning old surface
One of the most difficult processes is removing layers of old paint or varnish from furniture.
ELIZAForumHouse Member
If the paint is in good condition (not chipped, not a toxic color), then you can paint the top with fresh paint. But the catch is that the old paint can fall off.
Old paint is washed off with special removers (you can buy them in hardware stores). The manufacturer's instructions indicate for which materials it can be used. Before applying the remover, it is recommended to disturb the structure of the coating - scratch it with a nail or other sharp object. You need to apply the remover with a wide but thin brush. After this, the furniture should be covered with waxed paper and left for half an hour to two hours (if the old furniture was covered with polyester compounds). This work is performed with gloves and a mask, in a well-ventilated area.
About 300 grams of remover are needed per square meter of product.
After keeping the furniture covered with the remover under the paper for the required amount of time, you can proceed to removing the exfoliated surface with a spatula.
Then the furniture needs to be sanded with a soft disc sander, or just sandpaper. The goal is to get a clean and necessarily slightly rough surface.
Coloring
Before painting, it is better to apply a thin layer of primer to the furniture again - this way the paint will adhere better and stick well. All you have to do is wait for the primer layer to dry and proceed to painting.
- Apply the first layer of paint with a comfortable, small brush. The most important thing is that the bristles do not come out of it.
- Leave until completely dry, possibly for a day.
- After this, sand with fine-grain sandpaper.
- Apply a second coat.
Restoring an old iron bunk
An old metal bed can be restored by careful polishing.
- Scrape off the rust . To remove large pieces from rusty areas, use both a wire sponge and a special brush. Then the frame is washed and all parts that have peeled off are removed.
- Polish the product . Use sand and sandpaper to remove fine rust. Particular attention should be paid to hard-to-reach places. Sanding is carried out until completely smooth.
- Solvent wipe . The treated bed is prepared for priming and painting, wiping with any solvent, for example, acetone.
- Primed . For light-colored furniture, use a white primer; for dark furniture, use a duller primer. The primer is applied with gentle movements, in two to three thin layers, allowing each to dry thoroughly. After the piece of furniture has dried, wipe it with a rag to remove dust and primer residues.
- They paint. For painting, it is recommended to use high-quality aerosol paint, which protects furniture from rust.
AttentionSpraying is done from the can from top to bottom, holding it at a distance of about 10 cm from the product. The paint is applied in two to three layers, then the product is left to dry.
- Get rid of paint drops . Using a small brush or brush, get rid of drops and smudges. You can brush them off or smear them on the surface.
- Varnished . The use of varnish provides additional protection for metal parts. Most often, polyurethane varnish is used for these purposes. When spraying, hold the can at a distance of approximately 20 cm. The shade is evened out by lightly sanding with fine-grained sandpaper.
- Leave metal furniture until completely dry . To do this, it is placed for a day in a warm, dry room with good ventilation.
How to restore a metal bed in the video:
How to restore veneer
Veneered furniture requires a special approach. The means are basically the same, the methods are different. For example, if after getting hit the veneer is swollen, fill a disposable syringe with PVA glue, pierce the bubble, and inject glue into the cavity. Place a piece of thick fabric on top and place a weight. If the surface is uneven (convex or concave), use a thick fabric bag with heated sand as a load.
Such veneer damage is restored in two stages. First, the swelling is eliminated, then the scratch is painted over and the coating is restored.
If the veneer is glued with alcohol glue, you can return the swollen part to its place by ironing it through a rag with a hot iron. But do not overheat the iron: the veneer may stretch. Heating level is medium.
If ironing with a dry cloth does not help, try repeating the operation with a damp cloth (wet it and wring it out well). There is a chance that the wood will swell and become more elastic. To reliably fix the swelling, you can introduce PVA there and then heat it with an iron.
If the swelling is cracked, you can also try to seal it with heating (through a rag). If it doesn’t work, tear off the peeled piece. You don’t cut it, but rather break it off: on veneer, breaks after restoration are less noticeable than cuts. Therefore, you break off the lagging piece. Remove the old glue from the damaged area and the piece of veneer (with sandpaper or a nail file, depending on the size). Next, the repair of veneer on furniture is standard: spread it with PVA glue, lay it down, aligning the fault lines, lay a thick fabric on top and place a weight until it dries.
Such veneer peeling can most likely be eliminated simply by ironing it with an iron.
Scratches and traces of restoration on veneer are removed in the same way as on wood: they are painted over with a furniture marker of a suitable shade. If the scratch is deep, a little melted furniture restoration wax is applied to it (with a spatula). After drying, the wax is ground, and if necessary, fine-grain sandpaper is used, but after this treatment, the restored piece is covered with a layer of varnish.
Do-it-yourself furniture restoration requires patience and accuracy. You have to act gradually and methodically: smear it, wait for it to dry, level it, smear it again, etc. Sometimes you have to try several methods: damage varies, as do the materials used in production (glue, varnish, etc.). But as a result, the furniture will look much better.
Repair of laminated chipboard furniture
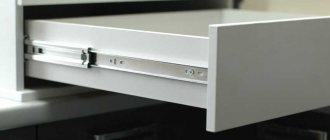
Serious repairs to laminated chipboard furniture frames are required in cases where hinges, guides, fasteners and fittings are torn out of the board due to excessive load or improper use. Let's consider various options for restoring buildings.
Restoration of holes for fasteners
Laminated chipboard is a fairly durable material, but as long as its integrity is not compromised. Due to loads, improper operation, periodic disassembly of furniture or frequent opening of facades, holes very often break, as a result of which screws, confirmations, hinges and other fittings fall out of their fastening points. Simply screwing the fastener into the same place will not work, since the diameter of the hole has increased. However, there is one method that furniture assemblers use.
In order to be able to screw a screw or confirmation into the old place, you need to proceed as follows:
- use a drill with a diameter of 8 mm to expand the existing hole;
- pour PVA or wood glue inside;
- drive a wooden wedge or “coke” into the hole and cut off the excess;
- make a hole in the “coke” with a diameter smaller than that of a self-tapping screw or confirmat;
- screw the hardware into place.
Now you can install the hinge mounting and adjustment pad
How to repair a broken furniture hinge
It happens that a furniture hinge on the facade itself is pulled out of its seat along with pieces of laminated chipboard or MDF. The simplest option is to completely replace the module door. But the façade material may differ slightly in shade from the rest of the structure, and the cost of such repairs may be high. You can repair the canvas and install the hinge yourself and at minimal cost. There are two options:
- Moving hinges above or below the original installation location.
- Repair of the hinge seat.
The first option is the simplest and fastest, but you will still have to seal the old holes. To disguise a broken seat, you can use a special plastic plug. Large holes are restored using PVA mixed with fine sawdust. After the mixture has dried, it is masked with wax pencils and polished.
Moving the loop to another location
The second option is more complex, but, nevertheless, it will avoid making new holes and will extend the life of the facade for several more years. To restore the hinge seat you will need:
- epoxy resin;
- small sawdust;
- rubber or plastic spatula;
- electric drill;
- loop cutter.
Loop torn from the façade with “meat”
First of all, you need to clear the seat of the torn loop, mix sawdust with epoxy resin and fill the recess, leveling the mixture with a spatula. Allow to dry and, if necessary, add more filler. After complete drying, sand the hinge installation area. Next, make markings and, using a cutter or electric drill, drill a groove of the required depth for the mount.
Prepare a mixture of sawdust and epoxy resin and fill the seat of the furniture hinge bowl
A simple but dubious method
There is another way to attach a torn loop, but it is quite dubious, both from an aesthetic and practical point of view. A wooden block or plywood strip is installed in place of the hinge using glue or self-tapping screws. The fastening for the facade is mounted on them. The plank or block is fixed using screws or glue. However, with this method of installing the hinge, the facade can move significantly relative to its original position, and no adjustment can correct this.
For your information! In order for facades to last for a long time, you need to follow a few simple recommendations. It is necessary to tear off the doors of cabinets and bedside tables smoothly, without sudden movements. Do not hang heavy objects on the handles of the facades, as this leads to increased load, distortion and tearing of the hinges from the landing sites.
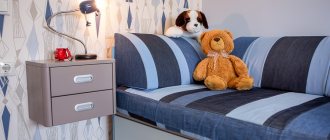
Photo with headboard design ideas
Find out more about how
do
and again
tighten
headboard.
Updating and decorating your bed yourself allows you to significantly reduce costs that cannot be avoided if you buy new furniture. Thrifty owners will appreciate the opportunity to restore furnishings with their own hands. This allows you to refresh the appearance of the bed and give originality to the bedroom interior.