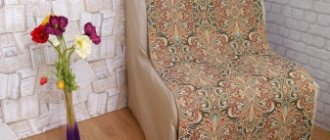
Beautiful chair covers create a cozy atmosphere of sincerity and warmth in your home. And if they are also sewn by the housewife herself, then such an interior detail also becomes a source of pride, evidence of homeliness and a creative approach to choosing the style of the home. Covers can be made from different fabrics; we will definitely dwell on the selection criteria and feasibility of different options. We will also consider how to use patchwork scraps for such products. You can sew original covers for chairs with backs and armchairs with your own hands using simple patterns for different designs of chairs, armchairs and stools.
Fabric selection
The main requirements for fabric for covers are wear resistance, high-quality dyeing, reasonable price, and pleasant texture. An individual requirement may be that the fabric is hypoallergenic. Let's look at the pros and cons of choosing different fabrics for furniture covers:
- cotton: the advantages are affordable price, durability, hypoallergenic, washable; of the minuses - they fade quickly, get wet instantly;
- linen: advantages - excellent durability, durability; disadvantages - due to the specific structure, they are suitable mainly for rustic and Provence style, they are problematic to wash and iron;
- gabardine and crepe-satin: the most acceptable option, due to density and elasticity; practical to use, easy to clean and wash;
- Elastic fabrics such as lycra are a good option, they do not get wet, are wear-resistant, and easy to clean.
The color of fabrics for sewing chair covers is usually selected taking into account the overall color scheme of the room.
Varieties of legs
Before you buy and glue special protective attachments or soft caps, you should decide on the furniture that needs such improvement.
Here you need to look at what kind of legs your chairs and stools have. There are basically 3 options.
[adv2]
- Stationary. These are classic versions of chairs and stools. The idea is to install caps or glue attachments on the lower part of the leg, which is in contact with the floor, with your own hands;
- Adjustable. Mainly made of plastic with a metal adjustable screw. The plastic itself can be quite soft. If not, you can also glue an overlay underneath;
- Wheeled. Relevant for office and computer chairs. It will not be possible to install protectors on them. You can only replace the wheels with softer and more elastic ones.
You can buy a ready-made set of heels at Ikea, Leroy Merlin, or make overlays from scrap materials.
I think there shouldn’t be any problems with where to buy a piece of soft material.
Patterns
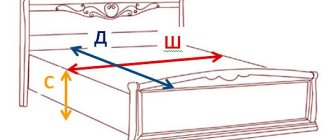
Just as when sewing any item one begins by taking measurements, so when sewing chair covers one first measures the object of work. If this is a chair, then you need to measure:
- chair height;
- seat length;
- width of the top of the back;
- height of legs;
- width between legs;
- width of the bottom of the back.
For an example of measurements, see photo.
Model selection
Recently, it has become fashionable to sew chair covers with your own hands. This way you can update the interior with the help of capes and other elements. This not only adds originality, but also allows you to change the decor in the apartment without buying new furniture. By making chair covers with your own hands, you can experiment with the style of the room at least every month. Such covers allow you to decorate your home for a holiday or special occasion; they are even used in expensive restaurants and cafes.
In addition to the ease and simplicity of sewing chair covers, this method of changing the interior has several advantages:
- it’s cheaper than buying new furniture or reupholstering it;
- capes protect expensive upholstery from pet claws and hair;
- furniture covers allow it to always remain clean.
The simplest case in shape is one-piece. It will consume more fabric than others, but it has many advantages. First of all, such a cape completely hides the chair. You can choose the height of the skirt to the middle of the legs or to the floor. This will hide the imperfections of the furniture. To make a pattern, you need to measure the height of the backrest, the chair itself, the width and depth of the seat.
DIY chair covers can come in several varieties:
- Universal – secured at the back with ties or clasps. They can hide the entire chair, while sitting on it freely. There may be a cape on the back and seat in the form of one piece of fabric, which is secured on the side with ties.
- A half-cover is a product that does not completely cover the furniture. Usually it is fixed to the legs or corners of the chair using braid or elastic.
- One-piece or separate covers. Seat-only covers are popular. They are the easiest to sew and require little fabric.
- Beautiful luxury cases. They are often used in cafes during banquets. You can sew such a chair cover with your own hands for a home party. It will require expensive fabric and various decorative elements.
Universal
Half-case
Separated
Luxury case
Models
You can sew covers for chairs or a computer chair of different types. These can be laconic seats or chic capes decorated with flounces and bows.
The needlewoman can use ready-made ideas or show imagination by coming up with an unusual option.
Some tips from the professionals
To sew really high-quality chair covers that will help decorate the kitchen, you need to carefully approach this issue and take into account several important points:
- Material consumption directly depends on the number of parts in the pattern. So, the more there are, the less fabric will be needed for the product.
- To use the material rationally, it is necessary to cut parts for all chairs at once.
- It is not necessary to purchase new fabric in order to sew a cover; you can also use old items, for example, jeans, knitwear.
- For greater comfort while sitting, a layer of foam rubber or synthetic padding is added inside the cover.
- For everyday kitchen covers, it is better to purchase inexpensive, practical fabrics.
- If you plan to sew a complex model of a cover, then it is better to try it first on unnecessary material in order to understand the design features of the product and not make mistakes later.
How to sew original chair covers with your own hands using Spanish patterns
Despite the lack of Russian explanations on the drawings, it is quite possible to understand the cutting details.
Rounded back
Cape with bows
Viennese chair with rounded seats
Decorative cover for a special occasion
Decorations for cases and capes
In addition to bows and frills, such products can be decorated with decorative buttons.
The buttons must be large enough and flat, otherwise they will create discomfort when sitting.
To make such buttons, you can use plastic curtain rings as blanks. The rings should ideally be permanent or, in extreme cases, have an oblique cut. How to sew such a button - see instructions in the photo.
If you think that sewing covers for chairs with a backrest with your own hands according to the given patterns is a rather problematic task, but you want to somehow decorate the interior, then we suggest you sew simple-shaped seats. To make them fun and cute, we recommend making them in patchwork style.
What types of chair covers are there?
Chairs decorated with covers are found in a wide variety of interiors. Covers are used to disguise any imperfections in furniture, to improve its functionality and as a stylish decoration. There are several types of such covers.
- Solid. The product completely hides the chair, leaving only part of the legs visible. Well suited for masking furniture defects. It features the most complex cut and sewing.
- Half covers . Only the seat and back of the chair are covered.
- Separate. They consist of two elements, one of which is put on the back, the other on the seat of the chair.
- For the back . Covers only the top of the chair. Very often used as holiday decor. Extremely easy to sew.
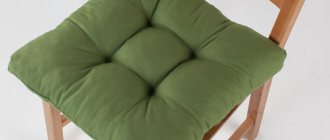
- For sitting . Most often it is performed in the form of a soft pillow, which makes sitting more comfortable.
Covers of any type are made according to individual patterns; there are no universal options.
Photo: Instagram heimtextilien_almaty
Seat cover in patchwork style
To work you will need:
- multi-colored pieces of fabric;
- batting for lining;
- a piece of plain fabric for the bottom lining;
- threads;
- tailor's chalk;
- scissors, pins, ruler, sewing machine.
Step-by-step sewing instructions
We cut strips 6 cm wide, their length can be from 10 to 20 cm (depending on the actual length of the flap).
We sort them by color.
Mix and collect into a common pile.
Cut out a square of the required size from the batting. Cut out the bottom piece from the lining fabric. On this part, when cutting, add 6 cm around the perimeter. This 6cm will be useful for finishing the edge.
We sew multi-colored stripes into a long ribbon.
Smooth all seams to one side.
We trim the uneven edges of the tape.
Roll up the finished tape.
We lay out the lining fabric, put the batting on it and then lay out the tape, forming a patchwork fabric.
We start from the corner, laying out the tape diagonally. Trim off the excess. Apply the following strip and cut to size.
Sew these two strips together and smooth them out.
We repeat the operation for the 2nd, 3rd stripe, etc.
All stripes are sewn in the same way - see photo.
When you sew all the strips, you will get a multi-colored square in patchwork style.
At the next stage, we lay out all the elements of the seat: the bottom is made of plain fabric, then the batting, and the patchwork fabric on top. We straighten, iron, and secure with pins.
We fold the specified allowance onto the front side and iron it.
We trim the excess fabric in the corners and secure it with pins to make it easier to sew. We sew a seam around the perimeter.
This results in a neat edge finish.
The final stage in making a seat cover in a patchwork style is quilting. We do it along the joining seams of the ribbons.
The original litter is ready!
In the same style you can sew a cover for the back of a chair.
The operating principle remains the same. From the scraps we make a multi-colored ribbon, which we use to form the canvas. For the cover, we sew a rectangle of the required size from tape, which we then fold in half and sew the side seams. Finally, we process the edge with a decorative facing.
Using this technique, you can sew a cover not only for a chair, but also for a computer chair. This work is more labor-intensive and requires good sewing skills. But the result is worth it. Look what a miracle you can sew from pieces of fabric.
Options that are easy to use
Let's look at all the options that you can easily do with your own hands. All the nuances and step-by-step implementation are below.
We sew a cover for a chair with a back
- After we have measured the height of the back, legs, and width of the chair, we make a pattern of three elements: rectangles covering the sides and the back with the seat. Don't forget to add a couple of centimeters to the seams.
- Transfer the pattern to the fabric. Since we are dealing with rectangular parts, you can use a ruler for greater accuracy.
- Carefully cut out all the details, taking into account the shared thread.
- First of all, we sew the side edges.
- Then we move on to the side and bottom sections of the back of the back. They should be folded and then stitched.
- Sew the side parts to the seat.
- We tuck and stitch the sections of the side and front parts of the product.
- Ready-made covers can be decorated with a bow or other decor on the back of the chair.
Advice Are you sewing for the first time and doubt your abilities? Try making a test piece first from inexpensive fabric, or at least basting it by hand.
Jeans option
We sew a simple seat
The easiest option, which is suitable even for beginners, is a regular stool seat. It's fairly quick to sew.
Step-by-step instruction
- We make a template from cardboard or other material according to the shape of the stool seat;
- using the resulting pattern, we cut out three parts of the same shape and size from the fabric (for the front, back side + padding polyester);
- We place the padding polyester between two pieces of fabric and secure it with pins;
- to quilt the future seat, you need to sew even lines parallel to each other;
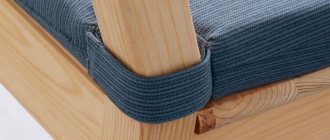
- we baste the pre-prepared bias tape for edging, leaving the ends as future ties;
- We carefully fold the ties in half and stitch them on a typewriter;
- We sew bias tape on the sides of the product using a machine.
Advice If you plan to sew several identical covers at once, you should cut them all at once. This will save fabric.
Easy to do it yourself
Elastic cover for a round stool
Such an accessory can be sewn even from a small piece of fabric.
Step-by-step instruction
- First, as usual, we make a pattern. In order not to bother with measuring instruments when calculating the diameter, you can simply attach a sheet of cardboard or newspaper to the surface of the stool, then cut it along the contour.
- We transfer the drawing to a new sheet of paper, adding a few centimeters along the contour.
- Based on the resulting template, we cut out the piece from the fabric.
- We put an elastic band on the edge of the fabric, fold the fabric, and stitch it.
- Our cover is ready - all that remains is to put it on the stool.
Tip To add softness, you can sew foam rubber or synthetic padding into the seat.
Provence style
Crochet chair covers
A knitted cover can be an interesting option for decorating a room. Crocheting will take more time than sewing a simple pattern, but the result will be a special and original item. Crocheted furniture will look especially cozy in winter, as it creates an atmosphere of comfort and warmth.
Most often, round or square models are crocheted for seating stools. Let's look at an example of knitting a simple round cover:
- We make the upper part from rows of lush columns, separated by short chains of air loops.
- We make the hem by knitting several rows in stitches without adding. This way they will form an even side (for greater stability we make the side higher).
- In the last row we knit air loops - at the end you can insert a fixing elastic band or cord into them to secure the product to the stool.
An interesting option for decorating a room
Using various knitting patterns, you can knit absolutely any model with your own hands. For example, the so-called flower cover or models crocheted from motifs (they can also be decorated with crocheted flower appliqués).
Advice There is no need to be shy in choosing bright, rich colors. Multi-colored knitting threads can add originality and enliven the interior.
Cover made from an old sweater
If knitting is not your thing, but the beauty and comfort of knitted covers haunt you, try making them from an old sweater. Any item of the desired size and color, knitted with knitting needles, large or medium knit, is suitable for this.
The edges of the sweater must be carefully processed so that the resulting item does not unravel in the future.
The pillow will add comfort when sitting
Depending on the size of the sweater, you can sew a cape only on the seat or on the back, or you can get a whole accessory, for example, by using several old products. Large volumetric patterns in delicate bed colors look especially atmospheric.
Tip Knitted items can stretch, so it is better to make them 1-2 cm smaller in width or diameter.
You can also sew models not only from knitwear, but also from other old things in good condition. For example, from jeans or coats that have become too small. The main thing is that the style of the resulting product matches the interior of the room.
On a children's chair
Chair covers in a children's room are more relevant than anywhere else. Bright, elegant fabrics can decorate the interior of a nursery and interest little fidgets. In addition, they are indispensable in protecting furniture from dirty handprints, spilled drinks or traces of children's creativity.
When sewing such accessories for the nursery, you can give free rein to your imagination: images of cartoon characters, funny animals, flowers, cars, princesses - everything that the child will be incredibly happy about.
The product is sewn according to a standard pattern, as for a regular stool. All measurements are taken in advance. Very often, for children's furniture, capes are sewn only on the back: two rectangular pieces are cut out and sewn in three places. At the end, you can apply a design or decorate it with fabric, sew on “bunny ears” or, for example, design it in the shape of a snowman.
In the interior of a children's room
Tip From the inside out, so that the cover does not slip, you can sew decorative laces that will be tied behind the legs of the stool. You can also use buttons, ribbons or elastic.
On a high chair
Covers made of easily washable fabric on children's high chairs are irreplaceable. They can make life much easier for young parents, since keeping a baby’s chair clean is almost impossible. In addition, the cover will provide additional protection for the child from slipping and, as a result, bruises.
If you decide to sew yourself, you need to carefully choose the fabric: it should not cause irritation to the baby. The best choice is thick cotton for the inner part, softer cotton or lawn for the outer part and padding polyester as a small layer.
For the bride and groom
- The pattern can be made by removing the pattern from the old cover, or use a ready-made pattern for a standard high chair.
- Having cut out all three parts of the product according to the pattern, we put it together (wrong side to each other), make a basting, and then sew it on a typewriter.
- Turn it right side out, fold the unstitched edges inward, then stitch again. We also sew on pockets, ties or straps, if necessary.
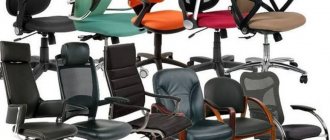
On an office chair
A computer chair can very quickly lose its appearance due to scuffs on the seat. Using a cover, you can update a worn-out chair, make it more convenient, comfortable, or simply liven up your office by decorating an inconspicuous chair with bright decor.
Products with buttons
To quickly sew a model for an office chair, follow the following instructions:
- We apply transparent tracing paper to the parts of the chair (seat and back), and trace along the outline with a pencil.
- Add seam allowances to the resulting patterns (2 cm for the back, 5 cm for the seat to hem the edge and insert elastic there), cut out and cut the fabric.
- For the back, we cut 2 identical parts, which are then sewn on three sides (except for the bottom).
- For sitting, you can sew a cover with a skirt that will cover the legs. Or with an elastic band that will fit the seat tightly. This model is suitable for an office chair on wheels.
Simple and stylish option
Patchwork style
Patchwork (or sewing from scraps) can be a great idea when you need to sew a chair cover and have a large amount of small scraps of fabric collected at home. In this case, it does not matter at all what color they are or how similar the pattern is. The peculiarity of this type of needlework is that you can combine pieces of fabric of different texture and color.
To make a patchwork style accessory, you will need to prepare blocks - squares or rectangles of the same size cut out of fabric. Their size and quantity will depend on the size of our future product.
You can use decorative pillows
- Before sewing all the parts together, you need to lay them out to create the desired composition. Here everything depends only on our imagination; for example, we can try to convey a gradient or simply leave a haphazard drawing.
- Then the parts are folded right side inward and stitched together on a typewriter. The fabric is carefully ironed.
This way you can sew a stylish cover for the stool seat. To make it softer and more comfortable, you can add padding polyester inside.
Accessories in the patchwork style will suit the interior in country, Provence, boho styles, and will also decorate a children's bedroom or playroom.
Foot covers
Covers for chair legs are especially relevant in rooms with tiled floors or parquet, which often receive scratches when moving furniture.
They are easy to sew or crochet or knit, they do not require a lot of material and look very cute. Similar knitted “socks” or even “socks” for furniture legs will look especially good with openwork covers for the seat and back, knitted from the same yarn.
Wedding covers
When decorating wedding chairs, the choice of color and fabric usually depends on the style and theme of the celebration. Fabric covers look elegant, but are often expensive. You can save money if you make such products yourself.
Tip To reduce fabric costs, you can only sew capes for the backs of chairs.
When decorating furniture for a wedding, you can do without sewing at all: the chairs are simply wrapped in pieces of fabric and secured with ribbons. Decorate with artificial flowers, lace or a bow (you can secure it with a heat gun or simply sew it on with a needle).
Bride's chair decoration
For wedding decor, guipure, silk, satin, organza or chiffon are usually chosen. The fabric can be either light colors - white, beige, soft pink, cream, or contrasting - red and white, white and orange. Chairs should not be the center of attention, but should organically complement the overall composition.
The design of the bride and groom's chairs may differ from those of the guests. For example, they can be stylized to match the wedding dresses of the newlyweds: a white tailcoat with a black bow tie for the groom and a long white dress with flowers for the bride.
Guipure, silk, satin, organza or chiffon are usually chosen
Tip If you add a large number of ties to chair covers, very often do not sew the pieces together, as the ties will hold them tightly together.
Holiday covers
A theme party, wedding anniversary, bachelorette party or birthday is another reason to decorate the interior, including chairs for guests. Festive decoration will not only delight children, but will also surprise and amuse adults.
For children's birthdays and holidays at home or in kindergarten, you can use decor to turn a piece of furniture into an element of a game or even an educational toy. For example, make a kitchen cover in the form of a stove, where kids will practice cooking, or in the form of cars for role-playing games.
New Year or Christmas models can be designed in the form of Santa Claus, snowmen, deer, bear cubs, gingerbread men and other favorite characters. This holiday will be remembered for a long time!
And when decorating for Halloween, you can’t do without ghosts, pumpkins, bats and cobwebs. Even a regular case in bright orange or in combination with black will create an amazing holiday atmosphere for both children and their parents.
Soft patchwork style seat for chair or stool
Description
We decide on the dimensions of the product. We select multi-colored scraps.
We draw a pattern of the required diameter and divide it into sectors. Using the pattern of a separate sector, we cut the required number of elements.
We lay them out on a horizontal surface, arranging them by color.
First we sew two elements together.
Then we sew the pairs together, getting two semicircles.
Then we make the last seam and get a sewn patchwork circle.
Using it as a template, we cut out a similar part from padding polyester.
Having retreated 3-4 mm in both directions from the joining seams, we perform a contour stitch along the faces. side.
On the inside on the side these seams look like this - see photo.
We cut out a solid round piece for the bottom lining.
We cut out four ribbons to secure the soft seat on the chair.
We bend the short edges of the ribbons inward, fold the fabric in half and stitch.
The process is shown step by step in the photo.
We cut a strip of fabric equal in length to the circumference of our seat plus seam allowances. The width of this strip should be equal to the height of the product plus seam allowances. We attach strings to this strip. We sew a strip between the top (patchwork) and bottom elements.
At the same time, we leave a small area unsewn, making a gap in the seam. We turn the seat out.
We fill it with filler. Sew up the gap by hand using a blind stitch.
Next, let's start making a decorative button. Cut out a circle of small diameter from a suitable fabric. We sew the finished button on the leg. For beginners, the entire technology is shown step by step in the photo of the master class.
We sew a button into the center of the seat, stitching through the entire thickness of the product. Sew a small button on the bottom side. The second button is needed to prevent the fabric from tearing when the threads are pulled.
The soft seat is ready!
Similarly, you can sew a cover for a round stool. It can be decorated with a frill around the perimeter.
Materials used
When repairing chairs or assembling them from scratch, you should immediately think about using soft pads.
There are several options for how to make the heels and what to glue to the bottom of the leg.
Let's start with what to make such protective elements from. They can be:
See also
How to change facades on a kitchen unit with your own hands quickly and inexpensively
- silicone;
- felt;
- rubber;
- plastic;
- felt;
- cork;
- Teflon;
- polyurethane;
- fabric;
- leather, etc.
You need to choose based on what goal you are pursuing.
Cork overlays are only suitable for stationary furniture. Therefore, they are not suitable for chairs.
Some overlays improve sliding properties, thereby making it easier to move furniture from place to place, and also protect the floor covering from damage.
But if you have a kitchen chair with a soft back, and the kitchen is tiled, you definitely don’t need strongly sliding heels. In this case, you should abandon felt and Teflon products.
But they will help when you need to move heavy furniture without extra effort. Felt, felt and Teflon heels have an optimal sliding effect.
It's a different matter when you need to achieve maximum stability. That is, do not allow the chair to slide and move at the slightest impact. Again, let me remind you about the kitchen and tiles. The surface is slippery if regular wooden chairs without pads are used. And metal stools can even scratch the coating. Therefore, here preference should be given to silicone, rubber or soft plastic. Plastic that is too hard will not cope with this task. It is better to refuse it.
So always be guided by the situation. The foot attachments are designed to perform several functions. And sometimes they turn out to be opposite to each other. I'm talking about improving gliding and providing an anti-slip effect.
Cover for a square stool
The corners on the stool are rounded.
Dimensions: 33cm by 33cm.
To work you need to prepare:
- denim fabric;
- fabric for lining;
- padding polyester to create volume;
- contrasting fabric for joining and finishing;
- The elastic band is thin.
Description
We cut out nine squares 10cm by 10cm from the main fabric and padding polyester.
We quilt them. We connect it with contrasting fabric, sewing it on the overlay.
The stitching is better visible on the reverse side.
For the side, cut out a strip of denim. At the bottom we make a drawstring with an elastic band.
We insert the elastic into the drawstring.
At the end of the article, given that a series of winter holidays will come very soon, we suggest you sew New Year's covers for chairs.
Chair covers for New Year's holidays
We will need:
- material, felt, red;
- white faux fur or a little white felt;
- threads, sewing machine;
- glue gun;
- centimeter.
Description
The first stage is to measure the back of the chair. We take two measurements along its highest and widest part. The rectangular cover should be 10cm shorter than the height of the backrest. Then we calculate the size of the cap. The height of the top of the cap should reach the middle of the back of the chair.
Draw out the pattern, immediately adding 1cm for allowances. Let's cut it out. We cut out two parts from the fabric. We fold them with their right sides facing each other, sew along the line shown in the dotted line in the photo.
Cut off seam allowances at the corners. If this is not done, they will stick out on the front side of the product.
We turn the cover inside out, sweep out the edge and iron it over the faces. side. In this case, the iron should be heated to medium temperature.
To ensure that the cap folds beautifully along the fold line, we sew a horizontal stitch under the triangle. The stitching should be done on faces. side.
We use white felt or faux fur to decorate. We cut a strip along the length of the lower circumference of the cover, taking into account the seam allowances. The width of the edging should be 5-7cm.
Sew the side seam along the wrong side. Art. We turn out the edging. We put it on the cover as shown in the photo.
Align both bottom edges and stitch through both materials. We also stitch the top edge of the white stripe, preventing it from turning away.
Now let's make the pompom. Cut strips of white felt. Their dimensions are 1cm by 15cm. You can adjust the size as desired by adjusting the size and fullness of the pompom.
We tie a sheaf of stripes in the center with thread, pull it tightly and secure it with a knot.
Using a glue gun, fix the pompoms on the top of the cap and let them dry. If you don't have a glue gun, you can simply carefully sew the pompoms on.
That's it, the covers are ready!
Measurements and pattern
In order for the pattern to be accurate and the product to fit well, you must first take measurements.
1 Take measurements. Depending on the model of the cover, you need to measure the height and width of the seat and back, as well as the estimated length of the product. Pay special attention to the measurements of the chair legs, as in some models they may widen downwards. In this case, you need to take several measurements at the top and then at the base of the chair. We mark the widest and narrowest areas in our drawing.
2 Drawing. Before transferring the measurements taken to the pattern, draw a drawing on paper and mark all the measurements taken there. The simplest pattern is for a one-piece cover: it simplifies sewing, but requires a little more fabric than cutting all the parts separately.
3 Pattern. After that, we proceed directly to the full-size pattern. It can be built on tracing paper, newspaper or leftover wallpaper, repeating the schematic drawing.
4 Checking the pattern. To be completely sure that the pattern is correct, apply it to the chair and secure it with tape. This way we can see all possible inaccuracies made when constructing the drawing and correct them before sewing begins.
5 Final version. Then we build the final version of the pattern - with seam allowances (about 2 cm on each side).
Before sewing, you should first take measurements