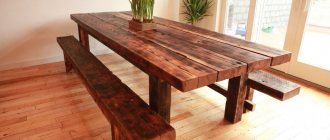
Ropes for a hammock: from A to Z
You can weave a macrame hammock from a variety of materials: linen, cotton, hemp and sisal ropes are suitable. Home craftsmen often use linen or curtain cord.
- Strongly twisted threads are well suited for work: their knots are clear, embossed, and the product does not deform. Weakly twisted fleecy threads become shaggy, the connected knots have an inexpressive texture - the pile “blurs out” it.
- To get a beautiful pattern with an expressive texture, choose a cord with a round cross-section.
- Weaving something from a stiff, coarse rope is quite difficult, and the work may not be the most pleasant. Make sure you have thin knitted gloves; tying knots is much easier in them.
- Do not use threads with a slippery surface (containing synthetics), knots made of this material become untied, requiring more effort.
If uneven, coarse threads are used, the hand-woven bed may not look as good as in the picture. If it irritates your aesthetic senses, pet it and the thread defects will become less noticeable. This is done like this: the product is laid with the wrong side up on a soft mat, covered with 2-3 layers of wet gauze and applied with a hot iron so as not to deform the knots. After the gauze has dried, the mesh should be allowed to dry.
A wicker hammock can be washed with care, but should not be twisted. After washing, it should be wrapped in fabric to remove excess moisture, then dried a little, straightened, and then ironed with a hot iron through damp gauze.
Weaving a hammock from linen thread (rope)
The clothesline has special strength and is not afraid of moisture and the scorching sun. That is, a hammock is great for a summer house; hung it and let it hang all season! This is a huge advantage of the material, namely, clothesline. But the thickness of such a rope is greater than that of a cord, and therefore it is not so convenient to weave. But it's economical! You will need less thick rope than thin yarn.
The simplest and most convenient way to weave clothesline is a net.
It's very easy to do.
- We tie a rope to the bar.
- Then we connect the ropes that are nearby. We tie them in a knot.
- We go lower and tie a knot in the ropes that are nearby, but were previously tied to neighboring ropes.
And so on to the very bottom. At the bottom we thread the rope through the holes of the plank and secure it with knots.
This hammock is made very quickly! But for complete comfort it should be equipped with pillows and bedspreads.
Calculation of material consumption
It is difficult to accurately calculate the required thread length. Its consumption depends on the size of the product, the use of certain knots and patterns, the texture and thickness of the threads, and the individual style of the craftsman (everyone has their own degree of tightening of the knots). Ready-made hammocks, woven according to the same pattern by different people, have different lengths and widths. Therefore, the calculation of the product should be carried out with a margin. The thread attached to the base should be 4 times longer than the dimensions of the finished product.
When tying the thread to the base, it folds in half. The length of the thread, accordingly, should double and become 8 times longer than the planned product. If the mesh is created from individual elements, then the length of the threads is calculated separately.
The consumption of the rope also depends on the size of the cells. The larger they are, the fewer threads will be needed, but any mesh will deform over time. The lower quality the material, the more it will stretch, so keep this consideration in mind.
Most often, hanging nets are woven using a bowline (triangular) knot because of its reliability. If a nylon thread is used, its thickness must be at least 6 mm; a thinner thread will not withstand the strength test of intensive use. If you are too strong, the product will resemble a volleyball net. Yes, a 10 mm thick rope will be guaranteed to be strong, but the appearance of such a hammock will be unsightly.
Calculation option: planned hanging mesh 180x70 cm with diamond-shaped cells 40x80 mm (cell diameter 65 mm). Weaving will be done with a bowline knot. You will need 40 ropes 5 m long, the total consumption is 200 m.
Do not rush to weave a hanging bed immediately after reading this material and performing the calculations, no matter what “golden” hands you have. We recommend performing a test weave of at least 8 ropes. This approach will certainly reveal several unaccounted details and allow you to better prepare for the real work.
Take 8 pieces of simple rope, 2 meters long, something for a wooden base, and try to make different knots with different cell sizes. Having decided on the chosen knot and the diameter of the cells, weave the mesh along the entire length of the ropes. Then measure the dimensions of the test product and recalculate the material consumption for the planned structure.
When you purchase the rope from which you are going to weave a net, test the consumption of materials a second time. Take 2 pieces of 10 meters long, wrap them around a round wooden rod, getting 4 five-meter threads. Weave them, leaving 25 cm at the ends for fastening, measure the resulting product and adjust the calculations. There is nothing to be done; in piece production, accuracy is achieved only experimentally.
DIY wicker hammock - step-by-step instructions
I will try to show and tell everything in detail. You know, looking ahead, I want to say that in fact everything is very easy and simple to do! Available materials, you don’t need a lot of space to make it, and your own hammock is several times cheaper in terms of money, and this despite the fact that we don’t limit the quality of threads and other materials for ourselves.
What we need:
- Durable wooden planks (length – 1 m, width and height – 3 by 2 cm) – 2 pcs. Here I wrote the size of the slats. But you, of course, can adjust it to suit you. Just keep in mind that the size of the rope will also be different.
- Rope (cotton cord) – 200m.
- Metal rings (diameter 10cm) – 2 pcs.
How we will do it:
We drill holes (12-14 pieces) in both planks at the same distance from each other. The diameter of the holes should be such that 2 ropes can be passed through them at the same time.
You should not start making holes in the planks without stepping back at least 5cm from the edges. And this must be taken into account! After all, the width of the hammock itself is automatically reduced by 10cm!
We sand the planks and varnish them. This way they will become more reliable and last longer.
A few words about choosing planks. You should not take planks that have a lot of knots. This is unreliable wood and a structure made from it will have low mechanical strength.
Prepare ropes of the required length. Look, the calculation of rope consumption depends on the length of the product. You need to multiply the length by 3. And after that, just cut off the ropes. That is, if our hammock is 2.5 meters long, then we cut off 7.5 m of rope.
How many ropes will we need? Exactly 2 times more than holes! Since 2 ropes are pulled into one hole, we cut off 24-28 pieces.
We stretch 2 ropes into each hole. We extend them at a distance of 70cm. We tie these edges to the ring.
We make strong knots immediately under the bar.
We retreat 7-8 cm and tie the ropes in a checkerboard pattern. And so on every 7-8cm.
To make the mesh even, and the strength of the structure depends on this, we will use a ruler, a board or any other dense strip of the length we need (from 1 m).
Immediately under the first nodes we lay this plank. And right under it we tie and tighten the knots tightly. Then we move the board lower and tie the remaining ropes in pairs.
IMPORTANT! The last row of knots must match the first! The ropes must be intertwined in the same pairs as immediately below the bar!
And immediately after this series of knots we pull the rope in pairs into the holes of the second plank.
We measure the edges. We trim them so that their length is 70cm.
We tie the edges to the ring.
To tighten the structure, you can pull in denser ropes along the edges and thread them through the edges of the mesh. Stretch these strong ropes and secure them with a knot behind the slats.
Typesetting row
Usually, along the edges, the mesh threads are attached to wooden rods, but they can also be brought into a corner to be grabbed by a metal ring (this will be discussed below). The ends of the ropes from which work begins are called a set row. In practice, more than one method of attaching threads is used; let’s look at the 4 most common ones.
Method 1: Horizontal hinge jumper on the front side
- The thread is folded in half and placed on a wooden handle with the loop facing up.
- The loop bends back and goes under the rod.
- Both ends are threaded into the resulting loop and tightened.
Method 2: crossbar on the wrong side
- The rope is folded in half and placed under the wooden base with the loop facing up.
- The thread folded into a ring is bent forward and wound over the rod.
- Both ends are inserted into the created loop and tightened.
Method 3: Double Hitch (Extended or Extended Hitch)
The crossbars remained on the wrong side. The typesetting row made in this way is denser; the wooden handle does not show through it.
- The thread folded in half is secured using method No. 2.
- Each end (separately) performs one turn.
- The thread that goes around the base is pulled over the loop formed at the bottom.
The attachment to the handle will be even tighter if you make more turns at each end. The same typesetting row can be made so that the bends of the nodes are on the front side, but such a solution looks less neat.
Method 4: Attaching only one end of the thread to the rod
- The upper end of the thread placed under the cutting is fixed at a distance of 2–3 cm from it.
- The lower end of the thread is draped over the base to the right of the upper, then, going around it, it makes a turn; the thread is pulled down.
- The next turn is performed to the left of the upper end, the operation is repeated in a mirror manner. After tightening it, the knot is ready.
When using threads of different colors or different lengths, several fastening methods can be used. For example, first hang one rope using method No. 3, not forgetting to leave a gap in the middle of the fastening. Then a second thread is tied to the left space using method No. 2.
Weaving macrame chairs: making the base
Instead of rings, you can buy sports hoops in the store or make them yourself from metal-plastic pipes with a diameter of 35 mm.
To calculate the required pipe length, you need to multiply the diameter of the required circle by 3.14.
To connect the ends of a metal-plastic tube bent into a circle, you can use a small wooden sleeve, which must be secured with self-tapping screws. It is best if the physically difficult work of bending metal-plastic pipes into a ring is performed by a man.
Cornering
Factory products are distinguished by bringing the threads into a ring at the ends. It looks quite attractive, but many craftsmen, planning to weave a macrame hammock with their own hands, abandon this idea. Why? The fact is that the corner (the so-called design solution used) is difficult to weave.
Another consideration influencing the rejection of this idea is the increased density of the resulting angle. It is impossible to fold such a product compactly, please note. But for those who still want to effectively bring all the threads into a ring, a detailed procedure is proposed below.
To weave a corner, you need to have 20 ends of ropes (10 threads), which will ultimately be attached to the body of the mesh. The length of the threads is the same; taken out from the corner, they form a straight line. The estimated 10 threads, folded in half, will look like 20 threads of 150 cm each. After weaving, you will get approximately 40 cm from the crossbar to the top point of the triangle.
Any action performed for the first time is an experiment. Therefore, take the threads a little longer, because cutting is easier than sharpening.
Hanging hammock chair using macrame technique – master class
I'll show you a very simple model. In fact, it is no different from a full-fledged hammock in which you can lie. But there is also a difference - this is how the strips are attached. They are not placed horizontally, but one is fixed above, the second below. Between them there are wooden slats that connect the upper and lower base and allow the structure to be stable.
A few words about the quality of the threads. The fact is that the main emphasis will be on the lower part. Therefore, the threads should not stretch too much; ideally, if it is a thin cable or dense synthetic rope, then the hammock will not stretch quickly.
What else do we need:
- Planks (1.6-2cm) – 2 pcs.;
- Reiki (0.6-1cm) – 2 pcs.;
- Rope for weaving – 125-130m;
- Clothesline for fastening – 4m;
- Screws and drill.
Making crafts.
We make 2 holes on each edge of both planks. One is at a distance of 2, the second is 3.5 cm.
We insert thin slats into those holes that are closer to the edge. And this is how all 4 wooden bases are connected.
We hang a wooden base to make it easier to weave. We cut the rope into 8m lengths (into 16 pieces).
Fold the rope in half. We leave the loop in front of the bar and fold the edges over the bar. We thread the edges into the loop.
This is how we fasten all 16 ropes.
Distribute all loops evenly over the base.
We take the first 4 ropes (from 2 loops) in our hands. We bend the rope on the far right at a right angle, place it on the 2 closest ropes and thread it under the one on the far left.
We pass the left rope behind the two that are nearby and thread it into the loop on the right, which we formed when we bent the right rope.
Lightly tighten the knot. We do this with all the ropes.
To make the second row, step back about 7cm. We skip the last 2 ropes. We take the next 4 ropes in our hands and do the same with them as we did in the previous row: we throw the rightmost one over the leftmost one; We pass the left one into the right loop.
And so the whole series. We weave until we have ends of ropes of about 20 cm.
We tie the edges tightly on the bottom bar.
The chair is ready! All that's left is to hang it up.
We cut the clothesline into 2 halves of 2m each.
We thread the ends of the clothesline into the holes at a distance of 3.5 cm from the edge.
We make strong sea knots at the ends of the ropes.
All! Let's hang up our chair! Simple, fast, and we are guaranteed a wonderful holiday!
Weaving patterns
You can make a macrame hammock with your own hands in exactly the same way as those sold in trade, i.e. simply throw the threads. Weaving will go very quickly, because you won’t need to tie knots. Lying in it for the first time will be comfortable, nothing is pressed into the body. However, the cells will turn out to be unstable, easily changing their size, with the prospect of the formation of holes.
Weaving flat knots (degenerate square knots) will not require much effort either. The rope consumption will not be much more, the size of the cells is easy to adjust. However, such a mesh cannot be overloaded; children should not frolic in it: there is a high probability of the knot turning out under heavy load.
The exact opposite of the thrown threads would be a square knot (double flat knot). The nodes will be a sight to behold, firmly fixed, flat, with the ability to change the size of the cells if necessary. However, the thing will turn out to be quite heavy (this is the most material-intensive method), such a hammock is clearly not intended for hiking.
Another knot that is traditionally used to knit networks deserves attention. This is a bowline (triangular knot). The cells do not tend to change sizes, the rope consumption is average, the weight of the product allows you to take it with you on the road. However, weaving such a knot is a labor-intensive task, and it is difficult to adjust the size of the cells if necessary. In addition, on one side the knots are sharp.
How to make knots for a wicker hammock - detailed instructions and drawing
Today we talked a lot about weaving a hammock. It’s worth finding out which knots allow the hammock to hold tightly and not slip or fall! A well-stretched hammock will allow you to fully relax, and not “lie” in a position where your legs meet your head.
I’ll show you clearly how to attach a hammock, with what knots:
- Bed. If we attach the hammock to the ring.
- Bleached. If the support is thin.
- Retractable bayonet. With a thick support, this type of knot is the most reliable.
And it’s better to show here. I understand this, so I selected a video on the topic:
Strengthening the sidewalls
After tying the hanging mesh, do not forget to strengthen its longitudinal edges. Without this measure, the hammock will not be able to withstand the maximum load when getting in and out of it. The binding is made from the same material that was used for the “body” of the mesh, or from a denser one. To weave 1 meter of sidewall it will take approximately 5.5 m of rope.
If cornering is used in the design of the hammock, then the number of threads must be taken as a multiple of 4 (2 threads are attached to 1 thread of the corner). The angle, in turn, is formed by an even number of ropes. In addition, we must not forget that the side ropes also require reliable fixation. In practice, there are 2 options for solving this issue; the schematic drawing below clarifies this in detail.
In the left figure, the side threads are fixed separately on the crossbar; the number of threads used for the hanging net is a multiple of 4 (for example, 40). The mesh shown in the figure on the right is woven from 38 threads, the sidewalls are combined with the outer threads.
General description of the design
A hammock chair is a movable element that is suspended from the ceiling or any support. Its design is quite simple and consists of:
- textile base (its quality is durable and wear-resistant fabric);
- crossbars that distribute the load;
- sling _ They are made using strong rope or braided cord;
- suspension _ It can be either rings with a spring or ceiling mounts.
Important : macrame swings are often installed on balconies, loggias, and verandas.
As can be seen from all of the above, a macrame swing is a comfortable and soft hanging structure. It's nice to swing from side to side with them in the garden at the dacha or on the veranda on summer evenings.
Securing the hammock in place
Typically, hanging beds in nature are attached to trees. If they are not nearby or the trunks are thin (diameter less than 15 cm), pillars are dug to a depth of at least 1 m. When selecting a place to mount the product, adhere to the following rule: add 0.3 m to the total length of the mesh and get the required distance between the trees. For example, if the hammock is 2.7 m long, then it is desirable to have 3 m between the trees (supports).
If the distance is smaller, the mesh is suspended higher. In addition, take into account its likely stretching during operation. If the stock is suspended from posts, it is convenient to use threaded hooks for fixation. Keep in mind the following consideration: the larger the hook, the more securely the product will be secured. The hook should be screwed in towards the direction of the slings; this approach will reduce the load on the metal.
You can hang a wicker bed in a city apartment, if you have:
- hammer drill;
- 2 anchor bolts 10x60 mm;
- concrete drills with a diameter of 5 mm;
- concrete drills with a diameter of 10 mm;
- ropes for fastening (if necessary);
- pliers, hammer, pencil.
The work order is as follows:
- Selecting a location, marking. A room width of at least 3 m is desirable; if the size increases to more than 4 m, additional ropes will be required for reliable fixation.
- Making holes, first with a drill of a smaller diameter, then with a larger one.
- Removing concrete chips from the resulting excavation.
- Installing an anchor bolt. If necessary, use a hammer.
- Tighten the nut clockwise (while holding the hook with pliers). You need to make every effort.
- Hanging a rope on a hook, tying a knot.
- Hooking a hammock hook onto a knot in a rope.
- Perform fastening operations for the other party.
Macrame hammock pattern: weaving a hanging chair for children
The simplest type of hammock is a regular reclining straight rocker. Weaving it will not take much time and effort, and even a beginner can handle it.
The number of threads for a hammock cannot be calculated accurately because synthetic threads stretch quite strongly. It is better to buy a larger size cord than a smaller one.
For this design you will need: 250 meters of thick synthetic cord and two wooden cuttings (which can be painted if desired).
How to weave a lying hammock:
- We divide the cord into segments, 7-8 cm each. We fold them so that one part is 1.5-2 m, and the second 5.5 - 6.5 and attach them to one of the cuttings.
- We lift the smaller segments up, and from every two long ones we make 10 loop knots. You should have 16 groups consisting of 2 cords.
- We take the first two groups on the left and weave a square knot from 4 threads (which are included in these two groups). We tie another 7 square knots in this way to the end of the row.
- In the next row we move the two outer threads on each side to the sides. We retreat 7 cm from the previous row and weave a new row from the remaining threads.
- From the second knot from the top we retreat another 7 cm and tie a square knot on the first four threads (including the drawn ones). Thus we weave the entire row.
- We continue weaving with square knots, staggered according to the same principle, until the hammock cover reaches the desired size. In the last row, the nodes should be located in the same way as in the third point.
- Braid every two threads into 10 loop knots.
- We insert the second stalk from the arc side, and tie every two threads behind it, into two horizontal rep knots
- We divide all the cords behind each rod into 4 parts, retreat 0.7 meters from the handle and knit a square knot from them.
- We braid the rest of the cords into a braid.
Such a hammock can be hung in a children's room, or by increasing the number and length of threads, placed in the living room or in the courtyard of a private house. Despite the simplicity of its manufacture, this hanging bed can withstand quite a large load.