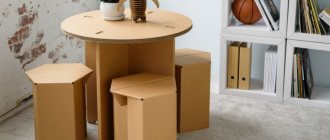
Advantages of do-it-yourself restoration
By restoring old chairs with your own hands, you can make completely new versions of the products, real works of art. In addition, it will cost much less than purchasing a new product. To update a wooden chair with a back, you don’t need a lot of materials, tools, or time.
Advantages of restoration:
- It is possible to completely restore chairs from the last century that do not harmonize with the design of the house today. The use of new materials will help adapt them to a modern interior.
- The ability to change the design and design using colored or transparent inserts, carved or forged elements.
- Even an inexperienced craftsman without special knowledge and skills can update old chairs.
- Saving. Professional restoration of antique furniture is expensive, so if you wish, you can do this work yourself at home at minimal cost.
Most often, products made from valuable wood species are subject to renewal. In rare old chairs, the carved legs and backs are restored, the upholstery fabric is changed, and the frame is also strengthened. The main thing is not to damage the coating when disassembling antique furniture, as this will significantly reduce its value.
Restoring a kitchen stool includes changing the seat upholstery, painting the legs or sewing fabric covers. Furniture can be updated in two ways:
- If the surface of the stool is not damaged, without visible defects, then it will be enough to remove the old upholstery, polish it, varnish the wood, and decorate the seat.
- If there are cracks or small chips on the surface, they are repaired using wood putty or glue. In case of major damage, furniture elements require complete replacement.
Restoring a child's high chair uses the same technology as for an adult. Only in this case should you pay special attention to the condition of the additional elements. For the safety of the child, they need to be strengthened.
You can also repair bar stools yourself. Wooden, metal products, as well as rattan models are subject to restoration.
It is possible to completely restore chairs from the last century
Possibility to change the design and design
The work can be completed without special knowledge and skills
Saving
To make wooden chairs look more interesting after repair, they can be decorated using various techniques:
- Artistic painting - colored patterns are applied to the refurbished chair using a brush.
- Decoupage - gluing cut-out pictures from paper napkins and applying glue and varnish to them.
- Self-adhesive film - can be used either colored or imitating natural wood.
- Craquelure is a technology for creating aged material. The work will require special plaster, varnish or paint.
- Regular painting.
An old, dry chair will have a fresh and updated look if you glue veneer to the surface and cover it with varnish.
Artistic painting
Decoupage
Craquelure
Painting
Adhesive tape
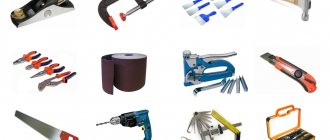
Necessary tools and consumables
To repair wooden chairs, you need to first prepare tools and materials. The list depends on what exactly the master plans to do. To completely restore an old chair, you will need:
- Acetone, alcohol, remover, degreaser - to remove old varnish.
- Furniture foam rubber. The classic reupholstery of chairs or stools involves the use of a thick variety 5-10 cm wide and a thin one 2-3 cm wide.
- Construction stapler. Strong staples will secure the upholstery fabric to the furniture frame.
- Stain, primer, varnish. Liquid formulations will give the product a certain color.
- Paint brushes. They can be with synthetic and natural bristles.
- Plywood sheet. If the restoration of a chair requires replacing the seat, use 4-layer material.
- Wood glue "Moment". This is a quick-drying material that perfectly holds elements together and does not delay the repair process.
- Clamping devices - clamps. They free both hands and fix the repaired elements in a certain position.
- Upholstery material is necessary at the final stage of restoration. The size depends on the dimensions of the chair itself.
- Hammer, mallet, electric drill, electric jigsaw, screwdriver.
- Fastening elements: screws, corners.
As for sandpaper, it is chosen depending on the stage of work. For the initial processing of a wooden chair, material with a grain size of P40-P60 is used, and to prepare the product for painting and decorating, you will need sandpaper marked P150-P180 or less. For interlayer cleaning of varnish or paint surfaces, use a variety of sandpaper P220-P360.
Selection of materials
Reupholstering a sofa with your own hands: stages of doing the work at home
To repair wooden chairs with a soft seat, in addition to a set of tools, you need the right material, in particular:
- foam rubber, padding polyester for the layer;
- suitable fabric for upholstery;
- springs for a specific type of product;
- plywood for restoring the seat;
- To make a pattern you will also need thick paper (cardboard) and PVA glue.
Foam rubber, synthetic winterizer
Upholstery fabric
Springs
Plywood
For reupholstery
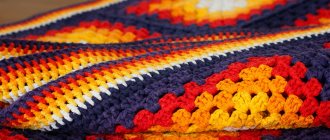
The choice of fabric for covering is quite large. Each option has its own advantages that determine the feasibility of use in certain conditions:
- Tapestry is the most common material in the manufacture of upholstered furniture with a rich texture and texture. Strong, durable, practical, does not fade in the sun, and is easy to wash. And besides, it is antistatic (dust does not accumulate on its surface). An excellent choice for chairs in the living room or bedroom.
- Chenille is another popular option, a beautiful and inexpensive jacquard fabric, the special type of weaving of which ensures its softness and volume. The most practical and durable are samples of mixed composition, containing natural threads and synthetics. A significant disadvantage of chenille - strong hygroscopicity - does not allow it to be used for the restoration of kitchen upholstered furniture. But on chairs for dressing tables, such textiles are irreplaceable - they are velvety and pleasant to the body.
- Jacquard is a fabric with convex patterns obtained by complex weaving of threads. She is not afraid of grease stains and moisture, and therefore do-it-yourself “jacquard” restoration of chairs is the best option for upholstered furniture in the kitchen.
- Flock, or artificial velvet, is not afraid of animal claws, durable, easy to clean and wash, and therefore suitable for any room, including as ottomans in the hallway.
- Velor is a spectacular material, pleasant to the touch, but very impractical due to rapid wear. Good for chairs that are rarely used.
- Genuine leather looks beautiful, is extremely easy to clean, but is very expensive.
Separately, it is worth mentioning the leatherette. Of the various substitutes, eco-leather is the most successful. This material is good for its consumer qualities, and in general is almost as good as natural leather, but will last about 8–10 years. Unlike ordinary fabrics, this upholstery has its own operating characteristics:
- Leatherette does not forgive mistakes - leaving holes from an unsuccessful stitch, some of its types stretch greatly in one direction, but not at all in the other, which should be taken into account when cutting.
- As for genuine leather, it is easiest to work with material up to 1.5 mm thick (maximum 3 mm), since, most likely, you will have to sew several parts together. In addition, the leather must be dry when working to prevent shrinkage when drying.
To make the chair softer, foam rubber 40–50 mm thick (density 30–50 kg/m3) is used as a filler. The upholstery will be easier to install and stretch without wrinkles if an additional layer of synthetic padding is placed between it and the foam rubber. The color of the fabric for upholstering a chair depends on the overall palette of the interior.
TapestryChenille
Jacquard
FlockVelour
Leather
For frame
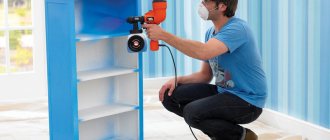
To restore an old chair, tools are selected depending on the work that needs to be done. To prepare them, use sandpaper of varying degrees of grain or a special mesh to remove old paint and varnish. After that:
- to preserve the visible texture of wood, stains, tinting compounds and varnishing are used (you will need a long-drying polyurethane varnish, since furniture varnish sets too quickly and is toxic);
- to change the color you will need the paint you like, a tray for it, a spray bottle, a primer, brushes and a paint roller, tape and varnish;
- for the aging effect - a special type of paint, solvent, varnish, rags;
stain
Polyurethane varnish
Dye
Varnish with aging effect
Materials for sealing cracks are selected depending on their size:
- for very small scratches - retouching pencils, iodine solution;
- for shallow cracks, use special wax, carpenter's or car putty, as well as flour mixed with PVA glue;
- for deep ones - shoe polish, mastic (a mixture of turpentine and heated beeswax in a ratio of 3:4).
Napkins for decoupage Wood putty
Corrector pencil
Repair and design of the frame
The work of updating old chairs and decorating them requires a careful and careful approach. If the product is durable and has not dried out anywhere, then it is not at all necessary to disassemble it into elements. It will be enough to replace the soft upholstery and paint the parts. But, as a rule, there is always some damage on old frames. These may be scratches, chips, indentations from impacts and other damage.
A small master class on restoring chairs for those who do not know how to eliminate these shortcomings:
- To remove minor scratches, sandpaper and construction mastic are used. After sanding minor damage, putty is applied. After 1.5-2 hours of drying of the paste, the surface is re-sanded with sandpaper and covered with varnish or paint.
- To fill a large nick, you will need putty, which should be applied to the nick with a spatula and allowed to dry. Then rub it with fine sandpaper and apply paint.
Use sandpaper to remove small scratches
After sanding, putty is applied
After the paste has dried, the surface is cleaned and covered with varnish or paint.
You can also restore a chair using a patch. For this you will need:
- small wooden patch;
- clamp;
- ruler, pencil;
- PVA glue;
- enamel.
Before starting work, you need to prepare a wooden block of the required size. The fibers in it should be located in the same direction as in the damaged area. Then apply glue to the base of the piece, close the notch, and secure with a clamp. After the composition has dried, rub the wooden block with sandpaper. At the next stage, you can paint over the old chairs with enamel or varnish.
The varnish is applied exclusively to a smooth surface. If there are cracks, they are sealed with a special putty. For work, use regular paint brushes, special rollers or sprayers.
If you plan to decorate chairs using the decoupage technique, you also need to remove the old coating from them. To do this, sanding is used. But to speed up the process, it is better to choose a liquid remover for varnish or paint. 10-15 minutes after application, the chemical is removed with a spatula, the surface is sanded and polished. After receiving a smooth product, you can begin decoupage. If the surface of the furniture is in good condition, then you need to remove the top layer only in the place where you plan to apply the images.
To remove epoxy adhesive from the frame, you can use a jet of steam instead of water. If there is no special device, a regular kettle can come to the rescue. A hose with a tip is attached to its spout and the wood is cleaned of glue.
Apply glue to the base of the block, close the notch, and secure with a clamp
Sand the wooden block and paint it
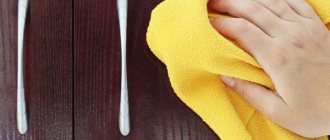
Removing stains
Stains on furniture are the most common defect. They may appear on soft surfaces or on MDF panels. Most modern furniture is made from this material, so every owner should know how to remove stains. Stains can have different origins; each stain has its own removal method:
- Fresh grease stains can be easily washed off with a cotton pad soaked in a solution of water and liquid soap. Any remaining moisture should be wiped off with a dry cloth. Do not use large amounts of water, the particle board is afraid of moisture and may swell;
- If the stain is already ingrained, remove it with alcohol or acetone. A napkin soaked in it is briefly applied to the stain after applying the soap solution. Immediately after this, wipe the damaged area with a dry cloth;
- Remove varnish and paint stains from furniture by applying a cotton pad with acetone. It should not be left on the surface for a long time to avoid major damage;
- Stains left on the surface by hot objects are removed with vodka and sunflower oil. The mixture is applied to the stain, after which it is removed and the surface is wiped with a cloth. When the traditional method does not help, you can resort to pencils for the laminated surface.
Removing stains from textile surfaces is carried out immediately after they appear, before they become ingrained and can be easily removed.
- Furniture should be vacuumed;
- Before starting work, all cleaning products must be tested on an inconspicuous part of the upholstery. Use a cloth moistened with vinegar to wipe off dirt;
- The stain must be wiped with a napkin or cotton pad soaked in soap solution. You can wait for it to absorb and start working on removing the stain. It is not allowed to use a large amount of water; it is better to wet only the surface layer;
- It is necessary to dry the upholstery without the use of special devices; to speed up the process, open the windows and create a draft.
Many homes cover furniture with blankets to prevent stains. This really helps with solid contaminants on the surface, but if we are talking about stains left by liquid substances, then only removing the existing stains can help. To make this easier, they begin to deal with pollution as soon as possible.
Vacuuming the sofa
Apply stain remover
Wipe with a dry cloth
Master class on chair decoupage
How to restore old chairs using the far from new direction of decoupage - it’s worth learning about this even before starting work. You will need special paper napkins, pieces of fabric, leather appliqués and other decor. To secure the elements, you can use PVA glue and varnish. You can decorate in this way not only the back and seat of the chair, but also the legs.
Step-by-step technology for performing the technique:
- Sand the surface of the chair with sandpaper. Use putty to repair cracks. Prime the surface of the product and, if desired, coat it with water-based paint.
- Cut out your favorite motifs from napkins. Place them on the surface and cover with PVA glue. After drying, varnish the chair.
- Place pieces of fabric or leather on the surface of the chair greased with glue. Cover the top again with glue and then varnish.
To prevent the glued elements from peeling off from the surface, you need to apply several layers of varnish.
Treat the surface of the chair
Prime the surface of the product
Cover with paint
Cut out your favorite motifs from napkins
Place on the surface and cover with PVA glue
After drying, varnish the chair
Disassembly of the structure
The connection diagram of the chair is well known; disassembling the structure yourself is not difficult. First, the back and rear legs are unscrewed. Assembling the chair occurs in the reverse order, then all the grooves will fall into place. If the chair is attached to glued tenons, you need to melt the joints with hot water - to do this, apply a hot wet cloth several times or use a steam generator.
Detected cracks are filled with a mixture of sawdust and glue or sealed and pulled together to fix them until dry. If tenon joints are damaged, new plugs are made to replace the old ones, and tongue-and-groove fastening and gluing are used to strengthen the drawbar joints. You need to drill a thin hole to the thorn and pour glue into it with a syringe, fix it until it dries. If the legs are inserted into special grooves in the bottom of the chair and the chair wobbles, then the legs are removed and the upper part is wedged out, it becomes larger and fits more tightly into the groove.
If a highchair is being updated, in addition to the above, it may be necessary to replace the hinges or the turning mechanism for transformation. Most wooden children's chairs consist of a large number of parts to ensure the safety of the child. It’s a good idea to glue them again with wood glue for strength.
When disassembling a folding chair, it is enough to remove the axial pins connecting the backrest and the seat and unscrew the seat. Chairs with a metal frame simply unscrew; for models with cast frames, only the seat and the soft part of the backrest are unscrewed for reupholstery.
The chair seat can be equipped with a spring block. The block itself does not need to be dismantled and torn from the base; if necessary, individual springs are replaced.
Working with the seat
Before repairing a chair, you must check the condition of its main part. If there is a need to replace the seat base, it is worth considering that the thickness of the plywood must be at least 18 mm. In this case, the chair will support the weight of an adult up to 120 kg.
Sequence of making a plywood base:
- prepare a drawing on graph paper, attach it to cardboard and cut out the template;
- attach it to the plywood, trace along the contour with a pencil;
- use a jigsaw to cut out the part and sand the edges with sandpaper;
- Drill holes on the base for fastening bolts;
- Insert the seat into the frame and secure it with bolts.
Attach the chair frame to the plywood, trace along the outline with a pencil
Using a jigsaw, cut out the part and sand the edges with sandpaper.
Insert the seat into the frame and attach with bolts
If you need to replace only the soft part of the seat, you should decide on the upholstery material. Firstly, it is desirable that it have increased wear resistance. Secondly, it must fit into the interior of the house.
If a complete replacement of the filler is required, the thickness of the foam rubber should be 40-60 mm.
Step-by-step instructions on how to make a soft seat if it was not originally provided:
- Draw a template for the filling and upholstery.
- Place it on the foam rubber and cut it with an increase of 7-8 cm to fit the edges of the base.
- Place the upholstery template on the fabric. Cut the material with an allowance of 8-10 cm for the hem.
- Attach the cut out parts to the base using a stapler and staples.
In order for the lower part of the seat to have an aesthetic appearance, you need to attach a lining. She will hide all the errors in repairing a chair with her own hands.
Attach a chair and trace with a pencil
Cut part
Cut the base material with allowances
Attach the cut parts to the base
Ready soft seat
If you need to cut the upholstery according to old patterns, you must first carefully remove it. To do this, remove the staples from the seat and separate the filling along with the upholstery. Before cutting, it is advisable to wash the material in order to find out the percentage of its shrinkage and not make mistakes in the calculations. If you don’t have an old pattern, you need to take horizontal and vertical measurements of the seat. On upholstery fabric, it is advisable to add 8-10 cm on each edge. To make it more convenient to fix the foam rubber, it needs to be glued to the base with PVA glue.
Proper execution of cladding:
- Lay the material face down on a flat surface.
- Place the base with the foam facing down on top.
- Fold the material and nail it with staples or nails. The distance between the fasteners is 15-20 mm.
The upholstery of the backrest in a chair occurs in a similar way, but with some nuances. Hard foam rubber is not placed on the structure; soft foam is used for it, which is cut along the contour and does not bend around the edges. The fabric on the back can be secured with staples.
Restoring chairs with your own hands is not as difficult as it might seem at first glance. On top of that, it is also economical. It is enough to select the appropriate materials, use your imagination, and after a few hours of work you will get an amazing result that exceeds all expectations.
Remove the staples and separate the filling along with the upholstery
Glue the foam to the base
Bend the material and nail it with staples
Secure the seat