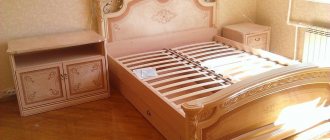
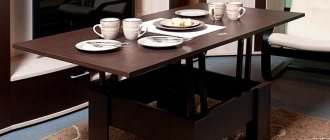
Paint can bring new life to an interior, and if you're tired of your desk, you don't have to get rid of it and start from scratch; a few coats of paint can easily transform it into a beautiful new piece of furniture. Or if you found an old table at a flea market or garage sale, you can create the table of your dreams simply by painting it yourself.
Transforming an old table with cracks and faded paint is much easier than you think. All you need is one free day and attention to detail. If you do everything according to the instructions and carefully, you will have a piece of furniture that will decorate your kitchen, dining room or other room.
Painting a table with your own hands - where to start?
If you're not sure what color to paint your table, we'll tell you. White tables with bright chairs look good in kitchens, while brighter colors can really make a delightful accent. Think about what kind of atmosphere you want to create and then choose a color that will help you achieve that look. Some shades include yellow, red, turquoise and navy blue.
Benefits of painting
Under the influence of unfavorable conditions, paint peels and crumbles. Old furniture is a carrier of a special atmosphere. Many homes have chairs, tables, armchairs or sofas waiting to be restored. When renovating woodwork, if you properly paint the table white, it will last for many more years. Many products of cabinetmakers of the past are recognized as masterpieces, but over time they need restoration. The legs of the table become loose, the wood wears away, it swells from moisture, rots, turning into dust. If it was not damaged by fungus, it is not too late to fix everything.
Note! Modern compositions will help restore an antique product, giving it an “antique” look. New enamels, stains and impregnations will help restore and decorate any handmade product.
It is impossible to explain in a nutshell how and what is the best way to paint a wooden table, but any modernization provides undeniable advantages:
- updating the appearance of the product or improving aesthetic properties;
- protection against soaking, rotting and fungal damage;
- updating the shade and enhancing the texture of wood;
- the ability to combine several products with a single color or decorative technique;
- the table will fit organically into a modern interior;
- When painting a table, parts are restored or minor repairs are made to individual components.
With a creative approach, you can transform the entire kitchen furniture - the room will look completely different. You can not only repaint an old table white, but also effectively decorate all work surfaces. After restoration, the countertops can be reliably “preserved” with flexible glass or a multi-layer water-repellent composition. All stages of preparation are easy to do yourself.
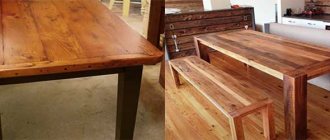
Comparison of the table before and after restoration
Interesting to know!
Dipped furniture is a popular home design trend that works well with kitchen tables and chairs. To try it out, paint the bottom half of your table legs. Or try the opposite: paint most of the table, but let the wood show through on the bottom half of the legs. A dipped look is a great way to introduce strong color. If you want to get really creative, consider using chalk paint on the top of your table. Children, for example, will draw while you prepare their breakfast, and adults will also have the pleasure of writing messages or reminders.
Changing the color
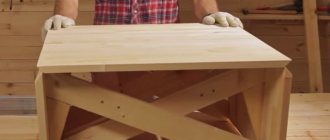
The easiest way to change the style and appearance of old furniture is to paint it. The work will go quickly and accurately if you prepare the necessary tools in advance: sandpaper, primer, brushes, roller, acrylic paints.
Algorithm of actions:
- furniture is disassembled into its component parts, fittings are removed;
- all surfaces are thoroughly sanded and then treated with a primer;
- Using a wide brush or roller, the prepared furniture elements are painted with acrylic paints.
Secret: you can speed up the painting process if you use spray paint.
- After the painted surface has completely dried, it is coated with colorless varnish (two or three layers).
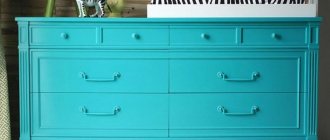
A modern look for old chipboard furniture can be created using the idea of contrasting paint in several colors. For example, the body of the chest of drawers is painted in a dark shade, and the inner surface of the sections is painted in light shades. For those who master artistic painting techniques, the idea of painting with a gradient transition will help create a new style for old furniture.
How to paint a table correctly?
To paint your table, you want to first prepare the surface by sanding it. After you finish sanding, you need to coat the table with primer. If you're repainting a really old table, try to find a primer that blocks wood stains. For added protection, add two coats of primer to the top of the table. Let it dry for a day and then use a medium sanding wedge to smooth out any rough areas.
When it's time to paint, be sure to choose water-based enamel paint Kitchen counters take a lot of loads, and you'll need paint that can handle plates, cups, and all sorts of other items.
Paint several layers and make sure each one is completely dry. Once you've finished painting, apply a coat of water-based polyurethane or furniture wax to protect your table, then enjoy your newly refinished piece of furniture.
Painting with oil paint will take longer to dry. Open windows if you are painting indoors. You won't be able to wash the brush in the sink like you can with latex paint, so you'll need either solvent or a disposable brush to paint the table. The only downside to oil paint is that you usually can't mix colors, so you have to choose from what's available.
Painting a kitchen or dining table is not much more difficult than painting any other piece of furniture. But if you don't know what you're doing, it can turn into a big problem. Before you start painting, remember that the main goal of repainting is to make the surface durable. Kitchen tables take more wear and tear than your dresser or bookshelf. And who wants to spend hours painting only to see the paint peeling off a week later?
- If you don't take the time to sand everything down, including the beautiful table legs, you'll end up with peeling paint, an uneven surface, and possibly stains underneath your new paint.
- Before applying paint, you must apply at least one coat of shellac-based primer. Shellac is used when you coat painted wood with paint. This helps maintain color and prevents future yellowing. Make sure you use a water-based primer for latex and an oil-based primer for oil-based paint.
- A thick layer of paint tends to chip more often than several thin layers. Take your time. We recommend using a paint sprayer rather than a brush due to its ability to easily spread thin layers.
Tools and materials
Before painting, the wooden surface should be cleaned of old coatings and defects should be removed. For this you will need:
- putty;
- putty knife;
- grinding machine or wooden block;
- sandpaper;
- brushes and roller;
- gloves;
- paint tray;
- protective glasses.
Painting the table is done if it is made of cheap wood, such as pine. It is not recommended to paint oak furniture - it will lose its decorative appeal and its value will decrease.
For painting work you will need:
- roller, brushes;
- dye;
- paint tray;
- masking tape;
- gloves.
Is primer required?
Prime the table using roll/brush primer. Roll-on/brush-on formulas are best for high-traffic surfaces as they tend to be thicker and more durable than spray-on formulas. Apply 1 coat of primer using a mini foam roller or medium brush. Allow this coat to dry before applying a second coat.
Primer helps the paint adhere to the wood and hides any stains or discoloration. Between layers, wrap the roller or brush in a plastic bag and place it in the refrigerator. This will keep the paint wet and save cleaning time between coats.
Be sure to fill any cracks or holes in the table with good wood filler. Be sure to follow the instructions and let the filler dry to the point where you can sand it well.
Using a stencil
A small detail - a drawing through a stencil - can radically change the appearance of outdated furniture. As a stencil you can use prints and patterns, drawings printed on a printer, lace.
- the selected area on which the design is planned to be applied is thoroughly cleaned and degreased;
- using a sponge dipped in acrylic paints, apply a dotted pattern onto the furniture with gentle movements;
- the resulting result can be corrected using a thin brush;
- After the paint has completely dried, the decorated surface is coated with a colorless protective varnish.
Which paint to choose?
- Enamel based paints are known for being hard, durable, corrosion resistant and easy to clean.
- Latex-based paints are also easy to clean and look nice, but they don't hide damage and aren't durable.
- The oil paints we discussed above have a strong, unpleasant odor and are absorbed into the wood as they cure, making them extremely durable and easy to clean.
Good paint is the key
Let's remember that properly preparing the surface for painting is only half the battle. A lot depends on the paint. Your requirements will be satisfied, first of all, by enamel, which creates durable coatings with high mechanical resistance. It is easy to get scratches and damage when using the table. For example, Dulux Rapidry . This is a universal, quick-drying acrylic enamel with a mild odor. A table painted with it will also be resistant to high temperatures and will not turn yellow or fade.
Black, green or red? Don't throw away your old wooden table - just paint it, preferably an attractive, surprising color.
To varnish or not
The varnish coating fixes the color, protects the surface of the furniture, and the product looks antique and well-groomed. Be sure to protect with varnish the furniture that is often opened and closed.
For varnishing, use specialized furniture (not parquet) matte or transparent varnishes. The second layer is applied 24 hours after the first coating.
Varnish choice:
Alcohol varnish is used when restoring antique objects.
New, popular acrylic varnish, odorless, suitable for indoor and outdoor use. Economical product - water is used for dilution.
More: Original interior design with stumps and logs
Durable alkyd varnish film withstands abrasion. A solvent is used for dilution.
Little oil varnish is used; it is often used to cover the floor. For dilution you need drying oil that dries for at least a day.
Polyurethane (ship) varnish has increased wear resistance due to the appearance of a protective, quick-drying film.
Nitrovarnishes are inexpensive and form a durable protective film. No special primer is required before coating. When applied, it is diluted with a solvent.