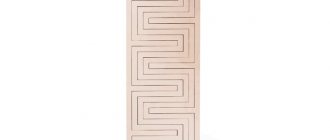
There are many cases when having a shelf is, if not a necessity, then a strong need. Shelves are good because they help to use the vertical space of the room, and thanks to their mounting on the wall, furniture or a piece of equipment can be placed under them.
Corner shelves are a separate category. Which can be used in different situations. Some people simply don’t want to buy such things, and therefore make corner shelves with their own hands.
Today we will talk about what they are, what you need to know to make such an item yourself and much more. So, let's begin.
Types of corner shelves
We all understand that the space in the corner of a room can be used in different ways. One of the most interesting ways to use it is on shelves.
You can see this by looking at the photo of the corner shelves made by yourself. Shelves can be either separate or part of an entire structure.
In addition, corner shelves can be wall-mounted or wall-mounted.
Representatives of the latter are corner-shaped floor racks. The remaining divisions are based on size, shape, design and materials.
Tools and materials
At different stages of the work you will need materials and tools for drywall. The raw materials must be carefully prepared so that the process can proceed without interruption.
| Work stage | Tools and materials |
| Drawing up a drawing diagram | Paper. Pencil or pen. Ruler or tape measure. |
| Surface marking | Plumb or level. Laser pointer for measuring differences. Corner for marking profile joints. Pencil or marker. |
| Assembly and installation of the frame | Profiles (guides) for complex structures that carry a large load, rack-type profiles will also be required. Self-tapping screws for drywall of the selected diameter. Screws and screwdriver. You need to buy a knife or metal scissors. |
| GKL sheathing | Plasterboard sheets of selected diameter. Drywall knife. Screwdriver and screws (self-tapping screws) for fastening profiles. |
| Sealing joints between sheets | Putty (dry, which needs to be dissolved or a ready-made mixture). Special reinforcing tape for sealing joints. Putty knife. Sandpaper for smoothing out uneven surfaces. |
| Finishing | Paint. Wallpaper for gypsum boards. Primer mixture. Putty knife. Glue. |
Having acquired all the above materials and tools, the process of creating corner shelves will be easy and quick.
Shelves and living room
Before you start figuring out how to make corner shelves with your own hands, you first need to decide in which room they will be located.
The size of future shelves, the materials we will use, and the design, to say the least, depend on this.
If you need a corner shelf for the living room or bedroom, then it is best to use wood, chipboard, plywood and similar materials.
The fasteners should be metal, which is quite logical - we won’t make them ourselves, but will go and buy them in a store.
Next, think about what will be stored on the shelf. For example, a do-it-yourself corner shelf for icons should match the size of the products that will be placed on it.
In addition, it must be in a clearly visible place.
Step-by-step instruction
- An ordinary board left over from the renovation will be suitable as the main material. The width should be selected individually, based on the items that will be placed on it and the place where it will be installed.
- In addition, for fastening you will need glue with a dispenser and screws (3.0x25 mm). Semicircular slats can be used as decoration.
- We mark the board at a 45° angle to the required length and use a hacksaw to cut it at an angle of 45°. As a result, we get 4 shelves.
- From the remains of the board you need to cut out racks of the same size (for example, 5x20 cm) in the amount of 6 pieces.
- All elements should be sanded until perfectly smooth.
- Let's start assembling the structure. Each shelf, except the top one, must be secured with two racks. The markings are applied in the middle, then the elements are fastened with screws. To strengthen the fasteners, use PVA glue.
- For ease of fastening, the middle shelf posts are placed along the edges.
- The remaining parts of the corner shelf are assembled in the same way.
- If you wish and have free time, you can decorate the shelves using semicircular slats. So, with their help you can make low handrails so that small or round accessories do not fall out. At the final stage, the shelf is painted.
Shelves in the bathroom
Some people are already starting to think about how to make their own corner shelf out of wood for the bathroom.
In this case, you must consider the specific location in which it will be placed. For example, most often corner shelves in the bathroom are placed directly next to the bathtub.
In such a situation, if you use the shower, the shelves will be regularly exposed to moisture. Therefore, the shelves must be covered with a thick layer of water-repellent agent - varnish, paint, but that’s not all.
- Do-it-yourself shoe racks: a review of the best ideas and a step-by-step description of how to build a shoe rack (85 photos and videos)
- Do-it-yourself bag chair - a detailed master class on how to sew a properly comfortable chair (75 photos)
- DIY chest - how to make a beautiful and stylish craft from a box, paper and wood (80 photos)
At the same time, the design will change slightly. DIY corner shelf plans for the bathroom should include small holes. Why?
It’s best when the shelves in the bathroom have, albeit small, sides. In this case, nothing will simply move or roll out.
At the same time, there is a high probability of liquid accumulation inside the shelf. This usually leads to the appearance of fungus, which in itself is harmful to health. An improvised drainage system will solve this problem.
Hanging shelf with straps
If you need a decorative shelf for small items, the following option is perfect - a board suspended on straps.
To make a shelf you will need:
- 2 edged boards 300x750 mm, 30 mm thick;
- 4 leather belts, 75 cm long;
- 4 long screws with plastic dowels;
- 4 short screws;
- building level;
- ruler;
- sharp knife;
- drill.
Step 1: Preparing the belts
The cuts of the belts must be perfectly even, so if necessary they are trimmed with a knife. Fold each belt in half, press the ends to the table, step back 2 cm from the edge and drill a neat through hole with a drill. The same is done with the remaining three.
Step 2. Attaching the straps to the wall
Using a level, two points are determined on the wall at a distance of 60 cm. Holes are drilled and plastic dowels are inserted. The belt folded in half is applied to one of the holes and secured with a long screw - you get a large loop on the wall. Another such loop is attached nearby.
Step 3. Installing the shelf
A sanded board is inserted into the loops and aligned horizontally. To prevent the shelf from moving, the parts of the belts adjacent to the wall near the board itself are screwed with short self-tapping screws. Now another shelf is hung under this shelf, exactly repeating the steps described above. The result is a light and neat two-tier shelf. If desired, you can add another 1-2 tiers.
To make the shelves described above, you can use not only wood, but also plywood, as well as laminated chipboard sheets. The last option is used most often, since laminated chipboard is lightweight, high strength, practicality and durability. When assembling shelves from this material, all sections must be covered with a melamine edge to match the color of the sheet.
Corner shelves and moisture
If we make a corner shelf ourselves, approximately the same rules will apply in the bathhouse as in the case of a bathroom - high humidity, and so does the temperature.
Because of this, glass or plastic shelves are often purchased for the bathroom, less often ceramic ones.
DIY bread box - step-by-step master class on making and tips on how to decorate a wooden model (105 photos + video)- DIY high chair - interesting drawings and projects on how to make a comfortable and functional high chair (120 photo ideas)
- DIY built-in wardrobe: 115 photos of original ideas and video tips for building built-in wardrobe models
When making shelves for a bath, you must take into account your needs and the things that will stand on the shelf. If you are going to store many items in one place, then it is better to make a corner rack - the same shelves, but much more storage space.
The downside of this solution is that the rack will completely take up the corner of the room. Hanging shelves can be hung almost anywhere, above any furniture.
Characteristics of materials used
Furniture departments offer a wide range of shelves, which are made from a variety of materials. When choosing a specific name, it is worth starting from the three most important factors.
- Operating conditions for the presented design.
- Stylistics of the room.
- Future load on the shelf (the design may have a decorative or functional purpose).
Be sure to analyze these factors, and then make your final decision.
It is easy to place indoor plants and decorative items on a multi-level structure
Table 2. The most common materials from which corner shelves are made
| Material | Description |
| Natural wood | Instances made of wood always look expensive. The use of rare breeds is not widespread due to the high cost of the product produced. Such a shelf should completely match the style of the room. The designs look elegant:
|
| MDF and chipboard | The presented material has a number of advantages, which include:
|
| Plywood | An affordable sheet material consisting of layers of wood veneer that are glued together. Advantages of plywood:
|
| Plasterboard and gypsum fiber sheets | Many people prefer to make their own shelves from plasterboard. This allows you to create a design that matches the interior of your home. It should be remembered that the material used does not withstand high loads. Therefore, heavy objects cannot be placed on it. If the design is being developed for the kitchen, it is necessary to use a moisture-resistant gypsum fiber sheet. |
| Plastic | The presented material is in most cases used for bathroom shelves. It has undeniable advantages, including:
|
| Glass | Glass options are highly valued in interiors where there are no clutter. The material creates an airy effect. The proposed designs fit harmoniously into the interior:
|
| Metal | Few people use metal shelves for home design. Its main advantage is strength, but heavy weights are rarely stored on such structures in the house. They are more suitable for:
|
Kitchen shelves
Shelves will not be superfluous in the kitchen either. If we are talking about apartments, then, most often, one corner is occupied by a wall of furniture, both hanging cabinets and ordinary ones.
Depending on what you have at the intersection of the sides of the furniture set, you can insert corner shelves.
A do-it-yourself corner shelf for the kitchen is done in the same way as for any other place, only here you also need to prepare it for exposure to moisture - water may get on it, or it will need to be washed off from something.
Main varieties
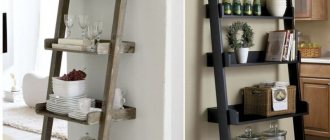
If you decide to functionally use the corner area by choosing a corner shelf for it, you should carefully study the types of structures. There are a large number of them. The simplest ones consist of 2 supporting parts and a board screwed to them on top. Even a novice craftsman can create such furniture with a set of simple tools at hand.
Table 1. Types of corner shelves
| Variety | Description |
Whatnot | It is distinguished by the presence of three supports on which horizontal parts are firmly fixed. Externally, the bookcase looks light and elegant. Can be complemented with openwork carving. |
Niche | It is advisable to install it in internal corners. When designed correctly, it becomes a harmonious recess in the wall. Most often, plasterboard sheets are used to create niches. The material attracts:
|
Open shelf | Many people choose this type of design because it is easy to install on the outer and inner corner of the wall. The shelf is distinguished by the absence of vertical posts; each tier is separately attached to the wall. This creates the effect of lightness and airiness. |
Decorative | It differs from other species by the presence of its own walls on the sides. They not only represent an attractive decor, but are also load-bearing elements. |
Corner shelf and flowers
Many people love to do home flowers. The main problem with this activity is that the pots take up quite a lot of space, but this can be solved with the help of shelves or racks.
DIY corner cabinet: 80 photo ideas and video description of how and what to make a cabinet from. Main manufacturing stages and best design projectsDo-it-yourself wardrobe for the balcony - 80 photos of how to make a balcony wardrobe from various materials with your own hands
Do-it-yourself wardrobe - a detailed description of how to make and assemble a wardrobe with your own hands at home (110 photos + video)
A do-it-yourself corner shelf for flowers will be an excellent storage place, both a hanging version and a rack - it all depends on the number of plants.
Later, you can decorate them a little with decor, but before that, if the shelves are made of wood, all parts need to be coated with a primer, antiseptic and then varnished or painted.
All so that the shelves on which you spill some water do not become a breeding ground for bacteria that can harm the flowers.
Selection of materials for work
The main task of the master in independent work is to select consumables. To date, the most optimal options are recognized:
- Wood.
- Chipboard panels.
- Sheets of plywood.
- Combination of profiled iron and tempered glass.
The combination of profiled iron and wooden panels is also very popular. Each of the presented materials differs in its properties, assembly features and rules of practical care. Wood has the safest and most durable structure.
Species such as ash, oak, and alder do not contain caustic resins and are quite resistant to moisture. If properly impregnated during shelf construction, the surface of the wood is not susceptible to rotting and mold development.
- Chipboard panels and plywood are slightly inferior in strength to solid wood.
- In the production of panels, wood chips and polymer resins are used, which are safe for the health of others, including children.
- These materials also do not cause allergic reactions, are perfect for subsequent decoration, and serve for a long time in everyday life.
The use of combined materials, such as wood, metal and glass, not only requires significant financial costs. In addition to the high cost, such an approach to work requires a detailed approach from the master and experience in handling many tools (grinder, welding, plane for grinding surfaces, glass cutters).
However, with the right approach, the interior of the apartment will be decorated with an incredibly stylish shelf with decorative coating on glass or a structure with a chrome frame and wooden plates.
DIY photo of corner shelves
Read here - Do-it-yourself chair bed: step-by-step description of manufacturing. 140 photos and video master class on building a stylish and comfortable chair
Did you like the article?
0
Dimensions and filling
As for sizes, these are very individual aspects in each case. And it doesn’t matter whether we are talking about buying a finished product or creating it with your own hands.
The height of the cabinet can be largely affected by the height of the ceiling. It can occupy the entire space from the floor to the very top or be just below the top border of the room.
Corner cabinet drawing
As for the minimum dimensions of the cabinet walls, one side should be about 120 cm . If you make the sides smaller, the volume will be insufficient. But this is true when we talk about triangular cabinets. As for the trapezoidal options, here you can vary the size to a greater extent, if necessary, making a partition inside the cabinet and adding shelves.
L-shaped cabinets are the best option if there is little but enough free space along the walls. It is also better to settle on this option, where one of the sides of the cabinet will be equal to 120 cm, the second may be smaller.
L-shaped wardrobe
Five-wall cabinets are suitable if there is at least 80 cm of free space along both walls in the corner. So such a cabinet, like an L-shaped one, is also suitable even for a cramped room - it will only take up a corner. The depth of the cabinets can be approximately 45-60 cm, the minimum option is 40 cm.
As for the contents, any closet can have shelves, a rod, and even drawers. Usually, even the smallest closet has at least two compartments, one of which can contain shelves, and the other a bar for hangers.
On a note! If there are no drawers in the closet, but there are shelves, then instead of the former, you can completely use baskets or boxes. And if there are no shelves, you can hang a scuba in the closet. Such storage systems are convenient for small things and household items.
Storage module with 9 compartments
Another feature of a corner cabinet is that it has places that are difficult to reach and therefore difficult to use. This refers to the spaces in the farthest corner of the structure. And if the closet is made with your own hands, then it is important to think about how to most effectively use the inconvenient space. As a last resort, if the problem cannot be solved, then rarely used clothes or winter/summer items can be placed in the far corner for storage for a certain season.
Advice! The best way to use corner space is to position rods and hang things. It’s just that the clothes that are needed less often are placed in the far corner. It is better to place shelves on the sides in adjacent compartments.
Drawing of a wardrobe with hangers for clothes
It’s a good idea to use the corner closet space completely for clothes on hangers.
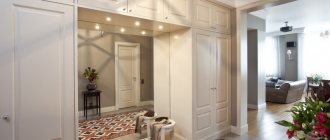
This option is quite appropriate in a spacious hallway if the shelves are placed in a separate cabinet. A shoe rack, an open hanger for seasonal clothes, a chest of drawers for accessories and other small items will help expand the functionality of a furniture set for the hallway. Still, it’s more convenient to store all your outerwear in a separate place where there is simply nothing else (well, maybe a couple of shelves for shoes, in a section designed for long clothes).
Drawing of a corner wardrobe with rods for short clothes
For a boy’s teenage room or a “men’s” bedroom, there is a reason to design a corner wardrobe with shelves and two-level rods for short clothes.
If there are not so many clothes on hangers (shirts, jackets, jackets, trousers), then you can remove the top bar, replacing it with three shelves. By analogy with the previous option.