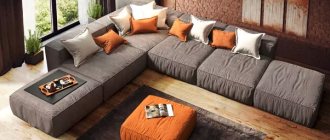
Carriage screed on furniture: technical features
The main feature of the technique is rivets, buttons or rhinestones, with the help of which the upholstery material is attached to the backing. Filler is added between layers to add volume.
Another highlight of the technique is the location of the fixation points at the same distance from each other. The result is a beautiful geometric pattern.
Furniture upholstered with carriage screed
Important! This technique is used on different materials. The decor looks especially impressive on leather, velor, and suede. The color of the material does not matter - the upholstery can decorate light, bright and dark surfaces.
Materials and accessories
When making a bed using the carriage screed technique, the choice of upholstery material, backing and fittings is crucial. The lifespan of the finished product will depend on their quality, so you shouldn’t skimp on them. For upholstery, high-quality, durable fabric with high density is suitable. The technique involves strong tension, so the thin material will quickly fail. The fabric should be plain. If you choose a small pattern, its lines will be distorted by the screed, and the appearance of the product will be ruined.
Making your own wooden bed, decorating tips
What materials are suitable for upholstery:
- Genuine Leather. Durable, wear-resistant material, the disadvantages include high cost.
- Chenille. Durable, wear-resistant material.
- Faux leather. It holds wrinkles well, is wear-resistant, but is inferior in durability to natural fabric.
- Flock. Nice soft pile fabric with a large selection of colors.
- Velours. Velvet material, with its help deep folds are obtained well.
- Jacquard. Luxurious fabric with a large pattern. Products with it look expensive.
The beauty of the design depends entirely on the soft lining. Synthetic padding polyester and foam rubber with a thickness of five to eight centimeters are most often used as a substrate. The depth of the screed will depend on its density, which will affect the appearance of the finished product. You will also need cords or threads to tighten the buttons. They must be durable, the thickness can be selected individually, depending on the screed technique.
The capitonné is decorated with decorative buttons or furniture nails. They can be complemented with bright rhinestones or covered with matching upholstery fabric. The choice depends on the design of the room where the bed will be placed.
It is important to pay attention to the stem of the button; it must be made of metal. The plastic one will not withstand heavy loads and will quickly break off.
Genuine Leather
Chenille
Faux leather
Flock
Velours
Jacquard
The history of the appearance of carriage screed in the interior
An alternative name for the technique is capitone upholstery. The decorative technique received its name due to its similarity with the design of royal carriages. The creators were first inspired by the idea of a similar design of interior items back in the 18th century.
However, the technique reached its peak during the reign of Emperor Napoleon III. His chambers were furnished with quilted furniture that delighted elegance and luxury.
People liked the decor so much that they began filling their homes with items decorated with the quilt. Gradually, the trend spread beyond France and became popular throughout the world.
Carriage screed decor on furniture upholstery
Types of carriage screed in furniture upholstery
Like all design techniques, capitone has different versions. Types of screeds:
- square - a pattern of regular quadrangles;
- diamond-shaped - decoration with elongated quadrangular elements;
- complex - bold experiments with the geometry of patterns.
Button fasteners add special chic to the upholstery. They can be shiny, mirrored, glass, or covered with fabric. Sometimes designers use large rhinestones. Such decorations look great on dark material.
This is interesting! Polyurethane foam is most often used as a filler between the upholstery and the backs of furniture. This elastic material easily takes the shape of the body and does not deform over time. Another filling option is high-strength foam rubber.
Diamond-shaped carriage screed on furniture upholstery
Square carriage tie on furniture upholstery
What interior styles will the carriage screed fit into?
Carriage screed for upholstered furniture is a desirable attribute of classical styles: Rococo, Baroque, Renaissance. The technique goes well with the correct shapes of interior items and luxurious decoration of the rooms.
An interior in a modern style will also benefit from the presence of furniture with decorative upholstery. Quilted decoration will look interesting within such trends as neoclassicism, art deco eclecticism, and Provence.
Sometimes designers go for bold experiments and integrate beds, sofas and carriage chairs into minimalist interiors. Such items look especially original in loft design. If you correctly combine elements, you can create a unique environment and slightly dilute the usual trends of the direction.
Features and types of decor
The carriage screed first appeared in the mid-18th century. It has still not lost its relevance and is rightfully considered one of the most luxurious types of interior decoration. Furniture covered with expensive fabric, with voluminous squares or diamonds, decorated with rhinestones or buttons, will not leave anyone indifferent and will decorate any room in the house.
France during the time of Napoleon III was distinguished by a special love for splendor and grace. It is not surprising that this type of decoration appeared there. The screed got its name because it was first used for interior upholstery, as well as for decorating carriages. Soon the technology migrated to the interiors of nobles and began to quickly spread throughout Europe.
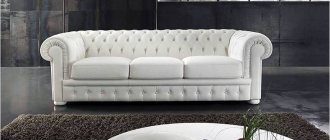
In the 19th century, the Chesterfield sofa gained popularity. He still remains one of the most famous representatives of furniture made using this technique. It is difficult to find a more elegant and sophisticated piece of furniture that so well combines beauty with practicality.
Today, the technique of decorating capitone, as carriage technology is also called, has received much greater use. It can be seen on furniture, wall panels, as well as interior and decor items. It is recognizable by its soft fabric upholstery with buttons or furniture studs. The pattern of the screed can be square or diamond-shaped, less often a more complex pattern is used.
Causes of bed squeaking, how to fix it and what to do for prevention
Furniture pieces with a carriage screed design
Upholstery using the capito technique can decorate any upholstered furniture. However, most often in the interior there are sofas, poufs, beds, armchairs and chairs. Let's consider the subtleties of their design.
Sofas, armchairs
Options for sofas with carriage screed: straight, corner, island, semicircular, modular. The products will decorate the living room, dining room, bedroom, nursery and office. All types of equipment are suitable for decoration.
Chairs with such upholstery can be either framed or frameless. A square pattern is suitable for compact furniture, and a diamond pattern is suitable for models with wide seats and high backs.
There are several upholstery options for sofas and armchairs. You can choose models that are fully decorated with patterns or choose ones with designed backs and armrests.
Advice! Chair models made in the form of a high throne look luxurious. They will become an exquisite highlight of the office, dining room or kitchen.
Armchairs with carriage screed in the interior
Sofa with carriage screed in the interior
We invite you to look at the original sofas and armchairs in implemented design projects:
- Petrovo is distant. Sofa
- Uralsk Sofa and armchairs with decorative upholstery
- Peace Avenue. Designer sofa
- Millennium Park. Quilted sofa
Beds
Beds with a high headboard are often decorated using the capito technique. The volumetric soft back acts as a catchy decorative element that immediately attracts attention. The element creates a sophisticated contrast with the monochromatic wall design.
Bed with carriage screed in the interior
Implemented projects of bedrooms with beds decorated with an unusual screed:
- Discord. Guest bedroom
- Uralsk Bed with carriage headboard
- Uralsk Bedroom No. 3
Poufs
Poufs with a carriage tie will fit perfectly into the living room, bedroom, and children's room. Round models, fully decorated with figured upholstery, look impressive in modern interiors. No less interesting are specimens of a streamlined square shape.
In a classic interior, rectangular pieces with curly low legs look organic. The combination of wooden supports and soft decorative cladding is a bold, non-trivial solution.
Poufs with carriage screed in the interior
Our designers' ideas:
- Nightingale Grove. Pouf with carriage tie
- Apple orchard. Bedroom
- Tashkent apartment. Bedroom
- Yalta sea descent. Master bedroom
Do-it-yourself carriage screed: step-by-step instructions
Classic of France. This is how you can briefly describe the carriage screed. Today, this method is used to decorate sofas, chairs, armchairs, headboards and bedside tables, and to cover walls when styling cafes, lounges and other premises. This method allows you to visually increase the height of the ceiling, thereby achieving a beautiful optical effect. For these purposes, plain furniture fabric, leather and eco-leather are traditionally used.
In this article we will talk about how to make a carriage screed with your own hands. You will also learn about the advantages and disadvantages of this technology. Step-by-step instructions with photographs for making capitonne will be provided, as well as separate instructions for making buttons for it. In addition, we will take a moment to look into history and find out how this upholstery technique actually appeared.
Let's go back in time
Chesterfield sofa - an eternal classic
The technology of carriage upholstery dates back to the mid-nineteenth century. Royal carriages were upholstered with it, so capitone immediately began to be associated with wealth, luxury and chic.
In those days, finishing of upholstered furniture, and sometimes even walls, was found in almost every rich home. Later, this technology became a thing of the past, but today it is coming back into fashion and becoming increasingly popular.
In a modern interior
Carriage screed in a modern interior
Today, as in the past, this upholstery is found in the luxurious homes of rich people. Although, if you put in a little effort, time and money, then every craftsman can make a carriage tie.
There are three types of this screed:
- classic diamond-shaped;
- square;
- modern complex screed with varying geometry from floor to ceiling.
The chic and nobility of the screed is achieved, of course, through buttons. They can be very different, but we'll talk about that a little later.
Button closure forms a carriage tie
A distinctive feature of capitonné is the characteristic folds that run between the buttons; with conventional tightening, these are absent. A rhombus can have different depths and sizes. These indicators depend on the thickness of the foam rubber.
Traditional capitonné or carriage tie
It is worth noting that tightening with buttons is much easier. You need to know the technology of creating beautiful folds. We will talk about this a little later.
Advantages
Advantages of carriage screed
As mentioned above, the carriage screed looks expensive and elegant. But is it practical? What are its advantages? I would like to note that capiton allows for individual selection of fabric or leather.
In addition, this way you can choose the same design for the bed and poufs or for the sofa and armchairs, etc. Another significant plus is the ability to choose colors in accordance with the interior palette.
The decorative surface is easy to care for. If you decide to make a wall with carriage upholstery, then it will act as additional sound insulation.
Choice of fabric and buttons
Variety of fabrics and buttons
Of course, silk and taffeta would look good, but these fabrics are very thin and will not withstand the pressure of buttons or nails. The appearance of a headboard, pouf or sofa made of such fabrics will quickly lose its attractiveness.
The thickness of the elastic lining is very important, since the beauty of the geometry of the resulting pattern depends on it.
When choosing carnations, you should take into account the interior design of the room. Furniture buttons look better on a carriage tie made in a large room. Furniture nails look great with decorations and decorative coatings. They will give the finished product even more sophistication and luxury.
The durability of an ottoman or bed, or sofa, or wall depends on the quality of the leather, fabric or eco-leather. And here the conclusion suggests itself: if you want to get a durable product as a final result, then you shouldn’t skimp on upholstery material.
You can choose one of the following fabrics:
- chenille is a wear-resistant natural material;
- jacquard - has a large embossed pattern, holds folds well and looks luxurious;
- genuine leather – wear-resistant and durable;
- flock is a fabric with a pile, there is a rich palette of colors;
- velor is also called velvet fabric; thanks to its plasticity, deep folds can be made;
- eco-leather is wear-resistant, fits well into folds and holds its shape well.
Making your own buttons
You can make buttons yourself
If you cannot choose buttons that match the tone of the main fabric or leather, then you can make them yourself. To do this, you will need blanks and leather/fabric for upholstery with a reserve.
Do not buy a button with a plastic loop: it will not withstand the loads and, if not in the process of making capitone, will definitely burst during use. Buy a product only with a metal loop.
To save money, it is better to buy the most ordinary smooth metal buttons, since blanks intended for plating are expensive.
| Making buttons | |
| Cutting a strip of leather for buttons | The first thing you need to do is cut a small strip of fabric/leather. |
| Rectangular button blanks | Then a blank for a button is made from this strip, that is, a rectangle is cut out. |
| Rounding rectangular blanks | Then the corners of the resulting rectangle are rounded. The circle should be 2 times larger in diameter than the button. |
| Preparing leather for buttons | This is what the leather/fabric for the button should look like. The advantage of leather is that its edges do not fray, which cannot be said about fabric. |
| We make small stitches in a circle | Take a thick, dense thread so that it does not come off during work, and thread it into the needle. Then the thread is folded in half and a knot is made at the end. You should step back a little from the edge and make small stitches in a circle. |
| Button cap | You should get a kind of cap into which a button is inserted. |
| Securing leather to button | Then the thread is pulled together. You need to fasten the thread, and the covered metal button is ready. |
| Homemade and factory button | It looks like a smooth edge and the homemade button is almost identical in appearance to the factory one. |
| View of a button from the inside | From the inside, of course, the appearance of the button is not so attractive, since the accordion remains. |
Materials and tools
What is needed to make capitone
To begin with, you should purchase all the necessary materials and prepare the tools. Materials for production:
- The plywood will act as a base, it all depends on what it will be - the sides or head of the bed, the wall.
- Foam rubber corresponding to the shape and size of plywood and having a thickness of 5 cm.
- Fabric/leather/eco leather is 0.5 m wider and longer than plywood, add 30 cm for buttons if you have to cover them. The amount of material depends on the pattern report; the smaller it is, the greater the consumption, and vice versa.
- Metal buttons.
- Glue for foam rubber.
- A piece of padding polyester that follows the shape of foam rubber and plywood. They need to be covered with foam rubber.
Tools you will need:
- furniture stapler, preferably pneumatic;
- cord for fastening buttons;
- crochet hook;
- sharp knife;
- drill for drilling holes in plywood;
- drill with Ziefendorf attachment.
Screed manufacturing processes are completed in a matter of minutes if you have a special tool. You can learn about the principle of its operation and features from the video we offer.
Video: features of manufacturing carriage screed
Step-by-step instruction
Step-by-step instructions for making a carriage screed
So that you can complete the carriage screed yourself, we suggest you consider the step-by-step instructions with photographs of this process. After familiarizing yourself with it, you can also watch an additional video on how to make capitonne using a different technology. All details can be seen in the table:
| Manufacturing instructions | |
| Plywood marking | The first thing to do after cutting out the plywood of the desired shape and size is to mark and make holes in it. |
| Applying glue to plywood | Then glue is applied to the plywood. |
| Gluing plywood | Foam rubber is glued. |
| Marking screed on foam rubber | The screed is marked on the foam rubber using a simple pencil. The marker may transfer to the fabric, causing the upholstery to lose its attractiveness. |
| Making holes | Then the holes are drilled using a drill with a Ziefendorf attachment. |
| Excess foam is removed | Excess foam rubber is removed. |
| A padding polyester is laid on top of the foam rubber. | A padding polyester is laid on top of the foam rubber. |
| Gluing padding polyester | The synthetic winterizer is glued with foam glue. |
| Markings on the skin | We make markings on fabric/leather. We retreat from the edge by the width to the first tightening + 7.5 cm for the allowance. |
| Stencil to help with marking | Next you need to take a stencil prepared in advance from cardboard with holes. It is applied to the wrong side of the fabric/leather. |
| Reconciliation of markings | The first marked point on the fabric/leather is checked. On all sides, the indentation of fabric/leather from the edge to the marks should be the same - the length from the edge to the first drawstring + 7.5 cm. |
| Putting the dots | Let's put points. |
| Insert threads | We insert threads into all marked tightening points. |
| Securing the first row | Now we pull the first row of threads using a needle or a special hook through the foam rubber and plywood and nail it to it with a stapler. |
| Formation of the second row | Then we turn the fabric/leather inside out and insert the next row of threads, lay out the folds and nail the threads with a stapler. If the template and markings are done correctly, then there will be enough fabric to create beautiful folds. To avoid skew and correctly lay the folds, you should lay them gradually, from row to row. |
| Straightening out wrinkles | It is convenient to straighten wrinkles using a special stick. After the row is completed, we proceed to the next one. |
| Fastening the ties from the middle | You should start securing a row of ties from the middle. In this case, the fabric will not stretch, and the finished capitonné upholstery will look very attractive. Before securing the thread with a stapler, you should carefully straighten the folds. |
| Product check | We check the product to ensure that all diagonals are even, straighten the folds if necessary. |
| Inserting and fixing buttons | We insert and fix several buttons. You can also insert buttons along the edges. But before the folds are fixed. |
| Formation of side folds | We form the side folds. |
| Fixing side folds | We fix the counter fold, which will result in a perfectly straight edge. |
| Fixing the corner | After all the extreme folds have been laid, the corner should be fixed. If you correctly calculate the material and fix the ties, there will be no difficulties at this stage. |
| Securing an edge | Ready corner. Final fastening of the edge. |
| Ready screed | The finished Capito screed made using this technology looks very attractive. It is worth noting that the process of its manufacture is not that complicated. What takes the most time is preparing materials and marking, while screeding is a fun and not so complicated process. |
With a little time, patience and investment, your home will turn into the beautiful possessions of a count's family. For clarity, we suggest you watch a few more techniques for making capitonné in the video materials.
Video: options for making capitone
Photos
A few more design ideas with a carriage screed
Using the carriage screed technique, not only furniture can be decorated. In design, wall panels with a similar design are often found. This is a great option for the bedroom.
Another interesting decorative accent is mirrors decorated with a soft frame with quilted upholstery. The leather frame looks best in this design. Such accessories look original in the interior of the office.
There is also room for experimentation in the hallway design. On the wall you can place hangers mounted on a panel decorated with a carriage tie. This is a great design option for rooms in a modern style.
Wall panel with carriage screed in the interior
The carriage screed inspires designers to create unique interior ensembles. Furniture pieces decorated in the best aristocratic traditions may also appear in your home. Our specialists will help you organically integrate them into the environment.
