What you need to know about podiums
So:
- Acoustic podiums have many advantages. If you simply install a speaker, for example, in a car door, then without a podium the sound will not be clear enough.
- The podium is very easy to attach, since it is not necessary to cut through the iron in the door. But thanks to the podium, various overtones will disappear, low frequencies will be added, and sound transparency will improve, so beloved by connoisseurs and professionals.
Acoustic podiums on daewoo nexia
- Wanting to install better acoustics, a car owner often encounters a problem. The fact is that good acoustic speakers can be large and many cars simply do not have space for them. For this reason, many make podiums with their own hands and install them correctly.
Note. One of the secrets of installing podiums in a car is the rigid mounting of the speaker. The more firmly it sits in the podium, the better the sound will be and, moreover, the higher the timbre coloring will be. To ensure rigidity, the podiums are placed on acoustic shelves, but are rarely used independently.
Speakers installed in ready-made podiums give a completely different sound than if they were played without them:
- It is best to make a podium from wood, since this material is acoustically combined with the metal of the car frame.
- The podium allows you to solve technical issues related to installing speakers. But this is not its only advantage. Thanks to the podiums, surround sound is created in the car.
Classic acoustic podium
- In addition to traditional acoustic problems, podiums can also solve aesthetic ones. In particular, the use of a podium is very beautiful, since it always fits into the design of the car interior, if, of course, the color tones and upholstery material are taken into account.
- Podiums will allow you to highlight non-standard and original speakers or, on the contrary, hide acoustics that are not very attractive in appearance from prying eyes.
- Podiums can be made not only from wood, but also from fiberglass or carbon fiber.
- Podiums can be trimmed with various materials: carpet, artificial leather, Alcantara, etc.
This is interesting: Installing and connecting a Pioneer car radio with your own hands
Modern fashion for car audio
Today, most modern vehicles come with standard speakers. However, lovers of loud music in cars are often not satisfied with their sound, so they buy larger speakers. In this case, a different kind of problem arises - how to install large-sized equipment in the cabin so that, on the one hand, it does not disturb passengers, and on the other hand, to create truly clear sound?
One of the common ways to solve the problem is to make podiums for speakers. They can not only improve sound quality, but also take the performance of the speaker system to a whole new level.
A DIY acoustic shelf allows you to mount speakers of different sizes and shapes
Making a platform for a column
- Measure the size of the speaker for the radio. And also take measurements of the protective mesh.
- Draw a ring on the cardboard, taking into account the fact that the internal diameter corresponds to the diameter of the place where the column will be planted. And the outer diameter of the ring is equal to the diameter of the protective mesh. To get it right, you need to add 6 mm to the annular diameter. For a decorative ring.
- Transfer the cardboard model onto a sheet of plywood and trace it. It is better to take plywood of at least 8 mm.
- Cut out all the details - shapes. It is better to glue the decorative ring to the base and attach it with small nails.
What should you pay attention to?
How to make podiums for speakers with your own hands? In practice, this is not difficult, but some features of such additional equipment should be taken into account. First of all, you should choose the optimal shape for the podium. In particular, make sure that this element will not interfere with the door handles or window regulators. Also, you should not cling to the podium during operation.
Decoration is no less important. But here we are mainly talking about the finishing features. It is recommended to select a material similar to the main interior trim.
Design development
. Here, first of all, you should choose the optimal shape of the podium. It is desirable that it be compatible with the style of the interior. The selected option is first drawn on cardboard. After which they are transferred to suitable plywood, it is better to choose it with a thickness of 6-8 mm. Next you should use a jigsaw. With its help, the workpiece is cut out. It is better to immediately make 2 patterns, for the right and left doors. At this stage, problems usually do not arise. You just need to carefully measure the size, otherwise you will only ruin the material.
Travel trailer for travel: choosing the right one
- VAZ 2110;
- Ford Focus;
- Chevrolet Niva;
- Chevrolet Lacetti;
- Daewoo Lanos;
- Lada Priora;
- Nissan Qashqai;
- VAZ 21099;
- Lada Kalina;
- Mitsubishi Lancer, etc.
Cars usually already have standard, factory-installed speakers or at least mounting holes for them. The dimensions and shapes themselves depend directly on the specific brand of vehicle. Domestic cars usually have speakers with a standard diameter of 13 cm, while foreign cars have speakers with 10 cm, 16 cm, 16.5, 20 and even 25 cm. 6x9 podiums are also extremely popular.
For doors, speakers are used that have oval or no less common round shapes. Depending on what kind of car you have, you need to consider the shape when choosing a speaker. Although in reality any form can be used. After all, the main task of the podium is to ensure reliable and strong fixation. This is what gives the sound volume and improves clarity.
And if you are still thinking about whether to make it yourself or buy it, I advise you to study the range of finished products, look for podiums for the rear or front doors for your car, compare prices and decide.
Homemade designs will be cheaper. But here you will have to work hard, take the production into your own hands and try to achieve the maximum result. Otherwise you will be disappointed.
This is interesting: How to choose an inexpensive and good radio for your car
We do it ourselves
If you try, the homemade podium will not be much different from the factory one. But the price will be much less. Plus an additional reason for pride.
To complete the work you will need a set consisting of:
- plywood (take a thickness of about 6-8 mm);
- PVA;
- epoxy;
- cardboard;
- degreaser;
- nylon tights;
- polyurethane foam;
- paints;
- putties;
- leather or fabric (will be tight);
- scissors;
- pencil;
- hacksaw or jigsaw;
- sandpaper;
- spatula;
- stationery knife.
I will say right away that in this case we are considering the option of making a homemade speaker podium, which will later be installed with your own hands in the front or rear doors of the car. Often a speaker with a diameter of 13 cm is used here. But no one bothers to make a design for the rear shelf.
But size is not key. The entire preparation procedure looks like this:
- think over the shape of the podium;
- take measurements of the speaker and its special protective mesh;
- the diameter of the ring here will be exactly equal to the diameter of the corresponding landing socket or place on the future podium;
- the external diameter of the existing ring we need, in turn, corresponds to the diameter of the tread (protective) mesh;
- a sketch is drawn on cardboard;
- the template is cut out;
- applied to plywood;
- outlined and cut out;
- a perfectly even hole is cut for the podium.
Do everything as accurately as possible so that no problems arise later.
If you are done with this, proceed to the next step.
Manufacturing process
You have already made the preparation. But it’s too early to relax. There is still a lot of work ahead.
- A layer of polyurethane foam is applied to the surface of the workpiece;
- The foam hardens, and the required shape is given with a blade or sharp knife;
- Next, apply 1-2 layers of putty;
- When it dries, make the product smooth using sandpaper;
- The product is painted in a suitable color;
- It is better to apply the paint in 3 layers;
- An alternative to painting is upholstery with fabric or leather;
- The banner is secured with glue.
The installation process finishes it all off. The most optimal method of fastening is installation using self-tapping screws on the inside of the existing door trim. This will preserve the sound quality, ensure reliable fixation, and at the same time definitely will not spoil the appearance of the interior and the podium structure in particular.
Do not forget to additionally use soundproofing materials. They are used to make noise on doors. This is not necessary, but it is useful and effective.
I think you have figured out how to make podiums in the doors. They can also be installed in rear shelves and racks.
Required materials and tools
Not every material is suitable for making an acoustic podium. There are specialists who use gypsum or clay for this. This is not correct, since these materials take up a lot of space behind the speakers, which degrades the sound quality. The most suitable material is plywood. Compared to other materials, it is inexpensive, durable, has high acoustic qualities, is easy to work with and can be found in any store. To work, in addition to desire and time, you will need the following tools and materials:
- Electric jigsaw for cutting plywood;
- polished 8 mm. Plywood
- polyurethane foam;
- epoxy adhesive;
- fiberglass (1 sq. m);
- Sander;
- carbon tape;
- special drill attachment for grinding;
- self-tapping screws with a press washer;
- anti-gravel aerosol;
- matte black spray;
- nylon fabric (women's tights can be used);
- stapler;
- sandpaper (coarse and fine);
- fiberglass putty;
- material to cover the podium (for example, leatherette).
Step-by-step instruction
- Using templates, you need to cut out shapes from plywood with a jigsaw.
- To select the inclination, you need to connect the base with the ring with plasticine. After selecting the desired angle, we make stands for the ring to secure it.
- The racks are held together with glue and several self-tapping screws. The skeleton of the future podium will be ready after the glue has completely dried.
- Take the polyurethane foam and place the finished skeleton on the floor (cover it with newspapers first). Now you need to fill the skeleton with foam. This should be done in several stages, since when drying the foam almost doubles in size. The poured skeleton must be dried for 24 hours.
- The dried foam needs to be given the correct shape with a knife, and then sanded thoroughly.
- Cut a piece of nylon fabric to the required size. Wrap the podium with fabric so that its edges extend beyond the base and secure it with a stapler.
- Coat the fabric thoroughly with epoxy resin and lay the fiberglass fabric on it.
- When the resin is completely dry, cut out holes (for diffusers).
- Eliminate all roughness on the surface of the podium with sandpaper until it is perfect.
Final finishing of the podium
To give a beautiful appearance, the finished podium can be painted or covered with fabric, vinyl or leather. It is better to choose the finishing method that is most suitable for the overall interior of the car. The painting option, despite its apparent simplicity, is far from the easiest: for an ideal result you need to carefully prepare the surface and make it smooth. It is much easier to cover the podium; you just need to choose the appropriate material and its shade. Leather or fabric is attached with a special glue for leather. The glue should be carefully spread directly onto the podium and the fabric should be gently pressed onto it so that it sticks everywhere. The edges of the fabric should wrap behind the base of the podium. A fabric cut to the shape of the back is glued to the base. After the glue has completely dried, you need to carefully cut holes for the speakers in it. Then press the podium against the door frame and, if it presses well against it, you can install it.
The podium should be secured with self-tapping screws, which are screwed into the underside of the skin. This way all fastenings will be invisible. If the podium turns out to be large, it is better to fix it on the metal part of the door panel.
Watch a video on how to make an acoustic podium on a VAZ 2114
This method can be used not only for a door acoustic podium, but also for installing it anywhere in the car interior. The most important thing is to choose the right and high-quality materials, since the result of your work and the quality of the finished podium will depend on this. Dear readers! We constantly write relevant and interesting materials for our online magazine ProCrossover, subscribe to our channel in Yandex-Zen! Dear readers! We constantly write relevant and interesting materials for our online magazine ProCrossover, subscribe to our channel in Yandex-Zen!
After completing the assembly, we also recommend covering the body with varnish or paint. You can ask an artist you know to decorate the instrument, or do it yourself. A unique design will make your Cajon unique and make it stand out from other instruments.
Where to put the acoustic podium
There are 2 ways to install an acoustic podium: monolithic and framed. Let's consider their features.
A monolithic podium is made using the “wet” method: a cement or concrete screed is constructed over the entire surface of the podium. The frame podium is a frame covered with two layers of plywood.
The advantages of the monolithic method are obvious: the result is a reliable, moisture-resistant podium. This podium is very easy to make and decorate. The disadvantage of a monolithic podium is that it creates too much load and it is impossible to hide communications in it.
The frame podium, on the contrary, is very light and multifunctional. You can even install drawers in it. Since the frame podium is empty inside, there is a need to isolate sound. Therefore, mineral wool or polyethylene must be placed under all supports and between the sheathing. There should be a small gap between the frame podium and the wall to allow the material to expand. And between the wall and the monolithic podium there should be a thick tape to prevent the possibility of concrete cracking.
Preparing to install an acoustic podium
To make an acoustic podium yourself, you don’t need any special skills - you just need to have the desire and be careful. The materials needed to create a podium can be purchased at any hardware store for a very affordable price. An important point is to accurately take measurements and determine the location of the future podium:
- For greater convenience, you need to remove the door panel. If it has a speaker, that should also be removed. The size of the future podium depends on the number of speakers and their sizes, as well as on the area of free space on the door panel.
- Make a template for the podium base from cardboard directly on the door panel, which will later be transferred to the plywood
- Cut a ring (from the same cardboard) to fit the size of the speaker
- To accurately determine the final height of the podium, you need to take into account that it does not protrude too much, otherwise it will interfere with the legs of the passengers sitting in front. A large podium makes it possible to install large speakers. The main thing is that it is comfortable and does not spoil the main interior of the car.
- If you want to slightly “recess” the speaker into the podium, make a frame from plywood and glue it along the contour to the main platform
- The correctly chosen design of the future acoustic podium is very important: it improves and makes the overall interior stylish.
How to make a classic podium
To make a classic podium, the same plywood as for the pencil case podium is suitable. You can also use colored laminated plywood, which will not require finishing later. The optimal material thickness is 20 mm.
Work order:
- Make a drawing of the podium and transfer it to the floor.
- Consider the height of the structure. Usually 17 cm is enough - this is the height of the stairs.
- Place transverse ribs 15 cm high, which will serve as support for the podium.
- Glue felt to the ends of the ribs at the top and bottom to prevent squeaking in the future.
- Cut the front side wall 15 cm high and equal to the length of the podium and attach it to the ribs. In the same way, connect the ends of the ribs on the back side of the structure.
- Cut the decking from one sheet of plywood. If it is too large, cut from several, but so that the number of joints is minimal. If joints cannot be avoided, then they must be located along the supporting ribs, otherwise the flooring will sag .
- If you used regular plywood rather than laminated plywood, cover it with carpet or paint it.
Attention! The material for making the podium can be inexpensively ordered from the Green Play company. We have all brands of plywood of all grades, thicknesses and formats. We sell plywood sheets wholesale and retail with delivery throughout Moscow and Moscow Region.
Stages of manufacturing and installation of the podium
1. Mold making
First of all, before starting to install the structure, you need to decide on a suitable location for it. When conceiving a form, you are limited only by your own creative imagination, but we must not forget not only about the aesthetic and design side, but also about the practical one.
IMPORTANT! When developing and installing the structure on their own, very often beginners do not take into account that the podium can interfere with the view of the rear view (podium towards the rear speakers) or make it impossible to open the doors or operate the power window. Please pay attention to this when making the model.
- Take a sheet of cardboard;
- draw a picture of the invented shape;
- cut out the template;
- attach the template to the plywood and trace it with a marker;
We drill holes in the plywood for the jigsaw blade and cut out the base blank for the future product.
Advice. For an audio system, experts advise using birch plywood, as this wood provides richer and higher quality sound.
2.Preparing the base for the speakers
IMPORTANT! The chipboard or plywood used must be at least 6-8 mm thick.
3. Assembly and filling of the podium
Advice. The stiffer the future podium frame is, the better. Most often, polyurethane foam is used for filling; some professionals also use epoxy resin, but working with resin requires skills, while anyone can handle foam; with its help, the podium can be given any shape.
- After the foam has dried (the period is indicated on the can), remove excess with a knife, giving the workpiece the desired shape;
- Next, take sandpaper and sand the product to a smooth surface;
- level the surface with a thin layer of putty (putty can be mixed in advance with PVA glue to prevent shedding);
- We repeat the process of polishing the product.
To make the podium structure more rigid and protect it from mechanical damage, the workpiece can be treated with epoxy resin or covered with fiberglass.
- Apply a thin layer of resin to the surface of the workpiece;
- We put fiberglass on top, carefully smoothing it out, leaving no folds;
- treat with another layer of resin and let dry;
- cut off the excess and sand it.
4. Painting or tightening the workpiece
- Painting
The finished structure can be primed and painted with aerosol paint, applying it in several stages, the main thing in this matter is to avoid smudges. After the paint has dried, the surface must be coated with aerosol varnish.
- Faux leather covering
Artificial leather is best suited as an upholstery material, because in appearance and physical properties it is most similar to upholstery. Most often, tension runs from the ring to the ends of the product, where each side must be tightened more than once. To perform this task, use a hair dryer. At the end of the work, the leather must be secured with a stapler, and the excess pieces must be cut off.
5. Installation of the podium
The most common mounting method is to screw it in with self-tapping screws from the back of the car trim. Before doing this, do not forget to install the speakers in the workpiece seats and securely fix them.
IMPORTANT! You can mount various speakers into a homemade structure, however, as professionals advise, you need to make sure of good sound and powerful bass before final mounting.
Ideally, to ensure ideal sound in a car, you should also take care of sound insulation. If the podium is installed, for example, in car doors, it is necessary to insulate them with special sound-absorbing materials. Also, in the podium design itself, it is necessary to provide and build an acoustic stage, selecting the position of high and low frequencies; you can also consult installation studios regarding the correct placement of speakers in the car.
You may not achieve ideal studio sound, but installing a podium yourself will cost you several times less, and by trial and error you can choose the best place in the car that will provide you with high quality sound.
For a more dynamic and visual overview of the procedure for creating and installing a podium, you can watch the attached video:
I want to change the old ones for new ones. But the new pancakes are very small, and there is absolutely no room for them in the car. No problem, now we will learn how to make a podium with our own hands.
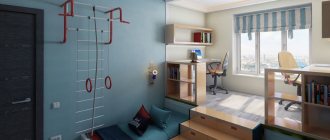
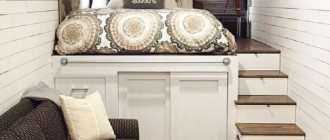
How to assemble a podium bed yourself
A do-it-yourself podium bed can easily be assembled independently. To do this, you need to determine the height of the structure (take into account the original height of the ceiling) and its location
The bed is placed away from the passage area to prevent injuries and bruises (this is especially important for a child’s room)
Timber podium frame
Of course, before drawing up a drawing, you need to decide on the main content of the structure. The podium can be hollow, with additional niches for bedding or with many internal retractable “containers”, represent only a place for sleeping, raised above the floor, or have other functions necessary in your room.
Fastening plywood to beams
The main elements of the podium structure are chipboard, wooden beams, and ready-made furniture panels. The thickness of the beam is carefully calculated based on the total height of the podium and its weight. It is believed that the total load of the frame and platform should not exceed established standards within the range of 400-700 kilograms per square meter of area.
If the podium is high, you can make steps
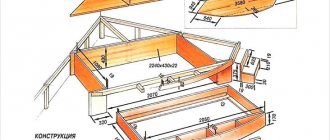
Let's look at how to make a podium measuring 2*1.5*0.466 m (width/depth/height). It has niches under opening lids in the wall area, and in front there are 3 drawers. Do not forget that all work is carried out according to a pre-prepared drawing, and you may need professional assistance in development if the design is too complex.
Drawers for linenThe assembly sequence in this case is as follows:
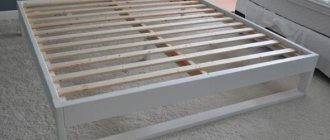
- A frame is constructed from beams with a cross-section of 50*50 mm, the dimensions of which correspond to the dimensions of the future bed.
- A 10-mm gap is left between the joists and the wall, where high-quality sound-absorbing material is laid.
- Vertical support posts are added to the structure.
- The upper joists and struts are secured.
- When the frame of strong longitudinal and transverse ribs has been assembled, they begin to cover it with plywood, OSB or chipboard. The thickness of the cladding material should be in the range of 16-18 mm.
The cladding is done on the front and top. In places where niches are installed near the wall, piano hinges are attached. The bottom drawers are mounted on ball guides. Make sure that they can be fully extended. The upper part of the podium is covered with carpet. The choice of this material is justified by its softness, durability and ease of care. In addition, the carpet easily takes any shape, which means the upholstery will be neat. The fact of its design variability is also important - you can choose bright or muted colors, with or without patterns. The last stage is the arrangement of a sleeping place.
And don’t forget about the decorative component - an elegant headboard, soft diffused lighting, and properly selected textiles will help you make the podium even more attractive. This bed will become the most original accent in your bedroom.
In the next article we will give tips on making a soft headboard with your own hands.
DIY speaker podiums
Speakers of this size are usually located in the front of the cabin. The basis of the structure is 10 mm plywood. It’s good if there is impregnated material. Such plywood will not delaminate, and the podium will last a long time. First, installation rings of the appropriate diameter and a base are cut out of multi-layer plywood using a jigsaw. Two rings form a hollow cylinder, which will be the seat for the loudspeaker. The rings and the base are not connected coaxially, but so that the speaker system diffuser is directed in the required direction. This is achieved by shifting the vertical guides to the desired angle.
The guides are cut out of the same plywood and fixed with self-tapping screws. To make the connection more durable, a little epoxy resin is added to the connection point. Then the hollow structure must be filled with polyurethane foam. Thick paper rolled into a tube is placed at the speaker installation location. After the polyurethane foam has completely dried, the paper is removed, and the structure is processed with a sharp knife and sandpaper to give it the desired shape. Leatherette is used as a decorative covering. Its color is chosen taking into account the design of the car's interior. The artificial leather covering is glued with glue 88. This work should be done very carefully, since secondary gluing leads to a deterioration in the appearance of the structure. A loudspeaker of this diameter has low power, so no special fastening is required to secure the podium to the installation site.
How to make podiums with your own hands
However, this design does not have increased strength and additional reinforcement will be required to place heavy objects on it.
The structure is made of bars and plywood, or rough boards. Wood flooring will always look trendy; in addition, it is an environmentally friendly and warm material, which is an undeniable advantage. Parquet or laminate can cover surfaces and smoothly transition from the lower level to the upper level. A covering made of boards, such as bleached or varnished wood, looks interesting; the podium area will stand out against the general background.
Carpet creates a cozy atmosphere in the apartment. This finishing option will look good in the interior of a nursery and bedroom.
Carpeting goes well with wood trim. A separate advantage for a children's room is increased safety. It is more practical to finish monolithic structures with tiles; this option is suitable for the bathroom, kitchen and hallway.
The surface is moisture-resistant, durable and easy to clean. The photo shows a studio apartment.
A monolithic elevation with tiled decoration divides the space of the apartment into a living room and a cooking area. The entire surface of the podium can have a soft surface, for example upholstery made of foam rubber, padding polyester or similar materials.
Definition and features of using a podium in the interior
The surface has a pleasant tactile sensation and looks cozy. For podiums with a bed, a 22 mm thick board is used. It will be needed to assemble the outer panels and the central part. The internal parts of the structure are made only from chipboard. The support frame for installing the mattress is assembled from the inside. The support bars will take on the entire load, so they need to be positioned evenly.
They are attached with screws. One bar is installed in the center of the structure and two at the edges.
DIY podiums for speakers
16 cm loudspeakers can be included in an acoustic system design consisting of two active elements. Podiums for such acoustics are usually installed on the doors of the car. To make podiums for 16 cm speakers with your own hands, you will need multilayer plywood, fiberglass, polyurethane foam and epoxy resin. The technology itself is quite simple, but it will require time to dry the layers of fabric after impregnation with epoxy resin. First, all the elements of the future acoustic system are cut out of multilayer plywood. These are the base, rings for installing speakers and vertical connections. The structure is then assembled into a single whole. Wooden blocks or metal fastening profiles can be used as vertical elements.
Next, the entire structure is filled with polyurethane foam, with the exception of places for installing loudspeakers. Then everything unnecessary is removed from the podium, and its surface is treated with fine sandpaper. For strength, a thin layer of epoxy resin with a hardener is applied to the surface and rubbed into the pores of the mounting foam. This procedure can be repeated several times. The finished podium is finally sanded over a layer of resin. The finished product is finished using artificial leather.
You can make podiums for speakers in doors yourself using another technology. After the frame for installing the speakers is made, the entire structure is covered with thin fabric, which is impregnated with polyester varnish or resin. After complete drying, a thin layer of epoxy resin and fiberglass is applied to the workpiece.
There should be at least three layers of fiberglass with epoxy resin. After the future podium has completely dried, a layer of fiberglass putty is applied to the structure. All excess is cut off, and the surface is brought to condition using coarse and fine sandpaper. To finish the finished product, you can use leatherette or several layers of enamel, which is matched to the tone of the interior trim. Using this technology, you can make podiums for speakers with your own hands for one, two or three speakers.
Construction of a frame podium
Installation of a wooden frame
The podium, like the rest of the floor, must be level, because you will have to walk on it and install furniture. Therefore, before starting construction, it is necessary to mark the height of the frame on the walls. Using a laser level (this is ideal, although you can get by with a regular construction level), draw a straight line on the walls with which the podium will come into contact, corresponding to its height and dimensions.
The frame is made of timber. Depending on the size and presence of niches, the frame support bars can be attached to the wall or to the floor. For a small podium, it will be sufficient to attach them vertically to the walls using anchors. The smaller the distance between these posts, the stronger the structure will be (recommended pitch is 40 cm).
Start assembling the upper part of the frame by laying horizontal beams on the posts. Connect the bars to each other strictly at right angles, using nails or self-tapping screws. Metal corners secure the connection points well, so if the podium is large, it is advisable to use them.
If the end of the podium should not be flat, but curved, then the frame should be made this way. To do this, a bend shape is outlined on the floor and vertical bars are fixed to the frame according to this guideline. The distance between them depends on the curvature of the end, usually no more than 20-30 cm. Additionally, the bars must be installed at those points where the end line changes its direction.
For sound insulation, it is advisable to fill the inner surface (if it is not used for niches) with mineral wool or polystyrene foam. This measure will reduce the booming sound that the empty internal space makes when walking along the podium, and will also serve as good thermal insulation.
Frame covering
The frame is sheathed on top with durable sheet material. To do this, you can use ordinary boards, USB or OSB sheets, gypsum fiber boards or plywood. Secure the sheets of the selected material to the frame bars with nails or self-tapping screws. Be sure to leave expansion joints (2-3 mm) between adjacent sheets, which, in case of possible swelling of the material, will prevent surface deformation.
We advise you to study - The best way to sheathe the outside of a wooden house
If the interior space of the podium will be used and must remain free, then the frame is also sheathed on the inside. If there are no internal niches, the front side (end) of the podium is immediately sheathed.
The podium is sheathed with durable sheet material, for example, 10mm thick plywood
Finishing the podium
The final finishing of the podium can be done using a variety of floor materials, almost like a regular floor (except that self-leveling floors would be out of place here). Choose what you like: carpet, laminate, parquet, linoleum, cork, ceramic tile.
Usually, finishing the front area of the podium requires a special approach. If it has an even border, then it is sheathed in the same way as the top of the podium. If the border is wavy, then its lining will require a flexible material that can be easily bent. For these purposes, specialists use flexible plywood, metal profiles (brass or aluminum), MDF panels, and PVC skirting boards.
Often the closed end of the podium is used as a surface for installing LED spotlights or neon light strip. All communications are hidden in the inside of the podium, preferably with access to them.
Now, after the construction of the podium is completed, walk along it, evaluate whether there are any deflections or creaks. If everything is in order, then you can install the furniture and begin to arrange the “elevated” corner of the apartment.
If your room does not have enough free space to install a bed or you want to have additional sections where you can store things, then consider creating a multifunctional podium with a bed. There are 2 options for how you can install a podium bed with your own hands in a few days. Let us consider in detail the manufacturing technology and possible errors in operation.
DIY podiums for speakers under 20
The speakers with a diameter of 20 cm are large in size and have decent power. Such speaker systems are usually installed on the trunk shelf. In order to make podiums for 20 speakers with your own hands, you need to use thick plywood. First, a base is cut out of it according to the size of the seat. The thickness of the material should be as thick as possible, since high-power speakers and the mounting board can resonate at high power. Rings for acoustics and vertical posts are cut out of the same plywood to provide the necessary tilt.
The loudspeaker mounting areas are covered with thin nylon fabric and impregnated with varnish. The top part is cut out and removed. A layer of epoxy resin and fiberglass is applied to the hardened surface. After applying 3-4 layers and completely drying, the surface is cleaned and sanded. You can cover the finished shelf with any decorative material, upholstery fabric or artificial leather. Some car owners install speaker systems on the ceiling of the car interior. It is not difficult to make podiums for ceiling installation according to the described schemes.
What should a podium look like?
As follows from the above, the podium for the midrange or midbass is not a simple decorative element, but a necessary component of the audio system that affects the sound quality. To effectively perform its task—damping unnecessary vibrations—the podium must be heavy. The heavier the better.
In order for a part to be heavy, it must be made of the appropriate material. But in practice, plywood is most often used, since it is easy to process at home.
Did you know that archaeologists discovered the first archaeological artifact made from a material reminiscent of modern plywood in the territory of Ancient Egypt. The plywood casket dates back to the 15th-16th centuries BC. e.
Plywood is a relatively light material. To increase weight, podiums are made as large as possible. Of course, taking into account the features of the car interior.
When determining dimensions, they focus not only on sound quality, but also make sure that the additional element does not interfere with the operation of the main devices. For example, a speaker installed in a door should not interfere with the use of handles.
The speaker podium should not be attached to the casing, only to rigid metal elements. Firstly, a weak base does not help dampen vibrations. Secondly, it will not withstand a heavy podium with a speaker.
Internal podium
There are internal and external podiums. The first ones are installed when they want to maintain the factory appearance without changes. For example, when they change a standard speaker to a diffuser that is similar in diameter.
The internal podium is entirely hidden in the internal cavity of the door or ceiling under the trim, which must fit tightly to the speaker. Otherwise, distortion is possible, as the speaker will “play under the casing.”
The outer casing should fit snugly around the speaker mounted on the inner podium
Table: advantages and disadvantages of internal podiums
| Advantages | Flaws |
|
|
External podium
An external or external podium allows you to install any speaker larger or smaller than stock. In addition, the head can be placed either parallel to the plane of the door or at an angle, directed towards the listener. An additional advantage of the external podium is that it presses the skin tightly, reducing vibration.
Table: advantages and disadvantages of external podiums
| Advantages | Flaws |
|
|
The external podium is not just a stand, but a single structure. Its components must be adjusted and fastened tightly, without gaps or cracks. This ensures maximum structural rigidity and prevents sound from escaping under the skin.
The podium components must fit together without gaps or gaps.
Acoustic design elements, including the podium, should not impede the free movement of air through the windows of the speaker basket. Interference may degrade bass performance.
The podium components must not obstruct air flow through the speaker basket windows
When the speaker is deeply recessed into the podium, the diffuser operates through a tunnel, which significantly affects the sound quality with a depth of only 1 cm.
The podium parts should not form a tunnel in front of the diffuser
The sound quality is also worsened by the tunnel being too long on the magnet side of the speaker. It is better to avoid such a design, but if it is necessary, make the opening as wide as possible.
The tunnel on the rear side of the speaker degrades the sound quality
A special feature of external podiums is the need for decorative finishing. If the internal one is hidden under the casing, then the external one is always visible. It should not spoil the appearance.
This problem is usually solved by covering and covering the finished podium with natural or artificial leather. In some cases, when the podium is quite high, before covering it is necessary to sew the cover to the shape of the base, since the material allows tension only within certain limits.
Another method of decorative finishing is painting in a suitable color after puttying and thoroughly cleaning the surface.
Tweeters do not develop much power and are less susceptible to vibration. Therefore, podiums for them are more decorative stands than elements of acoustic design. They are made in the form of overlays on the side pillars or built into the pillar trim panels, oriented, according to the subjective sensations of the listeners, approximately to the center of the cabin.
Adapter podiums from round seats to oval speakers are not fundamentally different from conventional external speakers. The only difficulty is to develop a drawing and install the head in compliance with the requirements stated above.
Materials
The main material for making bedroom furniture is natural wood. It is environmentally friendly and cannot cause any harm to human health. It can be larch, pine, spruce, oak, wenge, alder, beech, ash, hevea, thuja, birch, walnut, etc. Chipboard, laminated chipboard, plywood, MDF are no less often used. Metal is also used to create the base, in the form of profiles, pipes, and corners. Self-tapping screws, dowels, bolts, PVA glue, etc. are used as fasteners and connecting compounds.
From timber
The most commonly used laminated timber is made from pine. Each part is glued together from several - knots and other defects are removed from a piece of solid wood, and then cut into lamellas, connecting to each other with glue. Such furniture is strong, durable, most often decorated with carvings and luxurious upholstery, which looks good in the interiors of classicism, baroque, and empire style. The timber parts are thick and voluminous, so placing the bed will require a lot of space.
From boards
A wooden product is quite easy to assemble, takes up much less space than a timber product, and is almost as strong as it is. The boards should not have cracks, chips, signs of rot, or deformation. If this is intended, bark is left on the edges of the back and the parts of the footboard, which is treated with the same coating as the entire structure. Decoration with carvings, paintings, and applied elements is also acceptable here.
We advise you to study - Which heating radiators are best used for a private home - an overview of types and models
From the array
The construction of rounded or ordinary logs, half-logs is characterized by the greatest strength. You can make such a product even with a limited set of tools, including “without a single nail,” if you develop a suitable fastening scheme. The building will best fit into the rustic, country, and ecological style.
