There are mirrors in every home; they can complement the interior, and are also necessary for their direct purpose - reflecting objects. Sometimes there is a need to attach them to different types of surfaces, a cabinet, a wall, etc. The use of nails and similar means is not advisable, so special glue for mirrors is used that can provide reliable fixation. More details on how to glue a mirror will be discussed below.
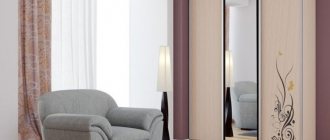
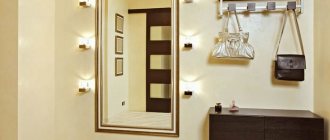
How to glue a large mirror in the bathroom.
Why do you need a large mirror in the bathroom? –
Well, unusual.
– and this answer is enough.
It also enlarges the room.
– Not bad either, considering the size of bathrooms in high-rise buildings.
It is better to plan the installation of a mirror at the stage of reconstruction or creation of a new bathroom. It becomes possible to fill the space of ceramic tiles with a mirror cloth and obtain a mirror plane at the level of the tile. There are banal savings on tiles and mirrors (there is no need to purchase it in a frame). Installation is simplified and it becomes possible to protect the ends of the mirror from moisture.
The mirror can be ordered in any size, depending on the situation. The size is limited by the height of the doorways of your apartment and staircases in the entrance, as well as the maximum glass size of the mirror manufacturers.
The base under the mirror must be even, because the thickness of the glue is about one mm. Simply leveling the plaster along the beacons is not always enough. Additional leveling with glue using a wedge is required.
What kind of glue is needed to attach mirrors.
In theory, any where the list of applications includes a mention of glass. But it won't always work out.
A composition containing strong solvents may turn up. This glue reacts with the silver layer of amalgam:
What glue for mirror?
One of the proven options for mirror glue is in the photo.
Other options are possible. The most famous glue from SOUDAL “Glue for mirrors No. 47”:
Glue for mirrors No. 47 “SOUDAL”.
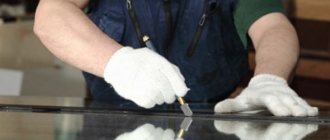
Mirror installation.
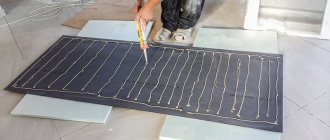
Some adhesive manufacturer's instructions indicate “...press and release...”. In the case of a mirror (even a small one), this is unrealistic. “SOUDAL” for large mirrors has a clause that it can be fixed by applying glue with a notched trowel over the entire surface. But this is reinsurance. Spot application of glue, even after 15-20 cm, provides reliable fastening (this is from experience in dismantling such mirrors). It is important that there are no “hanging” areas around the perimeter. These are potentially dangerous areas before silicone is applied around the perimeter.
The distance between glue strokes in our case is about 30 cm. The backing (for alignment with the surface) consists of simple glass 2 mm thick. Mirror thickness 4mm. So the total thickness is the thickness of the facing tiles on the wall.
You don't have to glue the glass backing. In this case, the mirror falls below the tile. Sometimes this value is significant.
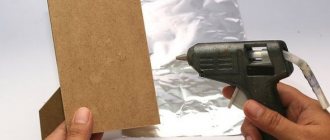
The large mirror was attached on the second day, after the glass substrate was attached.
glass backing for mirror
An important condition when installing mirrors in the bathroom is to close the end of the mirror from moisture. If you don’t, over time the moisture will destroy the coating and black spots will appear along the ends. For sealing, it is better to take better silicone, meaning more expensive. In our case, RAVAK Proffesional sealant. Silicone comes in two colors. White and transparent. In this bathroom, the color of the silicone matched the color of the grout.
In addition to protecting the end from moisture at the time of cladding, an important condition during the preparatory period is the construction of a place for the mirror strictly in the shape of a square. Quite a difficult process. Here factors such as the strict verticality of the end walls and the horizontality of the framing rows of tiles immediately come to the surface. This is especially important for two mirrors installed in the corner:
- This could have been avoided if 3 mm crosses were embedded in the bottom row of “bloopers”. More details in “LITTLE Tricks”.
Silicone filling technology also has its own characteristics.
One of the stages of filling a seam with silicone.
For everything to go smoothly, preliminary protection of adjacent surfaces with masking tape is necessary.
The masking tape must be removed immediately after forming the seam with your finger (no matter how trite it sounds). Or with special spatulas for forming a seam on sealants.
Methods for installing mirrors on gypsum boards
There are several methods for attaching products to a gypsum fiber surface. These include:
- Installation on dowels and other similar fasteners.
- Gluing using special adhesive solutions.
- Using double-sided tape.
- Installation using wooden slats.
Let's look at each of these methods in more detail.
Fastening with dowels
This method has been used for quite some time. With the advent of drywall, manufacturers began to make dowels with long legs and spacers at the bottom. They allow you to securely fasten any structure.
One of the most reliable ways of attaching a mirror to drywall is using special dowel hooks.
You will need the following tools:
- hammer;
- screwdriver;
- screwdrivers with different sections;
- building level;
- pliers;
- roulette.
You also need a pencil to make notes on the wall.
To install products on HA sheets, you must use special dowel hooks. They are used in fastening wall cabinets and shelves.
To attach a mirror to drywall, follow these steps:
- Measure the distance between the loops on the back of the product.
- Make appropriate notes on the wall.
- Drill holes using a screwdriver according to the established marks.
- Mount the anchors so that they are in the same plane with the wall.
- Screw in the dowels.
After this, you can hang the decorative element on the prepared mounts.
Installation using adhesive mixtures
How to glue a mirror to drywall? There are two means for this: glue and “liquid nails”. The methods of their use do not differ from each other. There are only a few nuances that need to be taken into account in the work.
Depending on the weight of your mirror, liquid nails or special mounting adhesive are used.
If the weight of the product and its parameters are significant, it is better to use “liquid nails”. They are endowed with excellent adhesion to any plane. If the mass of the mirror and its dimensions are small, use special glue for installation. It will also firmly secure the product to the gypsum board.
It is not recommended to use “liquid nails” in rooms with high air humidity. After a certain period of use, they lose their properties.
- Determine the exact location of fastening.
- Measure the dimensions of the element.
- Appropriate notes are made on the gypsum board.
- “Liquid nails” or glue are applied to the back side of the product (the contour is processed).
- The mirror is applied to the wall and pressed tightly.
If it is massive, you need to treat its entire rear surface with an adhesive solution.
Since the adhesive solutions will take a certain time to harden (20 - 30 minutes), it is necessary to build a support under the installed product. She will support him and eliminate the possibility of him detaching or sliding down.
Before applying the products, the surface is prepared - cleaned of dust and deposits. This is the only way to ensure normal adhesion of the decorative element to the gypsum board surface.
We use double-sided tape
This installation method is suitable for installing small mirrors. It is not suitable for massive products. Scotch tape will not be able to withstand heavy loads.
The fastening work will not be difficult even for a non-professional. Initially, marks are made on the surface of the gypsum board. Then apply tape to the back of the product (top, bottom and sides), apply the mirror to the wall and press it down.
To prevent it from sliding down, you can make a kind of support - install a wooden plank under the product.
The main disadvantage of the installation method is that the tape loses its adhesive properties at too high or low temperatures.
Wooden slats in installation
This method of fastening is applicable to a variety of decorative and functional elements. It is based on the use of wood planks and slats in the work.
How to attach a mirror to drywall using this method? Initially, the location for installation of the product is determined. Then wooden slats are fixed to the surface of the gypsum board according to the established marks - at the bottom and at the top. Screw them in with dowels.
To make the structure more durable, you can screw self-tapping screws into the base of the wall - a metal profile frame.
Special hooks are mounted to the top rail, on which the product is attached. Glue is pre-applied to the bottom. If the mirror is large, it will be useful to make additional fastenings. A wooden strip is screwed into the very center of the installation site. It should connect the upper and lower planks, that is, become a kind of support for them. Glue is also applied to it. The product is hung on hooks and pressed tightly to the surface. This method allows you to evenly distribute the load, which will have a positive effect on the performance characteristics of the plasterboard.
Glue "Titan"
In the market of construction mixtures and adhesives, this composition has established itself as the best and most reliable. It is designed to work with various types of surfaces. Including tiled flooring. The mixture is based on rubber and natural resins. Thanks to these components, tight adhesion of the contacting planes is ensured. Features of the adhesive composition “Titan”:
- formation of a seam that is resistant to moisture;
- ease of use and ease of application;
- high percentage of adhesion;
- high strength;
- availability.
Other ways to fix a mirror
When choosing a light and small mirror, you can use other methods of attaching it to the tile - using a special sealant or adhesive tape (necessarily moisture-resistant). Experienced builders combine these methods. When using double-sided tape, you must adhere to the following plan:
Degrease pre-cleaned tiles;
Cover the entire back side with strips of tape parallel to each other at equal distances;
To get a reliable result, you need to firmly press the product to the surface.
If everything is done correctly, the mirror will be firmly attached to the ceramic, but maximum protection against falling of the decorative element can be achieved by using a combination of “sealant-adhesive tape” or “glue-adhesive tape”. Liquid nails for mirror surfaces act as a proven adhesive composition.
The main advantages of use are the guarantee of the safety of the decorative coating, as well as the strength of the connection, which is several times higher than that of PVA glue. Liquid nails can have different structures: homogeneous or heterogeneous. The choice of construction adhesive should be based on the possibility of its use on ceramic surfaces.
Attention! If sealant or tape is used for fastening, then you need to immediately align the mirror. Unlike a similar process using glue, there will be no time for adjustments.
Storage recommendations
The polymerization process of the sealant begins immediately after opening the package. There are several ways to protect the glue remaining after use from hardening:
- remove the acid-based product from the tube and place it in a glass jar, tightly closing the lid;
- select a self-tapping screw so that the size of the head matches the diameter of the hole in the container with glue, and screw it in, after squeezing out a little silicone;
- Wrap the neck of the tube with polyethylene and screw on the lid.
Mirrors have a fairly long service life. One of the important factors influencing the reflectivity of products is the correct choice of adhesive composition that will be used when installing the product.
What to watch out for
Installing a mirror when tiling the bathroom
Take precautions when using mirror adhesive.
- Do not heat the cylinder over a fire.
It is prohibited to heat cylinders containing liquid nails or mirror glue.
It is prohibited to smoke near the adhesive surface
Be sure to ventilate the room
Use protective equipment
Avoid contact with eyes and skin
Do not allow children to use glue
We hope that after reading this article you have discovered a new idea about adhesive for mirrors on walls. Now you can safely go to the store and decorate your home. It’s not for nothing that one can only rejoice at the abundance of liquid nails sold in Russia.
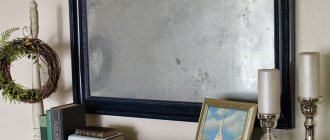
Mirror installed with glue
All types and properties
Neoprene mounting adhesive QUELYD Mastifix for mirrors
Acrylic mounting adhesive LACRYSIL “NADMITSNNIY” for interior and exterior work
Adhesive for mirrors on walls can be neoprene or acrylic
| Neoprene | Contains synthetic rubber. Capable of gluing any mirror to tiles. Adhere well to surfaces. Disadvantage: strong chemical smell. |
| Acrylic | They are water soluble. Not suitable for all types of surfaces. Disadvantage: acrylic glue is contraindicated for exposure to high temperatures. It is impossible to glue the mirror to metal surfaces and tiles. They are afraid of water. Pros: They are environmentally friendly and harmless. |
Rubber adhesive GROVER GR100 for heavy structures and mirrors
Using liquid nails and tape, you can easily glue the mirror to the tile in almost the same way as you would with hardware, and this can be done on any type of surface, be it metal plates, glass walls, tiles.
Using a glue and sealant gun, apply glue in strips to the back wall of the mirror.
Adhesive strips 5-7 mm wide should be applied at regular intervals of at least 5 cm and at a distance of 4 cm from the edge of the mirror
Now there is no limit to the flight of imagination, because a mirror can be hung anywhere, you just have to think and do it.
After applying the glue, apply the mirror to the wall and press firmly over the entire surface so as to leave a seam 2-3 mm thick.
By the way, in addition to gluing mirrors, using liquid nails and tape you can glue almost any type of material together:
- tree,
- tiles,
- concrete,
- metal,
- glass,
- plastic.
Waterproof, quick-drying mounting adhesive for mirrors and glass structures
Glue mirror to mirror
The need to glue mirror surfaces to each other sometimes also arises. Many people are interested in whether it is possible to glue a mirror onto a mirror and how firmly such a structure will hold. Note that this work is not difficult, but you will still have to make some efforts. So, there are two ways to glue two mirrors together:
- They can be connected to each other by ribs, which makes it possible to significantly increase the area of the mirror surface. This process is quite complicated and requires extreme care and precision. If it is assumed that the mirrors will subsequently be glued to the wall, then it is better to fix them separately, while simultaneously adjusting their position on the surface. If the structure will be hung on the wall, then it is better to glue both elements in advance, edgewise, using a special adhesive composition for mirrors. It should be noted that such fastening is not reliable and is used extremely rarely.
- Another way of gluing mirrors is completely with surfaces. The need for such a procedure arises at a time when there is an old mirror, but it is not possible to remove it. New mirror decor can be glued to it.
Fastening process
Let's get started with the work:
- First of all, it is recommended to prepare the workplace. It is better to place the door on some kind of flooring, so as not to worry about the surface of the floor or table on which the work will be performed.
- On the door you need to draw the correct placement of the mirror using a template. If you glue it unevenly, it will ruin the appearance of the cabinet.
- Let's move on to degreasing the surface: to do this, wet a rag with a special solvent and apply it to both surfaces that will be bonded in the future. Moreover, when working with a mirror, you need to be extremely careful so as not to damage it. To do this, it is recommended to spread some kind of blanket and only place our workpiece on it. And then start treating the back of the glass with a degreasing agent.
- Insert a tube of silicone into the gun, cut off its edge and you can start applying the product to the surface. It is better to do this in a zigzag pattern in increments of no more than 10 cm.
- As soon as silicone has been applied to the back side, the workpiece must be placed on the door according to the drawn marks. To do this, it is recommended to place the edge of the glass in the drawn corner and align the sheet along the side line. If the mirror blank is large, it is better to use the help of a friend.
- The glass is gently pressed against the surface of the door. Care must be taken to ensure that it does not move or warp. All lines along the mark must coincide with the edges of the workpiece.
- The final fixation on the door will occur in a day. During this time, you need to place heavy objects on the surface that will improve the adhesion of the materials. The main thing is that it is a uniform load.
After gluing the mirror, wait a few minutes to check that it is securely attached.
How can I attach a piece of furniture?
There are several ways to attach:
- Using glue.
- On special holders.
- For fastening with plastic expansion joints or screws to a furniture door.
- Using a decorative profile.
- On nails or dowels.
Glue
You can also use glue, but keep the following in mind::
- The glue must have a sufficiently high degree of adhesion to the base of the wall. The material will not stick if the surface is covered with cement-sand, gypsum or lime plaster. But this applies to epoxy, silicone and polyurethane glue. With a polymer coating this problem will not arise.
- Since the back side of your mirror is covered with paint (you can buy a special mastic), check the adhesion strength of the surface to the adhesive mass. Not every glue can “flow” properly.
- The strength of the adhesive seam is a separate concern. It must be strong in any direction of load application. For example, cyanoacrylate can hold a weight on a wall, but if the load is directed normal to the surface. If the load is different (bending, shearing), the strength will decrease to 1.5 kg per square centimeter.
Select and install an intermediate plate made of fiberboard, for this:
- A rectangular piece (with an area slightly less than half the surface of the mirror) is cut out of a fiberboard.
- Fix it on the wall (use self-tapping screws and plastic plugs) and attach it to the wall. Use a level while working.
The massive mirror plate is attached with polyurethane glue, the middle one with silicone.
If you want to remove the structure in the future, use a thin string. It will cut the adhesive without any problems.
If the mirror weighs more than 2 kg, it is better not to use the following materials:
- Glue for rubber and hot glue guns.
- Paint (epoxy, alkyd oil, polyurethane, acrylic).
- Sealing silicone sealants.
- Polyurethane foam.
- Double sided tape.
Even if the mirror sticks to the surface of the wall, the wallpaper itself may come off. The result is obvious.
High-quality adhesives - “Zubr”, “Ravak”, “Krass”.
Hang on dowels
- Make holes in the product itself. You can do this yourself, order a service from a specialist, or ask for help in the store itself.
- In the apartment, attach the mirror to the wall and mark the points where the fasteners will be located.
- Drill holes using a concrete drill bit. The depth of each is no more than 10 mm. Secure the sleeves.
- Screw in the metal screws and install the clamping elements.
- Install the caps on top.
- Check if everything is installed securely enough.
Fasten without nails
If you hate to spoil the wallpaper, use double-sided tape or liquid nails. Buy adhesive tape with a width of at least 10 cm.
- Apply liquid nails or tape to the back of the product, maintaining a distance of 6-8 cm from each other. Make small indentations along the edges so that while you press on the mirror, the solution does not come out from the side.
- Press the mirror against the wall for 10-15 minutes. You can organize special supports to help you. If you hang a mirror on a door, remove it from its hinges and place it on the floor - it will be more convenient.
Gluing on tiles is prohibited!
The following household tapes have proven themselves well::
- ABRO on foam base;
- German Orafol;
- adhesive tape "Liderpax";
- heat-resistant mounting adhesive tape 3M VHB GPH 110.
Loclite glue
An adhesive with a two-component composition, in demand as a high-quality installation product. It consists of an adhesive and an activator. One package of this set is enough to attach 1-2 decorative elements, depending on their size. And the spray adhesive is enough to attach at least 20 reflective surfaces. By the way, rear view mirrors in cars are mounted on Locklight.
Nuances of placing mirrors in various rooms ↑
Mirrors are installed in different parts of the apartment: from the kitchen to the bathroom. To ensure they last longer and bring maximum benefit, consider the conditions in the room during installation. A few simple tips will help with this.
- In a small dark room, attach a mirror opposite the window, this will significantly increase the amount of light.
- A large canvas covering the entire wall will visually expand the room.
- In the kitchen, do not hang mirror items near the stove: temperature changes and hot fumes will quickly ruin it.
- Before hanging the mirror in the bathroom, treat its ends and back with a special sealant.
Installing a mirror is not very difficult, although it requires some knowledge and skills. Theoretical knowledge will certainly make the installation process easier, but it is better to practice on small specimens. Entrust large canvases and complex fastenings to professionals.