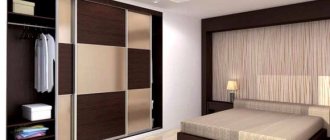
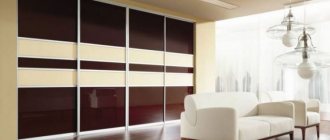
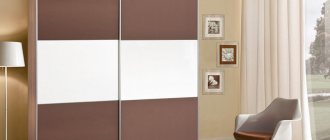
Are you familiar with the situation when, after repair work, namely wallpapering, there is excess material left? Often wallpaper is purchased with a reserve so as not to make a mistake when gluing it. As a result, the material gathers dust on the shelves until it is simply thrown away. But, there is an option to use the leftovers in decoration. There are a lot of ideas, one of which is decorating furniture with wallpaper. This technology is called decoupage.
If you have old furniture that is long overdue for decoration or restoration, then you can use canvases to give the furniture a completely different look. In this article we will look at the process of decorating furniture with wallpaper, which products are suitable for this work, as well as tips for covering furniture with self-adhesive film.
Selection of material for gluing
What is decoupage? According to the Wikipedia encyclopedia, this is a special technique for decorating glass, wood, fabric or other materials, in which a design, painting or ornament is glued to the surface. The technology of decorating furniture comes down to 3 steps:
- Surface preparation.
- Pasting paper.
- Varnish treatment for protection.
But the question arises, what wallpaper can be used for furniture? The good news is that almost all types of products are suitable for this purpose. The difference is vinyl sheets, which must be soaked in water and the paper backing removed before use. Decoupage of furniture with wallpaper can be done either as a whole canvas or as a separate fragment with an ornament. For work, you can use old canvases left over from repairs, or purchase your favorite options in the store.
What are the advantages of wallpapering furniture?
- Cheapness. To implement, you will need cheap tools and materials that are easy to find in the garage. And you won’t throw away the remaining materials after gluing.
- Rapidity. It will take several hours to process a cabinet or bedside table.
- Ease of operation. Even without specific skills, the task is easy to complete alone.
- Great appearance. Since wallpaper is sold in a huge assortment, the furniture made will be an original and beautiful addition to the interior. And if you use wallpaper that was used to cover the walls, then the design will turn out harmonious and organic.
- If the chest of drawers looked old and you were going to throw it away, wallpapering it will make it look like new. You just need to follow the instructions to remove all the flaws and breathe new life into it.
- Opened with varnish, furniture elements will not be afraid of moisture. In addition, caring for them will not be difficult.
All these factors point towards decorating old furniture with decoupage.
Preparatory work
If you have already purchased photo wallpaper for an old wardrobe, then do not forget about the building material. The list of necessities includes:
Updating a cabinet with your own hands is a fairly simple job, but it has its own nuances. For example, some parts of furniture may lose their original appearance, such as handles or hinges. In addition, this will interfere with further operation, so it would be wiser to replace them with new ones.
Before gluing, be sure to prepare the surface. Use sandpaper to remove the old coating. If the cabinet was varnished, then you can heat it up with a hair dryer and remove the paintwork from the surface with a scraper, but after that you can sand it thoroughly. After this, remove all dust from the surface with a damp cloth and allow the furniture to dry thoroughly.
In order for the pasting to be even, you can disassemble the cabinet fittings. This will allow you to better glue joints and other hard-to-reach places. Remember, assembly based on the results of the work should be done only when the product is completely dry; this may take from three hours to a day.
Types of technology
Decoupage is multifaceted. There are a number of methods that can be used to achieve original results on furniture. Each option allows you to get your own style and effect. Types of decoupage:
- classic, in which the entire surface or a separate part of the furniture is covered with wallpaper and varnished on top;
- reverse, used for clear glass. Cabinets, tables or other furniture elements may have glass areas. In this case, the wallpaper is treated with glue from the front side. After which the sheet is glued to the glass from the inside;
- volumetric, in which relief decor is made. An excellent option for the Baroque style;
- artistic decoupage is special because it is part of the composition. The canvases are glued to a surface that has been previously painted or decorated;
- Decopatch involves processing furniture using scraps and colored paper.
You can use a specific decoration option or combine all types to create an original and beautiful room design.
DIY decoupage: vinyl wallpaper as a three-dimensional pattern
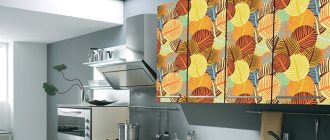
Vinyl wallpaper with three-dimensional ornaments and patterns will help to add an unusual decor to furniture. The remaining piece of wallpaper should not be thrown away, because it will help when decorating old furniture and interior items. The result will help turn ordinary cabinet doors into an element of style.
In addition to the basic items for decoupage, you will need spray paint with a metallic effect, such as gold, copper or silver.
Having prepared the cabinet doors, you need to place a piece of wallpaper on them, pre-coated with glue. At the same time, there is no need to soak it in water, as is the case with a chest of drawers and paper wallpaper. It is enough to thoroughly coat the desired side with glue, as with normal gluing during repairs, and leave a piece of wallpaper with the glue for 15-20 minutes so that the wallpaper absorbs more glue. To prevent the glue from drying out during this time, simply fold the wallpaper in half.
Furniture decoration technology
Now we can dwell in more detail on the theory of furniture decoration. Even a beginner can do all the work with his own hands, since this requires the simplest tools and minimal skills. Gluing wallpaper to a closet, bed or table is as easy as decoupaging with other materials. The only difference is the use of special glue. It is not recommended to use simple PVA for work. The fact is that wallpaper is made of quite dense material. It's better to use wallpaper glue.
If this is your first time working, we recommend practicing on a table, cabinet doors or other surfaces. This decor is quite simple, since it is enough to paste a large piece of wallpaper without additional manipulations. Above we briefly mentioned how decoupage is performed. This includes surface preparation, wallpapering and varnishing. To make it easier for you, watch this instructional video on how to decoupage furniture with wallpaper with your own hands.
Now let’s proceed to a detailed consideration of all stages in order to do all the work correctly.
Stage 1 – prepare the surface
The final result will depend on the correct preparation. Therefore, it is important to pay special attention to work. Then the surface of the product will be perfectly smooth, the ornament and varnish will be held and will not fall off during use.
Here is a list of tools that will be needed for preparation:
- putty;
- medium- and fine-grained sandpaper;
- filler;
- roller and brush;
- primer.
Further manipulations are performed in the following sequence:
- The surface is cleaned and wiped. Advice! If the furniture has a layer of varnish, it must be removed. Otherwise, the adhesion to the wallpaper will be poor.
- The wood has cracks. They need to be filled with filler. If the cracks are large, then putty is used.
- All that remains is to wait for it to dry and bring the surface to perfection using sandpaper (medium-grained). After this, fine-grain paper will help make the wood smooth.
- At the end, you need to remove the dust and open the wood with a primer. For this you need a roller and a brush. Acrylic paint is used to change the color of furniture.
That's all, the preparatory stage is completed. Thanks to this, the wallpaper will lie perfectly on the furniture and will adhere firmly to it.
Stage 2 – wallpaper glue
The simplest option is to use a whole sheet of wallpaper to cover a large surface, for example, a cabinet door, table, etc. In any case, the first thing to do is try on the wallpaper and decide on the right size. The canvas must correspond to the size of the surface being treated, plus 5-7 cm on each side for reserve.
When the workpiece is ready, it, as well as the furniture being processed, is coated with glue. But you shouldn’t put up wallpaper right away. It is important to wait 5 minutes for the glue to soak in. The glue layer should not be thick. Now the sheet is carefully applied to the surface of one of the sides. For final fixation, the sheet is smoothed using a roller, moving from the middle to the edges. The process is somewhat reminiscent of the work of pasting walls.
Advice! After the wallpaper is impregnated with glue, it becomes soft and can easily tear. When working, you need to take this into account and be as careful as possible.
The furniture is covered. All you have to do is wait for the wallpaper to dry, cut off the excess pieces and sand the edges with sandpaper. You also need to work with cut pieces. The only thing you need to do after gluing is to dip the brush in the glue and run it along the edge of the fragment.
Stage 3 – open the product with varnish
The final stage is to varnish the furniture. In this case, the opening is done in two layers. Wood varnish or acrylic-based permanent varnish is suitable for this work. First, the surface is treated with the first layer of varnish. The packaging indicates how long it will take for the layer to dry.
When the first layer has dried, you can apply the second. The work is simple, so it does not require much explanation. Please note that items in contact with moisture or water are best treated with yacht varnish. It is more resistant to moisture and will protect furniture with decoupage for much longer.
The whole process can be seen in practice from the video we prepared.
You can also watch decoupage of furniture with wallpaper, a master class on processing a chest of drawers.
Wallpapering
The gluing process is the final stage and the most critical; the appearance of the updated cabinet depends on the quality of gluing. The work consists of several stages.
- Take measurements of the selected part.
- We transfer it to the canvas, make a pattern or cut it to the required length.
- We coat the resulting sections with glue and apply them to the selected part. If the base of the wallpaper is non-woven, then the glue is applied to the surface of the cabinet.
- To fix, use a dry cloth or roller.
- After drying, the next day, install the fittings.
When using wallpaper glue, add a little PVA to it (1 tablespoon per 1 liter). When drying, do not allow drafts; if the windows are open, the wallpaper will crack or come apart at the seams.
The fittings are installed after the glue has completely dried
We simplify the task - use self-adhesive wallpaper
Adhesive wallpaper for furniture, or “self-adhesive” as they are called, will speed up the process of decorating furniture and save you from unnecessary work. The name itself speaks volumes about how they work. No glue is needed for decoration. Wallpaper is made in the form of a film consisting of two layers. The first layer is decorative. It is made of PVC, polypropylene and polyester. The second layer is paper-based, located below. It is covered with glue and has a protective film. Using self-adhesive wallpaper does not mean that the preparation stage is skipped. The surface of the furniture is still treated before pasting.
Only the part of the second stage associated with applying the glue is skipped. True, there are some points in working with self-adhesive wallpaper:
- Can only be used on flat surfaces. All defects and flaws under the wallpaper will be highlighted.
- The film on the doors may come off over time.
The good news is that the range of products is simply huge. On sale you can find a variety of ornaments, patterns and wallpaper designs. There are even those that imitate metal, wood or brickwork. Self-adhesive film can be cast, soft, flexible and low-plastic.
How is furniture decorated with such film? It is enough to repeat the first stage of surface preparation. Next, measure and cut out the desired piece of wallpaper, leaving approximately 3 cm of allowance on each side. The protective layer is removed from the film and it is applied to the surface. It is important that the film is slightly stretched so that wrinkles do not form. All that remains is to level and fix the film on the furniture. Sharp corners require special gluing. To do this, the film is heated using a hairdryer. The glue will warm up, and the material itself will be more plastic.
Note! There is another method of gluing - wet. To do this, the protective layer is removed from the film, after which the surface with the adhesive is wetted with a soap solution. This will allow you to adjust the position of the film. The wallpaper is glued into place, everything is trimmed, pressed and smoothed. The glue will dry in 10 or 20 hours.
You can also skip the varnishing step. Using film will make the work much cheaper and faster.
Don't know how to update an old cabinet? Budget ways
Furniture decor is creativity that does not like fuss. You've been thinking for a long time about how to update an old wardrobe, but you were afraid of ruining an out-of-fashion or familiar piece of furniture. Let's look at different options, ideas and techniques and choose something for ourselves. Simple wardrobes and sliding wardrobes may have similar decor, but as for a simple old wardrobe that has lost its former luster: you can make a unique piece out of it.
Let's sum it up
This simple method can bring any furniture back to life. The decoupage process itself is simple, and the result will make the furniture original and expensive. And the remains of wallpaper can be used rationally. And to make the furniture a work of art, it is additionally processed with interesting effects, such as craquelure, patination, abraded effect, gold leaf and tinting.
Recommended Posts
Wall shelves for TV and equipment
DIY curtains with eyelets
Design project for a small dressing room
How to design a niche in the wall
Sliding mirror doors for dressing room
White wallpaper with a black pattern in the interior
Interior decor in drawers and behind doors
There is another technique for decorating furniture with wallpaper, which is used extremely rarely. If the decoration on the facade of the furniture complements the interior, then the decor of the interior space is intended solely to please the user. Wallpaper can be used to cover the inside of drawers of a cabinet or chest of drawers, the back surface of doors, including radius doors, as well as shelves and the inner wall of the cabinet behind the doors. You can first purchase wardrobe doors and then decorate them. In this case, the choice of pattern and color of wallpaper depends on your wardrobe and your own preferences, and the color of the walls in the interior does not play any significance here. Again, experiment with contrast. If you have a lot of monochromatic items in your wardrobe, choose wallpaper with flowers and ornaments; if colorful dresses and skirts predominate, stick on striped wallpaper.
Did you like the article? Subscribe to the channel to stay up to date with the most interesting materials
Source
