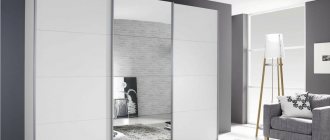
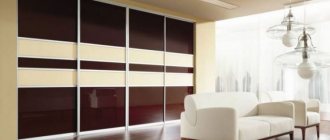
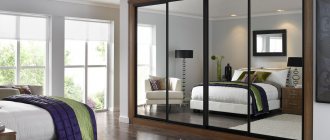
In a modern interior, it is often necessary to combine various complex elements. Particularly popular is the combined use of a built-in wardrobe and a suspended ceiling. But what are the nuances of their installation, and in what order should repairs be carried out?
Very often the question arises: what to install first, a suspended ceiling or a built-in wardrobe, or how to install a wardrobe in a room with an already stretched ceiling.
The main problem if you want to make a suspended ceiling is that it requires some indentation from the top panel of the room, that is, they take away part of the height of the room. This must be taken into account when choosing the height of the built-in elements, or rather, the wardrobe.
It is better, of course, to decide at the renovation planning stage: whether you will have a suspended ceiling, where and what kind of wardrobe will be installed, where to install the lighting.
To properly combine the cabinet and suspended ceiling, you need a “mortgage” - a beam up to 100 mm wide. It gives the structure reliability and is used in all three options for installing a suspended ceiling and a wardrobe, which will be discussed in this article.
With this installation, a wooden beam is provided between the main ceiling of the room and the compartment doors.
First option: installing a stretch ceiling after the wardrobe
We attach the door guide to the surface that has not yet been repaired. It is necessary to make a suspended ceiling around, not inside the cabinet, and attach it to the mortgage. In this case, you need to pay special attention to the points outlined below.
The advantage of this method lies in the presence of one common part - a beam located between the furniture and ceiling structures.
Firstly, it is necessary to calculate in advance the height of the canvas, taking into account the location of the upper communications: cabinet, air conditioner, ventilation hood or lighting elements. Otherwise, the interior will either look ugly, some of the doors will not be visible, or it will require the dismantling of the above communications.
It is thanks to the beam that the suspended ceiling and the cabinet become completely independent in relation to each other.
Secondly, careful calculations must also be made of the height of the false panel, which, if installed incorrectly, can destroy the harmony of the appearance.
Fastening techniques
Let's start with the fact that fastening methods entirely depend on the parameters of the object being hung (dimensions, weight), and based on the data obtained, you can get an answer to the question - is it possible to hang kitchen cabinets on drywall.
Professional techniques
- The most popular and accessible method even for beginners is to attach kitchen cabinets to plasterboard using butterfly dowels and special plasterboard dowels.
When attaching cabinets to the so-called “butterflies”, you need to make holes in the wall and then install the fasteners. When screwing a self-tapping screw into a “butterfly”, the tendrils of this type of dowel spread in different directions and tightly press the installed fastener to the surface of the gypsum board.
Operating principle of the butterfly dowel
If the cabinet is mounted on special dowels, use a screwdriver to screw the dowel into the cavity of the material and only then screw in the fastening bolt (screw). This method allows you to fasten only lightweight structures whose weight with all contents does not exceed 5 kg.
dowel nail; 2. snail dowel; 3. butterfly dowel;
- The second method is to attach kitchen cabinets to drywall using mounting strips. The main feature of this fastening technology is that the mounting strips are attached to a sheet of drywall, and not to the suspended structure. The strips are fixed in several places (both to the gypsum board and to the metal profile located under the drywall). Fixation is done with self-tapping screws.
Mounting rails for wall cabinets
After completing the installation work, you can hang a cabinet on such slats, the weight of which when fully equipped will not exceed 15 kg. But this method has one significant drawback - the use of unaesthetic fasteners that are unlikely to decorate your kitchen.
If you need to hang bulkier and heavier cabinets on the wall, there are other secure mounting options that will help you do the job yourself:
Extended anchor bolts can be used as fasteners - such fasteners will allow you to attach bulky kitchen cabinets and even household appliances to the wall.
In order to secure them, you should drill deep holes with a hammer drill through the drywall at the very base. We insert anchor bolts into the resulting holes and clamp them there using ordinary wrenches.
This method of fastening is relevant only if there are base walls (this fastening option is not applicable for a plasterboard partition);
Anchor Bolt Installation
The price of mortgages is zero - they can easily be made from leftover building materials.
Unconventional fastening methods
- Thus, a heavy kitchen cabinet suspended on a plasterboard wall can be additionally secured to the ceiling using decorative cables;
Hole in the shelf for the cable
- As additional elements for fastening kitchen cabinets, experts often use decorative chrome-plated tubes - they are screwed to the floor and installed in the form of a frame, which bears the weight of the suspended structure;
In order for the hanging cabinets to be mounted as efficiently and productively as possible, several recommendations must be followed:
- Use only those fasteners that have a quality certificate and meet aesthetic standards;
- When marking fastening points, you must use a building level, and not do the work by eye - correct marking will allow you to evenly distribute the load on all fastening points.
If you follow all the instructions and recommendations described above, then you will probably end up with a reliable fastening system that will quietly serve until the next repair.
In addition to cabinets, the presented techniques allow you to attach any other hanging accessories and attributes to the walls (hoods, air conditioners, cornices, curtains and paintings). All of the above work can be carried out without problems by beginners, without the involvement of expensive specialists.
Shelf on plasterboard for various accessories
Second option: attaching the wardrobe to a ready-made tension fabric
The suspended ceiling has already been created, therefore, the cabinet must be placed in the gap between the upper border and the floor. After measurements and selection of optimal dimensions, they proceed to attaching the cabinet rail. We attach it to the mortgage. In this case, the beam must already be installed inside the tension structure and calculated according to the depth of the built-in structure.
This combination option is not used as often as the first, and only when the furniture requires an attractive ceiling.
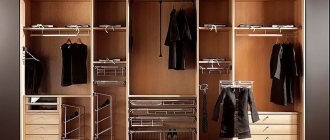
The peculiarity of this situation is that it is used more often when creating dressing rooms. The stretch ceiling also extends into the area inside the closet, which makes the design suitable for creating a beautiful mini-wardrobe.
Another advantage of this method is that the installation of the ceiling structure can be done before installing the cabinet with sliding doors.
However, it is worth considering that when installing a cabinet with a ready-made stretch ceiling, there may be difficulties in opening the doors, additional costs and difficulties during repairs. Here, special attention should be paid to hiring qualified specialists, since this installation method is rare, and few people are able to implement it; as well as strong fastening of the mortgage. The beam can come loose and damage both the tensioned fabric and the cabinet.
Why is it better to build a house than to buy a ready-made one, especially if this house was built for sale.
Why is it better to build a house than to buy a ready-made one, especially if this house was built for sale.
The beginning of this story was absolutely ordinary.
In a newly purchased residential building, one heating radiator was not heating. The plumber who had been called before “improved” this radiator by removing the control valve and stupidly installing a plug in its place. Remember how Celentano repaired the car in “The Taming of the Shrew”, since then he has had many followers
Source: homemasters.ru
Third option: fastening elements on one mortgage, but independently of each other
One of the most convenient installations. In this case, the installation time of both the suspended ceiling and the wardrobe is still unknown, so their fastening is calculated independently of each other. The common element of the cabinet and the suspended ceiling is only a single plane of the mortgage.
This option is most often used if it is not possible to maintain the sequence of installation of these two structures.
If the standard timber used for the mortgage is about 80 mm, then here you need to use a wider one - about 150 mm. The same is done with the guides: they are expanded to avoid damage from self-tapping screws.
In this case, the suspended ceiling is installed independently of the wardrobe. First of all, the PVC sheet is stretched, and then the cabinet is made. In this case, the wardrobe will have a top lid.
Comparisons of the advantages and disadvantages of various options
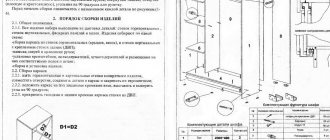
Those who carry out repairs from scratch need to decide on the order of fastening the elements. This table will help you choose the option that is most optimal for you.
| Option | Stretching after the cabinet (1) | Wardrobe after ceiling (2) | Independent installation of cabinet and suspended ceiling (3) |
| Advantages | The ability to repair one of the elements without affecting the other, because the common part is just a beam | – The height of the cabinet is ideally calculated, which makes the interior more aesthetically pleasing – The presence of a stretch ceiling inside the cabinet | The designs of the cabinet and tension system are absolutely independent of each other |
| Flaws | If the false panel is placed incorrectly, the design loses its attractive appearance. | – Possible collapse of the mortgage and expenses for repairs -No mortgage guarantee – Cabinet doors may not move well | Additional costs: for a wider beam and other extras. materials |
What to design first
If you stretch the ceiling and then proceed with installation, the following problems may arise:
- workers will damage the ceiling surface;
- the space formed between the cabinet and the ceiling will accumulate dust. Since it is not recommended to attach anything to the film and the distance between the surfaces will be around 70 mm;
- The cost of installing a tension structure depends on the area of the ceiling. Then the question arises, why pay more?
Before installing the ceiling, warn the installers about the subsequent installation of the cabinet
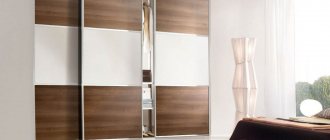
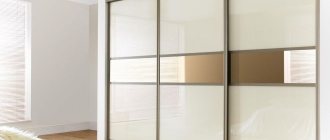
Built-in wardrobes in the interior - 50 photo ideas:
PreviousSliding wardrobesWhat should be the dimensions of a sliding wardrobe?
Next
Sliding wardrobesHow to choose the right sliding wardrobe?