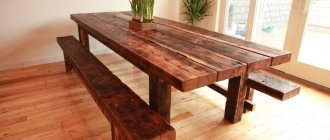
Restoring old furniture has become a real hobby for many people. This can help not only save money on buying a new piece of furniture. If you approach the process creatively, then even a table that no one needs, which has been collecting dust in the basement or attic for many years, will become a real work of art. Any furniture can be transformed. But if you are a beginner master, then it is wiser to try your hand at something simple.
To “breathe life” into your favorite bedside table, you just need to carry out its restoration using improvised means.
For example, restoring a bedside table with your own hands will not take much of your time.
Such work will not require serious financial costs. You can carry out repairs on your own, and materials that can be found in any home are suitable for decoration.
Do-it-yourself kitchen remodel
The kitchen is the most visited place in the apartment. Therefore, the kitchen set very quickly loses its attractive appearance:
- the fittings wear out, which causes the doors to sag and uneven gaps appear between the facades,
- doors bend, bend, swell and crack due to temperature changes and exposure to moisture,
- The outer layer of the tabletop is worn off,
- Drops of grease, dust and dirt stick to the body and front part, handles and other metal fittings rust.
There are two ways to put your kitchen furniture in order: contact a furniture shop to order new facades and countertops, or do the restoration yourself.
The easiest way to do this is to repaint the facades. True, this method is suitable exclusively for doors made of solid, framed and painted MDF. Laminated chipboard and film MDF are not recommended to be painted.
Patina effect on framed MDF
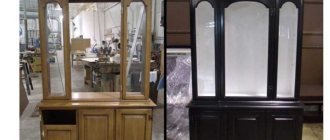
Repainting buffet doors white
Decoupage of kitchen furniture
It is very easy to give a new look to your kitchen by replacing visible furniture fittings: handles, supports (legs), baseboards on the countertop.
In addition to the kitchen set itself, you can update the dining table by replacing the boring tabletop with a glass one; stools and chairs, covering the top with new fabric or decorating the legs; change the appearance of the refrigerator according to the new look.
Reupholstering a kitchen stool
Pasting film with a pattern on the refrigerator
Replacement of accessories
Replace the nightstand handles with new ones. To emphasize the vintage feel, use stylized fittings such as copper, ceramic or wrought iron handles and locks. You can even use vintage pens that are different in appearance but identical in style on one product.
Now your nightstand is ready. You've put in a lot of work, but the results are worth it. A beautiful and unique piece of furniture can decorate your interior and create an antique and sophisticated vintage atmosphere.
Found a violation? Report content
Viennese bent beech chair
After
Before
Before
After
Sanded with grain 80, 220 and 800. Chips and cracks are filled with putty. All parts are glued together using PVA. The damaged veneer has been restored.
Behind a thick layer of old varnish hides the beautiful texture of natural wood, which appeared after covering with stain. The chairs were covered with 2 layers of stain and 2 layers of varnish.
Painting the product
First, mix 1 part chalk paint with 2 parts water. Then use light brush strokes to apply the paint to the surface of the nightstand. Try to leave small brush marks so that the wood can be seen in some places.
If the painting process results in harsh lines, you can smooth them out a little. To do this, take a damp sponge and wipe the entire surface, paying special attention to the places where you need to even out the tone. Repeat the process until you are satisfied with the end result.
There is an unusual holiday in Japan: how to celebrate Cat Day on February 22
The microwave has no place on the refrigerator
Why we disliked the new girl, or Why openness and kindness are not always good
After this, the paint should dry completely in the fresh air. This process may take 48 hours before you can move or touch the product.
Desk
The table is completely disassembled and the layer of varnish (polyester resin) is removed with a construction hairdryer.
The dowels, piano hinges, and bolts were replaced, and the peeling veneer was glued. One side of the table was completely replaced because it had completely delaminated. The locks have been removed and handles have been installed instead.
Preparatory work
The first thing you need to do is clean your nightstand. To do this, take warm water and add a small amount of detergent that contains chlorine.
After the party, the girl decided to apologize to her neighbor: the answer was unexpected
NASA plans to explore the surface of Mars using a mini-drone
A huge column of ash, fiery lava, peals of thunder: Etna woke up (video)
Thoroughly wash all surfaces inside and outside the bedside table to disinfect them and remove dirt and unpleasant odors. Then take warm water again and add a couple of drops of vinegar to it. Now you need to let the bedside table dry completely. To do this, leave it for several days in a well-ventilated area or outside, if weather conditions permit.
How to give new life to old furniture with your own hands: examples of original painting
It would seem that it could be simpler: buy paint, paint an old chest of drawers with it and enjoy the changes. But it's not that simple. It is important to do this correctly so that the coating goes on evenly and does not transform your piece of furniture into a design failure.
If you are a fan of Provence style or any other country style, then painted furniture will turn your room into a real corner of comfort and rural romance. The main thing is to choose the right shade of coating.
Please note that if your cabinet or chair is made of solid wood, such as oak, then it is better not to use paint, but to try to transform it using other methods. Such high-quality material can easily be spoiled by coating with simple paint or varnish, reducing its cost. But it is precisely this kind of furniture that sets the tone for the entire environment, emphasizing the status and good taste of its owner.
If you want to give new life to old chipboard furniture or remake a Soviet wall, then look at the photos of painting options in different colors and carefully read the master class that we offer.
- First, wash and clean the surface. Apply a layer of primer and plaster.
- Dip the brush into the paint and start moving it along the grain of the wood. This way it will be better distributed.
- Wait at least 12 hours for the coating to dry completely.
- Wipe the surface with sandpaper and apply a second coat of paint.
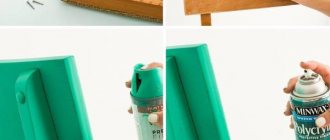
- When everything is dry, you can fix the result with varnish.
Pay attention to color
Black and dark brown are ideal for transforming Soviet furniture from the 70s and 80s.
Such shades will perfectly emphasize the severity of the lines in their decoration and add status.
Light colors, on the contrary, will add romance. If you prefer lightness, simplicity and tenderness in the design of the room, then feel free to choose pink and blue colors.
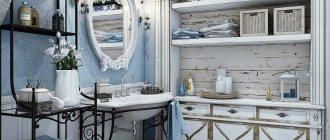
Diluted pastel colors will help you be transported to the atmosphere of Provence and feel the spirit of old France.
They are sold in stores, they can also be printed from the Internet and cut out on thick paper. Before applying the design to the furniture, the stencil should be secured with adhesive tape.
If simple coloring is not to your liking, then experiment with stencils or lace. For example, you can make your own forms for future drawings. Place the image on thick paper and cut it out along the contours.
Place the workpiece on the surface and paint thoroughly. The print will leave an imprint.
If you take a lace ribbon, first attach it, for example, to the wall of a cabinet or the head of a bed, and then run a paint roller over it, you will get a very beautiful and delicate decor.

