To connect all kinds of materials that are not very hard, construction staplers are often used. This device is capable of reliably fastening plastic and wood together with special staples. Using a staple gun is quite simple, but there are still some nuances in working with this device that you should be aware of.
How to choose, operate and repair a furniture stapler
Construction staplers are also called furniture staplers. They are increasingly used in construction, furniture production and households. Used for punching and fastening various materials. The tool simplifies many operations. To prevent your hand from getting tired, some types include a battery, a network connection, or a pneumatic mechanism. Due to this, the work is significantly accelerated. For many models of staplers, in addition to regular staples, nails and round staples are used as consumables for fastening wires. The impact force and penetration depth are controlled by special regulators. This increases the accuracy of the work. To select and operate such a device correctly, you should know some nuances.
Operating principle and purpose of construction staplers
A stapler is a device for attaching sheet material to a base. A construction stapler looks like a pistol.
Its action is reminiscent of driving nails with a hammer. To play a blow, you need to pull the trigger or the cocking lever, depending on the type of instrument. And then release the trigger. Using a system of springs located in the gun body, the staple from the clip is fed into the output channel and is instantly driven into the material. At the moment the trigger is released, the bracket moves towards the exit. Therefore, in the passive state of the stapler, the equipment is already ready for driving. In some models, the staple legs are bent, in others they are simply driven in. Not only staples, but also nails can be used as equipment. There is no need to put in any special effort, so the process is easy and quick. It can be used by women and older people.
Stapler at work
The stapler is designed to perform two types of tasks, which expands the scope of the tool:
- nailing one part to another. The base is plastic, wood, plywood, chipboard. The attached part is any material that the stapler will pierce: carpet, boards, baseboards, lining;
Nailing boards with a stapler
Stapler for stitching parts with a folded edge of the staples
In both cases, the fastening is reliable. To increase its resistance to deformation, consumables are used in which the sharpening is asymmetrical, or the coating melts.
Staplers are used in various industries:
- in construction;
Stapler in construction
Nailing baseboards with a stapler
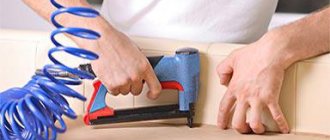
Upholstery of furniture using a stapler
Stapling the cable with a stapler
Stapling cardboard with a stapler
Making greenhouses using a stapler
Preparing the tool for work
In our case, a mechanical stapler will be used to attach the foam rubber and upholstery fabric to the bench seat. To do this, you need to choose the right fasteners . Depending on the thickness of the foam rubber, choose brackets that, when fastened, will grip the material itself and the base. It is better to take large ones, 14 - 16 mm in size, so that the material is securely fixed. But remember that the size of the staples should not exceed the maximum allowable for the tool you are working with. Otherwise, you won’t be able to insert them into the magazine, and if you do, there is a high probability that they will get stuck.
The choice of fasteners for nailing upholstery depends on what material you will use:
- For velvet, flock, cotton or linen, you need small staples, 4–6 mm in size (they will not damage the thin fabric and will fix it well).
- For denser materials, such as leather, suede, microfiber , staples measuring 8 - 10 mm are suitable.
Remember that it is better to buy branded consumables . After all, low-quality fasteners can damage the product or cause damage to the tool itself. Original staples will not get stuck in the stapler, will not break or bend, they fit perfectly into the material the first time, so they are used very economically.
Remember your safety! When working with sharp staples and nails, use personal protective equipment . Be sure to wear gloves so that if fasteners accidentally fly out, your hands are protected. Also, this will help prevent your palm from slipping, which is very important when carrying out such painstaking work as upholstery.
Types of furniture staplers
Types of staplers according to the type of force applied:
- mechanical or manual.Activated by hand force. Low power is a disadvantage of such devices. But there are also advantages: light, cheap, compact. Mechanical staplers are reliable in operation, as they consist only of a body, a lever and a spring mechanism. There are two types:
- lever To hammer in the equipment, you need to press the lever;
Hammer or impact stapler
Mechanical staplers come in the following types:
with a coil spring. Has a weak shot. Allows you to work only with soft wood. Gives noticeable feedback to the hand. Resource up to 12,000 shots;
Coil spring stapler
Stapler with spring
- household These are mechanical and cheap low-power models of electric staplers;
- professional. These include more powerful electric and pneumatic tools.
Types of staplers by type of equipment:
- staplers. Used for household work;
- nailers. Used for professional and household activities. Work with large staples and nails. The length of the equipment is more than 12 mm;
- universal. Can work with flat and round staples, nails and pins.
How to use a furniture stapler: device, operation, tips
A furniture stapler is a fairly universal tool with which you can not only perform furniture upholstery procedures, but also a number of other construction operations.
Today, there are several types of similar equipment, differing in their operating principles:
- pneumatic,
- electric,
- manual.
Pneumatic staplers are used in industry, and electric and manual staplers are used in everyday life. Models belonging to the latter type are the most common in the furniture industry due to their mobility and ease of use. Let’s use this example to look at the principle of operation, operation and repair of furniture staplers.
However, before moving on to this procedure, I would like to say a few words about staples and their varieties.
How to choose a device: advice from professionals
To choose the optimal stapler, you need to solve the following problems for yourself:
- frequency of use of the tool: every day or from time to time;
- places of use: indoors, outdoors. Is there electricity there?
- Do you need precision driving of equipment;
- materials you plan to work with.
Depending on the purpose and working conditions, choose the type of stapler:
- for infrequent work with non-solid materials, a mechanical stapler is suitable;
- If you don't need precision in installing staples and have the ability to swing, then consider choosing an impact stapler. He's light. Attached to the mounting belt;
- for a large amount of work in places where mobility is needed, take a closer look at a cordless tool;
- if you work indoors with an outlet and don’t want to overpay for the battery, buy a stapler with a mains connection;
- If you need a stationary powerful device, don’t hesitate to take a pneumatic tool.
What characteristics to look for when choosing a stapler:
- presence of impact force regulator. A mechanical tool has two types of regulation: minimum and maximum or smooth adjustment. Electric has up to 6 modes. The setting is made using a software switch. The thinner the material, the less the impact force, otherwise dents will form;
- Double punch. Only electric staplers have it. For hard materials, large equipment is used that will not clog immediately. The double strike mechanism itself determines this and works a second time. If there is no such mechanism, then you will not immediately see that the nail heads are not completely hammered in;
- removing fasteners using a stapler. If this function is available, then to remove poorly hammered equipment you will not have to do it manually or with a nail puller;
- body material. Structural steel staplers weigh more than plastic ones;
- rubber inserts on the handle. Their presence reduces the recoil of the tool, and the hand gets less tired;
- Battery type: nickel-cadmium suitable for low temperatures. But they have a memory effect, so they discharge quickly. They are used in inexpensive models;
- lithium-ion. They hold a charge longer, but are less resistant to mechanical stress;
- nickel metal hydride. Lightweight and have a long charge life;
Selecting staples for a stapler
When purchasing staples, you should know which staples will fit your stapler. The type of equipment is indicated on the packaging, in the instructions and on the tool body. Staples have characteristics that must be taken into account when choosing:
- form. It can be U-shaped or semicircular. The latter is used for cable installation;
How to insert staples into a stapler
To understand the specifics of refilling a stapler, it is necessary to determine the principle of its operation and the type of driving force. The following types of staplers are offered on the market:
- Construction.
- Stationery.
- Furniture.
They are also divided into 3 groups depending on the moving mechanism:
- Mechanical.
- Electrical.
- Pneumatic.
Representatives of the first group work using arm strength and demonstrate weak power. They hold a small number of staples and are not capable of nailing thick or hard structures.
At the same time, mechanical models are characterized by compact size and lightness, so they are convenient to use in hard-to-reach places. Such devices are also in demand due to their low cost and availability.
In electric staplers, the staple flies out only after pressing the corresponding button. However, the device is brought into operating mode only after electrical power is supplied. Models with battery or network connection are available for sale.
Electric staplers are much more expensive than mechanical ones. They are also distinguished by their increased dimensions.
When working with network models, you may encounter discomfort due to the specific placement of the cord. Cordless staplers have a bulky handle and weigh quite a lot.
Representatives of the pneumatic group operate by supplying compressed air, which helps the staples or nails fly out of the magazine. The devices have increased performance and a spacious magazine, so they can be used for a long time without charging.
A negative aspect of pneumatic staplers is considered to be noise during operation. This is due to the presence of a compressor. Moving with such a device is quite problematic, so it is better to use it for professional purposes.
When doing home finishing work or gluing simple materials, it is better to choose mechanical and electric staplers.
How to refill a construction stapler
Novice builders do not fully understand how to use a construction stapler, so they often wonder about refilling it. The process itself does not require much effort, provided that the employee follows all the rules and recommendations. To thread a construction stapler, you need to follow this guide:
- Before disassembling the spring, you must lock the device using the appropriate lever or button. The type of blocker is determined by the features of the model.
- There is a groove on the reverse side. Sometimes you need to apply mechanical force or press a button.
- Next you will need to remove the inner rod by displacing the spring and place it on the staple rod. The tip of the device is directed towards the handle.
- At the next stage, the rod returns to its original place, and the magazine closes.
- Finally, all that remains is to remove the tool from the safety lock and perform test shots to check its functionality.
Using a stapler is quite simple: the main thing is to make sure that it is configured correctly and works without failures. During testing, you need to adjust the spring tension and adhere to safety precautions. This device is potentially dangerous, so you need to work with it with special care:
- After completing the work, do not forget to return the fuse to its original location to avoid random operation of the device.
- Do not point the device towards people or pets.
- Do not operate the tool if you are feeling unwell.
- The workplace should be clean and the lighting should be bright.
- Do not run the stapler in a high humidity area or use it in the rain.
How to refill a stationery stapler
If you need to refill a stationery stapler, follow these instructions:
- Squeeze out the plastic cover attached to the spring. During this task, it will pull the springs along with it, and there will be free space for installing brackets. Large tools are equipped with latches that move away.
- Take the fasteners and place them in the groove with the ends pointing down.
- Close the lid and check if the stapler works by testing.
If the staple was bent or did not fall out of the tool, perform the step again or purchase a different tool. It may have been disabled and cannot eject staples normally.
Using a mini stapler is easier than using large staplers. Simply lift the lid and pull it back. When the procedure is completed, all that remains is to close the device and continue working.
Compact tools are equipped with a small staple compartment, so you will have to use tweezers to remove old staples to install new ones.
Often devices jam during operation. To fix the problem, you need to open the cover and adjust the staples. Otherwise, the device may be damaged.
Knowing the structure of a stationery stapler or finding a simple diagram, you can simplify your task.
How to insert staples into a furniture stapler
Inserting staples into a furniture stapler is quite simple. But before purchasing such a tool, you need to familiarize yourself with the list of tasks that it performs. First of all, it is worth assessing the thickness and density of the structure being processed in order to find the optimal number of staples with high reliability of fixation.
Each model is designed for the appropriate staple size. In most cases, the 53 type model is used. For upholstery work, they also take nails, which are also nailed with a special stapler. It provides quick fixation of materials.
A manual model is suitable for home use, while electric and pneumatic units are used for more professional purposes. The presence of a drive will be useful when performing large volumes of work, where maximum performance and reliability are important. Pneumatic models are not in great demand because they are only suitable for industrial tasks. Electric staplers are the most versatile and useful in various fields of activity.
The device is equipped with a special holder where you can install up to 100 staples. Before charging the tool, you must open the lid or pull out the container. Next you will need to pull out the feed mechanism and insert the clip. The main thing is to do it as evenly as possible so that it does not get stuck while nailing the surfaces.
After loading the device with staples, loosen the feed mechanism and secure the clip in the housing. Next you need to close the lid or push in the container and get to work.
The material is nailed as follows: the working area is leaned against the area to be fixed, and then the mechanical lever or drive button is pressed. As a result of such actions, the staple pierces the fabric and sinks into the base, ensuring reliable fixation of the upholstery. Furniture staplers differ only in the type of spring drive. The simplest inventions work using muscle power, while more professional solutions require electrical energy or compressed air.
Types of staplers
Before you go to the store to buy this tool, you should clearly evaluate the purpose of its purchase and the parameters that should be present in the device. Only after this you will be able to choose what you need from the presented assortment.
Manual stapler
This is a device that works mechanically, that is, to remove the staple from the device, you need to press the handle and apply some physical force. The main positive quality of this furniture stapler is its autonomy. So, you can work with it even on the street; the performance of the device does not depend at all on the presence of an electrical network.
Construction mechanical stapler at work
But, if you plan to carry out a large amount of work, then this will require a considerable investment of not only time and effort. We can conclude that this type of furniture stapler is good for use at home when solving small problems.
Electrical appliance
Such a device, in turn, requires a connection to an electrical network or a battery. This furniture tool is already used by professionals for longer work. But, as a rule, an electric stapler has low impact force and rapid failure of the mechanism.
Electric Construction Tool for Fixing Staples
Pneumatic stapler
For tasks performed on a production scale, pneumatic devices are used, which have greater speed, strength and durability compared to other options.
The design of a pneumatic stapler is more complex than that of a mechanical one
Important nuances
When purchasing a paper stapler, it is important to consider how actively you will use it. If you plan to use it often, then pay attention to metal options. They are considered more reliable and will last longer. In other cases, ordinary plastic devices will do.
Their operating principle is absolutely the same. It is also important to take into account that staplers differ in power. This indicator determines how many sheets your device can fasten at a time. By the way, it is also important to choose the right staples for a stationery stapler. It is advisable to know not only their size, but also the manufacturer.
Juniperus squamata Blue Swede
In addition, you need to know that there are devices that only work when resting on a table or other flat surface. If you try to fasten papers by weight with such a stapler, the staples will fall out or become deformed.
Choosing the Right Stapler
Based only on the nature of future work with a furniture stapler, you can already choose it. For example, for a single change of upholstery on an armchair or sofa at home, a mechanical model is quite suitable. This is due to the fact that mainly soft types of wood are used to form furniture frames in production and much effort is not required to attach fabric to them.
If the work involves installation on a solid base, then the mechanical option will not help. In this case, an electric stapler will help out. Of course, you can choose a pneumatic tool, but its cost is high, so if you do not need a professional device for regular use, there is no point in buying it.
Consumables for proper operation of the stapler
Here are the additional design details that greatly facilitate the use of a mechanical stapler and the presence of which you should pay attention to when choosing:
- Transparent compartment for staples. This addition will allow you to monitor the amount of consumables and, if necessary, quickly respond to its depletion.
- Adjustable impact force, allowing you to adjust the stapler to any material.
- A stopper on the handle will prevent accidental firing of the staple.
- The presence of a rubber lining on the handle allows the tool not to slip in your hands.
Selection of staples
For each stapler, it is necessary to select the consumables that will ensure uninterrupted operation of the device. Typically, the types of brackets for a particular tool are indicated in the instructions for it. You need to know about the basic parameters of staples for a stapler:
- The depth, which can vary, is from 4 to 14 mm. It is chosen depending on the material to be worked with. For example, to upholster furniture with tapestry you will need staples 8 mm deep.
Appearance of a whole set of staples
- The type of staples must be combined with the brand of stapler. Thus, incorrectly marked staples, for example, too small, can cause them to fly out one after another during operation or cause the tool to jam.
Operating principle
Depending on the type of drive, tools are divided into electric and pneumatic.
Electrical
These devices are widely used in everyday life. Working with an electric stapler is a pleasure; you just need to connect the device to the power supply. However, an electrical device, in comparison with its manual counterpart, is much more expensive. It is profitable to buy it for professional craftsmen who are constantly repairing furniture. Naturally, it is not profitable to buy such a model for a one-time repair. Manual models are suitable for household use.
Pneumatic
These models are not used in everyday life, since their use requires a compressor unit. You can buy your own compact compressor, but how quickly such a purchase will pay off is the question. Therefore, buying a pneumatic device is beneficial for companies producing and professionally repairing furniture.
Working with a mechanical stapler
To learn how to carry out repair work using a construction stapler, you need to know about the basic rules of this process.
Charging the device
Before you start, for example, upholstering a sofa, it’s worth learning how to charge a stapler. This is done step by step according to the following algorithm:
- Installing the device on the fuse.
- A folding flap at the rear of the stapler reveals a compartment for staples.
- Pulling the rod with the spring out of the compartment.
- Installing staples with the upper bent part towards the handle of the stapler.
- Releasing the rod to clamp them.
- Slam the sash until it clicks and start working.
Some models have a different mechanism and therefore many people think about how to refill them. There is nothing complicated here either, just remove the special chute that appears when you press the button. The staples are installed into it with their sharp ends down. Afterwards the filled element is inserted back.
The process of charging a mechanical stapler with staples
We attach the staples to the base
After clarifying the charging instructions, it will not be amiss to find out how to use the stapler during direct work.
This is done like this:
- Prepare materials for fixation and the instrument itself.
- Mark the line along which the staples will be attached. This makes it easier to install fasteners exactly in the place where you plan.
- The stapler is applied to the desired place quite firmly.
- Without lifting the device from the surface, press the lever.
- After this, if everything is done correctly, a characteristic sound will be heard, and the bracket will be securely attached to the base.
Staple fixation process
Classification of staples used
To use a staple gun, you need staples. They are divided into separate types according to the following criteria:
- according to the material from which they are made;
- by degree of hardness;
- by the presence of coverage;
- by size;
- according to form.
According to the material of manufacture
- aluminum, used when working with non-solid materials;
- copper (expensive), also intended for soft parts;
- steel, suitable for both non-hard and soft materials, but will rust over time;
- made of stainless steel (stainless steel) is a reliable option in a wide variety of conditions, but has a high price.
Furniture staples can also be galvanized to prevent them from rusting.
By hardness
Based on hardness, fasteners are divided into the following types:
The ends of the fastener can also be sharpened differently, making it easier to drive in under certain conditions.
By shape
Based on the shape of the staples, the following types are distinguished:
Most often in practice, fasteners in the form of the letter U are used, and U-shaped ones are used mainly when laying cable lines. Pins are almost invisible fasteners. They are used when fasteners must be as invisible as possible.
Tips for using the device
To maintain safety when working with a furniture stapler, you must follow the following recommendations:
- Before fixing the staples with a mechanical stapler, it is adjusted on an unnecessary piece of material. To do this, after the shot, they look to see if the staple has entered completely into the base. If yes, then you can start working right away. If not, you will have to turn the screw mechanism from minimum to maximum to achieve a good position.
- When working, be sure to hold the material to prevent displacement with your free hand.
- After finishing work, the handle must be put on the safety lock to avoid accidental pressing and operation of the device.
Stapler with safety handle
A construction stapler allows you to fasten any material to the surface of furniture in the shortest possible time. The tips in this article will help you choose the right tool and correctly approach working with it.
Content:
- 1. Preparing the tool for work
- 2. 5 useful tips for using a manual stapler 2.1. Tip 1: Adjust the Impact Strength
- 2.2. Tip 2: do not rush to immediately drive staples into the product
- 2.3. Tip 3: Be careful when attaching
- 2.4. Tip 4: check the availability of fasteners in the store
- 2.5. Tip 5: secure the handle with a safety lock when the tool is not in use
To fix the film on the greenhouse, to upholster upholstered furniture with fabric, to nail baseboards, platbands, roofing or finishing materials - mechanical staplers are often used in everyday life and are simply irreplaceable in workshops and small enterprises for reupholstering furniture. In addition, manual staplers are needed when creating designer products, original furniture, and interior items. As an example, we will look at making a bench and talk about the rules for using the tool at each stage of work. You will see that there is nothing complicated about it! Let's start with the main thing...
How to hammer staples into plywood with a hand stapler? Is there a shock adjustment?
There is a manual stapler Stayer 3150. It does a good job of driving staples into wooden boards. And then it was necessary to pin a fabric support to a piece of plywood, to a thin, ordinary three-piece plywood. And the brackets will only fit in there a couple of millimeters, but nothing further. When you try to finish them off with a hammer, they bend, complete nonsense. Is the trick in parentheses or something else? But I think my braces are also Stayer, branded. recommended according to passport A-053 type. Maybe there is something tougher? Which ones to look for? Or are there some cunning special methods of work, such as making sure to make the sign of the cross over yourself?
Is it possible to adjust the impact force? There is some kind of screw with a notch sticking out from above, but by God, I did not understand the relationship between tightening or unscrewing it with the depth of driving the staples into the plywood.
I understand that there are supers with a compressor - those are no problem, but for the sake of a dozen staples it’s worth looking for some smarter way to achieve your goal. Surely someone figured out some trick. Share, please!
T-34, use this screw to adjust, and try placing something solid under the plywood
. If that doesn’t work, try searching for “steel, hardened with bevel (for hardwood, chipboard and plywood)”
Kubera wrote: If that doesn’t work, try searching for “steel, hardened with bevel (for hardwood, chipboard and plywood)”
And it’s better not “branded”
T-34 wrote: But it seems like I also have Stayer braces, branded ones.
And branded ones.
Rapid or Novus. Type 53.
Alex___dr, I have braces from “Fit”
truth 140 type and spapper “Zyubr”
These seem to be thicker than type 53.
Alex___dr wrote: These seem to be thicker than type 53.
type 53: width 11.4, thickness 0.7 mm; and type 140: 10.6 and 1.2 mm, respectively
but type 53, judging by the Internet, also has red-hot staples
Kubera wrote: type 53: width 11.4, thickness 0.7 mm; and type 140: 10.6 and 1.2 mm, respectively
but type 53, judging by the Internet, also has red-hot staples
Yes, but what about the issue of interchangeability? Will 140 fit instead of 53? You can’t push them into the staple receptacle, it’s tight there. And these are 10.6 and 11.4. And there seem to be no complaints about the staples - they do not bend or deform upon impact. They just stick in a little, but don’t pierce through the plywood and don’t shoot the sackcloth to the plywood. This neat letter P sticks out.
It’s impossible to push hard, because it’s the seat of a chair, there’s 20 foam rubber plus sackcloth - it doesn’t allow you to press it dead.
How can you regulate the impact force with a screw - tighten it clockwise or vice versa, unscrew (like loosen) the screw?
As the screw is tightened, the impact force increases. Sometimes you need to screw it in, unscrew it, screw it in, maybe I’m so slow, I don’t know. When hammering, step with your knee and press the plywood with soft elements to the hard base so that the blow passes. Helps a lot.
Putnikk62 wrote: When tightening the screw, the impact force increases. Sometimes you need to screw it in, unscrew it, screw it in, maybe I’m so slow, I don’t know. When hammering, step with your knee and press the plywood with soft elements to the hard base so that the blow passes. Helps a lot.
You'll sell it to hell. I was really freaking out. The surface is large. Here you sit with your entire weight on your ass - it doesn’t press down all the way (and thank God, there are no hemorrhoids) so you can’t press it with your knee. You have to be smart with the stapler.
T-34 wrote: You'll sell it to hell. I was really freaking out. The surface is large.
and if you put it on an iron corner, i.e. press not over the entire plane, but only in the area of impact?
or take hardened staples of minimal length (although the foam can cushion them too)
You do not need to press down the entire seat, but only that part (corner or edge) where you hammer the bracket. I worked with 30th foam rubber, the problem is not that you can’t push it, but that there aren’t enough arms/legs. If you are not sending a batch for sale, but a couple of chairs for yourself, ask someone to help you and press with 2 hands (all your weight) on the edge of the seat (which should be placed upside down). Your hands should be as close to the bracket as possible. However, it’s still a hassle to drive into plywood. I have the same stapler, but I don’t remember the numbers. There were no problems with the stapler, there were problems with the selection of staples, they sagged in the middle. And yes, also, press the stapler “dead”, so that at the moment the staple enters the material, it (staples) does not “play out”; it is possible to press the stapler into the “oak” material (that’s exactly the threaded screw) with your left hand .
Are there any instructions for regulating the impact of the stapler? Where should you turn the screw and to what depth?
Tomorrow morning I will carefully sharpen the staples with sandpaper.
The deeper (clockwise, if you look at the screw from the top) the screw is tightened, the stronger the impact.
I haven’t seen instructions anywhere, everything is intuitive. Tighten the screw (down) until it stops and release it half a turn. There, in the lower position, there may be an option that prevents the firing pin from jumping off. Seek and you will find. The instrument is not one of the “precise and expensive” instruments, so everything is done “by eye”, in Russian, so to speak.
Putnikk62 wrote: I haven’t seen instructions anywhere, everything is intuitive. Tighten the screw (down) until it stops and release it half a turn. There, in the lower position, there may be an option that prevents the firing pin from jumping off. Seek and you will find. The instrument is not one of the “precise and expensive” instruments, so everything is done “by eye”, in Russian, so to speak.
Yes, that's exactly what I did. Tightened it all the way - hell there! Doesn't knock at all. Well, of course, I started to slowly unscrew it, loosened it the other way around - it just clicked - the staple fit into my palm very well. All the way. That's how it would be in plywood.
T-34, if possible, try to find staples for the ZUBR stapler, “Bulldog” series, asymmetric sharpening, type 53 (or similar) maybe it will be easier to fix them on plywood
Kubera wrote: T-34, if possible, try to find staples for the ZUBR stapler, “Bulldog” series, asymmetric sharpening, type 53 (or similar) maybe it will be easier to fix them on plywood
Wow! Animals. I've never even seen one like this! Tomorrow I'll run to the shop in the morning and show you the picture. Thank you.
T-34 wrote: Yes, that’s exactly what I did. Tightened it all the way - hell there! Doesn't knock at all. Well, of course, I started to slowly unscrew it, loosened it the other way around - it just clicked - the staple fit into my palm very well. All the way. That's how it would be in plywood.
Well, everything is working out. Apparently you don’t need our advice.
Putnikk62 wrote: Well, everything is working out. Apparently you don’t need our advice.
Well why not? Efficient ones are very necessary.
Yes, so far everything turns out to be a fart steam, we learn from our mistakes. There is only one practical piece of advice out of a hundred chatter.
An analysis of the Kashirsky Dvor market showed that manual mechanical staplers are, in principle, all the same. And everyone doesn’t hammer the staples into the plywood the same way. But if you undertake to repair furniture for money, it will be enough to cover up the eyes of the customer. They grab the upholstery a little with staples, attach it to the chair - and take it away. It will last a couple of days. And then it’s like it’s his own fault. All complaints about the customer's crooked ass.
I looked all over and couldn't find any decent staples. Sharpening with sandpaper does nothing except make the ends of the staples easily overheat, and then throw them away altogether. I still don't understand the adjustment. Then he’ll hit one to the ears, then he’ll stick a dozen in a little. Then on a new one, for one driven in - five stuck. Well, I settled in and made my own chair. But God forbid, I was foolish, it would be better if I earned normal money during this time than to play the fool.
But this chair is dear to me as a memory. I wrote my dissertation on it thirty years ago. That's why I resisted.
How to fill a staple gun with staples
A mechanical stapler allows you to nail plastic panels, clapboard clamps, fabric to furniture, wooden or plastic surfaces.
There are three types of staplers: mechanical, electric and pneumatic.
Mechanical staplers are affordable, compact, lightweight, and easy to maneuver. Below we will only talk about them.
How to choose a stapler?
In short, it is not advisable to buy the cheapest options, as well as plastic models. Metal tools are more powerful and reliable.
Choose professional models that have an adjusting screw (thumb) at the top. It helps regulate the force with which the tool will pierce the material.
Many people forget
Before work, adjust the adjusting screw according to the material of the surface you are going to work with.
If it is hard plywood, strong penetration of the material will be required, therefore, it is worth setting a high force. If it is a loose surface, the force must be reduced so as not to break through the fabric, or for example the PVC panel that you are shooting.
During operation, it is recommended to press the lever with one hand and press the adjusting screw with the thumb of the other hand. Then the recoil will be minimal and the load will be distributed evenly in the stapler. You will be able to nail the brackets much better.
How to insert staples into the receiver
The design of all mechanical hammers is almost the same. There is a handle-lever, due to which pressing occurs, and at the bottom of the stapler there is a metal plate that opens the receiver. This is where we have to load the staples.
Before you buy brackets at a hardware store, you need to find out what size will fit your device. As a rule, the size and type of suitable staples are indicated on its body.
For example, the body of our stapler indicates a width of 12 mm and a depth of 6-14 mm. This means that you will only be able to charge staples in this range.
Smaller or larger brackets will not fit into the receiver. The size of the staples in millimeters is also indicated on their packaging.
To insert projectiles into the stapler, you need to open the metal plate on the back surface.
To do this, you need to take it with your thumb and forefinger on both sides, then pull it towards you and slightly down. Thus, we press the metal tab on the back surface of the plate, and pull out a metal spring, similar to the one found in a regular office stapler.
If there are any staples left in your stapler, they will fall out once the spring is pulled out. If they are not there, then it’s time to install new ones for further work.
The staples are inserted into the receiver (the hole is in the “P” position). Next, insert the spring back, closing the metal tab. That's all, the tool is loaded and ready to go!
How many shells will fit?
Now a little about how many shells fit into a stapler. Staples are sold in small rows. The row can be divided into several parts yourself by slightly breaking it with your hands.
The tool is filled with 1-1.5 rows. 2 rows rarely fit in the bin, so if there is a lot of work to be done, it is better to prepare half rows before starting work.
What to do if a bracket gets stuck
It is worth noting another very important point that will help you in your work. It happens that the staples become bent and get stuck in the exit hole. They cannot be hammered into the surface and cannot be pulled out by hand.
In this case, we will need to pull out the feed magazine completely.
This option exists for almost all professional staplers.
First you will have to repeat the opening of the metal plate and pull out the spring.
Next, in the middle of the lower part of the stapler you need to find an iron part, slightly protruding from both sides. Grasp it tightly with your thumb and forefinger on both sides and pull down forcefully.
This will remove the entire feed magazine that was in the tool.
You will see a jammed staple that can now be easily pulled out by hand.
Putting the stapler back together is not difficult: the entire pulled out block returns to its place with a press. You should hear a click when you do this. Afterwards, do not forget to replace the spring.
Not just parentheses
Some staplers can work not only with staples, but also with studs of various shapes. The designations of what the stapler works with are indicated on its body or in the instructions.
I tuck the nails into the stapler in the same way as with staples, but you need to be careful after pulling out the spring. A row of nails must be loaded along one of the outer edges of the letter “P”, and not inside this very letter!
If you want it to produce two nails side by side when working with a stapler, load the second row along the second outer edge. Next, the spring is inserted and the stapler is closed.
Source: https://narodnyeokna.ru/kak-zapravit-stepler.html
Types of staplers
Before you go to the store to buy this tool, you should clearly evaluate the purpose of its purchase and the parameters that should be present in the device. Only after this you will be able to choose what you need from the presented assortment.
Manual stapler
This is a device that works mechanically, that is, to remove the staple from the device, you need to press the handle and apply some physical force. The main positive quality of this furniture stapler is its autonomy. So, you can work with it even on the street; the performance of the device does not depend at all on the presence of an electrical network.
Construction mechanical stapler at work
But, if you plan to carry out a large amount of work, then this will require a considerable investment of not only time and effort. We can conclude that this type of furniture stapler is good for use at home when solving small problems.
Electrical appliance
Such a device, in turn, requires a connection to an electrical network or a battery. This furniture tool is already used by professionals for longer work. But, as a rule, an electric stapler has low impact force and rapid failure of the mechanism.
Electric Construction Tool for Fixing Staples
Pneumatic stapler
For tasks performed on a production scale, pneumatic devices are used, which have greater speed, strength and durability compared to other options.
The design of a pneumatic stapler is more complex than that of a mechanical one
Classification
There are different types of furniture staplers.
Manual
This category also includes manually operated mechanical devices.
Stapling hammers
These devices hammer the staples in with forceful blows. Compared to manual analogues, the performance of this model is much higher. This tool is convenient for performing the following work:
- Fastening insulating material.
- Installation of roofing felt.
Important! In a word, a staple hammer is indispensable where, first of all, fast rather than delicately precise work is required.
Construction cable staplers
This tool is used for installing cables with a voltage load of 50 V. The maximum cable diameter is 7.5 mm. These staplers are used when performing the following work:
- Cable fixation.
- Laying an electrical network.
- Installation of communication lines.
Classic model
This hand-operated tool has become a true classic. After the release lever is pressed, the staple is driven into the material. A special category is hybrid models, with which you can perform several types of described operations.
Important! You can also classify all modifications into professional and household. Professional models are distinguished by:
- Convenience.
- Long service life.
- No plastic parts.
They have only one drawback: a relatively high price.
Choosing the Right Stapler
Based only on the nature of future work with a furniture stapler, you can already choose it. For example, for a single change of upholstery on an armchair or sofa at home, a mechanical model is quite suitable. This is due to the fact that mainly soft types of wood are used to form furniture frames in production and much effort is not required to attach fabric to them.
If the work involves installation on a solid base, then the mechanical option will not help. In this case, an electric stapler will help out. Of course, you can choose a pneumatic tool, but its cost is high, so if you do not need a professional device for regular use, there is no point in buying it.
Consumables for proper operation of the stapler
Here are the additional design details that greatly facilitate the use of a mechanical stapler and the presence of which you should pay attention to when choosing:
- Transparent compartment for staples. This addition will allow you to monitor the amount of consumables and, if necessary, quickly respond to its depletion.
- Adjustable impact force, allowing you to adjust the stapler to any material.
- A stopper on the handle will prevent accidental firing of the staple.
- The presence of a rubber lining on the handle allows the tool not to slip in your hands.
Selection of staples
For each stapler, it is necessary to select the consumables that will ensure uninterrupted operation of the device. Typically, the types of brackets for a particular tool are indicated in the instructions for it. You need to know about the basic parameters of staples for a stapler:
- The depth, which can vary, is from 4 to 14 mm. It is chosen depending on the material to be worked with. For example, to upholster furniture with tapestry you will need staples 8 mm deep.
Appearance of a whole set of staples
- The type of staples must be combined with the brand of stapler. Thus, incorrectly marked staples, for example, too small, can cause them to fly out one after another during operation or cause the tool to jam.
How to restore a furniture stapler. 4 chips. Master OK
Greetings, guests and regular readers! Today you are visiting the renovation site.
Photo 1.
It’s nice when a tool works flawlessly and quite the opposite when it takes a lot of time to “revive” it! That’s why I took up the junk stapler in order to improve something.
I'm disassembling the stapler, but not all of it
Since there is an unresolved problem with the impact, I had to climb inside a construction (furniture) stapler. For this:
- the adjusting screw
on top (responsible for the impact force). - I removed the clips
from the top and bottom
studs
and pulled them out. - I pulled the spring out of the staple feed unit.
- From inside I took out a shock spring with a nut
itself
. - I removed the housing cover from the end .
I laid everything out and it turned out what can be seen in photo 2. I didn’t disassemble anything else.
Photo 2. The disassembly sequence may be different.
Improvements
1
.
Cleaning the shock absorber.
When disassembled, you can see from the end a shock absorber in the form of a rubber gasket into which many bent brackets are pressed. The picture shows only a fourth of what was there, the rest flew in and was picked out, and this is for clarity. Although this step is simple, it will help get rid of jamming due to staples getting into the mechanism.
Photo 3.
2. Straightening the housing cover.
Since sometimes the firing pin fired two staples together, I decided to use a hammer to slightly bend the top cover of the housing where the staples came out. We managed to reduce the gap a little and now two definitely won’t pop out. It is important not to over-tapping, otherwise the striker will not go through later.
Photo 4a, b. At “a” you can see a slight bend in the lid, which straightened the hammer.
3. Elimination of wear in the striker body.
The gap was small, so it was possible to straighten the angle to 90 degrees quite quickly. A large file helped with this.
Due to the large output, the stapler fires prematurely, since the hook or beak on the handle simply slides off when pressed.
Otherwise, the shock block does not seem to raise any questions.
Photo 5.
4. Installation of growers.
I found a couple of locking washers and put them on the thin nose of the adjusting screw. It could have been washers of the same diameter. This move is due to the fact that the spring weakens over time and upon impact it is no longer compressed/decompressed with such force. Due to the lining of the engravers, it can be pressed another 4-5 mm, it becomes stiffer and the striker hammers the staples better. But this number does not apply to all models, as there is a design difference.
Photo 6.
After assembly, we passed test firings into rigid ten-layer plywood. Of course, I didn’t push in the entire 12 mm bracket, but I completely pushed in the 5 and 6 mm brackets, and that’s what I needed. And I was glad that two staples no longer fly out. Compared to what it was, there are obvious improvements!
If you approve of the material, please like it. Also subscribe
to the channel so as not to miss something new and unusual!
Working with a mechanical stapler
To learn how to carry out repair work using a construction stapler, you need to know about the basic rules of this process.
Charging the device
Before you start, for example, upholstering a sofa, it’s worth learning how to charge a stapler. This is done step by step according to the following algorithm:
- Installing the device on the fuse.
- A folding flap at the rear of the stapler reveals a compartment for staples.
- Pulling the rod with the spring out of the compartment.
- Installing staples with the upper bent part towards the handle of the stapler.
- Releasing the rod to clamp them.
- Slam the sash until it clicks and start working.
Some models have a different mechanism and therefore many people think about how to refill them. There is nothing complicated here either, just remove the special chute that appears when you press the button. The staples are installed into it with their sharp ends down. Afterwards the filled element is inserted back.
The process of charging a mechanical stapler with staples
We attach the staples to the base
After clarifying the charging instructions, it will not be amiss to find out how to use the stapler during direct work.
This is done like this:
- Prepare materials for fixation and the instrument itself.
- Mark the line along which the staples will be attached. This makes it easier to install fasteners exactly in the place where you plan.
- The stapler is applied to the desired place quite firmly.
- Without lifting the device from the surface, press the lever.
- After this, if everything is done correctly, a characteristic sound will be heard, and the bracket will be securely attached to the base.
Staple fixation process
Furniture stapler design and repair recommendations
Sometimes it happens that the stapler refuses to work. Namely, the staples do not fly out of the charger. Before starting repairs, disassemble the device in the following sequence:
- Remove the adjuster screw.
- Remove the spring.
- Remove the protective cover.
- Remove the pins and lock washers.
To successfully repair a furniture stapler, you will need:
- Hammer.
- Vise.
- Flat blade screwdriver.
- Pliers.
- File.
Drummer
Carefully inspect the striker and assess its condition. The most common reason for incorrect operation of the device is wear of the thrust pad on the firing pin body. With the help of a thrust pad, the impact mechanism and the trigger lever work together.
Important! The drummer is the executive part. A spring presses on the hammer. The spring force can be adjusted using a special screw.
Carbine
The charging carbine is located at right angles to the impact device. The striker contains brackets that are acted upon by a spring. When not in use, the brackets are covered by a plate attached to the device body.
Trigger system
The trigger system includes the following components:
- Spring.
- Cocking lever.
- Rocker.
How to use a furniture stapler? To drive the staple, you need to press the lever. The hammer lifts the rocker. After the staple enters the striker mechanism, the spring is released. The striker strikes the bracket with force, and it enters the base.
The rocker arm and the striker work synchronously. Otherwise, there is a “blank shot”. The furniture stapler needs to be adjusted. The trigger worked, but the firing pin did not engage the staple. When the thrust pad of the striker protrusion is severely worn, this is exactly what happens.
It won't take much time to complete the repair:
- Clamp the firing pin in a vise.
- Sharpen the protrusion with a file, giving it its original shape. This will significantly extend the life of the stapler.
Important! You just need to perform this simple manipulation after the device has started working “idle”. At the same time, the drummer plate becomes shorter and needs to be sharpened.
Tips for using the device
To maintain safety when working with a furniture stapler, you must follow the following recommendations:
- Before fixing the staples with a mechanical stapler, it is adjusted on an unnecessary piece of material. To do this, after the shot, they look to see if the staple has entered completely into the base. If yes, then you can start working right away. If not, you will have to turn the screw mechanism from minimum to maximum to achieve a good position.
- When working, be sure to hold the material to prevent displacement with your free hand.
- After finishing work, the handle must be put on the safety lock to avoid accidental pressing and operation of the device.
Stapler with safety handle
A construction stapler allows you to fasten any material to the surface of furniture in the shortest possible time. The tips in this article will help you choose the right tool and correctly approach working with it.