In most homes there are headsets that have gone out of fashion or have lost their presentability due to prolonged use. If your budget allows, you can buy new designer furniture and throw away the old sofa. However, if you want to save money, you can transform the interior yourself, creating a special comfort in your home. Decorating furniture is a great opportunity to give new life to old things and transform the interior. Today there are many techniques for transforming the decor of a room with your own hands; some of them are discussed below.
Using self-adhesive film
This method of decorating furniture is the simplest and most accessible at home. This update method is suitable for the following products:
- tables;
- chairs;
- shelves;
- kitchen sets;
- chests of drawers and bedside tables.
Thus, any products made of wood, metal or plastic are suitable for gluing with film. A minimum set of materials is used for decoration:
- Self-adhesive film. The material comes in various colors and textures. The most common film is one that is painted to look like wood. In construction stores there is film in bright colors and shades, with a metallic sheen or decorated with designs.
- Scissors.
- Degreaser.
- Metal spatula.
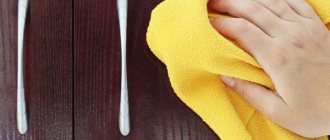
The work of decorating furniture begins with its preparation. To begin with, the product is cleaned of paint using a metal spatula. Next, the surface is cleaned and degreased. The film is applied in strips to the prepared furniture. This material is sold in rolls, which differ from each other in width. If the appropriate width of the film cannot be found, it can be trimmed at the edges.
During the process of pasting the film, you need to ensure that the material is glued evenly, without bubbles and does not bulge. Deformation of the film can be avoided by helping yourself with a roller to smooth out the coating. That's all the recommendations for decorating old sets with film. If desired, you can use several colors of adhesive tape, which will help create a bright and unusual room design.
Useful tips
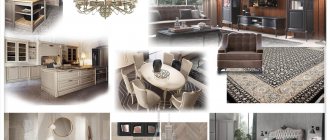
Decorated furniture should be in harmony with the overall style of the room. It is also important to consider the material used to make the item. For example, decoupage, stencils or painting are suitable for products made of wood, plastic, metal or glass. Fabric overlays and craquelure can be used to decorate furniture made of any materials. As for aging, it is traditionally used to treat metal and wood surfaces. For certain styles, decor is not needed at all, while for others, decoration is an integral part of the design of the set .
| Style | Characteristic |
| Vanguard | In this case, small elements are not used. It is acceptable to paint the furniture one color or cover it with plain wallpaper. The use of decorative plaster is allowed |
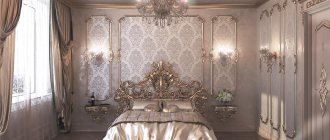
| Empire style | This style “breathes” luxury and wealth. Aging, craquelure with gilding, and pulp decor would be appropriate here. Set items are made of wood |
| Art Deco | Artificially aged furniture and antiques are also welcome in this style. Decoration of products with fabric is used |
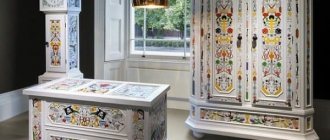
| Baroque | Antique decoration is used here. Furniture can be painted with floral patterns. Decorative molding is allowed along the perimeter of the products |
| High tech | There is no place for elaborate decorations in such an interior. The only thing that can be allowed in this design is a small decor made of polyurethane |
| Provence | This style uses decoupage techniques and aging objects. The walls of the products may be covered with wallpaper with floral patterns. |
Decorating furniture yourself not only brings pleasure, but also allows you to decorate your living space in the desired style. At the same time, the items turn out to be original. You just need to choose the appropriate decoration technique and follow the technology for its implementation.
Vanguard
Empire style
Baroque
Art Deco
High tech
Provence
Painting with acrylic paint
In order to emphasize the individuality of the owners of the house, you can decorate the furniture with various designs using acrylic paints. For example, using several paints of different colors, you can create a cozy children's room, where cute flowers will be painted on a pink chest of drawers, and multi-colored lollipops will be depicted on a yellow desk. Any child will be happy to spend time in such a room, and will also take an active part in modernizing the furniture.
An important condition is that before painting furniture with acrylic paint, its surface must be prepared. To do this, you need to remove the remnants of the old paint, clean the surface from dust and dirt. The joinery product can be covered with plain paint or decorated with drawings and patterns. Here you can give free rein to your imagination and discover the hidden talent of a designer.
For variety, decorating with acrylic paint can be combined with the decoupage technique.
Having completed the decoration with acrylic paint, the surface of the furniture must be varnished to give a glossy shine and protect the product from wear. The downside of this furniture renovation technique is the unpleasant smell of paint and varnish. Therefore, all work must be carried out outside the home. After a few days, the smell from the decorated items will disappear and they can be placed in the room.
Other types of furniture facades
Glass furniture facades - glass processed (polished) along the edges (including curved glass) with a variety of coatings, are most often used as a decorative element of furniture.
Facades made of artificial stone based on acrylic resin are characterized by high reliability, durability and... cost.
Louvered furniture facades are made of solid natural wood. Promote excellent ventilation of the interior space of the furniture.
Roller blinds are a modern version of vertically opening furniture facades, the so-called furniture blinds. They are made of plastic profiles with different coating colors, including those imitating valuable wood species.
Facades covered with leather (natural or artificial) look impressive, practical, functional and easy to maintain.
3D facades - made of MDF boards with surface milling imitating waves, sand dunes, flames, natural wood bark and other ornaments. They are covered with PVC film, or painted in a color that emphasizes the desired special effect.
Facades with photo printing - an image is applied to the surface of the MDF facade using a special technology, which is covered with a protective layer of glossy or matte acrylic varnish.
Acryline facades are a new direction, it is an MDF board coated with high-gloss acrylic plastic, which has a variety of colors, is easy to maintain and is an environmentally friendly material.
Furniture facades made of specific materials (plywood, OSB panels, stainless steel) are suitable both for arranging utility rooms and for creating a unique interior style.
In conclusion, I would like to say that when choosing a furniture façade, it is not so important to know which façade is better in terms of technical quality characteristics, but rather to have an idea of its appearance, its ability to harmoniously create a comfortable environment or blend into the existing interior, in the end simply to please the eye and cheer up
Using ready-made stickers for decoration
Stickers that are used for interior design have recently appeared on the shelves of hardware stores. The stickers contain various drawings of animals, nature, still lifes, and cartoon characters. Decorations are used to decorate walls, create collages, and they can also be used to decorate an old wardrobe or chest of drawers. The stickers are attached to a cleaned surface and smoothed out on it. There is no need to cover the furniture over the stickers.
If desired, such stickers can be made to order so that they fit harmoniously into the interior of the room. You can purchase several identical stickers of different sizes and place them as pictures, as well as decorate furniture with them. The advantage of using this method for decorating furniture is that the sticker allows you to hide minor defects on the furniture without completely redoing it. In addition, in the future, the sticker can be easily removed and again completely change the interior of the room.
Creating a new design
If you decide to update not only the furniture, but also the design of your entire home, you need to use other restoration methods. There are several techniques for this, each of which allows you to fully use your imagination. You can create a completely different appearance for your furniture, decorate it in different styles, decorate it with patterns, colors, various drawings or photographs. However, it is necessary to take into account the features of the interior of the living space. The furniture should look good, but at the same time fit perfectly into the overall design theme.
A Brazilian travels 36 km by bike every day to take his loved one home.
"Dad is offended." Agata Muceniece about her relationship with Priluchny after the divorce
The money tree pleases with lush flowering: my secret is in caring for the leaves
If you want dramatic changes, think about what kind of wallpaper, curtains, and interior items will be in your room. Based on these parameters, select the furniture design. In a room where harmony is disturbed, a person feels uncomfortable and even begins to get sick. Furniture can be decorated in the following styles:
1. Provence. Pastel colors dominate. On a white or beige background, grass and grapes are depicted in lavender color. You can do without drawing. The main thing is to maintain color shades.
2. Victorian. They use gilding, burgundy, pink, brown, beige colors. Draw animals and natural motifs.
3. Country. This style is otherwise called rustic. The highlight is the “aged” surfaces. Use blue, beige, white, brown colors.
4. Shabby chic. Pastel colors dominate. Mainly used on furniture in golden tones. The drawing is made blurry, with frayed edges.
5. Simple City. The name encodes the essence of the style. Furniture is decorated with photographs or drawings of city landscapes.
6. Military. They use military paraphernalia and any pictures related to the army theme.
7. Ethno. Based on folk motifs. Japanese, Indian, African styles are popular. Russian ones, such as Khokhloma and Zhostovo, are also often used.
Aging technique
Vintage antique furniture is valued by designers for its luxurious appearance. A chest of drawers that once graced the room of an aristocracy is now worth tens, sometimes even hundreds of thousands of dollars. Antique furniture will fit into design styles such as English, antique, Gothic or ethnic. If you can’t purchase antique furniture, you can create it yourself. Aging techniques can be applied to only one piece of furniture or the entire set can be changed.
For the aging technique you will need the following materials:
- Stain.
- Antique wax.
- Acrylic paint "metallic" or "gold".
- Brushes.
- Materials for cleaning the surface - spatula, degreaser, detergent, sponges.
- Two packages of acrylic paint of the same color, but different shades.
- Varnish.
There are two main ways to age furniture. The first of them is used exclusively on wooden products. First, the surface must be cleaned of the previous coating and degreased well. Next, a layer of stain is applied, which must be left on the product for 6-8 hours. Then, the remnants of stain that have not been absorbed into the product are carefully removed with a sponge. Antique wax is rubbed onto the prepared surface, which gives the furniture that same antique look. On top you can apply golden acrylic paint in the form of patterns or monograms. Using the same paint, you can cover the sides of furniture or decorate fittings. The finished product must be coated with a thin layer of varnish.
Application of three-dimensional drawings
Decorative plaster and stencil painting are an interesting way to restore an old cabinet. This design will elevate the furniture and give the surfaces a voluminous decor.
Suitable for decorating not only wardrobes and chests of drawers, but also for restoring kitchen furniture (sideboard, cupboard).
The paint will reliably protect the products from temperature changes and moisture. For work, use decorative plaster, acrylic paint, varnish, a stencil with the desired pattern, a spatula, masking tape, sandpaper, and brushes. Painting a cabinet with your own hands requires following a precise work algorithm:
- The fittings are removed from the furniture.
- Remove the layer of old coating.
- Treat with sandpaper.
- Cracks and chips are repaired with putty.
- The stencil is secured with masking tape.
- Prepare the plaster according to the instructions.
- Apply the material with a flat spatula.
- The stencil is removed and the pattern is corrected with a knife.
- After drying, the drawing is sanded with sandpaper.
- Paint is applied to the renewed base.
- To consolidate the effect, coat with varnish.
The same method is used to paint an old cabinet using a stencil, but without decorative plaster. Against the background of patterns, fittings painted in gold or silver look impressive.
To obtain a contrasting pattern, the product is coated with white paint. After the layer has dried, attach a stencil and spray it with spray paint (shake first) of the desired shade - the decorative coating is ready, and the furniture takes on an interesting appearance.
To ensure that the paint evenly covers the furniture and does not peel off, cabinets, bedside tables, chests of drawers, and wardrobes are prepared for painting by removing dust, dirt, and greasy stains.
Any shade can be used as a base background, but the design looks most expressive when the stenciled cabinet is painted white.
Aging using acrylic paint
This method is used for both wooden joinery and plastic or metal. The effect is achieved by using two shades of paint that differ slightly from each other, for example beige and dark beige. Before starting work, the surface must be thoroughly cleaned and, if possible, leveled.
The clean surface is covered with a thin layer of paint of the first shade. To obtain a high-quality result, you need to dry each layer of paint well to avoid drips and delamination on the coating. The designer needs to apply as many layers of paint as necessary to hide the real color of the furniture. When the paint layer of the first shade has completely dried, the second type of coating is applied to the product in the same order.
In order to create an aging effect on the furniture, in some places you need to apply sandpaper, which will partially erase the layer of paint of the second shade, thereby giving the furniture an old look. After completing all manipulations, the product is varnished.
Work order:
At first I wanted to paint it like this without removing the door, then I realized that it would be inconvenient. So I took a risk. and took it off. It turned out not to be difficult. True, worries about how to put them back on were present until the last moment. In the end, I also screwed it myself; I didn’t have the patience to wait for my husband))).
I pulled out the built-in lights and wrapped them in a suspended state with masking tape. The same tape was used to protect the walls on the sides of the cabinet, the floor, and the mirrors on the doors. Prepared the workplace. I decided to paint it. on the bed)))! I covered it carefully with polyethylene. And I have never regretted this choice. The bed was large and high, everything fit, there was no need to bend over and crawl on all fours. I prepared approximately equal stacks of books and wrapped them in cling film. They are needed as substrates so that the doors can be lifted and painted as if suspended; the painted edges will not come into contact with a flat surface.
Stage 2.
I sanded all surfaces that needed to be painted. It is necessary to sand lightly, without fanaticism, with the finest sandpaper. Light circular movements. Purpose: to create roughness without removing the laminated layer. If there are dents and scratches, they should be filled with putty at this stage. After sanding, thoroughly wipe all surfaces with degreaser. It will remove dirt, grease marks, and everything that can disrupt the adhesion of the primer and paint.
Stage 3.
Primer. I went through hard-to-reach places with a brush, and the rest with a roller. A thick layer is absolutely not necessary; it must be covered with primer without drips and in a thin layer. Uneven coloring is not a problem, but there should be no gaps. I didn’t prime the rattan inserts; the paint applied well to them anyway.
They are easy to paint - just roll them with a roller; with a brush it is more difficult not to go beyond the edges. Wipe off any blemishes immediately with a cloth. Each layer was dried as recommended by the manufacturer; the acrylic dries “touch” in an hour and, in principle, you can carefully turn the door over and paint the other side.
Stage 5.
I assembled the closet. I screwed the doors and handles. I removed the masking tape and cleaned everything up. At first I planned to keep the doors open for two days, I was afraid that they would stick. Nothing like that - you can close it right away.
Dresser.
Mirror.
Important!
Acrylic paints dry quite quickly “touch-free”, but polymerize for at least a month; with a primer the process can take even longer. The painted product can be used almost immediately (or it’s better to wait 2 days) and even wiped with a damp cloth. But within a month, the coating remains very vulnerable; it must be handled carefully, not scratched or rubbed with force. If shelves or horizontal surfaces are painted, then it is better not to immediately place things on them that could “stick”, wait until the paint “sets”. Although I immediately put everything I needed on the chest of drawers, nothing stuck).
Here you go. The work is labor-intensive, but I was pleased with the result. The paint job ends up looking no worse than the factory paint, no brush marks are visible. It holds up well too. I haven’t tried scratching, I use the furniture as usual. But usually I don’t scratch it))). Although I will conduct an experiment in a month. The room has been pretty updated). Alas, the photos after compression leave much to be desired; in fact, the colors are brighter and cleaner, but this is not so important.
If you also want to redo furniture and have questions, write to me and I will answer. And if such a rework seems complicated to someone, I assure you that it is not, labor-intensive - yes, but quite doable without any experience. You can just start with internal, unnoticeable parts, or with small furniture, a chair, for example. The rework took three days. At the same time, I managed to cook and... suffer from bronchitis + my leg is still slightly lame after the cast. The “disabled painter” was able to paint, which means you can too))).
Using decoupage and decopatch techniques
The use of decoupage techniques for decorating furniture allows you to create products for any interior style. This method is simple to implement, does not require large amounts of money, and is very exciting.
Interesting to know: The term decoupage, translated from French, means to cut, which is the basis of this technique.
To decorate furniture using the decoupage technique, any stickers, drawings and images are used. You can use ready-made drawings or create your own using computer graphics. These can be photographs of celebrities, sheet music, landscapes and still lifes, images of celebrities, family photos and any other materials.
As usual, the initial process of decorating furniture is preparing the surface for work. A layer of PVA glue is applied to the cleaned furniture, and a design is placed on it. If the decoupage technique is being performed for the first time, then it is better to use decorative paper napkins as a design. It is imperative to separate the dense bottom layer of napkins and leave only the image. In your work, you can use either a whole napkin or images cut out from it. You also get an interesting collage if you tear the image into several parts, which are glued at a distance from each other.
What drawings can be used for decoupage
When decorating carpentry, you can use several patterns at once, which are glued end-to-end, scattered, or superimposed on each other. Craft stores sell decoupage kits, which include special glue and a set of drawings and stencils. In fact, in any home you can find a lot of old magazines, newspapers, photographs that can be used for this technique.
Tip: if you use drawings on thick paper for decoupage, you need to soak it well in PVA before gluing it.
To decorate furniture, you can also use scraps of fabric, lace, beads, sequins, pebbles, and sparkles. The fittings are combined with patterns in any order. In order for the decoupage to not lag behind the surface, it must be thoroughly varnished and left to dry.
To decorate glass parts of furniture, another technique is used - decopatch. This method involves gluing the design face down onto the surface. This method is applicable on glass cabinet doors and on interior door openings.
Materials
You can use a variety of ideas for your creativity. But to bring them to life, the materials and tools will be needed approximately the same. This:
Rare shot: Viktoria Isakova showed her grown-up daughter from Yuri Moroz (new photo)
Lost weight: what Sofia Tarasova sacrificed for the sake of “VIA Gra” (new photos)
A student at the Vietnam Police Academy shared how she takes care of her facial skin.
- drawings on paper (it should be well saturated with glue);
- acrylic paints;
- PVA glue;
- acrylic primer;
- glue varnish for decoupage;
- putty;
- several brushes;
- foam sponges;
- sandpaper (it is better to take both coarse-grained and fine-grained);
- putty knife;
- roller;
- rags or rags.
Decorating with fabric
To update upholstered furniture, the method of upholstering it with fabric is used. This method allows you to radically change the interior of the room. In a few hours of work, you get a completely new sofa and armchairs that are no different from those bought in a store. In order for the new upholstery to lie perfectly evenly, you need to remove the old fabric from the upholstered furniture. A construction stapler is used to attach the new material. This decoration method is quite complicated and may not work the first time.
If the master doubts his abilities regarding the upholstery of the sofa, then he can make a new furniture cover. This way you can refine upholstered furniture without spoiling its original appearance.
The fabric can also be used to decorate other furniture - tables, chests of drawers, chairs, cabinets and shelves. Decorating with fabric is done using a combination of two techniques - decoupage and patchwork. Work on updating old furniture can be divided into several stages:
- Preparatory stage. Before carrying out work, it is necessary to prepare the surface, namely, clean it of varnish using sandpaper and remove any contaminants. In addition, you need to remove fittings from the furniture - hooks, locks, handles and more.
- Decoration. To decorate carpentry with fabric, you can use either a whole roll of fabric or remnants of various fabrics. It looks very beautiful when the fabric on the furniture repeats the fabric of the curtains or bedspreads. The fabric must be soaked in PVA for 30-40 minutes, and then applied to the surface of the product using an adhesive spray. You can decorate the fabric with colored ribbons, lace and other accessories.
- Consolidation. To prevent the fabric from fraying and getting dirty, it must be generously coated with a layer of varnish.
Thus, furniture decor is quite an interesting and creative activity. It does not require expensive materials, since you can use everything you can find at home. By upgrading old furniture, you can not only save on buying new ones, but also surprise your guests with the unusual cozy atmosphere of your home.
Ideas for restoring an old cabinet with your own hands
Restoring old furniture is an interesting option to update interior elements and show your creativity. It is not necessary to go to a furniture store or factory and buy new furniture. By showing your imagination, you can give tables, chairs, and shelves an attractive look and a special twist. The simplest and most economical option for updating an old cabinet is to paint the furniture using decorative paints and varnishes.
You can also use wallpaper, decoupage, photo printing, photo wallpaper and decorative plaster for restoration. But which method should you choose?
Photo of furniture with paneled framed facades
>
Attractive, practical and affordable, frame cabinet fronts allow you to make your interior unique, creating a special, cozy atmosphere in your home. And their high performance characteristics will ensure durability of the furniture complex, allowing owners to use it for many years.