Self-adhesive film is a material familiar to many. But today it is experiencing new life in a budget-friendly interior update. And kitchens too. The reason is that the quality of such materials and the variability of design are growing - you can find self-adhesive on sale not only with the usual wood pattern, but also with marble, stone, tile patterns, just plain matte or glossy surfaces. Our selection includes inspiring examples of updating kitchens using self-adhesive film.
How to choose film for furniture
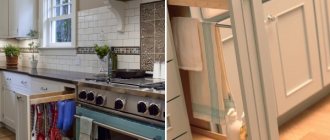
Gluing the kitchen facades with film will help give a new life to an outwardly worn out but still strong set. This idea will also be useful for changing the interior of the room.
To make the updated product beautiful and practical, you should choose the self-adhesive material wisely.
Types of film
Several types of film are used for furniture:
- from PVC (polyvinyl chloride);
- polyester;
- polypropylene.
These materials have similar properties. They are moisture resistant, resistant to abrasion, high temperatures, and physical impact. Do not react to components of solvents and household chemicals.
Films can be smooth or textured, imitating fabric, leather, or pile.
Vinyl materials are most often used to decorate furniture.
Single-layer films are a sheet of PVC composition with an adhesive layer covered with paper. In two-layer versions, a paper or fabric backing is added under the polymer.
Color selection
The design variability is unlimited. Films are:
- Plain . A light palette refreshes the room. Yellow, orange, pink shades promote a good mood and increase appetite. Blues, cyan, violet are calming. Green helps to achieve harmony. Black, white, red are best combined with each other or with other colors. Dark colors are appropriate in a well-lit room.
- Under the tree, stone . Always relevant in the kitchen, fit into almost any interior.
- With imitation fabric or leather. This film will help in creating an interesting, unusual design.
- With various images, drawings, patterns. Absolutely everything can be reproduced on them: city landscapes, nature, animals, abstractions.
- With photo printing. You can make a custom film with any selected photograph or an exclusive image or your own drawing.
In order not to get confused in the variety of patterns and colors, base your choice on the general concept of the kitchen interior. The updated set should match the color of the walls and other furniture in the room, and the facades should match the shade of the countertop.
Selecting an effect
In addition to color, materials for pasting furniture have different finishes:
- Glossy . Ideal for use in dimly lit kitchens as it reflects and diffuses light. The surface to be pasted must be perfectly smooth: glossy vinyl emphasizes the smallest irregularities of the renewed canvas.
- Matte . Universal, looks discreet in any lighting and in different colors.
- Metallized . Plain fronts with a metallic sheen add shine and brightness.
- Mirror . Visually expands the space and brightens a dark room.
- Holographic . Has shine and a three-dimensional effect.
Interior renovation using film
Designers love polymer films. They have good plasticity and decorative properties; with their help you can quickly update almost any surface. Material suitable for decoration:
- tiles in the bathroom or kitchen;
- wall panels;
- doors;
- different furniture.
Films are available in different colors, with and without patterns. With their help, you can update your kitchen set and change old furniture in your home without extra costs. After all, the price of even the most expensive film will be cheaper than a new headset.
Restoring tiles using vinyl is not difficult. It is important to choose the right drawing here. Delicate chintz designs or films with textured embossing are suitable for the kitchen.
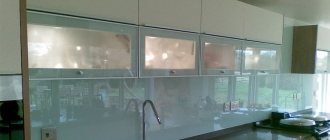
Complete the design with a decorative kitchen apron. Its restoration using film usually does not cause difficulties. The main thing is to carefully read the instructions on the roll.
Before gluing the tiles in the bathroom, you need to carefully prepare the surface - degrease it well. Otherwise, the film will quickly peel off.
Pros and cons of film facades
In addition to the variety of appearance, the advantages of film for MDF facades include:
- low cost;
- simple application technology;
- practicality in operation;
- high moisture resistance;
- good resistance to ultraviolet radiation (fading);
- environmental Safety.
The disadvantages include:
- Relatively low resistance to mechanical stress. The surface is easy to scratch.
- Low upper threshold of operating temperature (about 80°). Therefore, film for a kitchen table is not the best option - even a cup of hot tea can leave a “whitish” mark.
- It is impossible to restore the surface by grinding or polishing.
Kitchen furniture has the highest risk of damage - this is where it experiences high mechanical and thermal loads. But all these shortcomings are compensated by the possibility of updating using self-adhesive film for the kitchen.
Coloring
Restoration of solid wood facades can be carried out by using coloring compounds. Some craftsmen recommend using auto enamel, which is not afraid of moisture, high temperatures, or acidic cleaning agents.
The procedure takes place in several stages:
- dismantling the facade: the door is removed from its hinges, the glass inserts are removed or temporarily sealed, and the fittings are unscrewed;
- the surface is sanded with sandpaper;
- The entire part is coated with a special primer for wood processing in 2 layers;
- Proceed directly to painting using a brush or roller.
Restoration of home kitchen furniture made from natural solid wood requires subsequent varnishing. Using a brush, the transparent composition is evenly applied to the painted wood, making its color brighter. To achieve an aesthetic result, it is necessary to apply 3-4 layers of varnish, trying to make each top layer thinner than the bottom.
Unlimited possibilities of self-adhesive film
Kitchens covered with film look impressive both in photos and in real life. Surfaces are updated using vinyl or other film. The range of this material is amazing in its diversity, and the price pleases with its affordable price.
Decorative “self-adhesive” imitates:
- natural wood of different species;
- natural stone;
- ceramics and tile texture;
- leather and fabric.
In the photo - imitation wood.
Its texture can resemble patterned silk, a colorful tapestry or cute chintz. The material is produced in matte and glossy versions. There are films with holographic and mirror patterns. And all this can be combined with each other, creating interesting effects, changing an ordinary kitchen cabinet beyond recognition, as in the photo below.
The price of the film depends on the manufacturer and the decorative surface.
Vinyl “self-adhesive” is quite practical because it:
- not afraid of moisture;
- does not fade in the sun;
- does not respond to temperature changes.
With its help, you can completely update the design of both the kitchen and the bathroom, transform the kitchen cabinet or the entire set.
Adhesive film is a good budget replacement for a full-fledged repair. Of course, you need certain knowledge and skills, but the video will help you quickly understand the intricacies of the process.
Design examples
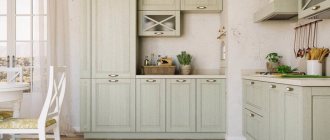
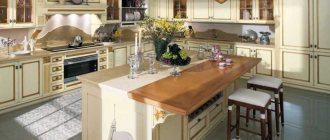
In skillful hands, self-adhesive film is no longer just a means to restore the appearance of the kitchen, but also a great way to make it beautiful and unique. Most often, of course, natural patterns are used - either flowers , as in the first example, or fruits and vegetables , which lifts the mood and improves appetite.
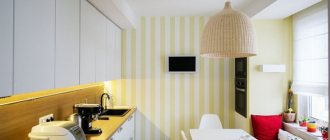
However, no one is stopping you from decorating the kitchen in accordance with your own idea of how this room should look. No more standard solutions - for example, if you like urbanism, you can delight yourself with the landscapes of a metropolis even in a provincial town.
The main thing is to do it carefully and tastefully, as in the second example, without going too far, otherwise it will only get worse.
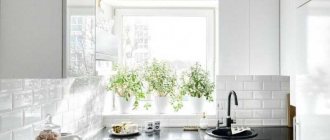
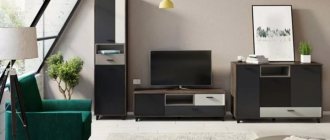
With the help of film, you can repair almost any surface, even those that are not necessarily related specifically to the kitchen - for example, the same doors. In addition to the fact that they will no longer look shabby, now such an accessory can become a real decoration of the room and its main accent, which is clearly confirmed in photo number three.
You will learn even more about self-adhesive film for the kitchen in the following video.
Advantages
- it is moisture resistant - an important plus for a room in which the water supply valve literally does not close;
- it is practical - you don’t need to put in a lot of effort to ensure that the covered tabletop or facades retain their classy appearance;
- it is durable - the film copes with any type of impact and lasts for years;
- it does not require professional installation - even the person whose hands grow from a well-known sad place can handle the pasting.
Of course, the latter is true only in one case - if this person first becomes familiar with the process technology.
Method 1: Painting the kitchen with chalk paint
Do you want to update your kitchen set beyond recognition with your own hands? The best way to do this is to repaint the facades with chalk (mineral) paint. Why chalk?
- The fact is that this type of paint has a thicker consistency and increased adhesive properties, due to which it fits perfectly on any surface - even on laminated chipboard/MDF. Moreover, chalk paints eliminate the need for tedious sanding and sometimes even without primer.
Chalk paints are also good because they give the painted surface a texture similar to that obtained when painting a wooden surface. Therefore, even the most ordinary kitchen with film facades will look much more noble after such an “update”.
- In Russia and the CIS countries, you can buy chalk paints from designer Daria Geiler, foreign manufacturer Annie Sloan, Kazakh Vernenskaya Manufactory, etc. You can also make chalk paints yourself using recipes that are easy to find on the Internet.
Here are some photo examples of kitchens before and after restoration.
Photo of a kitchen with film facades before and after painting with Daria Geiler paint. Here the author of the alteration restored the peeling film on the facade near the stove, and then painted the furniture without removing or sanding the film
Old kitchen with veneer cabinets before and after painting with Annie Sloan paint. By the way, in this kitchen even the tiled floor was painted with chalk paint, and the patterns on it were painted using a homemade stencil
Inspired? Then it's time for a master class.
To paint the kitchen you will need:
- Primer (special for chalk paints or alkyd if the furniture was painted with oil stain);
- Chalk paints (preferably with a 10% margin);
- Matte moisture-resistant varnish (acrylic or polyurethane).
Useful tips
- Material consumption is calculated following the manufacturers' recommendations. It is especially important to correctly calculate paint consumption. If there is not enough of it, you will have to repaint the remaining areas with paint from another batch, which, due to the nature of production, will be slightly different in tone.
- Which varnish is better - polyurethane or acrylic? To ensure that the kitchen coating can withstand extreme loads, it is safer to use polyurethane varnish. However, if you rarely cook and do not have pets, acrylic varnish is perfect, especially since it dries faster, does not have a strong odor and is cheaper.
- Brushes: two synthetic brushes for primer and varnish, as well as one natural or synthetic brush about 4 cm wide (a natural brush gives a more pronounced texture);
- Degreaser, such as white spirit;
- Sandpaper with a grain of 100–180 microns;
- Ladder;
- Film and masking tape (to protect non-paintable parts);
- Screwdriver;
- Gloves.
How to paint a kitchen set:
Step 1. Preparation
First you need to remove the handles from the facades. The floor, walls, splashback, countertop, glass inserts, fittings and other surfaces that you do not want to paint should be covered with film and masking tape. Next, clean all parts from grease (preferably with a degreaser), stains and dust.
- Do the facades need to be removed? It is not necessary to do this, but it is more convenient to paint this way.
Step 2: Primer and/or sanding
It is not necessary to sand the old paintwork, film or lamination, but it is necessary to treat it with a primer in 2 layers. In this case, each layer of primer must be allowed to dry, and then the primed surfaces must be sanded to even out the coating and enhance paint adhesion.
- However, if the lamination has a strong gloss, then it is advisable to remove its top shiny layer with fine-grained sandpaper - this will make the coating even stronger.
Adviсe:
- If you are not too picky about the result (for example, if the kitchen is temporary, very old or got for free), then you can do without a primer. All you need to do is: wash the facades from grease, then paint them in 2-3 layers and finally cover them with 1 layer of varnish.
- Do you want to achieve the most even and durable coating? Then it’s worth sanding the surfaces after each layer of primer, paint and varnish (except for the finishing layers).
- Before starting work, test the paint on any object.
- If you want to save money, paint only the fronts and visible parts of the frame, and the interior walls and shelves of the cabinets can be painted cheaper or left unchanged.
Step 3. Coloring
Once the primer is dry, begin applying 2-3 coats of paint, allowing each layer to dry completely (one coat of chalk paint only takes about 30 minutes to dry).
- It may take 5-6 coats to cover a dark finish with white paint.
Step 4. Varnishing
When the finishing coat of paint has dried, you can begin applying the varnish in 2-3 thin (!) layers with a synthetic brush (not used). It is advisable to allow each layer to dry completely for about 24 hours.
Step 5. Finally, we return the fittings and facades to their places.
Voila, the old kitchen is as good as new!
How to properly wallpaper a kitchen?
The procedure for gluing walls and furniture does not require any special skills, but for a good result you should still read the minimum instructions first. So, when repairing furniture, it is usually recommended to remove all removable parts first - this makes it easier to work with them.
There is usually a millimeter grid on the back of the film, which allows you to cut off exactly the required amount, but keep a ruler at hand - without it you cannot measure the dimensions of the surface to be repaired. You can use sharp scissors for cutting, but a stationery cutter is even better - this way the cuts will be without any scraps. Pasting is carried out exclusively on clean and grease-free surfaces , therefore they are first washed with soap and then, once dried, treated with white spirit.
In addition, the surface must be perfectly flat, therefore, if possible, it is pre-treated with sandpaper.
When everything is ready, the part to be pasted is measured, a piece of film is cut according to the obtained dimensions and placed on the part “face” up. If the dimensions are the same, in one of the corners a part of the backing is bent slightly and the adhesive side is pressed against the surface to be repaired. The substrate is folded back gradually as the film is glued, and the resulting air bubbles are removed using an elastic spatula . If during the gluing process the fragment is glued unevenly, the blot is corrected immediately by carefully peeling it off and re-gluing it correctly.
Some bubbles will inevitably remain, so after complete gluing they are pierced with a needle and also smoothed out with a spatula. For perfect smoothness and reliable adhesion, the glued surface is also passed through with a powerful hairdryer - the heating removes small wrinkles.
Which film should I choose?
First of all, you need to look at the thickness of the material and the manufacturer. German “self-adhesive” tapes are of good quality; their price depends on the thickness.
Dutch and Italian manufacturers have proven themselves to be excellent. You can choose something from budget series or take a closer look at exclusive products, but then the price will be quite high.
The most inexpensive are Chinese adhesive decorative materials from unknown manufacturers. However, low price should not be the main selection criterion, otherwise a beautiful kitchen decorated with self-adhesive vinyl film can quickly lose its appearance.
Not all adhesive materials intended for promotional products can be used in the interior. Some of them are designed for short-term use. Choose high-quality decor, and then the restoration will be durable, and a simple kitchen cabinet will become an interior decoration.
The color can be any. If you want to take a creative approach to kitchen design, place photos of fruits, vegetables or flowers on the facades, thereby decorating ordinary old furniture. The drawing can also be applied using photo printing.
Kinds
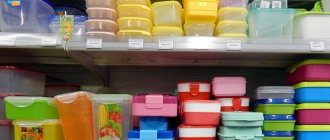
Self-adhesive film is just a general name for a whole group of outwardly similar products, which may differ in material and performance characteristics. For example, such a finish is considered the cheapest of all possible, but the cheapest options are usually made of simple polyethylene, and this option is only suitable for those who like to change their interior design with a high frequency. PVC film is already considered to be of much higher quality and will last much longer, the same goes for vinyl.
Since film is most often purchased for the aesthetic appeal of the finished surface, it is desirable that it at least does not fade in the sun. If bright light is not typical for your kitchen, this can be ignored, but ideally it’s worth paying a little extra for material that has ultraviolet stabilization - then the finish will last longer without replacement.
Many modern types of self-adhesive film are loudly called universal, that is, suitable for any conditions of use, but in practice this is more of a marketing ploy, especially if we are talking about an inexpensive product. For the kitchen, you should choose especially sustainable solutions, because the film must be both moisture-resistant and heat-resistant . Special thermal film can even be located quite close to the stove, however, then you should not think that it will cost at the same level as the most budget options.
Finally, film can also be classified by image. Most popular types are decorated with a specific pattern, but there are also transparent options - they are used to provide additional protection for furniture that still looks beautiful and should remain so for as long as possible. “Modern” solutions like mirror or holographic films are becoming increasingly popular, but you need to understand that an attempt to create excessive glamor with budget materials can look downright cheap.
What are MDF facades in PVC film?
PVC film for furniture facades is a polymer material made of polyvinyl chloride, 15-80 microns thick, used for covering furniture made of MDF and chipboard, as well as for self-gluing.
Furniture facades are usually made of wood or wood materials: solid hardwood, chipboard and MDF (. There are also “curvilinear” or “radial” doors of cabinets and cabinets, but this is a separate category, although in this case plywood is bent on the matrix, special grade MDF or gluing together several sheets of fiberboard.
Photo: this is what a MDF kitchen door looks like without film
Each type of facade has its own “set” of decorative processing options. The most limited choice for chipboard is only lamination at the factory, followed by gluing the edges of the blanks at the ends. Chipboard facades are straight slabs that cannot be milled, sanded or painted.
And MDF facades have the most possibilities for finishing and processing. They, like chipboard, can be laminated at the factory and imitate any “smooth” or “voluminous” texture. The slabs can be milled, sanded, painted, and enamel applied. But the most economical option for decorative finishing is gluing MDF parts with PVC film.
Films for MDF facades have a wide variety of colors and textures
In factory conditions, facade production looks like this:
- cut out the part;
- if necessary, mill a three-dimensional pattern;
- polish the surface;
- pressed with PVC film.
Peculiarities
Most likely, self-adhesive film is present in your apartment even if this is the first time you have heard about it. The fact is that it is intensively used in the furniture industry for the external decoration of furniture made from relatively inexpensive and environmentally friendly MDF boards. Today, not all wooden products look like wood, and the same imitation of stone on the countertop is precisely the result of gluing with such a film.
In this case, the film does not perform any functions other than decorative , that is, there must be some kind of reliable base underneath it. Repairs made with its help have a purely cosmetic effect - for example, it makes sense to cover old doors with it, which are still durable and reliable, but have become somewhat worn out over the years of use and make them blush in front of guests.
The big advantage of such decorative material is the huge variety of available design options, and if you are also willing to pay extra, then any image you want can be applied to the film to order.
In the case of the kitchen, there are simply a lot of possible places of application for such a film - it is used for pasting doors, furniture, aprons , and in specially created varieties - even for pasting windows, imitating stained glass. The material has minimal characteristics for use in the kitchen - it is not afraid of moisture and can even be washed. At the same time, the fire-resistant properties of such a material are questionable, so it definitely has no place near an open fire.
Stages of update work
Filming kitchen facades takes place in several stages.
Facade preparation
Vinyl is a thin and flexible material. Any flaw in the surface being glued will stand out and spoil the appearance of the product. Careful preparation of the base will help avoid this.
First of all, the facades need to be washed from grease and dried, disconnected from the cabinets, and remove the fittings. Clean any irregularities found and fill them with putty. Sand the leveled surface.
If the item has already been covered with film, it is better to remove it before gluing a new one.
You can do this in several ways:
- Soak a small area with hot water and try to remove the coating. You can carefully pry off the material with a spatula or knife so as not to scratch the surface.
- Use a heat gun to heat the coating. A household one set to maximum temperature and power, or even a fan heater, will also work. Peel off the film while it is hot.
- Special aerosols for removing tinting and stickers from cars will help. Spray the product onto part of the surface. After a certain time specified by the manufacturer on the packaging, remove the coating. Instead of aerosols, you can use WD-40. Work with it carefully: the white spirit contained in the composition can damage the paint on the facade.
- White spirit and rectified alcohol are used when the surface coating under the old film does not need to be preserved. Soak the material in them and carefully separate them from the base. The same means, gasoline or other solvents, remove glue residues. Apply them to a piece of fabric and remove the dried adhesive.
Degrease the product with alcohol or gasoline. Prime with furniture varnish or wallpaper glue based on methylcellulose (it is suitable for rough surfaces).
Metal and glass bases are moistened before pasting with water or soap solution.
Measurements and markings
Measure the parameters of all parts to be pasted and transfer them to film. On its reverse side there is usually a centimeter grid for more convenient marking, around which an allowance of 1-2 cm is added.
Cut along the lines with an allowance using sharp scissors, a stationery knife or a breadboard scalpel. It is recommended to cut the film with a pattern from the front side so that you can see how to correctly separate the fragments of the picture and then fold it back into a whole composition.
Pasting the film
When the preparatory work is completed, the most important stage begins - gluing the kitchen unit:
- We begin to glue the part on top.
- We apply the film evenly to the facade. Remove the protective paper layer from a small area no larger than 10 cm.
- We press the vinyl tightly against the facade, smoothing it from the middle of the part to the edges. This can be done with a rubber roller or a plastic wallpaper scraper (if you wrap it with tape, it will become softer). A piece of cloth or a foam sponge will do.
- When the first section is secured, separate the paper from the next one. Press, smooth. Repeat until we reach the bottom of the part.
- We iron the film-covered façade again with a cloth, and trim off the remaining material with a knife or scalpel.
Small air bubbles can be pierced with a thin needle from a syringe and the film pressed well to the surface in this place.
Processing of figured parts and corners
If you plan to update not only the front, but also the side parts of the facades, when cutting the material, add their width to the workpiece, not forgetting about the allowances.
The film is cut diagonally in the corners, and the front part is covered first. The material heated with a hairdryer is pulled onto the edge of the part and carefully ironed. Close the corners. Working with rounded ends is similar.
Important ! Vinyl may shrink as it cools, so do not cut off excess film until the part has completely cooled. Do this after 40-60 minutes.
On the facades there are figured recesses or volumetric projections. They are also covered with vinyl heated with hot air. It is important to straighten the film and smooth it to the surface.
Decorative elements also require an increase in material when marking.
When the width of the PVC film is not enough, it is necessary to join several parts. This is done like this:
- When cutting, add another 1.5–2 cm to each piece.
- We overlap the material, do not press the top layer.
- We cut both pieces simultaneously with a scalpel or knife along a ruler.
- We remove the excess strips, align the edges, and glue the material.
- Warm it up with a hairdryer.
Correcting errors
Allowances will save you from unevenly pasted film. Due to them, a slight distortion will become invisible. This only works on options without a clearly defined pattern, such as plain or marbled.
If during gluing defects become noticeable - severe distortion or large air bubbles - it is better to peel off the material immediately, until it covers the entire surface, and start again.
When the vinyl is glued, but serious mistakes are obvious, remove it as quickly as possible before the glue dries. You can try to re-glue the removed film: high-quality material will withstand 1-2 times, will not stretch or tear.
It happens that the PVC material begins to come off after a while. The reasons are improper preparation of the base, non-compliance with gluing technology, poor quality. To avoid dragging the entire facade again, try attaching the film with transparent universal glue. It is convenient to do this with a syringe.
Step-by-step instructions for gluing
So, the choice has been made, the self-adhesive tape has been successfully purchased in the store (for this purpose, go to any construction supermarket), and there is a mood to breathe new life into the “ruined” kitchen. It's just a matter of small things - actually, the pasting:
- remove all removable parts (fittings, doors);
- carefully sand all problem areas on them, having previously puttyed them; wash them with soap and water and degrease the surface - for this you can use a regular solvent or acetone;
- wait for the fat-free base to dry and take all the necessary measurements, consistently adding at least 1 cm to each segment (your safety “reserve” in case of a beveled corner);
- turn the film over and apply markings - most options have a millimeter grid, which makes the task much easier;
- cut off the necessary fragments with a stationery knife - scissors will also cope with this task, but they leave unevenness and ugly scraps, so it is better to prefer the first option;
- if you cut a drawing, then do it along the front part - so as not to miss and save the image;
- begin to sequentially cover the façade and countertop of the kitchen unit with self-adhesive film, separating the protective paper by no more than 4-5 centimeters and placing the adhesive side against the surface;
- From the middle to the edges, carefully level the film with a soft cloth or silicone spatula, avoiding the appearance of unpleasant bubbles - if you do everything correctly, excess air will escape through the edges of the facade;
- glue the joints with an overlap of at least 1.5 centimeters;
- Before you start gluing the fittings, carefully use a knife or any sharp object to make holes in the films at the locations of the joints.
That's probably all. There is no need to rush anywhere - and everything will work out in such a way that even the most picky eye will be satisfied with what it sees.
Attention: all stages must be performed in the brightest possible light. This way you will significantly reduce the likelihood of missing some defects on the surface along the way.
Installation of moldings and fittings
You can return the old fittings to the vinyl-covered façade (they also change it by repainting it) or install new ones.
Furniture moldings or trim will complete the renovation process. They come in the form of strips of various shapes or with twisted, patterned elements.
Moldings are made from wood, PVC, polyurethane, and metal. There are self-adhesive models.
Decorative elements are cut into parts of the required sizes. Products with an already applied adhesive composition are pressed tightly against the facade, others are secured using universal glue.
Attention ! It is better to pre-mark the places where the decor will be attached with a pencil.
Replacing the countertop
To update the appearance of kitchen furniture, restoring facades made of MDF or wood is not enough. The tabletop, the most used element of the set, also requires tidying up. Heavy hot pots are placed on it, food is cut on it, meat is beaten. It is not surprising that its surface quickly deteriorates. You can update your countertop in several ways.
Decorate with ceramic tiles
On a surface cleaned with a grinding machine and treated with glue, a mosaic of small tiles is laid out. The elements should be in close contact, leaving no gaps. 6-8 hours after laying out, the joints are grouted, and when everything is completely dry, they are covered with 3-5 layers of furniture varnish.
Installation of protective glass
The original way to update. The tabletop is cleaned, wooden planks are attached to it, dividing the entire surface into sectors of arbitrary shape. Then each of them is filled with decorative material: expanded clay, pebbles, large beads, coffee beans, etc. Tempered impact-resistant glass is placed on top, secured with bolts or glued with special glue.
Installation of a new countertop
The old one is removed and another is installed in its place. Replacement should be entrusted to professionals.
To update the look of your kitchen, you don't have to spend a huge amount on buying a trendy set. Do-it-yourself restoration work will allow you to save your family budget and realize your personal design fantasies.
Source: trizio.ru
Errors when pasting
You tried your best, but something went wrong. It doesn’t matter, almost everything can be fixed safely.
Bubbles? If they are small, then simply pierce them with a needle: squeeze out the air that gets in where it is not needed and carefully smooth the problem area with a cloth. With larger ones, an ordinary syringe will help - inserted inside, it will draw out all the air, and the hole will easily disappear when smoothed.
Folds? Whatever helps dry your hair will also work great on your hair. Run a hairdryer over the folds and they will smooth out. Don’t get too carried away, otherwise, by getting rid of one trouble, you will invite another.
Crooked? If you remember to leave a margin of 1 centimeter for each fragment when taking measurements, then you definitely won’t panic: an ordinary stationery knife will correct the situation, which can be used to remove the excess, and joining will easily cover the traces of your “cunning” operation.
Finishing with paper and wallpaper
One of the options for updating a kitchen set using improvised means is finishing with colored paper. The gluing process is identical to self-adhesive film. The only difference is the absence of adhesive tape, instead of which regular glue or double-sided tape is used.
Step-by-step instruction:
- Initially, we sand those surfaces where paper decoupage is supposed to be done. If the decoupage is on glass, it cannot be sanded.
- Next, apply one coat of primer. The mixture is applied only to wood or chipboard. It is not suitable for glass.
- Cut out the necessary pictures, words or drawings from paper.
- Apply glue to the reverse side of the drawing.
- Leave for five minutes. During this time, the glue will be absorbed and spread evenly over the paper.
- We glue the picture or drawing partially. When gluing each part, we align the paper to prevent air bubbles from appearing under the design.
Decoupage
Do you like Provence style kitchens? Restore your old and tired kitchen furniture using a decorative technique called decoupage. The material for it can be fabric, oilcloth, postcards and even ordinary newspapers.
To work you need:
- paint brush with narrow bristles;
- putty knife;
- wood putty;
- sandpaper;
- solvent;
- PVA glue;
- varnish
Finishing the front panels begins with sanding with coarse-grained and then fine-grained sandpaper. Then the slightest cracks are carefully rubbed with putty. To make the surface smooth and easy to work with, apply the composition in 2 layers, allowing the first to dry thoroughly first. The workpiece is degreased with a solvent before pasting with the material.
Fabric, paper or oilcloth is glued with PVA glue. After drying, coat with varnish in 4-5 layers, using a flexible brush to prevent the formation of pale spots. After a day, you can already use the headset.
Some more useful information
- Do you want to turn a minimalist kitchen with solid fronts into a classic one? This is possible by gluing moldings or carved parts onto them and then painting them following our instructions.
Also, before painting, the headset and wall cabinets can be supplemented with shaped brackets (they can be purchased ready-made or cut out yourself), and the base can be supplemented with baluster legs.
- For the best result, it is worth approaching the “update” of the kitchen in a comprehensive manner and, if necessary, changing not only the color of the facades, but also the countertop with an apron, curtains, dining table and chairs.
- Sometimes the thirst for change can only be satisfied by replacing/painting furniture handles.
- Of course, before painting the kitchen or covering it with vinyl, it needs to be repaired: tighten/change the fittings, glue and iron the peeling film a little, polish the scratches, and fill the chips, cracks and holes from furniture handles with furniture putty.
(Rate the material! Already voted: 75 average rating: 4.43 out of 5) Loading…
What to do if the film comes off?
With the right decoration technology, the updated set will delight the owner with its design for several years. However, there are such unpleasant moments when the surfaces being glued begin to peel off.
To achieve the proper look, you will need scissors and glue (“Super Moment” or liquid nails). The glue is introduced under the film and pressed.
Another way is to heat up the place where the film has come off with a hairdryer. This will bring the melted glue into working condition, after which the film must be pressed tightly.
Photo
Now we invite you to look at a few more photos with updating the facades of the headset at minimal cost.
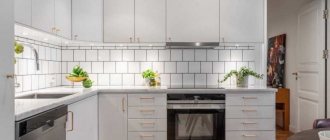
Restoration of facades with decorative film
The appearance of the kitchen largely depends on the cladding of the facades. If your kitchen has smooth doors without a relief made of chipboard, then they can be easily covered with vinyl film.
Updating kitchen MDF facades with convexes will be easier if you use an industrial hair dryer. Only a well-heated film can take the desired shape. If there are decorative details on the facades, they must be removed before pasting.
Replacement of the old film is carried out only after removing the previous layer. Remember that decorative film is only applied to prepared surfaces.
It should be taken into account that in production, MDF film facades pass through a special press, which makes it possible to obtain a smooth surface without flaws. At home, MDF can only be covered with self-adhesive.
Difficulties in work and their solutions
Problems often arise with processing the ends and shaped parts of kitchen units made of MDF or other material. An industrial or household hair dryer will be a good helper in this case.
The restoration will go faster if you work together: one person stretches the material by heating it with a hairdryer, the other carefully glues it to the base.
It is easier to apply the self-adhesive tape evenly on a damp surface. To do this, lightly moisten cabinets and doors with a spray bottle. Water will not allow the material to immediately grasp the surface and will provide an opportunity to correct the work.
When cutting the material, you need to make allowances on each side. For parts with ends, do not forget to make cuts in the corners. First, they paste over the part itself, and then proceed to the ends. The rounded ends of MDF facades are treated with a hairdryer for a better fit.
How can you surprise your guests?
Note that recently owners have often tried to cover the kitchen facades with self-adhesive film with photo printing. Anything can be used as a print, but the most relevant for a kitchen theme are always beautiful flowers or juicy and ripe fruits.
Or no less beautiful representatives of the animal world. This also includes one of the most common options - butterflies.
There are also purely abstract photographic prints using geometric shapes and their derivatives.
The coffee theme always looks organic and advantageous. Grains scattered over the surface, beautiful foam, cups filled to the brim with a fresh invigorating drink - that’s all.
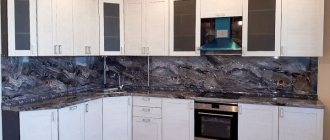
Well, if you really want to surprise the guests of your home, then try covering the kitchen countertop with self-adhesive film imitation wood or marble.
So you can’t immediately say that these are not real materials!
Reasons why kitchens age quickly
Kitchen furniture made of wood looks presentable and expensive. In production, environmentally friendly materials are used that do not emit chemicals even when heated. But wooden furniture facades are subject to rapid deterioration and aging due to the influence of many factors:
- high temperatures;
- high humidity;
- constant exposure to water and other liquids;
- exposure to household chemicals;
- mechanical damage to cutlery and dishes.
As a result, even the most expensive kitchen becomes faded, scratches and cracks appear on the surface. Changing it is quite expensive and time-consuming; it is more profitable in all respects to repair and restore kitchen facades made of solid wood and MDF.
Restoring kitchen facades made of solid wood and MDF has several advantages when compared with purchasing new furniture:
- Less financial costs. Restoring the facades of wooden kitchen furniture will cost several times less than buying a new set.
- Change of design. If you are tired of your old kitchen, then restoration of furniture facades will give you a new kitchen set that will delight you not only with its functionality, but also with its appearance. This is especially true when changing the interior of a room, when the design of the facades must be combined with the overall decor. Bringing complex design ideas into reality. If you see a chic set in a store that attracts you with its design, do not rush to save money to buy it. Restoration of kitchen facades will allow you to turn any ideas into reality.
- Fast work. If manufacturers spend up to 2 months on the production of a new set, then with us you will receive an updated kitchen in 7-10 days.