Recommendations for preparing basic material
Inspired by the idea of creating a rug from old things, go through your wardrobe and select everything that is unnecessary. Next, prepare your clothes:
- Cut off parts that may still be useful - snaps, buttons, zippers.
- Trim necklines, thick seams, pockets and other irregularities.
- Cut strips. Their width depends on the thickness of the material. The thinner it is, the wider the tape.
- Cut the ribbons in a spiral to increase their length. For smoothness, round right corners.
- Roll up balls, sorting the strips by color. This makes it easier to combine shades.
Advice. Before cutting the strips, pull the piece cut from an old knit item horizontally and then vertically. When stretching, you can see in which case the fabric curls on the right side. Cut the ribbons in this direction.
Preparing yarn for rugs
Revision of old things is an invaluable “treasure” for lovers of handicrafts.
It is advisable to review things in spring and autumn, at the end of the warm and cold seasons. This will free your closets from junk, and in the “storage” for handicrafts there will be a lot of improvised “yarn” from old knitwear.
Items are sorted by type of knitwear - tights, socks, T-shirts and sweaters. From this cut strips of equal width.
Helpful advice! If you cut diagonally, the strips will not fray. Pull the ribbons slightly in length - they will roll themselves up, hiding the trimmed edge.
In some cases, a frayed edge is required, which will give the rug additional fluffiness, then the strips are cut horizontally, carefully folding along the edge of the product. It is important to decide on the color scheme in advance so that the product looks harmonious.
Knitted products are made from synthetics and cotton threads. Artificial threads are more practical and less susceptible to rotting. Therefore, a rug made from old synthetic items is suitable for bathrooms.
It is better to knit a patterned runner from soft cotton wool for a bedroom or children's room. It will be pleasant to stand on it barefoot after sleep.
Important! Thick knitwear should not be cut into wide strips to prevent the product from being rough and tough.
The T-shirt, allocated for cutting knitted ribbons, needs to be divided into parts, removing the finishing strips with seams, sleeves and neck.
Next, draw the back and front parts into strips of 2-4 cm, not reaching 3 cm from the side seam. Laying it out on the table, make cuts diagonally across the seam to create a long strip, cut as if in a spiral.
Shape selection
The most popular are round or oval-shaped rugs that will harmoniously fit into any room interior. But rectangular models, ideally suited to the high-tech style, are no less in demand. Rugs of non-standard configurations will fill the atmosphere of the room with cheerful and cheerful notes.
The modern market is rich in a variety of different models, but handmade rugs (pictured) will be unique and will not incur financial costs. In addition, you will get rid of old things and buy new ones.
How to make a rug from old sheets with your own hands.
Handmade items can decorate any interior just as well as purchased ones. Moreover, by working on such an item, you charge it with your warmth and comfort, and in the future such things will only evoke bright and pleasant emotions and memories in you.
Quite often we strive to get rid of old things as quickly as possible and never think about the fact that they can be given a second life. So the next time you're going through your closets, consider that the item you're about to throw away may still serve you for many years to come.
There are many options for reusing old items. This article invites you to reuse an old sheet and make a simple rug out of it with your own hands. It doesn't have to be a sheet; if you have old pieces of fabric lying around the house, they will also work for this job. To make a carpet you will need minimal sewing skills, as well as a little time and desire. Such an item can become a bedding for your beloved pet, as well as an excellent rug for the bathroom or kitchen.
To work, in addition to sheets or fabric, prepare a sewing machine, scissors, and also a base for the future rug (pick a fairly thick fabric, you can sew several ordinary pieces of fabric together).
First of all, cut all the sheets into strips about 3 cm wide. Remove all the threads on the sides.
To make the rug more vibrant and original, choose fabric with a variety of patterns. You can also combine several patterns. Take three strips, secure them with a pin at the base and braid. Secure the end of the finished braid with thread. Make multiple braids in the same way, using all the strips of fabric.
Now take the fabric base and place one braid on it. Start twisting it in a circle from the center, periodically securing it with pins or stitches, using a needle and thread.
In the next step we will use a sewing machine. Using a zigzag stitch, sew all the braids together. Adjust the base: cut it to fit the shape of the rug. The edges of the braided carpet and the base need to be sewn together.
That's all, after following these simple steps, you can easily make a similar rug from sheets with your own hands, and we also managed to get rid of old things. This is just one idea for using old sheets, there are actually a lot of them. Be inspired and enjoy your creativity!
Using old items from your closet
Perhaps, almost everyone has old unnecessary things in their closet that it’s simply a pity to throw away, but you no longer want to use.
Therefore, they should be used to make a rug. For example, an old sheet or other cotton material will do. Such rugs made from old things can be laid in the bathroom, near a bed or chair, or given to a pet.
So, in the process of work, in addition to an old sheet, you cannot do without scissors, pins, threads, other dense fabric (for the base) and a sewing machine.
Operating procedure
Each case has its own specific procedure for making a rug from an old sheet, it looks like this:
- using scissors, cut pieces from the sheet, no more than 3 cm in width, it is better to remove the hanging threads;
- To make the rug bright, you will need sheets of different colors;
- Group the resulting segments into groups of three;
- use a pin to secure the ends of the segments at the very beginning and begin to braid, at the end also secure the ends with thread;
- As a base, take a dense fabric in the shape of a circle and wind the prepared braids, periodically fixing them with a pin or needle and thread. Then you remove them;
- twisted braids must be sewn on a sewing machine with a zigzag seam;
- At the end of the work, carefully remove the dense base.
A new DIY baby rug is ready to use. It will look great in a nursery near the bed or in a playroom.
Crochet pattern
Vintage is still one of the favorite styles of many designers and decorators. It is cozy, romantic and goes well with many interior elements. A crocheted rug will decorate any room and fill it with harmony and beauty.
First of all, decide how thick your mat is: thin or thick. Then select the appropriate threads. The color scheme is also an important criterion when choosing them.
A bright, colorful rug is not suitable for a room made in pastel colors. To improve the situation, you should add pillows and accessories of similar colors to the interior. The crochet hook should be 2 times thicker than the thread.
You will find detailed instructions for crocheting a rug on the relevant websites. For beginners, a simpler method is suitable:
- take unnecessary multi-colored rags;
- cut them into 3 cm strips;
- tie them alternately with each other and wind them into a ball;
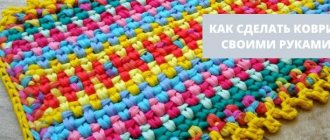
- take a hook and knit in the simplest circular pattern to the desired size.
Pompoms for the rug
A rug made of pompoms looks playful and cute. It's not difficult to do:
- Prepare multi-colored thick threads, cardboard circles, scissors and patience;
- make holes in the cardboard circles, the diameter of which will determine the size of the pompoms;
- wrap threads around the circles, cut them along the outer edge of the circles, and tie them along the inner edge with thread;
- remove the cardboard circles and fluff the threads;
- It turned out to be a beautiful pompom.
To create a rug you will need quite a few of these cute pompoms and the following procedure:
- take a plastic canvas or synthetic mesh;
- tie the prepared pom-poms close to each other on the canvas from the front side, on the back side you will get only knots;
- hide the knots with another canvas and you can use your creation.
Glowing rug for a children's room
The original version of “granny circles” made from T-shirts and tights. Such products were popular during the Soviet era. They were crocheted using regular single crochet stitches in a spiral, gradually adding the number of elements to expand.
Today, a sweat base is laid under the posts. A round jute rug is the simplest example of doing work using this technique.
Instead of jute, you can take any strong base, clothesline or diode tape. A homemade glowing circle is an excellent solution for those who have trouble finding their way in the dark at night.
The soft glow near the crib does not prevent the child from sleeping, but takes away the fear of being left in the dark without the presence of adults.
Soft fluffy rug made from “Grass” patches
This rug is very pleasant to the touch, it is pleasant to step on, and you can sit on it. The best material for it is tired T-shirts or lycra items that have not been used for a long time. Whatever you choose, you need to prepare strips of 20 x 120 mm. Let's look at the process step by step:
- We buy a base - painting or plastering mesh. If there is a special mesh for carpets, then it will work, but its edges need to be protected from unraveling using masking tape.
Master class on making rugs using a crochet hook
A hook can create beautiful things from unnecessary things, including all kinds of rugs. They are laid on stools, placed on the floor near the sofa or by the door, made into sofa cushions, and used as a hot stand. It is easier to knit a scarf-shaped rug. Let's start with it.
Rug in the form of a scarf
So that nothing distracts from the creative process, let's prepare everything in advance:
Now you can start:
- We cut the selected old things into ribbons and collect them into balls.
- We make a chain by knitting air loops. Why do we first make a loop, knit a loop, and from it the next one, etc. The number of loops in the chain should be such that its length is equal to the planned width of the product.
Crochet round rug
To make it we use the usual circle pattern. A rug of this shape is not much more difficult to knit than a rectangular one:
- make a loop;
- we knit air loops from it - 6 pcs;
- we tie the resulting half-columns;
- perform a lift - 1 air loop;
- We continue to work on forming a circle, doing double crochets.
An approximate scheme for adding loops:
- 1st row - knit 2 single crochets from each loop;
- divide the circle into 6 equal parts;
- knitting the last loop of each segment, add 1 double crochet.
- We finish the circle by knitting to the desired size.
Idea 1 – Braided carpet from old T-shirts “Pigtail”
The simplest method of creating a rug from unnecessary things is braiding .
Suitable even for those who have never done needlework.
You can decorate your living room or bedroom with this knitted decoration. The beauty of wicker is that you can create a product of any shape. Circle, square, whatever your heart desires.
Materials for creating a rug:
- old T-shirts;
- dense threads;
- scissors;
- sewing machine (can be sewn by hand);
Step by step instructions:
- Cut off the neck and sleeves of the T-shirt to create an even fabric.
- Start cutting strips along the entire length of the fabric. Choose elastic fabrics for braids. The thicker the fabric, the narrower the stripes. Stretch the resulting strips.
- Gather all the strips into a ball for convenience. Then the strips from different T-shirts need to be connected. There are two options: stitch using a sewing machine or join it yourself. To do this, make small holes at both ends of the ribbons and thread one into the other.
- At this stage we braid the braids. Secure the beginning of the braid with threads. Then start braiding a regular braid as you would with your hair.
- When the braid ends, carefully sew on the next one. For a square or rectangular carpet, you need to weave many identical braids.
This ball is made from 30 t-shirts!
Shaping the braid
Then there are two options for weaving : a circle and a rectangle.
How to weave an oval shaped :
- Roll the T-shirt braid into a spiral with your hands, pressing each circle tightly together.
- Sew the circles on the inside.
Square shaped rug:
For a square product, you will need a piece of fabric to attach the braids.
- Fold the fabric in half and stitch along the seams.
- Carefully sew each pigtail (with a machine or with your own hands) as shown in the photo.
Related material: How to make a table with your own hands
Idea 2 – Rug made from scraps of fabric without a sewing machine
A bedside rug made from scraps of fabric using the patchwork is far from being an old-fashioned “grandmother’s” product. Modern craftswomen skillfully decorate their homes with patchwork blankets, rugs and other decorations. Many complex methods require a sewing machine. But not everyone has this unit.
Materials for a rug made from fabric scraps:
- clean uniform pieces of fabric or remnants of rags;
- fabric base (piece of fabric the size of the desired rug ) or construction mesh;
- thick multi-colored threads, needle;
- pins for basting;
How to make a rug:
- Place all the pieces of fabric on the base, secure with pins (see photo below).
- Carefully quilt all the patches, starting from the edges. The closer the stitches, the stronger the rug will hold.
That's all! A simple but very beautiful carpet for the floor is ready!
There are a lot of ideas for creating rugs with your own hands from scraps!
Small patch rugs
A color drawing can be done on a grid, having previously drawn it into several segments. These areas are filled with knots - much like carpet weaving professionals do.
Each square is a segment of the pattern. Narrow pieces of flap are tied with a loop, wrapping the loose tails over themselves. By working row by row or section by section, you can achieve a durable product with excellent aesthetics.
Helpful advice! Narrow pieces of knitwear (any other fabric) are faster and more convenient to thread into the mesh with a crochet hook, regardless of the size of the cells and the density of the pattern.
Idea 3 – Carpet made from old wine corks
An original rug will be made from old wine corks.
This is an ideal option for a bathroom, as the material is moisture-resistant and long-lasting. There is no need to wash such a product, and it is very easy to care for.
Materials for making a rug:
- about 150-200 plugs (depending on the desired sizes);
- base (old rubber mat , rubberized fabric, thin layer of plastic);
- sandpaper or knife;
- waterproof glue;
- kitchen board (thick);
Technique:
- Wash the plugs with detergent. If wine stains remain, leave the corks in a container of bleach overnight, then dry.
- Cut the corks lengthwise. It is better to cut the cork vertically rather than on its side.
- Come up with a pattern. Various pattern options.
- Start gluing the corks to the base. Remove any remaining glue immediately.
To make the product waterproof, its surface must be treated with a sealant!
The product is ready! Perfect for a bathroom or patio.
Mat from old belts
Wicker products can be made from any wear-resistant material. Old belts that have frayed on the fastener can be used for a durable rug at the front door.
There are several design solutions, the most affordable:
- weave at small intervals according to the principle of chintz fabric;
- stitch or stick a geometric pattern onto a woven or polymer base;
- lay the strips parallel and rivet them end to end on the sides.
Leather straps can be laid out in different ways, for example, light in the center and dark on the edge. The product can be plain or variegated, but all buckles are removed. It is better to align the edges; you can leave narrow cuts as a “picket fence” or lay them out so that you get a “ragged” edge.
Helpful advice! Old belts can become deformed over time, so after joining the strips or gluing them to the “sole”, be sure to place a leather mat under the press.
Idea 4 – Soft pompom rug
Many housewives still have a stock of woolen threads from Soviet times. Why should they gather dust in the closet if you can create excellent decor for a child’s room - delicate rugs made of multi-colored pompoms.
Kids especially like this product: it is soft and interesting , and mom can safely let her children play on the floor.
Materials for production:
- wool threads;
- construction mesh or rubber carpet with holes;
- scissors;
Technique:
- Wind the thread tightly around your palm or a toilet paper roll. Create several layers so that your fingers are not visible. The more layers, the more magnificent the pompom will be.
- Prepare a long thread for dressing. Then carefully remove the threads from your hand so that they retain their shape. Tie them with prepared thread. Make a strong knot so that the threads do not come apart.
- Cut the ends of the skein on both sides.
- When the pompoms are ready, start attaching them to the holes in the base.
- Trim off any excess threads when the design is complete. For strength, you can glue it with glue from below.
The new toy is ready, start your fidget!
Idea 5 – Door mat made from old belts
Do you have a huge amount of leather belts in your house that your grandfather wore? If they're not family heirlooms, feel free to turn them into stylish hallway decor .
Material for creating rectangular leather rug:
- 10-15 belts;
- awl;
- thick rope or twine;
Manufacturing technique:
- Remove all buckles from the belts. If necessary, cut it off. Make sure that all straps are the same length.
- Make holes along the edges of each belt at a distance of 2-3 cm.
- Sew them together using an awl and twine.
Here's an easy-to-make rug for the hallway with your own hands. Surprise all your guests with a fashionable item and display your handicrafts by the front door.
New pillowcases
If you accidentally singe a relatively new sheet with an iron, re-sew it into pillowcases. It's quite easy to do this:
- Cut off the damaged area.
- Fold a whole piece of fabric in half with the right side facing inward.
- Attach the finished pillowcase from your pillows to it.
- Add 3–4 cm on three sides and 15–20 cm on one edge.
- Cut it out.
- Sew the cut on three sides by hand or by machine. Don't forget to fold the fabric so it doesn't fray later.
- Sew the pocket. To do this, cut the fabric along the folds by 15 cm. Fold one side and sew on the sides. Shorten the second one by 13 cm. Hem the edges.
- The pillowcase is ready.
We recommend: How to quickly clean beef tongue in your home kitchen?
More details in the video:
Idea 6 – Terry rug made from old towels
Unused towels will make a soft bedding on the bathroom floor. An excellent alternative to cork carpet, because the material from which towels are made also absorbs moisture first-class. Place this sheet next to the shower stall and forget about a wet floor forever!
Carpet material:
- several large towels (an old robe or blanket will do);
- ruler and scissors;
- thread and needle;
- sewing machine (optional);
Scheme on how to make a soft shower mat step by step:
- Cut strips 3 cm wide;
- Attach 3 strips of different colors to each other and sew them at the beginning (to better hold the braid).
- Make a braid. As soon as the strips come to an end, sew the product further. The end result should be a long braid.
- Wrap the fake in a spiral (like a snail’s house), sew each circle tightly.
Animals really like these rugs - they are very comfortable to lie on! Your pet will be happy too!
Enjoy your work!
Preparing tapes
We prepare the material for the braids - we cut the found “treasures” into strips. The width of the strip depends on how thick you want the rug to be. To begin with, you can make knitted strips 6 cm wide. Strips of terry cloth are also made of the same width. But in the case of knitwear, the rug will be 2-3 cm thick, terry - at least 5 cm.
If you use T-shirts, cut off the “body” exactly at the armpits. We use the resulting pipe in this form. We cut into strips, but not completely, but leaving 5-7 cm uncut at one seam (as in the photo on the left). You'll soon understand why.
How to make a long strip of T-shirt for a homemade rug
Turn the uncut part towards you (as in the middle photo), take scissors, and cut along the bias from the bottom to the first cut. The next gap is also cut on the bias. And so on. You complete the last whole piece like the first - reduce it to nothing to the edge. The result is a long strip, several meters long, with barely noticeable seams. And there is less work - no need to sew. It’s easier with towels - you just cut off the edge, then cut it into ribbons, but they will need to be sewn.
During operation, the tapes will have to be connected. They can be tied or stitched. But there is a convenient way that allows you to reliably connect two strips of fabric/knitwear without a needle.
How to join two strips when weaving a rug
We place the edges of the strips one on top of the other, by 3-5 cm. We cut a hole 1.5-2 cm long approximately in the middle (with a strip width of 5-7 cm). We pass the free strip through this hole. The result is a reliable knot, which, nevertheless, does not interfere with weaving, does not stand out and is not felt later in the product. To understand how it works, try it on small pieces.
Rug making techniques
Handmade items often impress with the creative approach to how old socks and T-shirts look impressive in a new incarnation. A homemade rug for a bathroom or toilet can become an accent decoration against the background of a monotonous tiled cladding.
Thick polyamide yarn is the best material for handmade bags, blankets and rugs. Handicraftsmen sell real masterpieces made using various techniques via the Internet.
Mini-format and simply huge products, for the whole room - round, oval, rectangular. They are usually crocheted with a large crochet hook.
Basic techniques:
- knitting or crocheting;
- tying a tourniquet or thick base;
- tying knots on a mesh;
- braiding followed by stitching.
Instead of yarn, old terry sheets and towels are often used. 2-3 old towels will make a small “circle” under your feet in the bedroom. If you cut a whole set of old towels into strips, the workpiece will come out no worse than expensive yarn.
Note! The simpler the method, the more exciting the process and the faster the production of the selected model. The overall aesthetics depends on the accuracy of the work and the color scheme.
The grid can be filled in with colored sections in a variety of ways, including tying knots and crocheting in a specific pattern. These methods are quite simple; you can take a ready-made mesh or make it from yarn and impregnate it with acrylic paint.
DIY rugs made from braids
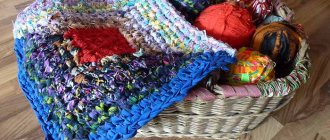
Do you know how to braid hair? The usual one, of three stripes? You can make amazing rugs with your own hands. What’s great about homemade braided rugs is that you can make them from just about anything. Any old things will do. Literally any. The best place to start is with knitted t-shirts. Soft, flexible material that is easy to work with. You can also use:
- Old towels, sheets or terry robes.
- Knitted items (sweaters, jumpers, but not very thick).
You can make amazing carpets from cords - Fleece blankets and sheets that have lost their appearance or relevance.
- Cords - ready-made or woven, tied.
- Old bathrobes, colored sheets.
- Jeans.
You can make very interesting and beautiful rugs from old things. And not only for the dacha... - Children's tights (and women's, by the way, too).
- Jute ropes.
And whatever you find and consider possible to use. When selecting materials, we try to find them of approximately the same thickness and density. Then there will be no problems with weaving. At first, you don’t have to think about choosing colors. When experience comes, it will be possible to select colors. It’s more pleasant to work with knitwear and terry cloth, but old jeans and jackets can also work.
Braiding hair
The braid is usually woven from three ribbons. The length of the stripes should not be the same. They will need to be tied or sewn (it is better to sew). And it is much better if the connection points are spaced some distance apart.
Preparing the “material” for a braided rug
We fasten the selected strips together. They can be wrapped in thread, sewn, knitted. The thickest knot is obtained. This is not always convenient. We braid a pigtail. When one of the strips ends, we sew or tie the second one.
Footage - as needed or desired. It also depends on the thickness of the braid. If it turns out to be voluminous, you won’t need much length. If it is thin, then you will need 5-8 meters. In any case, you can not finish the weaving, but fix it with something so that it does not unravel. You can grab it with a thread and a needle, tie it with a rope, or use a binder.
DIY rugs made from T-shirts: you can start assembling and not finish weaving
Assembling the rug
You can make a rug of any shape from a woven braid: round, oval, square, rectangular. To make a round homemade rug from T-shirts, twist the braid into a spiral on the table. Take a large needle and strong thread and sew it together. We make small stitches, connecting the woven braid centimeter by centimeter. This is perhaps the most time consuming part. But with this method of connection, a double-sided mat is obtained.
Weaving a rug from fabric strips - sewing braids
To prevent the end of the rug from looking unsightly, make the stripes increasingly tapering for the last meter or so. So that the braid becomes thinner and thinner. The length of this “tapering” section is equal to at least half the finishing diameter of the rug. It’s not a problem to fold a narrow edge down and sew it there. You can also hide the “tail” under one of the stripes in the braid. In general, this completion is aesthetically pleasing.
Oval rug made from T-shirts, scraps, old things
If you want to make an oval rug, you need to twist the braid around a straight section. The longer the section, the longer the resulting rug will be. If you want a square or rectangular one, you will have to braid the braid “in place.” To ensure that the turns are not smooth, but sharp, a special technique is used.
How to make a twist in a braided rug
At the turning point, leave the bottom strip free. The one that is currently on top wraps around the middle one. You need to make two or three turns, sometimes more. Having turned the work, we weave in a third strip, directing it over the one that was wound and passing it under the “main”. It's difficult to explain in words, look at the picture above.
Special models
Braids woven from old things can be the basis of very interesting carpets and rugs. For example, you can make a number of braids of the same length. Tie them tightly along the edges, leaving 5-10 cm free and cutting these parts into “noodles”.
Sew the resulting pieces together. You will get a rectangular rug. It will be convenient near the front door, in the bathroom, etc. You can also make a rather long rug that can be laid near a sofa, armchair, or recreation group.
Variations of rugs made from old T-shirts woven into braids
From fabric or knitted braids you can make a rug from small fragments. An example of this is in the photo on the right (see figure above). You roll up fragments of certain sizes and assemble them. From the same set of “materials” you can get dozens of variations of “carpets” and rugs.
Options for carpets made from old T-shirts. Beautiful and stylish
The imagination of needlewomen is limitless. Models of different shapes are assembled from circles of different diameters, and each of them is unique. This is not an ordinary circle or oval, these are original works.
Sources
- https://PostelMix.ru/tekstil/kak-svyazat-svoimi-rukami-kovrik-iz-staryh-veshhej.html
- https://svoimirykamiinfo.ru/kovriki-svoimi-rukami/
- https://1PoMebeli.ru/gostinaja/15-idej-kak-sdelat-kovrik-iz-staryh-veshhej-i-futbolok-svoimi-rukami.html
- https://chudopol.ru/kovriki-svoimi-rukami
[collapse]
Rug made of pebbles and wine corks
The imagination of handicraft lovers is simply limitless. The hard work, perseverance and patience with which one or another version of exclusive hand-made products is produced is amazing.
Every year new techniques and materials for unusual things are proposed.
You can also make a nice rug made of pebbles - you can lay out a colored mosaic with your own hands or a regular path made of smooth pebbles brought from the sea coast. You will need a rubber base and “liquid nails”.
Important! In a couple of hours you can create a real masterpiece for the pool. Don't rush to connect the puzzle pieces. It’s better to spend twice as much time pre-laying it out on the floor, but make sure that the “picture” folds up safely. Then the design is glued onto a rubber backing with polymer glue.
Wine bottle corks are another eco-friendly material used to make unusual rugs. Such a product will invariably delight visitors to your wine cellar, private sauna or steam room in a country house.
Check out interesting design ideas from our photo gallery:
- A simple cat litter mat made from scrap materials.
- A practical rug made from socks.
- Colorful rug made from old T-shirts.
- Twine rug.
- A circle of tights using the “grandmother’s” method.
Soft rugs and hard runners - all these “homey” masterpieces will decorate the interior design of any room. Depending on the material and design, rugs find a worthy place in any home.
