Vadim
4250 0 0
Vadim November 24, 2018
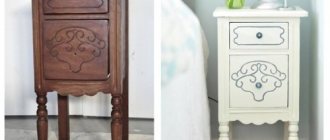
To this day, many houses still have Soviet coffee tables, dining tables and desks. The design itself is made soundly and with high quality, but the years have not been kind to the appearance. Let's look at 10 ways to restore such furniture at home, and craftsmen will receive a master class on restoring tables with their own hands.
It is quite possible to restore old but good furniture at home.
Stages of restoration
Inspection
We inspect the table and determine what defects are present on the product. It can be:
- scratches and dents,
- erased varnish,
- damaged legs that wobble.
If the legs are very wobbly, it is better to disassemble the table and carry out further restoration in disassembled form.
Grinding
The purpose of this process is to remove the old paintwork and prepare the table for subsequent refinishing.
For sanding we need sandpaper. We begin to sand the product with coarse sandpaper, moving in a circular motion over the entire table: along the tabletop, legs and drawstring belt.
Next, to better remove old varnish and level the surface, you can use finer sandpaper. If you have a sander, the sanding process will be much faster.
When sanding, it is important not to overdo it and not sand into holes.
After sanding, be sure to clean the product from dust.
Impregnation, restoration of countertops
If the table is made of natural wood, it is better to treat it with a special impregnation that will protect it from pests and diseases.
Leave the parts to dry for a while. Next we cover all the cracks with putty. After complete drying, sand the putty again with fine sandpaper.
If the table is made of chipboard, you need to inspect the tabletop and determine whether there are bubbles on the surface. If there is, then the veneer is peeling off.
Such a defect can be corrected by making an incision on the surface of the bubble with a thin knife. After this, you need to apply glue into the hole with a syringe. Next, take a regular iron and iron the surface of the table until the veneer sticks.
If the veneer on the edges of the tabletop has chipped, we can cut a patch from a new piece of veneer, apply glue to it, apply it to the damaged part and iron it again.
Painting
Let's start painting. We take paint or varnish, depending on your taste, brush and paint. You may need to paint in two or three layers.
This is determined as the restoration work progresses, depending on what appearance we want to achieve. Let the paint dry well.
Table assembly
When all the parts have dried well, we begin assembling the product.
To prevent the legs from wobbling, when installing them into the grooves, we insert thin pieces of veneer or matches along with the legs. The legs with a tsar belt are assembled using glue.
We leave the assembled furniture until the glue has completely dried and the parts have set.
It may be that the old table is solid, does not wobble and the legs do not need repair. Then it is better to carry out all stages of restoration in assembled form. There is no point in disassembling it.
So we looked at the main stages of restoring a wooden table. We wish you to try to make the repair yourself and be satisfied with the result.
Good luck!
What materials are needed to restore
Undoubtedly, tools alone are not enough to fully restore a table. You will also need materials: for processing wood, sealing defective areas, cracks, and final finishing. These are putties, impregnations, stains, glazes, paint and varnish compositions. In critical situations, you will have to resort to replacing individual elements, making them from wood, and then gluing them in.
putty
A special material that is used to seal deep cracks, crevices in countertops, frames and legs. Most often it has an acrylic base and dries quickly. Hardened putty can be easily processed with sandpaper. Certain types allow you to disguise the material as wood types (pine, ash, oak). They make the table repair area unnoticeable.
Special products for wood
This group of materials includes impregnations. Including those that prevent rotting and destroy fungus (if the table has been in a damp room for a long time, in the attic).
Varnish
Varnishing is used when it is necessary to emphasize the noble structure of wood. In all others, it is successfully replaced by coloring. The use of varnish is justified if the table is made of natural wood. Modern paints allow you to achieve an equally impressive appearance for the table (if you choose them correctly).
Dye
The painted surface of the table is not afraid of water and looks good. By using several areas of different colors, bright mosaics achieve a complex range. Just like on expensive and rare tables.
Glue
In case of serious damage to the tabletop or individual elements, gluing in new parts cannot be avoided. For this, two-component mixtures, PVA or polymer, are used. The main thing is that after gluing there are no unsightly stains or marks left on the surface.
Wooden canvas
Wooden inserts are used in particularly difficult situations when it is impossible to do without “prosthetics”. In this case, the grade and color of the material (wood) and its texture must match.
Option 1. Coating with paint and varnish
This option is great for beginners; it does not require any special knowledge or skills from you.
Sequencing:
- Repair the table and prepare the surface.
- Stir the paint thoroughly.
- Using a soft brush, carefully apply the paint along the grain. You need to start from the tabletop and gradually work your way down. This is necessary to avoid paint drips.
- Apply the paint in two layers and wait until it dries.
- Apply varnish in the same way. The varnish can be from one to three layers, depending on what level of gloss you want to get in the end.
- Instead of paint, you can use solutions that give the surface of the furniture a gold or silver color.
A simple DIY table restoration for beginners is complete.
And since there are many different technologies for restoring and remodeling furniture, we will look at other options.
twisted rope
This method of decorating an old tabletop is perfect for a round table. You will need any thick rope made of natural fabric (hemp, jute) and an adhesive gun.
Fix one end of the rope with glue in the center of the tabletop. Then, moistening the rope with adhesive, move around the circumference, winding circles around the center. Each next row should fit tightly to the previous one.
Restoration methods
Familiarization with modern methods of repairing it, as well as the appearance obtained after treatment, will help determine the optimal option for restoring the table. You can cover the products like this:
- Using regular brushes (to create a perfectly smooth surface or create a smooth transition from one color to another by mixing paints directly on the countertop with a small brush).
- Through meshes, tulle, stencils (to obtain patterns and stylized spots on the surface).
- Craquelure compositions (allows for antique stylization, giving the surface the appearance of cracked paint).
You can also cover tables with different types of films and paste them with paper materials. All of the options discussed are more applicable to wooden furniture, but some of them are also suitable for restoring plastic products.
Multi-colored tape
You can make a fun table if you decorate it with decorative tape of different colors. The striped “thing” will instantly turn into an accent spot against the background of any interior.
The tape can be applied to any surface. The metal countertop needs to be thoroughly cleaned. If there are small areas of rust, try to get rid of them with vinegar or a special product - moisten the surface and then treat it with a scraper. It is also advisable to degrease the canvas with an alcohol solution. The wooden tabletop needs to be sanded thoroughly.
You can completely cover the surface of the table with ribbons of multi-colored tape. But if you avoid excessive diversity, then initially paint the table white, black or any other color, and then make a design with a ribbon of one contrasting color.
Required materials and tools
To restore the chairs you will need the following:
- quick-drying varnish (clear or tinted);
- dye;
- upholstery fabric;
- foam;
- plywood;
- sandpaper;
- metal washers and bolts (screws);
- springs (for a specific type of chair).
Sandpaper will be needed to clean the surface of the furniture from uneven surfaces, chips and cracks in the varnish.
The fabric chosen is resistant to abrasion and mechanical stress, and quite dense. Tapestry, flock, matting, etc. are suitable. For an antique chair, choose decorative material with embroidery.
Updating furniture on your own will cost much less.
Select the wooden base according to its density and texture in advance, cut it to size and use a pattern to create the desired design.
Sandpaper will be needed to clean the surface of the furniture from uneven surfaces, chips and cracks in the varnish. It is necessary to completely sand the chair (wooden structure) for a smooth application of the laminating compound.
For major repairs, the chair can be disassembled, the broken parts replaced with new ones and fastened with bolts or screws.
To update the chair, you need the following tools:
- scissors;
- roulette;
- wood saw (saw off excess plywood under the seat);
- screwdriver;
- screwdriver.
For greater reliability, you can add a little universal glue to the grooves.
For major repairs, the chair can be disassembled, the broken parts replaced with new ones and fastened with bolts or screws. Seat frames also often require restoration.
Seat frames also often require restoration.
A Viennese chair or any other looks best in this design.
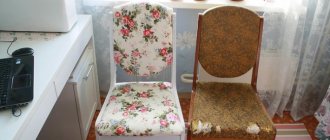
A leaky seat is updated by replacing the base with slats and/or the upholstery is completely restored.
Restoration of old furniture interior
If the owner of old furniture has no desire to restore it using conventional methods, then there is an opportunity to make a masterpiece out of it. Today, professionals use various techniques with which they can do something extraordinary, unlike conventional painting or varnishing.
Painting with paints
Many people have wondered how to restore an old table with their own hands. To do this, you can simply color it. Painting furniture is rightfully considered the best and cheapest way to restore furniture. First you need to apply a plain base on which you can decorate. You can decorate a chair or table, for example, with flowers. The main thing is that the drawing matches the style of the room. Patterns can be found on the Internet. Such furniture is great as decoration, for example, in a buffet.
https://youtube.com/watch?v=OGe3BJRiZnY
Ornament in decoupage style
You can do this kind of decoration with children. It is simple at its core. You can cut various patterns from fabric and paper. After this, all the details, as well as the decoration object as a whole, are varnished. You can also make decoupage with your own hands at home, for example, by wearing a regular fabric cover.
Craquelure coating
Perfect for restoring an old cabinet. Two technologies are used here: varnishing and decoupage. Using this method, you can give the furniture an antique look. First you need to apply a regular layer of varnish, and while it is still wet, apply craquelure, which will form an imitation of cracks, like in antique furniture.
Veneer finishing
Veneer looks like small and thin pieces of wood of different species and colors. Decorative elements for furniture restoration are cut from sheets of such veneer. They are glued to the surface using PVA glue. You need to prime it in advance. The combination of several techniques together looks very cool.
As you can see, old furniture, which remains durable but has aged a little, lends itself perfectly to restoration using various methods and techniques. It can not only be repaired, but also given a completely new look.
Originally posted 2018-03-03 06:27:11.
Required Tools
To make the process of assembling the table as efficient and comfortable as possible, you should prepare for it in advance. Cutting of wooden elements, as well as treatment with antiseptics, is best done in the utility room. Tools you will need:
- Jigsaw. Used for sawing boards in a vertical plane.
- Sander. Serves for smoothing and polishing the surface of furniture elements. You can do this work manually using sandpaper, but in this case the procedure will take much longer.
- Drill. The tool is indispensable when drilling holes and connecting table parts.
- Screwdrivers. You will need cross-shaped and flat. Short devices (12–15 cm) are useful for hard-to-reach places. When choosing, you should pay attention to the handles, which should fit comfortably in the palm of your hand.
- Ruler. Better metal, 500–1000 mm.
Drawing of a dressing table for making with your own hands, stages of work
Making tables is impossible without a hammer, nails, screws, corners. For craftsmen who often make furniture at home, it is advisable to acquire a woodworking machine. With it, work efficiency will increase significantly.
Finishing touch
Old table decor using decoupage technique
The final stage of restoring a wooden table is decoration. You can take up the brush again and, using various stencils or masking tape, apply an applique to the surface of the table.
Painting a table through tulle should be done on top of the base layer, with a pigment of a contrasting color
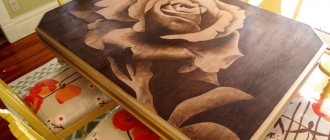
For those who can draw well, an image of their own masterpiece on furniture is suitable, which will remain for many years.
A table with artistic painting will perfectly complement the interior in an ethnic or rustic style
A pattern on the tabletop can also be created using mosaics or gold leaf. The latter is used in work when the goal is to imitate one of the noble metals - gold, silver or bronze.
We create a picture from small fragments on the surface of the table
Potal (gilding) - a wonderful decoration for a table in a classic style
Self-adhesive film
Another great solution is to decorate an old table with self-adhesive film. Moreover, the modern market has a huge assortment of it - from simple plain to mirrored, luminous and imitating natural textures.
To cut the film correctly, you need to use the centimeter markings located on the back side of it. It is important to thoroughly clean the surface of the table, since the self-adhesive will instantly reflect all the flaws.
Glue the film slowly, pressing it tightly and at the same time smoothing it with a soft towel so that no air bubbles form.
10 cool ideas on how to decorate your apartment for the New Year
Surface coating with varnish
So, the stain has dried, and you can safely varnish the table. The choice should be made in favor of colorless furniture varnish (not matte). It should be applied in one direction.
https://kuhnyamoya.ru/www.youtube.com/watch?v=iW1Mj6B55E4
Allow each layer to dry for the time specified in the instructions for use. There is no need to rush, as premature application of a layer can lead to the appearance of “waves” from the previous layer on the surface of the table.
If small spots appear on the varnished surface (and this, alas, often happens even with experienced restoration professionals), they should be sanded with sandpaper. And don’t let the white spot that appears at the stripping site scare you. At the last stage, you will make the table perfectly level with your own hands. After all, you have to polish the surfaces. You can use any modern polish that is chemically compatible with the previously used varnish. But ideally, you should always strive to use ancient methods, so we can safely recommend using ordinary wax.
https://kuhnyamoya.ru/www.youtube.com/watch?v=KHDpAbyGCuU
It should be heated and applied to the surface of the table, rubbing it into the wood in a circular motion using felt. The work is hard and monotonous, but the wax is worth it. It will help you finish restoring the table on a very pleasant note: the smell of natural wax will immerse you in the world of childhood, and in the future you will be very eager to approach a table with such a familiar smell. You may also want to restore old things.
Ceramic tile
At the end of the renovation, there are often excess tiles left in the kitchen or bathroom, which can be safely used to decorate the table. In this way you can beautifully decorate an old dining table in the kitchen or on the open terrace.
Patchwork tiles in the patchwork style look great, as well as decorative tile panels and borders with patterns. No less impressive will be a tabletop made of tiles that imitate stone or expensive wood.
Decor options
Restoration and subsequent decoration of the table is a very long process. But the result is worth it, because you can get an exclusive designer item with which memories are already associated. Furniture decor can be completely original and at the same time fit very organically into the concept of using the item and the room.
A laconic design is suitable for a book-like or folding table. It can be painted in one or two colors. Or you can add nobility and emphasize the natural structure of the tree.
The sliding table can be decorated with drawings that can appear only when the tabletop is disassembled as much as possible. And of course, if this kind of table is used as a dining table, you can use a kitchen theme in its decor - images of food, fruits and vegetables, tableware. The kitchen table can be decorated with tiles and mosaics. This will be a very practical solution.
For a dressing table, due to its functionality, delicate pastel shades and light colors are suitable, as well as all kinds of “girly” prints (flowers, cosmetics, patterns).
The coffee table can be painted in a rich color or equipped with a bright pattern.
For a children's table you need to use only high-quality finishing materials. And you can decorate it with a variety of animals and cartoon characters.
A practical solution for a student would be to create a “cheat sheet” table, on the surface of which you can apply a variety of didactic materials (rules, diagrams, formulas).
Using a computer desk/stand requires high usage. Therefore, materials need to be selected appropriately – not easily soiled (the computer “attracts” dust), wear-resistant (especially to heat).
Decor under glass
To decorate an old table using the following method, you will have to work hard, but the result will be well worth the effort!
If the wooden tabletop is thick, cut out a recess inside and fill it with themed decor. You can, for example, decorate the seabed by laying shells, pebbles, sand, artificial seaweed, or even colorful Christmas tree decorations for the Christmas holidays. Finally, the finished “filling” must be covered with transparent glass.
If the tabletop is thin, just fill the edges with bars and paint them the same color as the table, then lay down the decor and also cover with glass cloth.
Creative ways to update
Many people are wondering how to update old desks that are looking dismal. There are many ways to decorate the top of a kitchen table or any other:
- Painting. A very simple restoration method. Different types of paints are used, for example acrylic, alkyd or enamel.
- Artistic painting. Quite a complex method that requires drawing skills. You can use a stencil, this makes the task much easier.
- Craquelure. This method is a decoration by applying a finish that imitates an old cracked coating. This is done using special chemical mixtures.
- Mosaic. You can make it using smalt, but it is very expensive. It is better to use broken tiles. For gluing, use universal glue.
- Decorative film. It is pasted after polishing and cleaning the surface. Using this technique, you can turn an old coffee table into a fashionable piece of furniture.
- Pasting with decorative tape. After polishing and treating with alcohol, adhesive tape is applied. Then the pasting area is rolled with a special roller.
- Processing with epoxy resin. This solution turns into plastic after application to the surface. With its help, decoration occurs with the addition of various patterns.
- Applying varnish or stain. This is the simplest way of decorating, which even a beginner can handle. Moreover, this will preserve the natural texture of the wooden coating, and also provide protection from moisture and fading. Most often, this method is used to update an old kitchen table.
- Painting through tulle. To do this you will need to find a piece of old tulle. Next you need to paint the table white. After the paint has dried, apply tulle to the surface of the furniture so that the arrangement of the pattern looks as beautiful as possible. Secure the fabric so that it does not move during painting. Then you need to take a can and start painting. After 15 minutes, the tulle can be removed.
- Gilding. Using transfer gold, you can achieve a beautiful gilded effect. This operation is carried out in the same way as painting, using a stencil.
In order to restore a coffee table with your own hands, it is best to use mosaic decoration, painting, burning or varnishing. To “revive” a faded desk, you can choose staining or varnishing. There are quite a few ways to decorate a kitchen table: painting it with lace or tulle, decorating it with ceramic tiles or using decoupage.
Garden tables are best decorated with tiles or mosaics, especially if they are located outdoors. If you need to decorate a children's craft table, you can get creative and paint each leg a different color to create a bright and cheerful piece of furniture.
Summarizing all the recommendations, we can confidently say that you can carry out the restoration of outdated furniture yourself. Anyone who has ever held tools in their hands can turn an awkward, shabby table into a real work of art. Of course, this will take time and patience, but the result is worth it.
Painting
Craquelure Artistic painting
Mosaic
Decorative tape
Decorative film
Processing with epoxy resin
Applying varnish or stain
Painting through tulle
Gilding
Covering with leather or dermantine
You can breathe a second life into an old coffee table, making it stunningly original, using regular leather or dermantine. Choose a material with large embossing, for example, crocodile leather or bright gold, which will certainly attract the eye.
Use a piece of dermantine to completely cover the top surface of the table top. The material should be pressed tightly and smoothed, getting rid of air bubbles. The final touch will be upholstering the sides of the table with nails with a wide head, which will be similar in color to leatherette.
Stages of restoration
Acclimatization. To prevent the elements of wooden furniture from becoming deformed after restoration, you need to let it “get used” to its environment
Air temperature and humidity are important for wood
The optimal temperature for the room in which furniture restoration work will take place should vary from 18 to 25 degrees, air humidity - no higher than 75%
You should also pay attention to the harmful effects of direct sunlight and heat from radiators
Dismantling of elements. For better processing, it is better to disconnect all furniture parts from each other and work with them separately. You need to use tools as carefully as possible without damaging the wood.
If it is important to keep the elements and fastening system in their original form, it is better to disassemble them and lay them out in order
Cleaning. Each element must be cleaned in the most gentle way possible - with a soft brush wrapped in a cloth, a vacuum cleaner and non-aggressive chemicals.
Removing dents and scratches. To do this, use special wax pencils, “liquid wood” or steam from a regular kettle. These options are suitable for small, shallow damage; otherwise, the entire module may need to be replaced.
Repair of fastenings. This implies complete or partial replacement of fasteners. Restoration of the top layer of wood. To do this, you may need to glue a sheet of plywood to the old surface.
Coloring. First, a primer is applied, then painted with alcohol-containing paints. Varnishing and polishing. Decoration and intentional aging of furniture. Assembling elements into a finished product.
If everything is done carefully and correctly, the value of the furniture after restoration with your own hands will not be lost. Work should be carried out slowly, carefully, using all the recommendations of the chemical manufacturers and allowing the necessary time for their exposure.
Restoring chipboard furniture with your own hands will allow you to control the entire process step by step, make adjustments at any stage and ultimately get a completely exclusive item.
Without extra money for new furniture, you can easily restore what is available in your home, at your parents’, or at your grandmothers’. Soviet furniture is famous for its quality, and the atmosphere and comfort that familiar interior items create from childhood cannot be bought for any money.
How to update a plastic table
Most plastic furniture loses its original attractiveness over time, even if used in home (not balcony or country) conditions. For example, due to minor mechanical damage, it may become covered with scratches and abrasions. But constant exposure to sunlight can cause the plastic to burn out and turn yellow. You can update such tables in two ways:
Repainting.
The best option for products with smooth countertops. Initially, the surface of the plastic is treated with fine abrasive sandpaper, then degreased and coated with a primer. The final step will be to coat the product with spray paint.
Decoupage.
The best solution for tables with shaped projections or recesses. Initially, using fine abrasive sandpaper, the entire table top and frame are cleaned. Then it is degreased. The napkins (or paper, thin newspaper) chosen for decoration are glued onto the decoupage glue. After the glue has dried, the product is coated with transparent varnish.
Updating the tabletop using decoupage
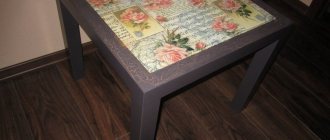
If you don’t want to stop there or your table does not have serious damage, but just needs a little updating, then you can decorate the table with drawings: paint it with acrylic paints by hand, use stencils and stamps, or update the table using decoupage. Perhaps, we will consider this decorative technique, which is popular today, in more detail, because decoupage will not only allow you to quickly and inexpensively transform a table or, for example, stylize it as Shabby chic (as in the photo below), but also hide some defects of a dilapidated surface.
To update the table with your own hands using the decoupage technique you will need:
- acrylic primer and acrylic paints - if desired;
- beige wood putty;
- sanding machine and sandpaper of varying degrees of grit;
- rubber spatulas;
- flat and artificial brushes;
- matte or semi-matte wood varnish;
- decoupage napkins or decoupage card;
- scissors;
- PVA glue or special glue for decoupage.
Decoration using the decoupage technique can begin either after the stage of priming and sanding (see step No. 4 above), or after painting and varnishing. Then you should choose a picture - it can be any image on paper or table napkins, as well as special rice paper for decoupage.
First, make the markings, lightly marking with a pencil the places where the images will be located. Place the cut out paper image face down in a container of water and hold for half a minute. Then the soaked image is laid out face down on a plastic file, and all the excess paper layers are rolled off. Then the picture is carefully coated with glue and attached to the tabletop. The file is not removed - through it the image is smoothed out as much as possible.
The surface around the pictures is decorated with paint. The final stage of decoupage is varnishing with acrylic varnish. After three days, the varnish will dry and the table can be fully used.
And finally, a selection of photos for your inspiration.
Stages of restoration using decoupage technique
If we decide to restore the coffee table with our own hands, for decoupage we will need the following tools and materials:
- Ruler
- Pencil
- Scissors
- Napkins with drawings or special pictures for decoupage (in our version these are photographs)
- Water
- Polyethylene file
- Brushes of different thicknesses
- PVA glue
- Acrylic primer
- Paints for furniture (in our version, acrylic white and black)
- Stencil (but you can do without it)
- Finish acrylic varnish
The table restoration process step by step
1. Now we can start decorating the coffee table. First we need to apply primer to the surface of the table. For this we use acrylic primer. It is needed so that the paint that will be applied in the future is more evenly distributed on our product.
We prime it carefully with a brush and wait about half an hour for the primer to dry.
2. Next, take a ruler and a simple pencil and mark the tabletop so that you know where to glue the drawings.
3. Now take the drawing. In our version, this is a photograph. Dip the drawing in a bowl of water for 30 seconds.
It is very important not to overexpose the drawing, as the paper may be damaged. We take the photo out of the water and place it face down on a plastic file.
4. Since our photo paper is thick, we carefully remove excess layers of paper so that the picture remains undamaged. Then use a brush to apply PVA glue to the photo.
5. Now carefully turn over the file with the photo stuck to it and place it in the desired place on the tabletop. Using the file, we smooth out the drawing so that it lies evenly. And only after that we remove the file.
6. Take white acrylic paint and, using a brush with stiff bristles, draw fields along the contour of the drawings. We try to hold the brush at one angle, as the bristles leave streaks. Then leave the table to dry for about 1 hour.
7. We decided to further decorate the corners of our table using a stencil. To do this, you need to attach the stencil to the corner of the tabletop and use a brush with black acrylic paint to walk over it. We hold the brush in a vertical position so that the paint does not flow under the stencil and is not smeared.
8. Now you can remove the stencil. Leave the table to dry for 1 hour.
9. And finally, after the paint has dried, you can apply a finishing acrylic varnish to fix the drawings. We also apply the varnish with a brush.
10. Finally, the restoration of the table is coming to an end. The table must be dry before it can be used. Dry in a well-ventilated area for 24 hours. After this time has expired, use it to your health!
Now you know how to update a coffee table with your own hands, the photos presented above demonstrate what a masterpiece you can create yourself. Don't throw away old furniture, give outdated items the opportunity to please you for a while longer, give them a second life!
