Chipboard edge: how to process the ends yourself
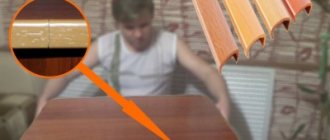
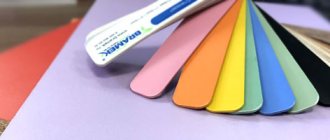
After cutting the chipboard with your own hands, you will be faced with the need to process the visible ends of the future product. When compiling a list of parts, seeing the drawing in front of you, it is better to immediately mark the sides that will need to be covered with a special edge in order to hide the bare cut of the chipboard. The edge of chipboard can be different, let's look at the three most common options.
PVC edge is the best option for cladding the ends of chipboard
The term PVC (Polyvinyl chloride) is quite well known; it refers to a thermoplastic that is used in various ways in furniture production and decoration.
PVC furniture edge is a rigid tape of different thicknesses, from 0.5mm to 2mm, with a decorative coating applied in contrast or “to match the color” of the chipboard texture. An edge of this type is very resistant to mechanical damage and perfectly protects the ends of the chipboard from moisture penetration and chipping. But there is one important thing. It is impossible to glue a PVC edge to the end at home, without special tools, glue and skill.
Therefore, an excellent option would be to order edging of PVC parts immediately after cutting. The cost of the thinnest PVC tape with a thickness of 0.5 mm is almost equivalent to melamine tape (excluding gluing work). And the type of furniture and its durability characteristics will increase significantly. In addition, on visible ends (countertops, open shelves, facades) a PVC edge with a thickness of 1-2mm looks much more solid and beautiful. Don't forget to take its thickness into account when calculating the dimensions of the parts!
Where should edging be done?
Furniture manufacturers often edge only the visible parts of the end surfaces. From the point of view of economy, this seems quite understandable, but taking into account the above facts, this approach can lead to certain problems - the protective edge must be present in all places where there is an open internal structure of the chipboard.
If you purchased furniture with unprotected edges, you can easily do their edging yourself at home. To do this, you do not need to have any special equipment - the edge can be glued with a regular iron.
Don’t be lazy to spend a few minutes on this operation - you will reliably protect yourself and your furniture and significantly extend its service life. Next, we will look in detail at how to properly glue the edge tape with your own hands.
Wraparound overlay profile - an option for hiding chips and unevenness
If you purchased ready-made Leroy furniture panels or sawed chipboard yourself with a jigsaw, then most likely the quality of the cut is not very good. You can probably see chips along the edge, and the cut itself is not entirely even along the length, with a blocked horizon. If the parts are used to assemble a dressing room or wardrobe and the design itself is a combination of shelves and standing ones, then to hide the flaws you can use the so-called “hammered” edging (profile).
The wraparound overlay profile is a rigid or flexible U-shaped edging made of plastic or PVC, which fits tightly onto the edge of the chipboard.
With its edges, such an edging extends onto the front sides of the chipboard, enveloping it to a depth of 2-3mm. Thus, all chips and unevenness of the end become invisible.
Before “putting on” the U-shaped PVC profile, it is advisable to treat the ends of the chipboard with sealant and apply glue in spots for fastening strength.
Don't forget to take into account the thickness of the overlay edging when calculating! For example, in shelving structures it is better to deepen the shelves by 5 mm relative to the vertical sides.
The disadvantage of this option is that it is not suitable for processing the ends of facades, drawers and other elements.
Edge materials
Edging the open surfaces of furniture can be done using various decorative elements that differ in the quality of the material, appearance and, accordingly, cost.
- Melamine tape . The simplest and cheapest edge. It is used in budget products and can be destroyed by moisture or mechanical stress. The main advantage of such a tape is its price and ease of application. Advantages and disadvantages of melamine edging
- PVC edge . May have a thickness of 0.4 or 2 mm. It is customary to glue thicker tape to the front surfaces, and thinner tape to hidden ends. This edge protects furniture well from chips and shock loads, but gluing it at home is difficult - this requires special equipment.
- ABC plastic . The most durable option. Plastic edging is done only in production.
- T-shaped profile . It was used in the past, when there were few specialized machines for edging, and milling machines were installed in every workshop. A milling cutter was used to cut out a longitudinal groove in the end into which the edge is inserted.
- Overlay T-shaped profile . T-profile edging is the most convenient option for independent use. It is enough to simply glue it to the end of the chipboard using liquid nails or glue. The disadvantage of this solution is the edge protruding above the surface, which increases the thickness of the product and after some time becomes clogged with dirt.
Melamine chipboard edge: how to glue it with an iron at home
Melamine (or, as they also say, paper) edge for chipboard is a tape with a decorative coating on one side and glue on the other.
The process of gluing it to the end of a chipboard at home is extremely simple and understandable:
- We install the chipboard part vertically, with the processed end facing up.
- We apply the melamine edge evenly to it.
- Gently run the heated iron several times.
- After gluing, wait until it cools down and cut off the excess with a stationery or shoe knife.
- After cutting the edges, additionally sand with fine sandpaper.
It is better to first determine the optimal heating temperature of the iron experimentally, on a small piece of tape. If the temperature is insufficient, the glue will not melt completely; if it is too high, it will be “absorbed” into the chipboard, and the tape will also not stick well. You need to be careful with the selection of temperature and with dark melamine edges (wenge, black) - whitish spots may appear on the surface.
To make it easier to hold the chipboard workpiece in a vertical state, you can use clamps or construct a kind of “groove” from scraps into which the part can be inserted and fixed.
That's all the tricks for independently processing the ends of chipboard and gluing with melamine tape at home.
Source: delay-shkaf.ru
Required Tools
To edge edges, it is not necessary to use professional equipment or seek help from craftsmen. If you need to update old items, you can cover the surface yourself with multi-colored tape. The question arises: how to glue the edge to the chipboard? It is enough to have the essential tools at hand at home:
- iron;
- sandpaper (fine fraction);
- file (optional);
- stationery knife or scissors;
- rubber roller (optional);
- felt or other dense material.
By adhering to some rules, the product will turn out neat. To trim excess tape, use a stationery knife, and to glue it, use an iron.
When the edge on the furniture has come off, you can use a hot iron to glue it back on, and if that doesn’t work, then remove the old edge tape with the same movements of the iron and replace the old one with a new one.
How to seal the ends of chipboard: PVC edging; furniture edge; plastic profile
After cutting chipboard or laminated chipboard into parts, an open end edge is formed, which must be closed for the following reasons: - to give an aesthetic appearance to the workpiece (part); -reduce formaldehyde fumes; -protect the end surfaces of workpieces from minor mechanical damage; -protect the end surfaces from moisture entering the slabs.
There are also edges that act as shock absorbers (SOFT edges) and are used for the manufacture of children's furniture. Let's look at some methods for sealing the end surfaces of chipboard and arrange them according to the rigidity of the end surface. The hardest surface will take first place.
MORTASE EDGE (PVC)
In the cross-sectional drawings we see several different edges.
To install them, you need a hand router
make a groove along the entire length of the end, the required width and depth. The width of the groove is formed by a milling cutter,
after passing which, it should be 0.5...0.7 millimeters less than the thickness of the spike. The depth of the groove can be 6...10mm, depending on the length of the tenon.
Step-by-step instruction. 1. We grind (grind) the edges of the laminated chipboard end with fine-grained emery cloth. 2. Select a cutter of the required thickness and diameter and install it in the center of the tenon seal. 3. Mill the groove of the required size. 4. Apply PVA glue or “liquid nails” to the outer surface of the tenon. 5. Gently hammer the edge with a rubber hammer until it fits snugly against the surface of the end. 6. Trim the ends on both sides and finally align them with the end surfaces.
An overlay plastic profile does not require the use of expensive tools. There is no noise or dust during operation.
To install the profile we will use glue and a knife.
Preparation
In order for the melamine end edge to stick efficiently and evenly, you need an iron with a flat and thick sole. The best option would be a Teflon coated iron. Also, its surface must be clean and smooth.
For convenient work, it is better to take a sharp knife with a thin handle or find an old knife blade and make a cutter out of it. You can use a spatula.
An ordinary chipboard piece with sandpaper glued to one side (grit size P120) is suitable as a block.
The melamine end edge comes with a pre-applied layer of adhesive. If it suddenly turns out that it does not have an adhesive layer, then it must be applied to the part.
For this operation, we will also need a part holder, which can be made from the remains of chipboard. It looks like this:
How to glue an edge (tape) to a tabletop with your own hands: step-by-step instructions
For the work to be successful, you must adhere to the following instructions:
- The table top is installed with the end facing up, making it more convenient to work.
The cut of the tabletop should be smooth, not sprinkled. The edge strip will not hide unevenness; it adheres well only to an even cut.
- The end is cleaned of dirt and dust deposits.
- The edge is applied for measurement, and the required part is cut to size.
- A strip is installed on the end part of the tabletop with the adhesive layer down.
- The iron warms up on the program for ironing synthetic materials.
- The paper is placed on the tape, ironed for three minutes, while the adhesive layer warms up under temperature, melts and sticks the strip.
- The edge is adjusted to size and trimmed.
If an ABS strip is used, it is difficult to cut and burrs may remain on the edges. They are carefully removed with fine-grained sandpaper.
If a hairdryer is used for heating, then for strong adhesion the strip must be ironed with a roller.
We recommend videos on the topic:
Let's start gluing
We unwind the edge tape from the coil (it’s more convenient to unwind from the inside) and apply it to the end of the chipboard, first leaving a margin for trimming.
Its standard width is 21 mm, and the chipboard is 16 or 18, leaving a margin for trimming and rubbing. In order to avoid the need to cut on both sides, it is better to immediately align it on one side, and on the other side it will overlap.
After we have applied it, we begin to heat it right along the end and iron it with an iron. You need to iron the edges of the ends especially carefully.
Short parts can be ironed entirely, and if the part is long, we warm up 40 cm sections one by one. After that, cool the end with a slightly damp cloth.
The temperature of the iron is adjusted depending on the quality of our tape. It should glide quickly, easily and without friction, without scratching the surface or resisting movement.
High-quality heating will be indicated by uniform spreading of the glue under the edge. If it overheats, bubbles will appear and it will deteriorate, so monitor the temperature and do not overexpose the iron in one place.
If you suddenly damage the edge, it will need to be replaced. Using heat with an iron and a knife, remove the old one, clean the end of any remaining glue and start all over again.
In order to cut off the excess efficiently and evenly, you must first bend the edge with your finger, tap along the edge and rub it several times with a block until you see a white chamfer (this is the paper backing). And you can start cutting off the excess.
Next, carefully and slowly we rub the edges of the end with a block, check with our finger to see if there are any protrusions and burrs, and this completes our work on gluing the melamine edge.
The PVC edge on the furniture has come off, what and how can I glue it on?
The edge did not come off completely, but partially.
What and how can I glue that same edge, or is it better to completely replace the edge, which is the correct way?
First, decide on the integrity of that very edge; in some cases, it is better to completely replace that same PVC edge than to glue the old one.
The PVC edge can be self-adhesive, that is, it already has an adhesive layer and it just needs to be “reanimated”.
You need a sheet of thick white paper, paper with printing or inscriptions will not work, all this can be used on furniture.
Next you need an iron, apply the edge to the end, then paper between the iron and the edge.
Then we heat the iron and press it quite firmly against the paper, that is, “iron” the edge.
It is better not to stop in one place for a long time, the PVC can melt due to the high temperature; it is enough to press the iron for literally 2-4 seconds.
If it is not possible to revive the glue, then bend the edge and clean it of the remnants of the old glue (you can first use a knife, then use a solvent).
If there are glue residues at the end of the furniture, remove them too.
Next, you need to degrease the edge (I degreased it with alcohol) and, if necessary, the end of the furniture on which it is glued.
You can glue the edge using many types of glue, including hot melt adhesives, or you can use glue from the “liquid nails” series.
I glued it with this glue
This is a transparent adhesive with excellent adhesion.
It is resistant to moisture, that is, it can be used even if we are talking about furniture installed in a damp room (for example, furniture in the bathroom).
You need a “gun” for glue.
To ensure that the glue does not extend beyond the dimensions of the PVC edge, we apply it indented from the edges (in the center of the edge).
That's it, we press the edge to the end and sort of smooth it out; I used a rubber mallet for this purpose.
We press the mallet to the edge and press on it, then stretch it along the edge.
It is better to remove excess glue immediately.
I’ll add a little to the previous speaker’s answer.
If a thick edge (2 mm) has come off, and it is usually glued in production using hot melt adhesive, then it will not be possible to glue it with an iron. An industrial hair dryer will come to the rescue. We heat the glue by directing a stream of hot air into the gap between the peeled edge and the end of the part. Visually, the melted glue will become more shiny, after which we press the edge against the part for 15-30 seconds. It is advisable to do this through a rag. If the length of the section is large and the part is straight, then it is advisable to use a flat block. You need to press hard (the tighter you press, the better it will hold).
If a thin PVC edge is overexposed or the temperature is chosen incorrectly (too high) - it melts very easily - then it will have to be changed. We tear off the tape completely and glue the melamine edge in its place. It is much more tolerant of overheating (the worst thing that can happen from an iron is that the glue will boil). This edge is inexpensive, sold by the meter - the best option for home repairs
Source: www.remotvet.ru
Lesson 22 - Types of edges and do-it-yourself edging (review)
Anyone who has ever encountered laminated chipboard knows that a board made of this material has smooth surfaces with a textured pattern, while its end parts are a mixture of wood shavings and glue.
To give parts sawn from such a board a marketable appearance, a process such as chipboard edging was invented. It consists of gluing a decorative strip - an “edge” - onto the ends of the parts, which can be either the same color as the chipboard decor or different from it. Today, two main types of edges are used:
- PVC edge
- melamine edge
PVC edging is used in the factory production of furniture; it is more reliable, strong, durable, but the edging procedure when using it is quite labor-intensive. Furniture shops use special edge cutting machines. The thickness of the PVC edge is 2 mm and 0.4 mm. The width also varies depending on the thickness of the chipboard sheets.
Melamine edging is less durable, but requires minimal tools to apply and is widely used among home furniture makers. But due to its low mechanical resistance, its use is limited. Personally, I glue melamine edging mainly to drawers. Hot melt adhesive is always applied to the back of the melamine edge, and it itself is sufficiently resistant to elevated temperatures, so a simple iron is enough to stick it on. It can only be thin (0.4 mm) and I have never seen it wider than 20 mm.
Since our site is mostly dedicated to working at home, let’s first look at how to glue melamine edges.
So, for work we need the edge itself, an ordinary iron, a metal ruler, a clamp or vice (optional), and fine sandpaper on a block.
The technique for gluing the edges is as simple as a nail:
- We fix the workpiece that we are going to edge. To do this, you can hold it between your knees, place it on a stool so that the edges hang in the air, or hold it in a clamp.
- We put a piece of edge on it, approximately corresponding to the length of the surface to be treated (the remainder will then easily break off). The edge should completely cover the surface of the chipboard - for this it is made slightly wider.
- We iron the edge with a heated iron (you can use it through a sheet of paper so that there are no marks left on the sole of the iron, unless you have a special working iron and are not afraid for your white shirts later). It is necessary to heat it evenly and thoroughly so that the hot-melt adhesive reliably glues the edge to the part, without bubbles or other defects in which the edge will definitely chip.
- After the glue has cooled, we proceed to removing the excess edges protruding from the sides of the part. For this we need a metal ruler. Having placed it on the surface of the part, we guide it at an acute angle to the surface of the edge itself. A kind of “scissors” is formed, one of the blades of which is a ruler, and the second is the edge of the chipboard. Making “shearing” movements with a ruler, we cut off the excess melamine.
- Using fine sandpaper on a block, we clean up any possible unevenness in the cut. You need to be careful not to sand off part of the laminate along with the excess edge - this will be very noticeable. Ironing melamine edges
Now let’s look at how to properly glue a PVC edge with your own hands, i.e. without using an edging machine. Such an edge will last much longer than a melamine edge, and besides, it is 2 mm and looks “richer”. It is worth mentioning that PVC edges can be either with an adhesive layer (hot melt adhesive) or without it. In the first case, edging is done using a hair dryer, and in the second case, you need to purchase glue. Let's consider the second method in more detail, because... it is more economically profitable.
Let's start by gluing a 0.4 mm PVC edge. To fix it, it is best to use contact types of glue, for example 3M™ Scotch-Grip, Moment Crystal, Titanium or “88”. It is worth noting that it is more convenient to work with liquid glue (3M), it is easier to level and its consumption is much less. We work with glue according to the instructions indicated on the packaging.
Contact adhesive can be replaced with hot melt adhesive. To do this, you will need a glue gun with a set of rods and an industrial hair dryer.
To work, we will need a roller for pressing the edge (successfully replaced with a rag or a piece of felt boots)), the glue itself, a spatula for leveling the glue or a simple brush, as you like, a wide chisel or a knife from a plane to remove excess edge, a sanding block with fine sandpaper .
- We cut pieces of edges, leaving a 1.5-2 centimeter margin (for all parts at once) - this will significantly speed up the sticker process
- We take 5 parts prepared for edging, preferably approximately the same size, stack them, aligning them along one edge. The entire stack (from the aligned edge) is coated with glue using a brush. We leave the preparations alone - let them dry.
- Let’s move on to the edge itself; to conveniently coat it with glue, we use a piece of fiberboard approximately 15X150 cm. The glue is drawn into a twenty-cc syringe (or spread from a tube);
- We fasten the edge to the substrate (fibreboard) at one end (top) with a clothespin, and press the other with a weight so that the edge is smoothed into a strip;
- Using a syringe, apply glue to the edge tape, level it with a spatula or brush and put it aside (it is better to place long pieces on the edge - due to bending they will not fall, and short pieces - just with the glue up) and also coat the rest of the trimmings;
- During this time, the glue on the workpieces themselves will dry out a little, and you can begin the actual edging. We apply the edge of the chipboard, align it and press lightly. after which we roll it with a heavy roller (if you don’t have one, use a piece of felt felt glued to a board, as in the photo).
- Let it dry for about 10 minutes, after which we once again level the edge with a felt boot, at an angle to the surface of the edge - with this we press possible small gluing defects from the edges.
- Then we cut the overhangs from the ends, you can get by with a simple assembly knife, but cutting the face with a knife is inconvenient - it is better to use a wide chisel or a plane blade.
- Final finishing - removal of glue residues and uncut overhangs - with sandpaper on a sanding block
Manual gluing of 2mm PVC edges differs only in a few points:
- Before gluing, it is advisable to heat the edge with a hair dryer - when heated, it becomes more elastic;
- Considering the thickness of the edge and its springy properties, it is better to press it with clamps until it dries. Please note that a pressure bar is used to evenly distribute the force on the edge, and pads are placed under the jaws of the clamps to avoid accidental scratches.
- It is no longer possible to cut off the edge with a 2mm knife, so trimming the overhangs is carried out with a router with a finger cutter. The photo shows a universal router. In general, there is a special edge router for this work, but if you do not have your own furniture workshop, then it is better not to buy such a highly specialized tool. Trimming with a universal router, especially in a canopy (as shown in the figure), requires a lot of skill, so you should first practice on scraps. And be sure to use the parallel stop that comes with these units. Edging with 2 mm edge using a hair dryer
In fact, at first it’s better not to bother with edging, but to order it from the same workshop where the cutting is done - you’ll save a lot of time and nerves)))
Types and causes of damage to chipboard furniture
The most basic defects that appear during the operation of laminated chipboard furniture are scratches, chips, loosening, deformation, peeling edges, torn hinges and fallen off facades. The reasons for their occurrence can be very different:
- chips, scratches, peeling edges - caused by careless transportation, improper operation, manufacturing defects;
- loosening - frequent disassembly, improper operation, manufacturing defects;
- fallen-off facades, torn or creaking hinges - weak fixation of fasteners, improper installation, heavy door weight, frequent opening (closing).
Furniture made from chipboard can be restored in several ways, namely:
- Restoring the color of a worn laminated surface.
- Masking scratches and chips.
- Label the new edge.
- Restoration of fastener and hinge locations.
What you might need for cosmetic restoration of chipboard furniture
Each type of defect and restoration requires its own approach, materials and tools. Let's look at what you might need to repair laminated chipboard furniture:
- furniture wax (soft and hard). It has moisture-repellent properties and is used to seal scratches, cracks, chips on wooden and laminated surfaces of furniture, doors, parquet, etc.;
- retouching agents. Markers or felt-tip pens, with the help of which the texture of the material at the restoration site is completed after treatment with furniture wax. You can also use paints, office corrector, iodine and even shoe polish;
- varnishes and polishes, to restore the coating after removing scratches and abrasions;
- PVA, two-component glue, wooden cokes for filling holes and recesses from fasteners and hinges;
- tools: utility knife, chisel, rubber spatula, fine sandpaper, iron or industrial hair dryer and rags for finishing.
Set for restoring furniture with wax pencils
Why else do they edge furniture?
In addition to the most obvious goal - to provide an elegant appearance, edging furniture performs several more equally important tasks:
- Moisture protection . It is known that when wet, chipboard swells and loses its original shape and strength. The plastic edge prevents moisture from penetrating from the ends. This is especially true for rooms where there are constant flows of water - kitchen, bathroom, dining room, etc. The edge, in addition to giving the furniture a finished look, performs several other important functions
- Protection against insects and mold . The porous surface of particle boards is well suited for the proliferation of various microorganisms that destroy the internal structure of the material. If you glue a protective film to the edge, the service life of the furniture will noticeably increase.
- Fight against harmful substances . As is known, in the production of chipboards, formaldehyde resins are used, vapors of which can be released during operation through the open ends. The edge tape prevents these substances from entering the environment.
Restoration of chips and scratches
At the ends and surfaces of countertops, especially at corners and radii, chips are not uncommon. They can be easily removed, especially if a melamine edge was used when processing the ends. For restoration, you will need to purchase new material for processing edges, preferably PVC, of the required length and color, from a specialized store that sells chipboard and furniture fittings. Using an iron or an industrial hair dryer, remove the old edge, clean the chipboard from chips with sandpaper and, while also warming it up, stick on a new one. Cut off excess edges with a utility knife and sand with fine-grained abrasive paper. Often, after installing the edge, traces of glue remain. They can be disguised with tinting.
How to glue melamine edge
If you want to update old furniture and save money, use melamine edging with glue. It’s easy to stick it, for example, on a tabletop:
- Cut a piece of tape with a margin of about two centimeters.
- Place the adhesive side to the tabletop and press with a hot iron or heat with a hair dryer.
- Hold until the glue words melt.
- Move the iron along the edge gradually, preferably no more than 0.5 cm at a time.
- Immediately after warming up and removing the iron, press the edge strip with a dry cloth and hold to fix it.
Advice! An iron or hair dryer will also help you remove the old edge tape. Just warm it up and remove it with a knife or thin spatula.
Repair of laminated chipboard furniture
Serious repairs to laminated chipboard furniture frames are required in cases where hinges, guides, fasteners and fittings are torn out of the board due to excessive load or improper use. Let's consider various options for restoring buildings.
Restoration of holes for fasteners
Laminated chipboard is a fairly durable material, but as long as its integrity is not compromised. Due to loads, improper operation, periodic disassembly of furniture or frequent opening of facades, holes very often break, as a result of which screws, confirmations, hinges and other fittings fall out of their fastening points. Simply screwing the fastener into the same place will not work, since the diameter of the hole has increased. However, there is one method that furniture assemblers use.
In order to be able to screw a screw or confirmation into the old place, you need to proceed as follows:
- use a drill with a diameter of 8 mm to expand the existing hole;
- pour PVA or wood glue inside;
- drive a wooden wedge or “coke” into the hole and cut off the excess;
- make a hole in the “coke” with a diameter smaller than that of a self-tapping screw or confirmat;
- screw the hardware into place.
Now you can install the hinge mounting and adjustment pad
How to repair a broken furniture hinge
It happens that a furniture hinge on the facade itself is pulled out of its seat along with pieces of laminated chipboard or MDF. The simplest option is to completely replace the module door. But the façade material may differ slightly in shade from the rest of the structure, and the cost of such repairs may be high. You can repair the canvas and install the hinge yourself and at minimal cost. There are two options:
- Moving hinges above or below the original installation location.
- Repair of the hinge seat.
The first option is the simplest and fastest, but you will still have to seal the old holes. To disguise a broken seat, you can use a special plastic plug. Large holes are restored using PVA mixed with fine sawdust. After the mixture has dried, it is masked with wax pencils and polished.
Moving the loop to another location
The second option is more complex, but, nevertheless, it will avoid making new holes and will extend the life of the facade for several more years. To restore the hinge seat you will need:
- epoxy resin;
- small sawdust;
- rubber or plastic spatula;
- electric drill;
- loop cutter.
Loop torn from the façade with “meat”
First of all, you need to clear the seat of the torn loop, mix sawdust with epoxy resin and fill the recess, leveling the mixture with a spatula. Allow to dry and, if necessary, add more filler. After complete drying, sand the hinge installation area. Next, make markings and, using a cutter or electric drill, drill a groove of the required depth for the mount.
Prepare a mixture of sawdust and epoxy resin and fill the seat of the furniture hinge bowl
A simple but dubious method
There is another way to attach a torn loop, but it is quite dubious, both from an aesthetic and practical point of view. A wooden block or plywood strip is installed in place of the hinge using glue or self-tapping screws. The fastening for the facade is mounted on them. The plank or block is fixed using screws or glue. However, with this method of installing the hinge, the facade can move significantly relative to its original position, and no adjustment can correct this.
For your information! In order for facades to last for a long time, you need to follow a few simple recommendations. It is necessary to tear off the doors of cabinets and bedside tables smoothly, without sudden movements. Do not hang heavy objects on the handles of the facades, as this leads to increased load, distortion and tearing of the hinges from the landing sites.
