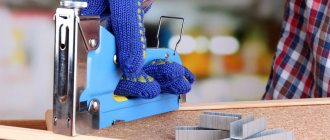
The number of attachment points (the number of screws) is determined by the size and thickness of the slab and in most cases is at least 20 per 1 square meter, provided that the size of the screw is selected correctly.
In the middle of the slab, a lower density of fastening points is allowed than along the perimeter.
Source: www.ekzoles.ru
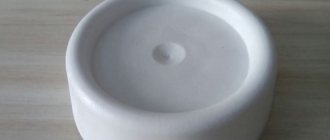
Furniture dowel
This type of fastening is rarely used on its own in the modern furniture industry. It is mainly used only to impart rigidity in conjunction with eccentric couplers.
Its main function in most cases of furniture construction is to prevent the panels from moving relative to each other and giving additional rigidity to the fastening.
Usually used in conjunction with an eccentric coupler. It is made from hard natural wood and has a cylindrical shape. This is a very simple and cheap part that has been used in wooden joints since time immemorial.
Craftsmen and carpenters who work with wood use furniture dowels as the main fastening element. In this case, the furniture parts are connected to dowels, which are glued to the parts using PVA glue. In this case, using any other screeds together with PVA no longer makes sense.
How to choose?
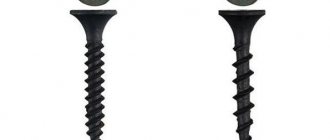
When purchasing self-tapping screws, it is important to consider many points. The base of the screws is steel. To connect specific parts, elements with different coatings are used. When assembling furniture, you must consider:
- length of fastening elements;
- their diameter;
- cap thickness;
- carving;
- degree of corrosion (depending on the coating).
| Thread width and height | Application |
| Rare and high | MDF, wood, chipboard, fiberboard |
| Frequent and low | Hardwood |
| Combined (two-way) | Combined materials (with different densities) |
To connect specific parts, elements with different coatings are used.
The selection of self-tapping screws is also influenced by the type of design and the desired appearance of the product.
The color of the fasteners is also important when the connection is open. In this case, it is worth choosing elements to match the canvas.
To make a table or cabinet, you may need different screws, so it is recommended to consult with the seller if you are going to create the furniture yourself.
It is worth choosing elements to match the canvas.
Self-tapping screws have different types.
Confirmat is used for a more reliable screed. At the same time, a cap is often placed on the cap to make the fastener look more aesthetically pleasing.
To make a table or cabinet, you may need different screws.
Self-tapping screws are used to fasten parts without prepared holes or with them.
Screw tie
The screw coupler consists of a screw and a barrel. This kit is used to attach the end of one panel to the face of another. For example, for attaching a shelf to a side panel or a headboard to the drawers.
This is a very strong fastening due to the large tightening stroke. The only drawback of this fastener is that the screw head is visible from the front of the panel.
You can, of course, close them with special plugs, but this is also not a panacea. The plugs on the outer panel of the cabinet do not look aesthetically pleasing.
Installation of this type of fastener requires skills. Beginners may encounter such a problem as inaccurate alignment of the barrel holes with the hole in the end of the shelf, and it is not so easy to remove the unwanted barrel from its nest.
But the inconvenience during assembly and aesthetic errors are more than compensated for by the reliability and durability of the connection.
Communities › Dream Garage › Blog › How to screw a self-tapping screw into a chipboard, in place of a torn one.
Hi all. I encountered this problem when purchasing used lockers for my garage. Some cabinets had their hinges ripped out by the roots. I found on the Internet what I think is an excellent solution to the problem.
Comments 89
You take sawdust and PVA glue, mix it, form a lump, cover the hole, wait, and you get a new chipboard.
Faster than cutting chops.
Where can I get sawdust?
When I was about 13 years old, I used a knife to cut a piece of hardboard from the back wall of a closet, crush it, and repair the hole. I think an adult will even be able to figure out where to get a couple of grams of sawdust.
Why should I bother with this? Wait until it dries. I did it, hung it up right away and that’s it.
I bought furniture clips, drilled holes for them in the places where they were screwed in, glued them in and screwed them into place
Not pretty. Aesthetics is also important to me. But practical.
Drill through the bolts and nuts
Euro screw, holds well. And that will work too)
The center one also needs a screw.
Why not re-drill the hinges on the facades? )
the price of a forstner drill is higher than the cost of a dowel, and you can google the markings))
I usually use a larger diameter screw.
Stuff super glue and soda into the holes and tighten the screw, then unscrew it... Wait until it hardens. and everything is ready... It will be even stronger)
I stupidly always screw it right through with big screws))
If you thought of it yourself, then you can still understand the joy of repair, but in general they have been doing this since the use of chipboard in furniture production, and this is the 70th century
I've never needed to repair furniture. This is the first time. If you had such furniture, I sympathize.
Yes, there was, because I was born in the USSR, and there was no other and the quality was bad, there is no need to sympathize, that was the time. But everyone has the first time, there is a second and a third
Oddly enough, I was also born in the USSR. The wall stood and was fine, nothing broke.
In such situations, like many people, I use epoxy, but mixed with sawdust to a thick mass. Epoxy is easy to drill, machine, and holds very tightly.
Bullshit, for this I used a 8-gauge chopper and glue... it holds tightly.
Bullshit. For this I used M5 threaded rivets. Inserted it from the back and screwed it on. Holds on for dead. I placed it on the door of a large closet.
I planted the pieces of wood with epoxy
It's easier for you, everything is available at the factory. I don't work there.
It will be more reliable!
I’ve been working at a furniture factory for 12 years, I’ve never seen anything like this before)), maybe it’s easier to drill a hole for a 5mm Euro self-tapping screw and screw it in?
The place there is very broken. There will be no point.
And I hammer into matches with pva and then tap the screw, it holds no worse than the old one.
I also hammered matches with glue into Soviet furniture, it held up fine
Screw the aluminum plate, and screw the same screws into the same places as in the photo, only there the plate will be there.
And without blue electrical tape)))
Good option, I'll take note!
Nonsense, it will fly off, especially since this is a garage, and not to put cups... A friend changed the kitchen, I put it in my garage... half of the doors were also torn off... Using ordinary small bolts to fly out... for centuries...
Good luck! The view will be great! They have already offered for a bolt and nut.
Nonsense, it will fly off, especially since this is a garage, and not to put cups... A friend changed the kitchen, I put it in my garage... half of the doors were also torn off... Using ordinary small bolts to fly out... for centuries...
What do you put on the doors in the garage?
It can be different... either some kind of wire, or a carrying case, an extension cord was hung for convenience near the car... when you’re working you don’t really notice... I also looked at this furniture for the first month, then, believe me, it gets forgotten in the garage every day.
Why complicate things? You take it, fill these holes with superglue and while it’s liquid, screw in the screws. How many times have I done this and never vomited?
I poured it with a glue gun, waited for it to harden and screwed it in, it holds well
Why complicate things? You take it, fill these holes with superglue and while it’s liquid, screw in the screws. How many times have I done this and never vomited?
Conical coupler
The conical tie is often used for fastening thick chipboard panels (25 mm, 38 mm) and assembling frame facades on tie bars.
One of its advantages is the absence of visible caps on the front side of the panels. Unlike the screw in a screw tie, the rod used in a tapered tie is screwed into the panel. The screed itself has 2 holes. One is for the rod, which is screwed into the panel layer. The second is for the conical tie screw. The disadvantage of this type of fastener is the small tightening stroke. Under heavy loads, the holes for the rod screw may become loose over time. Then the screed will simply stop working!
What is a self-tapping screw?
This type of fastener, known as a self-tapping screw, is a type of metal screw with a screw thread and a pointed or flat end. The head of the element has a notch (straight, cross or polygonal) for twisting it into the fabric. To more quickly connect parts of a cabinet or other object, for elements with a sharp end, use a screwdriver (in the absence of a screwdriver).
The selection of self-tapping screws is also influenced by the type of design and the desired appearance of the product.
To connect specific parts, elements with different coatings are used.
Self-tapping screws are used to fasten parts without prepared holes or with them. Due to the thread, the screw is easily screwed into a wooden panel or chipboard. For hidden fastening of furniture parts, an eccentric coupler is used, in which self-tapping screws play a major role. As a result of this type of assembly, tables or other objects are neat, without external traces of installation that spoil the appearance of the product.
This type of fastener, known as a self-tapping screw, is a type of metal screw with a screw thread and a pointed or flat end.
Important! The length of the screws can reach up to 50 mm and above. These fasteners are designed for thick solid wood panels.
The appearance of the product is affected by the possibility of installing a hidden connection.
Euroscrew
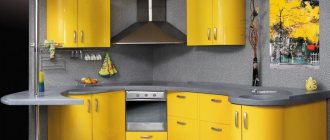
This fastener is often used for assembling kitchen furniture modules and in economy class furniture. Just like with a screw tie, Euroscrew heads or plugs are visible on the front side of the side panel of the cabinet.
It screws into the end of the shelf with a pre-drilled hole. This screed also belongs to the economy class. To install it, 2 holes are drilled - into the end of the shelf and into the face of the part. They are attached perpendicular to each other. The most commonly used euroscrews are 7 mm in diameter and 50 or 70 mm in length.
This screed has 2 significant drawbacks:
Firstly, the outer side of the cabinet, if there are many shelves behind it, as a rule, is all “disfigured” with caps or Euroscrew plugs. Therefore, these fasteners are used in economy furniture. In kitchens, this drawback is hidden thanks to the cabinets standing in a row.
Secondly, furniture assembled with euroscrews cannot be disassembled and reassembled more than 3 times, since screwing the tie into the end of the shelf destroys its internal structure.
Eccentric coupler
One of the most popular types of fasteners today. All high-quality furniture is assembled on an eccentric screed (minifix). Its operating principle is as follows: an eccentric rod is screwed into the face of the part to which another panel will be attached at the end, into which the eccentric itself is screwed through the end of the other shelf, and then the eccentric turns the rod into itself.
An eccentric tie is always used in conjunction with a wooden dowel, which was described earlier. The dowel provides additional rigidity to the assembly and prevents the fixed panels from moving relative to each other.
Furniture assembled on this screed can be disassembled and assembled an unlimited number of times! There are different diameters of the eccentric itself: 25, 15, 12 mm. More common is an eccentric with a diameter of 15 mm.
Since the eccentric itself is visible on the side panel, plugs are provided for it to match the color of the panel. One of the disadvantages is the weakening of the tie in the event of spontaneous rotation of the eccentric.
To avoid this, some hardware manufacturers have provided notches directed in the opposite direction from its rotation during installation, which enhances adhesion.
Types of eccentric couplers
As practice shows, furniture is assembled and disassembled with great difficulty if all the fasteners in it are metal ties, described above. Let’s say that in order to remove one shelf, you practically need to disassemble half the cabinet. For horizontal parts (shelves), it is more convenient to use eccentrics, which allow you to place horizontal parts in an already assembled furniture box. Their operating principle is the same as that of the previously described eccentric coupler.
The only difference is that the eccentric, located in the shelf, fits onto the rod screwed into the face of the sidewall from above and there is no need to disassemble half the cabinet for this. In some factories, this type of fastener is called a shelf holder, since it is intended only for horizontal parts. Horizontal shelves assembled using these ties further tighten the joint, which increases the rigidity of the entire furniture frame.
Repeated dismantling and installation of furniture on such fasteners does not lead to wear of the connections.
Source: dd-space.com
How to choose the right one
To select the correct furniture screw, you should consider what material it will be installed in. The choice of head will depend on the force applied and the space available when screwing. It is also important to choose not only the type of head, but also the pattern for the tool used.
With proper selection of bits, a strong grip of the fastening element with the screwing tool is ensured. Only in this case, the screws smoothly and evenly enter wooden boards, drywall, laminated chipboard, MDF.
Some important nuances that will help buyers of fasteners much better navigate their diversity, as well as make the right choice:
- color - screws from the same batch must be in the same color scheme. This indicates that all products have undergone the same processing under similar conditions, and also have the appropriate strength and corrosion resistance;
- parameter - the sizes of one batch of products should not be visually different from each other, and also comply with standards;
- pitch - the load between the threads should be distributed evenly;
- hole - the slot must be clear, symmetrical, and be deep enough;
- marking - the standard designation of screws - is a number in which the first number is the size of the thread diameter, the second is the length of the product from its very head to the sharp tip.
If furniture screws meet the specified criteria, then you can be confident in the quality of the furniture fasteners, which will not break during installation.
In order to efficiently assemble and install furniture elements, you need to use such a convenient, accessible assistant in fastening work as a screw. This type of furniture screed will not only simplify the assembly and installation procedure, but will also be invisible after the installation process is completed, thanks to its unique structure. All structures and foundations fixed with such fasteners will retain their shape, appearance, and properties for a long time.
Hole depth and width
When assembling furniture, confirmat size 6.4*50 is usually used. Because the thread diameter is 6.4 mm, and the diameter of the confirmation body is 4.4 mm, then for high-quality fastening of parts, the hole diameter must be in the range of 4.5-5 mm and a depth of at least 50 mm.
If the thickness of the hole is greater than the specified one, the confirmat will not hold the parts well; if it is less, its thickness can tear the chipboard.
For drilling, use a confirmat drill with a diameter of 4.5 mm, which is equipped with an additional head for drilling an enlarged hole for the neck of the confirmat, which also makes a countersink for its head.
Of course, you can use a regular drill with a diameter of 5 mm, but for high-quality fastening in the hole you will additionally need to make space for the neck of the confirmat and its head.
Correct use of fasteners
The choice of hardware when assembling furniture and other structures from particle boards is important. When using a confirmat (a screw with a countersunk head and a blunt end), after two or three screwings for assembly and disassembly during moving and transporting furniture, the self-tapping screw simply does not stay in the chipboard. When choosing hardware, you need to consider several factors:
- Required fastening strength.
- The degree of destruction of the chipboard when the dowel is repeatedly unscrewed and screwed in.
- Appearance of fasteners.
When it is necessary to attach chipboard to a base made of another material, for example, brick or foam blocks, the properties of the wall's masonry should also be taken into account. You cannot screw a chipboard shelf to a wall made of foam blocks using ordinary self-tapping screws - the fasteners will quickly fall out of the holes under the weight of the load.
Marking drilling locations
In order to perfectly fasten two parts, it is necessary to mark the places of their fastenings as accurately as possible.
On the part that will be applied to the end (the one on which there will be a through hole), you need to make two measurements - along the length (usually 5-10 cm) and from the edge - exactly 8 mm (this is if the thickness of the plate is 16 mm).
On a part that lies perpendicular, mark the drilling point at the end. Here you need to maintain the same distance in length (5-10 cm from the beginning), and in width - strictly in the center (8 mm from the edge).
Markings must be done as accurately as possible, especially along the length, because If the markings are incorrect, your parts may have extra gaps or protrusions when joined.
It is better to make a through hole in the first part, attach it to the second - and immediately use a drill to mark the drilling location at the end of the second part. And then, separately, calmly drill the hole.
Drilling in two parts at the same time
This option is considered the most accurate and, moreover, the fastest. But in order to make a hole in two parts at the same time, you will need to fix them before drilling. To do this, you may need special clamps, clamps and other devices.
Hole Drilling Tools
In order not to mark 8 mm from the edge each time both into the layer and at the end, you can use a special device, which, by the way, is easy to make yourself.
It is a kind of wooden template with a metal sleeve for a drill inside.
It looks like this, see photo:
And this is a more professional thing:
Watch a short video on how to accurately drill holes in chipboard for confirmations and assemble furniture parts:
How to assemble furniture
1 Different types of connections
1. Corner and cross joints provide a strong connection between the load-bearing parts of the furniture. They can be rigidly fixed or collapsible, as well as visible or hidden.
2. End connection allows you to fasten several parts located in the same plane. This method can be used to make a dining table or work table.
3. Hanging furniture is usually used in kitchens or bathrooms, for example.
2 Which wood materials to choose
1. Medium Density Fiberboard (MDF) has various applications. The surface of such slabs is completely smooth, and their thin structure makes them easy to cut and process. Such slabs can be varnished or tinted. Hallways and cabinet furniture are often made from them.
2. Plywood, made up of at least 3 thin layers of wood, is a durable material and works well for making shelves. Plywood covered with valuable wood veneer (oak, beech) is ideal for making decorative furniture.
3. Conventional chipboard and melamine-coated chipboard are made from compressed wood chips, they are relatively inexpensive and come in a wide variety of thickness(5 to 40mm), quality, moisture resistance and surface treatment.
4. Laminated wood consists of 2 layers of wood reinforced with timber. This material is used, as a rule, to make simple products, such as table tops for a dining table or work table.
3 Corner and cross connections
Connections for assembling furniture or shelves can be visible or hidden.
A) Hidden corner or cross connections
Hidden connections provide higher quality furniture appearance; As a rule, special holes must be drilled in advance for them.
- For quick assembly, you can use special chipboard screws
Helpful advice
Fastening with self-tapping screws for chipboard is the easiest and fastest way to make a quality connection. We advise you to choose a wood thickness of at least 16mm.
1. Place the 2 panels next to each other the way you want to connect them. Drill both panels at the same time with a 5mm drill.
2. Using a 7 mm drill, drill again into the panel in which the screw head will be located. Additionally, drill this panel to a depth of 2 mm with a 10 mm drill in order to hide the screw head. Screw in the connecting screw. Cover it with a decorative cap.
- For a stronger connection, use a furniture screw M6x60 M6x100 with a nut installed in the hole.
Helpful advice
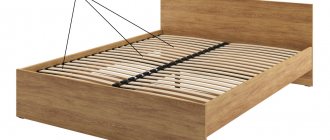
This more complex type of connection is used for fastening fragile materials. This connection increases the strength of the fastenings and allows you to assemble and disassemble furniture. It is ideal for attaching shelves to a vertical panel. We advise you to choose wood materials with a thickness of at least 16 mm.
1. Select a suitable dowel size of 6, 8 or 10 mm. Install a drill depth limiter on a wood drill of the required size. Drill the flange intended for connection to a depth of 15 to 20 mm (depending on the size of the dowel) using a wood drill equipped with a stop. Make as many holes as you need.
2. Insert the core into the drilled hole. Place the panels next to each other. The location of the holes on the second panel is outlined. Drill the corresponding holes on the second panel.
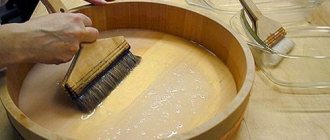
3. Insert dowels into the holes. Apply glue to their ends. Assemble the panels. Use a rubber mallet if necessary.
For a stronger connection, use a furniture screw M6x60 or M6x100 with a nut installed in the hole.
Helpful advice
This more complex type of connection is used for fastening fragile materials. This connection increases the strength of the fastenings and allows you to assemble and disassemble furniture. It is ideal for attaching shelves to a vertical panel. We advise you to choose wood materials with a thickness of at least 16 mm.
1. Place the 2 panels in the desired position.
2. Drill both panels with a 6.5 mm drill to a depth of at least the length of the screw.
3. In a horizontal panel, drill a hole at least 3 cm from the edge using a 10 mm drill to a depth of 15 mm. You must drill to the hole that was made in the previous stage of work. Insert the nut into the groove so that the threads are opposite the previously drilled hole. Insert the screw into the hole. Screw it into the nut.
(for eccentric tie 12.5 mm thick and 15 mm diameter and wood 16 mm thick)
- For easy assembly and disassembly of furniture, use the eccentric connection.
Helpful advice
This is a classic type of connection, which is most often used by built-in cabinet furniture . This connection allows you to repeatedly assemble and disassemble furniture. We advise you to choose wood materials with a thickness of at least 16 mm.
1. Mark on the shelf to be secured the location of the eccentric at a distance of 33.5 mm from the edge of the shelf. Using a cutter with a diameter of 15 mm, drill a recess for the eccentric 12.5 mm deep.
2. In the middle of the end part of the shelf, use an 8 mm drill to drill a hole that reaches the recess for the eccentric. Insert the eccentric into the notch. On the main panel, use a 5mm drill bit to drill an 11mm deep hole where the shelf attaches. Screw in the bolt.
3. Connect the shelf and the main panel by inserting the bolt into the hole so that it touches the eccentric. To assemble and disassemble, turn the eccentric screw.
B) Visible fastenings
Visible fasteners are easier to manufacture and do not require pre-drilling.
To quickly make a corner mount, you can use plastic or metal corners.
Helpful advice
Inexpensive plastic angles make connections quick and easy. They are suitable for lightweight shelves intended for small loads. Metal corners provide greater strength.
Plastic corners are attached immediately when connecting the panels. Use wood screws with a diameter of 4 mm. Use a level.
4 Different types of connections (copy)
Please indicate the dimensions of the kitchen
Room length (D) m
Room width (W) m
Height from floor to ceiling (H) m
2. End connection allows you to fasten several parts located in the same plane. This method can be used to make a dining table or work table.
3. Hanging furniture is usually used in kitchens or bathrooms, for example.
Source: ufa.leroymerlin.ru
Shape and dimensions
A furniture screw is the most popular fastening method in the production and assembly of furniture. There are many sizes and shapes of hardware designed to carry out any technological operations associated with the manufacture of furniture products.
The length and diameter of such hardware are determined in millimeters or by number. The ratio of diameter to length varies for each standard, but these differences do not have much practical significance. The number is determined by a number from 1 to 20; the higher the number, the thicker the product. Diameters with numbers 2,3,4,6 are widely used.
GOST regulates the parameters of the product, but products may also have atypical sizes and be produced, for example, to special order. Table of nomenclature of universal screws in millimeters.
| Diameter | 2,5 | 3,0 | 3,5 | 4,0 | 5,0 |
| Length | from 10 to 25 | from 10 to 30 | from 10 to 40 | from 13 to 50 | from 16 to 70 |
The most popular size for furniture is 3 x 16 mm; 3.5 x16 mm; 4.0 x16 mm. The parameters of universal screws are regulated by the following types of GOST.
| GOST 1144-80 | A screw having a semicircular head and characterized by a straight slot |
| GOST 1145-80 | Fasteners that combine a countersunk head and a straight and cross-shaped slot |
| GOST 1146-80 | Product with a semi-countersunk head |
Confirmats for furniture have three main diameters, of which diameter 7.0 is the most commonly used. Nomenclature table for Euro screws in millimeters.
| Diameter | 5,0 | 6,5 | 7,0 |
| Length | 40-50 | 50 | from 40 to 70 |
Table of standard confirmat sizes in millimeters.
| Diameter | 7 |
| Thread diameter | 6,7-7,1 |
| Thread pitch | 3 |
| Body diameter | 4,7 |
| Tip diameter | 4,4-4,5 |
| Diameter of non-threaded part | 3-6 |
| Cap height | 10-12 |
| Cap diameter | 9,5-10,3 |
| Spline depth | 2,7-3,2 |
The screw parameters are individual for each type. The main determining indicators are their length and thickness. Length is the distance between the end and the plane under the cap. This figure is in the range of 6 - 150 mm. The thickness is equal to the diameter of the thread on the outer part of the hardware, and its size ranges from 3.5 to 6 mm. The weight of an individual hardware depends on its parameters and can be in the range of 0.3 - 16.6 g, and the weight of a package containing a thousand pieces will be from 0.26 to 20 kg.
Preparing for furniture assembly: marking and adding chipboard with your own hands
After the furniture parts have been cut to size and all visible ends have been glued with edges, you can proceed to the stage of preparing the furniture assembly. It consists of two parts - marking the holes and adding laminated chipboard with your own hands. This is a rather important stage, the accuracy of which determines the appearance of the furniture and the quality of the assembly.
Strictly speaking, many craftsmen neglect marking and adding chipboard, preferring to use clamps and drill straight away. But this requires having several corner clamps in your arsenal and skill in handling them. Constantly pulling parts together at right angles in order to accurately drill and tighten them onto confirms, and then unscrewing them is quite labor-intensive and time-consuming. It is much more efficient to first mark the parts for fasteners, drill holes, and then assemble the furniture.
Do-it-yourself chipboard markings, nuances and useful devices
Cabinet furniture made of laminated chipboard is assembled using confirmata (euro screws). Accessories in the form of hinges, guides, hinges and other retractable, rotary, swing mechanisms are installed on self-tapping screws. Dowels and shelf holders can also be used in the assembly. If you think in advance where which fasteners will be installed, and not “think as you go,” then the assembly will be simplified significantly. Errors are also minimized. Extra holes drilled in the wrong places are not uncommon even among experienced furniture assemblers.
Marking chipboard is the process of measuring and outlining the centers of future holes for assembly. They are marked both on the front side of the part and on the end, at the junction.
In addition to screeding chipboard sheets, it is necessary to mark holes for hinges, handles and other fittings.
To make the marking process faster and more accurate, furniture templates and jigs are used. They are offered in a huge range by various manufacturers.
Why are furniture jigs needed when marking and adding chipboard parts? The fact is that when marking furniture, “system 32” is most often used, adapted for a 16 mm thick chipboard.
8, 16, 32, 64, 96, 128 are the most common distances that will have to be marked. For installing hinges, guides, handles and other fittings. Therefore, for convenience, it is better to get a special template.
This can be a homemade jig, which is an ordinary wooden ruler attached at one end to a block at a right angle. On the ruler itself, small holes (for a pencil) are marked and drilled, corresponding to repeating sizes according to the “32 system”.
The sheets will be fastened using confirmats (euro screws), so to connect you need to mark the centers for the holes in both sheets. One hole is on the front side of the sheet, and the other is on the end.
To facilitate the calculation of the location of assembly holes, special programs are used (for example, Basis-Furniture Maker). In 3D format, fasteners are placed on the product drawing, and then additive cards are printed with drawings of the parts and the dimensions of all marked holes.
Chipboard
Chipboard or chipboard (chipboard)
is a slab material that is produced by mixing dried technological chips and special resins that improve the binding properties of the main component. Chipboard is quite difficult to use. Particle board does not hold screws and nails well. In addition, you should pay attention to the manufacturer and the requirements for the production of chipboards. The fact is that the resins used must be applied in a certain ratio to the main raw material of the particle board. Otherwise, chipboard will become an environmentally hazardous building material. Several types of chipboard are produced in Russia. Single-, three- and multi-layer types of particle board can be produced. On sale you can find both sanded and unsanded chipboard. You can buy particle boards with increased moisture resistance and even fire resistance. The slabs are also distinguished by density. Many of these types of chipboards are used in the construction of buildings and structures, as well as in interior decoration.
The production of chipboard is regulated by GOST 10632-2007. According to GOST 10632-2007, the thickness of chipboard is from 3 mm with a gradation of 1 mm. The most commonly used chipboards are 16mm, 18, 20, 32 and 40mm thick. The main disadvantage of chipboard from the point of view of fastening is that the material easily crumbles under dynamic loads and, accordingly, does not hold nails and screws well, especially when re-tightening. To connect chipboard materials, it is necessary to use self-tapping screws exclusively with a large thread pitch.
Do-it-yourself laminated chipboard additive
Adding or drilling parts also refers to the preparatory stage of assembling furniture with your own hands.
Through holes are drilled only for assembly with confirmations. It is better to use a special confirmation drill. You can do without it: drill from the front surface with an 8 mm thick drill, and from the end with a 5 mm drill. But in this case there will be no countersink for the confimat head. This means that “sinking” the fasteners neatly flush with the surface of the chipboard will be problematic.
For shelf holders, blind holes are drilled from the inside.
For guides, hinges, and lifting mechanisms, do not add laminated chipboard using a drill yourself; you just need to prick it with a self-tapping awl along the marking mark.
Source: delay-shkaf.ru