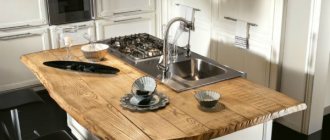
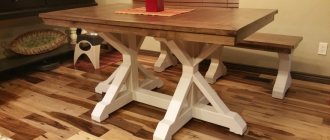
Wooden countertop for a rustic kitchen
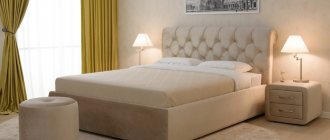
The smell of strong morning coffee fills the cozy kitchen. You want to be here all the time, inhaling the aromas of freshly prepared food - fried meat, mushroom soup, sweet freshly baked muffins. Here you want to meet in the evening, have leisurely conversations after a working day, spend the weekend doing pre-dinner chores for the family, or just sit, when your family has already fallen asleep, with a cup of herbal tea. Yes, right here, behind this kitchen wooden countertop - warm, cozy, welcoming... and, it seems, eternal.
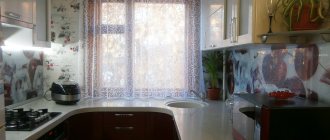
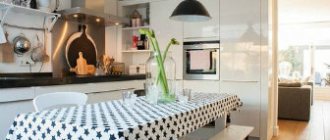
Cozy kitchen island design with a wooden countertop
How to paint a wooden table?
Wood products can be coated with any composition of paints and varnishes. Only when choosing is the type of wood from which the piece of furniture is made taken into account. Let's look at the main types.
Water-dispersed
To update the appearance of an old dining table, the best option is water-dispersion paint, which does not cause allergic reactions and does not form toxic substances. The material is afraid of climate change, so if the furniture is placed outside, then over time the coating will begin to peel off.
Oily
To create a bright and shiny tabletop, use oil paint. It is evenly distributed over the countertop and requires little material consumption.
Acrylic
Is this paint used to coat wooden interior items that will be used both indoors and outdoors? Yes, it applies. The material is characterized by resistance to weather changes and has no foreign odor. Apply with a brush or aerosol can.
Alkyd
It is characterized by high moisture resistance due to the formation of a thin protective film on the surface. This type of painting quickly loses its original appearance and therefore requires periodic updating.
Enamels
The material gives a glossy or matte effect. Enamel reliably protects against various types of damage, temperature influences, and corrosion. If you additionally coat the wooden surface with varnish, this treatment increases the service life. Processing in this way allows you to install objects outdoors without worrying about the safety of the coating.
Features of wood
Many furniture sets, including dining table tops, are made from wood. Wood can be either natural or made from wood chips, such as fiberboard, MDF, and others. Tables made of wood can be without finishing, and can also be covered with some kind of paint and varnish material.
Wood has many advantages, for example, high thermal insulation, beautiful appearance, various shapes, and wood is quite easy to restore. Despite these advantages, wooden tables and other products made from this material have several disadvantages - they get dirty quite quickly, are flammable, scratch quite easily, and are susceptible to mechanical damage. Another disadvantage of countertops made of natural wood is the high cost.
How to repaint a wooden table with your own hands?
If you are going to paint the entire table with legs, then it is better to disassemble it. If, for example, there is only a tabletop, then it is recommended to seal the areas that will not be painted with masking tape.
- We process it with sandpaper or a sanding tool.
- We prime all defects.
- Cover the floor with paper or a rag so as not to get dirty while working.
- If you use a can, you need to shake it. The distance to the furniture should be 30-50 cm.
- If you are using canned paint, pour it into a tray to make it convenient to dip your brush or roller.
- Paint evenly, covering the tabletop first, then the legs.
- When the layer is completely dry, apply the material a second time.
- After drying, sand the surface to create a rough surface.
- To consolidate the resulting effect, apply acrylic varnish to both the tabletop and legs.
- Remove the tape after 10 hours.
Selecting the material that will be used for painting
Painting a wooden table
Wood has always been very popular in the production of furniture and interior decoration. But since it is a natural material, when painting surfaces, all the flaws and flaws can come out. Therefore, proper preparation of products is important here. We'll talk about this right after we choose the paint we need.
To paint wood you can use the following materials:
- Varnish and enamel are almost transparent materials used to protect surfaces. But even after such staining, wooden products acquire an attractive shade
- Paint - can completely change the color of the object being painted, but at the same time leave the original wood texture
Table of divisions by composition:
| View | Properties |
| Alkyd paint | After application it forms a protective film. It is better to use for painting indoors, as it is not durable |
| Acrylic | Painting wooden walls and products is possible even outdoors and all this thanks to the durable base and protective film after painting |
| Paintwork elements | Such materials contain an element that protects wooden products from the harmful effects of sunlight. Therefore, they can be used to paint a fence or a table in the yard |
Important! Modern paints are distinguished by their naturalness. More precisely, they are less toxic than varnishes and enamels. That is why use a respirator when painting with such materials.
Impregnations can not only shade wooden elements, but also protect them from the influence of fire. They have antibacterial properties and are quite often used for woodworking.
Impregnations can not only shade wooden elements, but also protect them from the influence of fire. They have antibacterial properties and are quite often used for woodworking.
How to paint a table white?
Despite the light shade, painting white increases the service life of products made from pine or birch, oak or beech.
- We clean the objects from dust and remove the old coating.
- To highlight edges, slats or carved decorations, paint them dark.
- To create a natural appearance, rub the painted areas with wax.
- Repaint with white paint in several layers. After each coating, you must wait until it dries completely.
- The waxed areas must then be rubbed with a knife.
- We sand all areas with fine sandpaper.
For whitening, a special composition is used, which includes wax and pigment. During processing, lines are formed that give the product an antique appearance. The work is carried out in the following sequence:
- Dust is wiped off the furniture.
- Previous layers are removed.
- Colorful material is applied.
- Using a metal wood brush, small indentations are created in the direction of the grain.
- The cavities are filled with whitening paste.
- After drying, wipe the surface with a dry cloth.
- Everything is covered with varnish.
Types of wood varnish
| Illustration | Description |
| Alcohol based varnishes . They have the following features: |
- A transparent or translucent layer is created on the surface of the wood.
- The tabletop acquires a characteristic glossy shine.
- The layer reliably protects the wood from both moisture and mechanical damage.
- Strength is achieved through resins that harden as the alcohol evaporates and create a durable coating.
In order for the layer to be durable, the varnish must be made from alcohol with a strength of 90 degrees or more.
Decorating furniture
How to paint a table so that it becomes an accent element in the interior? To do this, choose different options for decoupage and decoration. One of the original methods is painting through tulle. To do this you should:
- remove the previous coating and level the surface using sandpaper. Wipe with a dry cloth to remove all dirt;
- apply white acrylic paint in two layers;
- spread the tulle on the table and paint it with blue paint;
- When everything is dry, we fix the effect with varnish.
Anyone can update an old table and create a unique piece of furniture. You just need to show imagination and patience.
Source: dverimassivspb.ru
Painting a table while maintaining the wood texture
The best result of painting while preserving the texture of the wood is obtained on an array of large-porous species, such as oak, ash, chestnut. The question immediately arises: why paint an already beautiful array. If the issue of painting is not discussed, let's move on to technology.
1. Sand the clean surface prepared for painting, first with medium and then with fine sandpaper. By hand, without the use of sanding machines, sanders and other devices. Under your fingers, the softer fibers of spring and summer wood will be sanded harder than the denser ones. Autumn/winter layers will remain slightly convex.
2. Cover with a thin layer of colorless varnish or primer by spraying.
3. Remove the raised pile with a fine abrasive or steel wool.
4. Blow the surface to be painted with a compressor to remove fine dust.
5. Cover the tabletop with a thin layer of the chosen paint.
6. Dry for at least 24 hours.
7. Finish coat with a transparent, silky matte, durable, wear-resistant varnish.
If the process of painting a table seems unnecessarily complicated or there is no time to do it, we will take on this concern with all our professionalism and knowledge of the matter. The photo shows a desk, tinted mahogany. Decorated with brass broaches, overhead handles, and bronze-colored oarlocks. The tabletop is covered with leather in a matching color with an aged effect. Aging furniture with your own hands is a tempting activity, but when it comes to expensive furniture, it is better not to experiment, but to entrust it to professionals.
Workshop gallery
Estimated cost of restoration (price as of January 9, 2019)
| Price, rubles | |
| Chair | 5000 – 20000 |
| Armchair | 10000 – 30000 |
| Sofa | 30000 – 60000 |
| Cost, rubles | |
| Table | 10000 – 40000 |
| Buffet | 30000 – 80000 |
| Closet | 30000 – 80000 |
Restoration of paintwork
| Finishing | RUB/sq. meter |
| Waxing | 500 |
| Polishing | 1500 |
| Shellac | 2000 |
| Gilding | 3000 |
| Decoration | RUB/sq. dm |
| Patination | 50 |
| painting | 200 |
| Marquetry | 500 |
| Mosaic | 1000 |
By sending us a completed form with photographs, as well as asking a question, you will receive complete information about the item (what it is, material, age) and the cost of restoration work. Next, the restorer will come to the site, inspect it, and determine the final price of the restoration.
The final price will not change. Departure is free.
How and with what to paint a wooden table with your own hands - analysis of the best options
Restoring old favorite interior items has become a fashionable trend among modern designers. Few people know how to paint a table themselves, preferring to purchase a new analogue. However, you shouldn’t rush to throw away good quality furniture that has lost its former appearance when you have the opportunity to show your creative imagination and create a unique hand-made masterpiece. Experienced specialists will tell you how to varnish a table with your own hands and what paint is best to choose.
Need to update
Any wooden product needs proper care. Despite their strength and durability, wooden materials lose their former attractive appearance over the years: the paint peels, cracks, and crumbles. There is a need to paint the table again. In addition to visible deformations, the wood itself becomes unusable. It rots when there is an excess of moisture, swells, breaks, and also becomes a target for pests, such as wood borers. If the irreversible destructive process is not stopped in time, the old table will become unusable and the tabletop will crumble before our eyes. But with timely help, the furniture will last for more than one generation and will delight the eye with its unique design.
Main advantages of varnish
A varnished table will be more practical and will last much longer. After applying these paintwork materials, the aesthetic characteristics of wooden furniture will significantly increase - the textures will become more expressive, they will be better visible, the color will become richer. Also, several layers of varnish will help prevent the destruction of the wood surface. The wooden table will be reliably protected from liquids, moisture, and mechanical influences.
Choice of coverage
Modern manufacturers offer a wide range of materials to suit every taste and budget. Let's look at the main features of each coating before we get to work and paint the table.
- Water-dispersed acrylic paint. It is non-toxic, dries quickly after painting, and is easy to use. Even a non-professional can handle it and paint the kitchen table, since it lies evenly on the surface. If it was not possible to paint the table properly, the tabletop can be washed with cold water, but only before the paint has time to dry. After drying, the wooden coating becomes impervious to moisture and is not afraid of ultraviolet exposure.
- Alkyd enamel. The material is suitable for exterior finishing work with a wooden surface, so it is suitable for furniture that stands outdoors. The enamel has a wide range of colors, can be matte or glossy, and is resistant to aggressive detergents, frost and direct sunlight. It is usually used in aerosols, but there is also a liquid option for painting the table. When working, be sure to wear a respirator and be outside or in a non-residential area, since the pungent odor disappears slowly after covering the countertop with enamel. To paint a table with alkyd enamel without harm to health, it is important to follow these precautions.
- Nitro-enamel paints. Very toxic, but dry quickly. Among the advantages are the relatively low cost, and the disadvantages include low thermal stability, the rapid occurrence of cracks after coating due to exposure to ultraviolet rays. You can paint a table with this paint that is in the shade most of the time.
- Oil paint. It is made on the basis of drying oil, so it dries for quite a long time. Used for interior and exterior work on wooden products. Covers the surface with a thin film, but subsequently quickly wears off and peels off. Previously, oil paint was used everywhere, but today, to paint the table, higher quality analogues are used.
Caring for your cutting board
No matter what material the kitchen countertop is covered with, it is better to cut food not on it itself, but on the surface of the cutting board. The raw materials for creating a cutting board can vary. Kitchen boards can be made using plastic, special glass or wood (most often chosen because it is a natural antiseptic).
A new cutting board needs to be soaked, for which oil is suitable. This impregnation will protect it from liquid, food and bacteria getting inside it.
The oil layer of the board should be harmless to health and resistant to various damages. If you use sunflower or olive-based oil to cover the cutting surface, it may deteriorate after some time, and the board will need to be thrown away. Products based on coconuts or flax are expensive, but will not allow the cutting surface to become unusable.
Mineral-based oil is a good option for coating a cutting board. To do this, wipe the cutting board with it, wait until the composition is absorbed, and wipe it with a dry cloth. The procedure must be repeated once every thirty days.
Beeswax can be added to this cutting board coating to add density to the coating. Wax will increase resistance to moisture and prevent aging of the cutting board. After applying the oil and wax, you will have to let the product dry and then polish the outside of the board until it shines.
You should also remember to disinfect the board for cutting ingredients for preparing dishes. You can disinfect cutting boards using these methods:
- hot water and detergent containing surfactants;
- vinegar;
- hydrogen peroxide;
- chlorine-containing bath cleaning products.
Dyeing technology
Before you paint a wooden table, you need to arm yourself with:
- with a brush, roller and container (if paint is used) or spray (aerosol);
- goggles, mask, gloves, respirator (to avoid toxic substances getting into and on the body);
- antiseptic (necessary for protection against insects) and wood primer (reduces paint consumption).
Painting the table is carried out on a hard surface, previously covered with newspapers or plastic wrap to avoid paint getting on the floor. For those who decide to cover the table with varnish or non-water-based paint, it is better to carry out the restoration outdoors due to the strong toxic odor. If the piece of furniture is large enough, it is better to disassemble it into its component parts using a screwdriver, hammer drill, etc. Many experts argue that it is not worth violating the integrity of a wooden object, since in the future it may lose its shape. However, this statement is controversial. If you assemble all the parts together correctly and efficiently, this will not affect the life of the product, and it will be easier to paint.
Before repainting a varnished table, you must remove the old coating. To do this, you can use a chemical solvent, a spatula, or a metal sponge. At the initial stage, sandpaper should be selected coarse-grained, which does not abrade the surface so much. Next, you should sand the surface with fine-grained sandpaper, cover it with an antiseptic and primer and leave to dry. An antiseptic is needed so that pests cannot subsequently reach the wood. After the primer has dried, the surface must be sanded again and wiped with a dry cloth or vacuum cleaner.
Masking tape is useful if the wooden product has glass or plastic inserts that do not need updating. It is enough to seal unnecessary places and you can proceed directly to painting. If you use aerosol paint, be sure to wear a respirator, goggles and gloves. These methods of protection allow you to paint a wooden tabletop without harm. The substance should be sprayed at a distance of 30 cm from the wooden table. Next, you need to leave the product to dry, and then cover the wooden table with another 2-3 layers of paint. The same sequence is maintained when using conventional liquid paint, which should be applied with a roller or brush with soft bristles. To make sure that the furniture is ready for the next treatment, it is recommended to lightly touch the edge of the surface with your finger. If the paint does not stick, then you can proceed to the next step.
Condition assessment and preparatory work
At this stage the following is done:
Oil-based formulations. Their features are:
| |
Compositions based on nitrocellulose. The features are:
| |
Water-based varnishes. Let's look at them:
| |
Polyurethane-based compositions, they have their differences:
|
| Illustration | Description |
| Carefully inspect the table. Assess the condition of the surfaces; if they have deep damage, you will have to use wood putty. Also check the condition of all connections; if they are loose, then first strengthen the structure. Sometimes it makes sense to disassemble the furniture and process all the parts separately. Pine usually has more damage than hardwood, making it more difficult to work with. | |
| Prepare your work area . Since a lot of dust is generated during the grinding process, I advise you to process the table in the garage or outdoors; you should not do this in an apartment. Don’t forget about work clothes and protective equipment - glasses and a respirator will come in handy. | |
Purchase the necessary materials:
| |
The tool you need is the following::
|
Decoration
If you want to diversify your interior and add a touch of soulfulness and homely warmth, table painting is a great way to decorate your table and combine business with pleasure. Designers offer many different creative options for decoupage and decoration, with the help of which old wooden objects will become a real pride for their owner. One of the simplest and most common techniques is painting through tulle. This technique will allow you to transform the appearance of the table with your own hands at minimal cost. All you need for the job is white and blue paint, sandpaper and tulle with a beautiful pattern.
Manufacturing technology
- Using sandpaper, you need to sand the wooden surface, removing the previous coating. You should then wipe the table with a dry cloth before painting it.
- Use acrylic interior paint to paint the table white, applying 2 layers. After each coating, it is recommended to allow an interval until the product is completely dry before painting the product again.
- The tulle will serve as a stencil, so the damp fabric should be laid on the table, carefully straightening the edges so that there are no folds or folds. Next, you need to paint the tulle tabletop with blue acrylic spray paint.
- After drying, the tulle is removed and the product is varnished.
You can learn more about how to paint a table and decorate the product from the photo instructions, and also watch an instructional video on the Internet about how to paint a table with your own hands.
Even a non-professional can provide new life to old interior items. A little creativity and imagination - and the result will exceed all expectations, and the table will please the eye for a long time.
Video: do-it-yourself restoration of a lacquered tabletop.
Source: prokuhni.info
What should you consider when choosing a kitchen countertop?
The appearance of the kitchen table cover can radically change the impression of the design of the room. It can decorate any kitchen table or unpleasantly surprise against the backdrop of expensive, luxury furniture with its wear and tear. When choosing a covering for a kitchen table, you should consider the following criteria:
- The covering on the kitchen table should be as strong, hard and durable as possible, since it will have to experience mechanical stress (friction, shock, pressure) every day;
- The countertop for the kitchen table must have increased water resistance;
- A surface with minimal porosity provides the highest protection for a wooden table from dirt and dust;
- The surface of kitchen furniture must meet such an important parameter as hygiene (that is, maintaining such a countertop should not take much time);
- An important factor is the appearance of the kitchen table (however, when choosing a spectacular transparent coating or a tabletop made of liquid PVC glass, do not forget about the safety and reliability of the surface).
Required tools and materials
To make a beautiful wooden tabletop and legs, you will need the following building materials:
- sandpaper;
- antiseptic;
- white primer;
- waterproof varnish or paint;
- masking tape.
You need to make sure you have the tools in advance:
- brushes and rollers;
- paint tray;
- grinding tool.
To paint your table while protecting your hands from harmful chemicals, make sure you have rubber gloves.
How to update wood countertops?
Sooner or later, the surface of the wooden tabletop will have to be renewed - the wood will have to be re-saturated with oil. How often should this be done?
“It’s difficult to name a specific period; a lot depends on the specific operating conditions,” answers the Belinka brand technologist. — To understand whether it’s time to renew the countertop, apply a few drops of water to the surface and observe - if the wood quickly absorbs them, it’s time to take out a jar of oil. However, don’t worry, applying oil is not a difficult task, every housewife can handle it on her own.”
We wrote more about how to refresh treated wood surfaces in our blog.
Which paint to choose?
The following types of paints are sold in stores:
- water-dispersed;
- oil;
- acrylic;
- alkyd;
- enamels for wooden surfaces.
You can paint wooden furniture using any of them. However, before purchasing, be sure to check the type of wood of the table so that the type of paint is chosen correctly. Then you will be able to do the job efficiently.
Water-dispersed
This type of paint is designed for furniture used in heated rooms. It contains no dangerous harmful substances. It is evenly distributed over the entire surface and dries quickly, so even an inexperienced painter can paint a wooden table. The paint creates a durable coating that is resistant to moisture. But it does not withstand mechanical stress when cleaning with abrasive particles. To avoid rapid wear and tear, it is better to wash such a table using a soft sponge.
Oily
The basis of oil paint is drying oil - a greasy agent, due to which the painted surface takes a long time to dry. Used for interior and exterior finishing of any wooden products. After application, a thin oily film remains, but after a short period of time it dries out and peels off.
This outdated type of painting work is used less and less, since modern enamels are more economical and wear-resistant.
Acrylic
After treatment with acrylic enamel, a beautiful glossy coating is formed on the surface, resistant to fading from the sun. The drying process does not require much time - a durable film appears within 15-60 minutes, depending on the conditions where the painting work is carried out. It is not harmed by mechanical impact, therefore, due to wear resistance, enamel outperforms other analogues.
Alkyd
If the table will be used outdoors, then it is better to opt for alkyd enamel. It has proven itself best when carrying out external work on finishing wooden surfaces. A rich color palette, glossy sheen and matte finish will allow you to get any desired result.
The paint withstands exposure to aggressive detergents, frost and direct sunlight. Available in the form of aerosol bottles and liquid. It should be taken into account that its strong smell can take a long time to disappear from the room.
Enamels for wooden surfaces
Using wood enamels allows you to repaint furniture to suit any color and taste. They allow you to protect surfaces from thermal and mechanical damage, which is especially important for countertops. Negative weather events do not harm them.
5. Will this countertop suit my design?
Wooden surfaces in the kitchen also offer wide design possibilities and are a current trend. Here's what designers think about it.
“The world is becoming more urbanized, and people are experiencing stress due to lack of communication with nature. Natural materials in the interior, such as wood, stone, clay, help modern people feel comfortable in the “concrete jungle,” comments Valentina Konstantinova, creative designer.
The designer gives examples of using wooden tabletops in “star” interiors: “Jake Gyllenhaal, the star of the movie Source Code, uses a wooden tabletop in a Provence-style interior. The kitchen backsplash is finished with small boar tiles, and the furniture is exactly like in the south of France: soft blue with a chamfer and retro handles.
Since wood is not a moisture-resistant material, the part of the countertop adjacent to the sink can be replaced with an artificial stone surface, as in Sarah Jessica Parker's kitchen. The wooden countertop fits perfectly into the modern urban interior of the actress’s kitchen, built on contrasts of textures and colors - white stone and dark brown wood.”
Designer of the interior studio LOFT & HOME Anastasia Yarysheva believes that you can find a place for wood in the kitchen in any style, it is only important to approach the matter correctly. “So, a tabletop made of solid wood with knots, uneven texture, and aging effects will suit a kitchen in a rustic or loft style. But smooth wooden surfaces will look great in modern interiors, high-tech, especially tinted in white, black or graphite - such a tabletop will combine effectively with chrome and glass surfaces. It’s worth paying attention to options made from laminated wood – perhaps even from different species: the rhythmic pattern of the elements can emphasize the beautiful geometry of the room.
Surface preparation and painting
It is better to disassemble the table if you plan to paint all its parts. If only the countertop requires updating, then you don’t have to do this. You only need to cover with masking tape those areas that will remain untreated.
Preparing the surface for painting includes the following steps:
- Cover the floor with oilcloth or newspapers if you will be working indoors.
- Using a sander or sandpaper, carefully sand the desired area of wooden furniture. Remove any dust remaining after cleaning the table parts.
- Defective areas are leveled with putty or primer of the same color as the paint. Let the treated surface dry.
- Pour the paint into the tray and use a brush or roller to apply it to the parts, evenly distributing layer by layer until you achieve the desired effect.
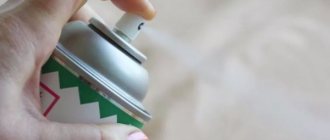
- When using an aerosol, shake the bottle first. Apply paint from a distance of 30-50 centimeters from the tabletop and legs.
- Allow the previous coat to dry before applying a new coat.
To increase the wear resistance of the paint, you can apply an additional layer of acrylic varnish on top of it after drying. 10 hours after treatment, you can remove the masking tape.
Painting works
When you have decided on the paint, you can move on to further actions. And the first is the purchase of related materials:
- painting tools: brushes, lint roller (for painting table tops) or mechanical sprayer;
- a paint bowl (in which we wet the roller);
- personal protective equipment (gloves, mask, goggles if you spray);
- wood antiseptic;
- primer for wood (to ensure better adhesion of the base and paint, plus reducing the consumption of the painting mixture).
This is the main set of materials. If desired, you can purchase a finishing varnish. And if the table first needs to be “sanded” and cleaned of the old coating, then the following are used:
- solvents and chemical cleaners for old coatings;
- metal sponge;
- a set of sandpapers with different abrasives.
The table is ready for painting.
You will definitely need rags, unnecessary newspapers or plastic film to protect the area within the work radius from accidental drops of paint. You can safely use water-based paints indoors. But if you have to work with non-aquatic animals, then it is better to remove the furniture from the room to some non-living area.
Please note that even if the packaging of the purchased paint says “quick-drying”, you should still let the coating dry thoroughly. This means that you can use the table again no sooner than in a day, or even more. This, for example, applies to water-dispersion mixtures, since water evaporates longer than organic solvents. And until the coating finally hardens (dries), it is very vulnerable.
The table prepared for painting is first treated with antiseptic impregnation. The next stage is priming. Follow the instructions for use of the products indicated on the packaging. The primer has dried, all that remains is to paint.
Decorating the table surface
The painting of the table will be decorated in an original way if you use the decorative technique of decoupage. It is important to decide on the color and pattern, which should be in harmony with the overall interior of the room. For example, an image of a geographical map will go well with the interior of an office if it is placed on the surface of a desk.
Specialized stores for decoupage sell napkins with various designs, so choosing a suitable design will not be difficult. Or you can go the other way and make the table lace using tulle. Here you need to rely on your imagination, and your table will become a piece of art.
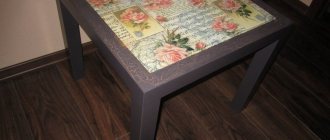
Decoupage technique in vintage style
To paint a countertop in vintage style, you will need the following materials and tools:
- sanding machine or sandpaper;
- glue (use PVA or special decoupage glue);
- aqualak;
- primer;
- varnish for a wooden table;
- decoupage cards or drawings, photographs from magazines;
- a jar of white acrylic paint or other light colors;
- fan brush or roller.
Work order:
- Using sanding, the surfaces where painting will be carried out are cleaned.
- The dust is swept away and the base for decoupage is primed.
- Paint the table white in at least 2 layers. The first one must dry completely before repainting.
- The dry surface is sanded again - first with coarse-grained and then fine-grained sandpaper.
- A layer of scuba coat is applied.
- The cut out drawings are laid out on the table surface in the required order, with their outline outlined.
- Remove the images and place them in a container of water for up to 5 minutes. Using PVA diluted with water, carefully glue the drawings to the contour areas, avoiding tearing the paper.
- After drying, you need to sweep away the dust from the table and apply several layers of acrylic varnish, being sure to let the previous layer dry.
The work must be done carefully and consistently. Be especially careful when gluing wet pictures so as not to damage them.
Decorating with tulle
You can paint the table yourself and decorate it with a pattern using tulle. The work includes several stages:
- The countertop is cleaned and leveled.
- Base paint is applied to the table, which will be the main tone.
- Use masking tape to cover areas that do not need to be decorated.
- Tulle is laid evenly on top, and acrylic paint is smoothly applied from a spray can.
- Carefully remove the tulle and allow the surface to dry.
- To protect the pattern, you need to varnish the wooden table. Let it dry.
Any old table, if it is still functional, can be revived and given a chic look.
4. How practical is a wooden countertop?
How to protect wood besides using wood products?
“If you want the tabletop to last longer and maintain its appearance, follow simple rules: do not cut anything directly on the wood (perhaps only oak will withstand such violence), do not test the surface for fire resistance and heat resistance,” continues Artyom Lepyoshkin. — Very hot objects can darken wood, ash is especially sensitive. But if you spill wine or juice on the surface, just wipe it with a damp microfiber cloth. Do not use wet rags, this will cause the wood to swell.”
Andrey Lyamin-Borodin advises not to use aggressive household chemicals to wash the countertop: “It happens that drops of such a product fall on the countertop when cleaning the sink or hob. If this product contains, for example, a solvent, it can change the color of the wood and whiten it. An important rule when any stains get on the countertop is to not allow them to be deeply absorbed and, therefore, to remove them immediately. A stain that cannot be washed off can be removed by walking over the area with fine-grained sandpaper, after which the protective coating will need to be renewed.
Regarding the choice of sink - in this case it should be mortise or, in other words, overhead. Washing an under-table installation will create constant exposure to water on the edge of the tabletop, which will inevitably cause it to deteriorate. However, lovers of country style or owners of tabletops made of particularly water-resistant wood may not be bothered by this.”