How to paint furniture with your own hands so that it turns out good, not bad. Furniture maker tips
Furniture is bought to last for several years, but it becomes obsolete
much faster than it wears out physically.
You can update your closet, chairs, shelves, racks or kitchen facades with your own hands
- just repaint them.
There are a large number of specialty paints available today. Most often, furniture pieces are painted in a fashionable white color to maintain the Scandinavian style, but in fact they can be repainted in any color of the rainbow.
Most frequently asked questions
If the technique of painting furniture itself does not cause any difficulties: any person can hold a brush or roller in his hands, then the choice of materials and the sequence of work often confuses people.
Where to begin
?
Is it possible to paint old furniture
?
How to do this
- just buy paint, brushes and paint?
Will this be correct
or am I missing something?
What paint should I paint furniture so that it doesn’t peel
?
These are the questions that those who decide to experiment with remaking furniture themselves ask themselves.
What paint to use for furniture
First, I will reassure the owners of old furniture who are worried whether something can be done with it. You can repaint any structure made of wood, MDF, chipboard.
Any odorless interior paint will be suitable for this purpose.
acrylic or water-based
is best .
How to prepare the base: the smoother the better
In order for the result to be flawless and similar to factory painting, you need to carefully prepare the surface - level it until smooth.
.
If the product is polished or varnished, then the layer of varnish or resin must be removed
.
To do this, you will have to work with a knife or spatula, heating the surface layer and removing it. You will have to buy special products for removing varnish (they are called “Paint Destroyer”).
After removing the varnish, you need to putty the cracks, recesses, and seams.
Then the surface is sanded with sandpaper or a sander.
th, after which the smallest dust is removed.
The cleaned surface is degreased with any alcohol or solvent.
. This will improve adhesion - the adhesion of the paint layer to the base.
And then the leveled, cleaned surface is painted. First, use a small brush to go through the corners and hard-to-reach places, then begin to paint the entire plane.
Advice. It is better to take a synthetic brush (the lint climbs less), and the roller is not foam rubber (it wastes paint uneconomically), but with lint.
Paints have such a characteristic as hiding power. The higher the coverage of the composition, the fewer layers will need to be applied.
It is important!
Each new layer of paint (primer or varnish) is applied only after the previous one has dried!
Should I use a primer?
If you want to achieve an ideal result, prime the base
. This will reduce material consumption (this is especially important if expensive imported paints are used).
And finally. Every housewife can transform the interior by painting the furniture a new color. You just need to want it and put in a little effort.
If the article was useful to you, please like it!
How to fix minor defects
To restore and repaint old furniture, it must first be disassembled. The more individual elements you have, the easier it is to work on particularly hard-to-reach areas.
If you are going to paint furniture yourself for the first time, then paint with a roller rather than a brush, so you can cover the desired area more evenly.
All damage and dents are puttied and cleaned. You can apply an additional layer of antiseptic to prevent the formation of mold and mildew. If you do not plan to paint the product, but only varnish it, buy transparent putty. It will not stand out against the background of the entire wooden surface. To correct defects, work in thin layers, which must dry well.
It is better to apply putty several times than to create a dense layer that will take a long time to dry and possibly become deformed during the painting process.
Preparing the base
You can remove the old coating from a chest of drawers in various ways: using washing liquids or a hair dryer. Both options are quite effective.
Using flushing fluids
To remove old coating from the wooden surface of a chest of drawers, it is convenient to use removers. This may be the well-known drug Antikras-Universal. The optimal temperature for working with the composition is from 8 to 25⁰C.
To remove grease, it is necessary to treat the surface with a solvent, and to remove dirt, it is enough to rinse thoroughly with water. After cleaning the surface from dirt, treat it with a remover, then leave for 5–15 minutes.
When the paint begins to bubble and crack, you can begin to remove it. To do this you will need a metal spatula. Old paint must be removed within 2.5 hours. Otherwise, the remover will dry out, making it difficult to remove.
After the paint is completely removed, re-treat the work area with solvent.
Many substances are highly toxic or have an unpleasant odor. Do not forget to use personal protective equipment and ventilate the room well.
Using a hair dryer
In order to get rid of paint using a hair dryer, you need to heat the paint layer, moving from bottom to top. Due to the hot air, the temperature of the paint will increase and it can be easily removed with a spatula. This must be done with a hairdryer until the surface has cooled down.
Putty
After you have cleared the chest of drawers of old paintwork, it’s time to start puttingty. Wooden furniture often contains cracks, fallen knots, chips and other damage. Such defects must be puttied, otherwise after painting the chest of drawers they will come out. Acrylic putties are best suited, and they can be applied using a rubber or steel spatula.
Grinding
After puttying, the surface will have various types of unevenness and roughness. For this reason, sanding is necessary to remove visible imperfections. Sandpaper No. 160–200 is suitable for this. If possible, it is put on a grinding machine, and if there is not one, then the surface is leveled manually.
Preparing a chest of drawers for restoration
During use, the coating of any furniture becomes dull, cracks, or even peels off from the surface. It becomes ugly and ceases to perform a protective function. If you do not intervene in time, the deeper layers may be damaged, and the chest of drawers will be hopelessly damaged.
It is quite possible to restore your favorite piece of furniture with your own hands. Restoration work begins with preparation. First of all, you should dismantle the old fittings and put them aside. Subsequently, it is screwed into place or replaced with a new set.
Then they begin to remove the old coating. It is extremely important to complete this step without damaging the surface of the wood. Despite its worn appearance, the paint can stick firmly in some places, so you will have to use auxiliary means to remove it. There are two proven methods that help you easily get rid of old coating:
- Chemical. You will need a universal paint thinner, which is sold at a hardware store. The solvent is applied to the surface and left for 10 minutes. When the old coating begins to bubble, remove it with a spatula, being careful not to scratch the wood. The period of action of the solvent is limited to 2.5 hours, so you need to have time to clean the chest of drawers during this period of time. If the piece of furniture is large or has a complex topography, then it is better to apply the solvent in stages to different areas. The product has a pungent odor and contains caustic components, so you need to wear gloves and a mask when working.
- Thermal. Before removal, the chest of drawers is heated with a hair dryer. A stream of hot air is used to treat surfaces from bottom to top. In the heated area, the paint will soften and it will be easy to remove it with a spatula. You should work quickly, without allowing the wood to cool.
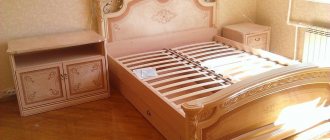
The purpose of the chest of drawers and its color
When choosing a design for a chest of drawers, it is important to consider in which part of the house you will place it: bedroom, living room, children's room or dining room.
Bedroom furniture should have many drawers of different sizes; such models are presented in abundance on the Ikea website. As a rule, the upper compartments are small and are intended for storing accessories and linen. The lower ones are more impressive and can accommodate bedding. If you attach a mirror to the tabletop, you can combine the chest of drawers with the dressing table.
It is better to choose calm pastel colors for this piece of furniture for the bedroom. These colors can be: beige, soft pink, white, milky, cream.
Chests of drawers for the living room have more of a decorative function. Such furniture is decorated with beautiful carvings or all kinds of inserts made of leather, rattan and even precious metals. The color palette should match the overall design of the room.
If the chest of drawers is intended for the kitchen, then models with opening doors and drawers are best suited. The color should be in harmony with the rest of the furniture in the room and the tone of the walls.
For a child's room, a chest of drawers with large drawers is suitable, in which you can put toys, books, pencils and all the accessories necessary for a child. This time you can experiment with the palette.
Painting of chipboard and plastic products
Restored furniture is not always made of wood. It can be made of chipboard or plastic.
To paint chipboard furniture, follow the same steps as for wooden furniture:
- removing old paint;
- putty;
- grinding.
You will have to apply paint to the chipboard surface in several layers to obtain an aesthetic appearance of the object.
Plastic products are best coated with acrylic paints or other water-based dyes. Brushes should be of good quality. It’s better to overpay and achieve the desired result than to save money and end up with damaged furniture, the surface of which will be covered with brush hairs.
Features of working with chipboard, laminated chipboard and MDF
Unlike solid wood, chipboard is usually covered with melamine film (chipboard is obtained). MDF has a denser structure, so it is not always laminated. There are two ways to repaint this type of surface. In the first, less labor-intensive, the laminating coating is not removed, but simply sanded. Then it is treated with an acrylic primer of a suitable shade and, after it dries, it is painted with acrylic-based paints and varnishes over the laminated layer.
This method is attractive in its simplicity, but is only suitable for furniture with intact coating. In addition, there remains a risk of film peeling after restoration, so this method cannot be called the most reliable.
The second method, more complex, consists of the following steps:
- removing the film (warming the surface with a hair dryer will help make this procedure easier);
- cleaning of adhesive residues (carried out by sanding);
- sanding (it should be done immediately before painting, and not long before it);
- degreasing (wipe with acetone, alcohol or a special anti-silicone agent);
- priming (for these purposes you will need a primer for MDF and chipboard, which allows you to seal the pores in the canvas well);
- painting (carried out in stages, in several layers).
This method guarantees long-lasting results. The photo shows a chest of drawers made of chipboard, processed in Provence style, painted with white enamel.
Painting furniture with acrylic paints
If you decide to repaint the chest of drawers with acrylic paints, then you need to choose the right tool. You can paint furniture with either a roller or a brush designed for working with such paints. It all depends on personal preference.
When going to the store to buy a tool, you should remember a few rules:
- choose only high-quality tools;
- To thoroughly paint furniture parts, you may need brushes of different widths.
- Even if you decide to work with a roller, it is better to handle small parts with a brush.
Before starting the process, the surface must be coated with a primer. Acrylic-based compositions are best suited. When choosing a material, you need to pay attention to three points: drying time, surface area to be treated and color, which should match the tone of the paint.
Apply the primer in a small layer and be sure to let it dry. After this, you can begin applying acrylic paint.
Benefits of painting
Using staining, you can quickly and effectively decorate old furniture. This process can easily be done independently at home, and the following is possible:
- choose the desired color scheme;
- perform quality work;
- the finished furniture will match the general style of the room;
- During the operation of the table, you can change or supplement the decor.
Therefore, to paint a table with your own hands, you only need to use your imagination.
( 2 ratings, average 5 out of 5 )
Furniture varnishing
If the chest of drawers was made of solid wood, then its surface can be varnished in several layers. You should choose the coating responsibly; the result of the work will depend on it.
There are special varnishes designed for working with furniture. You should not take shiplap varnish or the one intended for the floor. These compounds can ruin the appearance of a piece of furniture.
There are two types of varnishes: water-based and solvent-based. It is better to choose the first option, as it does not have an unpleasant odor. This makes it possible to work without personal protective equipment. In addition, these compounds dry quickly.
How to choose the right paints and varnishes
The modern market offers the consumer a wide variety of paint and varnish coatings. How can an ordinary person understand the characteristics?
In order for the painting of a chest of drawers to be successful, and the result to please the owner for a long time, you need to choose dyes that are resistant to abrasion and mechanical damage. Oil or enamel coatings have these qualities, which are not suitable for restoring a chest of drawers. But, the best option would be acrylic compositions.
They have the following characteristics:
- no pungent odor;
- harmlessness;
- optimal price;
- ease of use;
- the ability to change color using tint;
- can be diluted with water.
Unusual ways
By showing ingenuity, imagination and creativity, you can decorate the chest of drawers beautifully, unusually, individually. The result of your efforts will be an original item that has no analogues.
Idea No. 1: Flower meadow
This design will fit perfectly into a bedroom or the interior of a country house.
To work you will need:
- wallpaper with large floral print;
- furniture handles made of glass or acrylic;
- pencil;
- ruler;
- scissors or stationery knife;
- transparent PVA glue.
From a sheet of wallpaper you need to cut out a piece with an allowance of 10 cm. Glue it to the front of the chest of drawers, tucking the edges inward. To avoid swelling of the wallpaper and the formation of wrinkles, the sheet must be carefully smoothed with a dry cloth or a special spatula. When the surface is dry, coat with clear acrylic varnish.
After waiting for the inside to dry completely, carefully make a hole for the handle. In the same way, you can glue linen or cotton fabric to a wooden surface.
Idea #2: Stencil Lettering
This chest of drawers is suitable for laconic interiors and children's rooms.
To work you will need:
- stencils with letters;
- light paint for wood;
- brushes
After painting the chest of drawers, you should wait until the color dries completely. Then apply the stencils to the surface, draw letters and words in a contrasting color. To secure the effect, coat the top with clear varnish.
In order to turn an old chest of drawers into an interesting interior element with your own hands, no special skills are required. The main thing in this matter is patience and creativity.
How to paint an old chest of drawers white
Most people can easily paint wood furniture, but have difficulty when trying to freshen up or change the color of already painted furniture. This old chest of drawers would fit perfectly in the hallway, if not for the dark stained wood and terrible handles. After cleaning it, painting it and changing the handles, the dresser looked like new.
Paint Primer Two brushes Two rollers Two paint trays Masking tape Newspaper Sponge, soap and water Sandpaper Wet cloth New pens Screwdriver *Note: We liked the semi-gloss finish, although it doesn't hide some surface imperfections that would be hidden well by a matte finish. If your furniture has a heavily scratched surface, we recommend using a matte finish.
First, wash the furniture with soap and water. Wait one to two hours for it to dry completely. Lightly sand the surface. We skipped this step because the surface was already quite worn. Use a damp cloth to remove any remaining dust. Wait until it dries. Remove all drawers and doors. Use a screwdriver to remove handles, hinges, door hinges, etc. Use masking tape to separate the areas you will not paint. If you're remodeling a cabinet with drawers, leave the sides of the drawers and the inside of the cabinet unpainted. If they are painted, the drawers may not fit freely when you put the cabinet back together and will not slide freely. Lay newspapers on the floor to avoid getting paint on them. Add some primer to the first paint tray. Use a brush to apply primer to the corners that the roller cannot reach. Using a roller, apply a thin layer of primer to the rest of the surface. If you use too much primer, uneven surfaces may appear when it dries. Wait a few hours for the primer to dry. In a warm, dry environment this will happen faster. In damp, cool conditions it will take longer. The dried primer is non-stick and should be smooth. Add some paint to the second tray. Use a second brush to apply paint to the corners. Using the second roller, apply a thin layer of paint to the remaining surface. Here, too, try not to overdo it. After a few hours, the painted surface should become smooth, dry, and not sticky. Apply a second coat of paint (repeat steps 11-13). Once the item is coated with one coat of primer and two coats of paint, you are almost done. Usually two coats of paint are enough, but you may need a third if you applied particularly thin layers or the surface is very damaged. Once everything is dry, install the new handles. Reinstall drawers, hang doors. All is ready!
DIY decor: 3 new faces for an Ikea chest of drawers.
Once in my life (4 years ago) I had the opportunity to upgrade a simple wooden chair from Ikea - as part of my participation in a decorating competition. Since then, the topic of modifying the furniture of this company has been haunting. In my opinion, it is good not only for its combination of affordable prices, wide range and modular variations, but also because there are very simple and cheap models made of natural wood. If you apply your imagination and a little effort to it, you can get a piece of furniture with a number of obvious advantages:
firstly, it still remains a natural, environmentally friendly piece of furniture; secondly, this will not happen to anyone except you; and thirdly, you can proudly say: “author’s work.” The author, of course, becomes you yourself. And create the design absolutely according to your wishes, adjusting it to the chosen interior style. To clearly show how this is possible, today I will show 3 options for transforming one simple chest of drawers - in all the details.
This theme can be developed further, and “dress up” tables and chairs, cabinets and shelving. But let's start with the chest of drawers: it has quite a lot of surfaces and fittings to allow your imagination to run wild. If you think this item is too difficult, try it first on a mini-nightstand
Repainting the chest of drawers
Prep work is especially important when painting a chest of drawers. Take your time, otherwise you will make mistakes. To begin, carefully remove all the drawers using a screwdriver and empty all the drawers. It will be much easier to work with the chest of drawers if it is not loaded with things.
If your dresser has a smooth finish and is in good condition, don't be afraid to skip this step if you're using chalk paint. However, if you want to smooth out some rough edges, use a medium-grit sanding block.
So, let's start painting the chest of drawers. Follow these step-by-step instructions:
- Clean the dresser and let it dry. Removing dust and debris from the surface is the most important step during preparation. Dust gets stuck in the paint and compromises the finish. Use a damp, lint-free cloth to wipe down the dresser. Heavier stains and dirt can be removed with vinegar and water.
- All paints work a little differently. Read the paint instructions. Since we are using chalk paint, we will need to add a tablespoon of water to thin the paint to the desired consistency before painting.
- We recommend using a roller on large areas to avoid visible brush strokes. The roller will provide a smooth surface on large areas (fronts and sides of drawers). If you use a brush, just make sure it's a high quality one so there's no bristles left in the paint.
- Unfortunately, not every area of the dresser can be painted with a roller. Use a quality brush and fill in the unpainted areas.
- Let the paint dry completely before moving on to the next step. Depending on the paint used, you may need 1-3 coats of paint.
- Wait 48 hours before continuing.
- For latex and oil paints, it is not necessary to apply a topcoat over the top of the dresser. But for chalk paint, the wax finish is an important finishing step. Use two different waxes: clear and dark. Use dark wax on details and edges. Transitions should look smooth.
- Ready!
Follow these easy step-by-step instructions and you can quickly and easily transform your chest of drawers.
We paint old furniture white or give life to unnecessary things
Often an old chest of drawers, chair, table or cabinet made of solid wood is very dear to us, like a memory. It’s a shame to throw them away, and they no longer fit into the new interior. Therefore, the task is to update it. How to paint furniture at home?
I suggest the most elegant, fresh color is white. Painting furniture is a great way to extend the life of old furnishings and equipment and give them new life.
For example, white distressed furniture can be finished in such a way that it looks very stylish. You will need to process the furniture in two stages:
- whitening;
- light sanding with sandpaper.
Wooden products made from solid wood are best suited for this purpose: oak, pine, birch, beech.
To work you should prepare:
- dark dye and white acrylic paint or two colors of acrylic paints;
- white wax candles;
- brushes;
- coarse and fine-grained sandpaper;
- textile;
- knife.
- Clean the surface of the chest of drawers or chair from dust, wipe it several times with a damp cloth and leave until completely dry.
- If the surface is painted, you need to remove the varnish layer with sandpaper (first coarse and then fine-grained).
- Places that you want to highlight: carved decorations, slats, edges, should be covered with darker paint (brown and blue shades are ideal here). Leave the paint to dry.
- To get an uneven and natural effect of worn corners, wax the areas previously painted with dark paint. The wax will make it so that the next coat of paint will not adhere tightly to these areas.
- Cover the entire surface with white paint, preferably several times, with breaks to dry. Avoid stains.
6. Areas covered with an additional layer of paint and wax should be rubbed with a knife. Don't press too hard - this way you will get a good effect.
7. Rub the entire surface with fine sandpaper to level the surface.
Whitening with whitening paste
Bleaching using a bleaching paste consists of rubbing the wood with a special paste containing wax and pigment. The wood surface will develop distinctive white lines, making it look older. Porous wood is suitable for such bleaching - trees such as oak and ash.
You need to buy in the store:
- special paste,
- prepare paint in the chosen color,
- metal brush,
- hard brush,
- textile,
- a piece of coarse and fine-grained sandpaper.
- Wipe the clean surface of a chair or chest of drawers from dust several times with a damp cloth and leave until dry.
- If the surface is painted, you need to remove the varnish layer with sandpaper.
- Paint the surface with paint and let it dry.
- Using a wire brush on the wood, make tiny grooves according to the grain orientation.
- Apply the whitening paste, fill the grooves well and wait for the paste to dry.
- Wipe the surface with a dry cloth.
- Cover the surface with varnish.
Express whitening
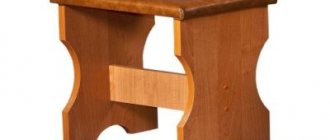
If you want to give a simple wooden stool new life, you can do it with a washed-off white paint effect. Nothing could be simpler.
- Rub the wooden surface with sandpaper.
- Using a brush, apply a coat of paint.
- When the paint dries, remove excess paint with a napkin.
- Coat the wood with varnish.
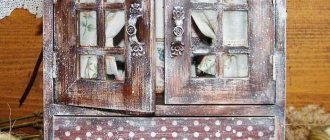
Work order:
At first I wanted to paint it like this without removing the door, then I realized that it would be inconvenient. So I took a risk. and took it off. It turned out not to be difficult. True, worries about how to put them back on were present until the last moment. In the end, I also screwed it myself; I didn’t have the patience to wait for my husband))).
I pulled out the built-in lights and wrapped them in a suspended state with masking tape. The same tape was used to protect the walls on the sides of the cabinet, the floor, and the mirrors on the doors. Prepared the workplace. I decided to paint it. on the bed)))! I covered it carefully with polyethylene. And I have never regretted this choice. The bed was large and high, everything fit, there was no need to bend over and crawl on all fours. I prepared approximately equal stacks of books and wrapped them in cling film. They are needed as substrates so that the doors can be lifted and painted as if suspended; the painted edges will not come into contact with a flat surface.
Stage 2.
I sanded all surfaces that needed to be painted. It is necessary to sand lightly, without fanaticism, with the finest sandpaper. Light circular movements. Purpose: to create roughness without removing the laminated layer. If there are dents and scratches, they should be filled with putty at this stage. After sanding, thoroughly wipe all surfaces with degreaser. It will remove dirt, grease marks, and everything that can disrupt the adhesion of the primer and paint.
Stage 3.
Primer. I went through hard-to-reach places with a brush, the rest with a roller. A thick layer is absolutely not necessary; it must be covered with primer without drips and in a thin layer. Uneven coloring is not a problem, but there should be no gaps. I didn’t prime the rattan inserts; the paint applied well to them anyway.
They are easy to paint - just roll them with a roller; with a brush it is more difficult not to go beyond the edges. Wipe off any blemishes immediately with a cloth. Each layer was dried, as recommended, acrylic dries in an hour and, in principle, you can carefully turn it over and paint the door on the other side.
Stage 5.
I assembled the closet. I screwed the doors and handles. I removed the masking tape and cleaned everything up. At first I planned to keep the doors open for two days, I was afraid that they would stick. Nothing like that - you can close it right away.
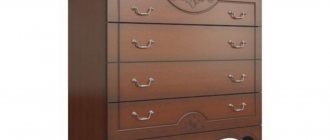
Dresser.
Mirror.
Important!
Acrylic paints dry quite quickly “touch-free”, but polymerize for at least a month; with a primer the process can take even longer. The painted product can be used almost immediately (or it’s better to wait 2 days) and even wiped with a damp cloth. But within a month, the coating remains very vulnerable; it must be handled carefully, not scratched or rubbed with force. If shelves or horizontal surfaces are painted, then it is better not to immediately place things on them that may “stick”, wait until the paint “sets”. Although I immediately put everything I needed on the chest of drawers, nothing stuck).
Here you go. The work is labor-intensive, but I was pleased with the result. The paint job ends up looking no worse than the factory paint, no brush marks are visible. It holds up well too. I haven’t tried scratching, I use the furniture as usual. But usually I don’t scratch it))). Although I will conduct an experiment in a month. The room has been pretty updated). Alas, the photos after compression leave much to be desired; in fact, the colors are brighter and cleaner, but this is not so important.
If you also want to redo furniture and have questions, write and I will answer. And if such a rework seems complicated to someone, I assure you that it is not, labor-intensive - yes, but quite doable without any experience. You can just start with internal, unnoticeable parts, or with small furniture, a chair, for example. The rework took three days. At the same time, I managed to cook and... suffer from bronchitis + my leg is still slightly lame after the cast. The “disabled painter” was able to paint, which means you can too))).