10302 0 0
Icer March 27, 2018Specialization: master in the construction of plasterboard structures, finishing work and laying floor coverings. Installation of door and window units, finishing of facades, installation of electrical, plumbing and heating - I can give detailed advice on all types of work.
Today we will figure out how to assemble a reliable cabinet for an oven and hob. Almost anyone can do the job, the main thing is to have the necessary materials and tools at hand.
Assembling a simple nightstand for a hob and oven is not difficult
Blueprints
In the accompanying documentation, manufacturers usually indicate the dimensions of the built-in oven and hob. If one is not available, take a tape measure and a ruler and measure the equipment yourself. Write down the data on a separate sheet.
Find a drawing of the cabinet on the Internet. Print it on a printer. Compare the dimensions on the plan with your measurements. Usually the standard dimensions are the same. Otherwise, adjust the cabinet dimensions to fit your equipment.
Expert opinion
Alexander Didenko
Furniture assembler at Mabaks
You must understand that if the height, width and depth of the cabinet opening in the drawing are larger or smaller than your oven, then you need to add or reduce the dimensions of the cabinet parts accordingly. After adjusting the dimensions, draw your drawing. When calculating the dimensions of the planes, take into account the thickness of the adjacent parts.
Diagram of the structure of a standard oven cabinet
What are the benefits of built-in designs in the kitchen?
When choosing a principle for arranging a room, you need to carefully weigh all the pros and cons of different options for furniture and equipment, as well as their layout. This also applies to choosing the type of oven. The quality of the oven does not depend on whether it is built-in or a free-standing unit; both types have the right to exist.
Gas oven
However, integrating an oven into a set has undoubted positive features.
- There is an opportunity to save usable space.
- The appearance of a set with built-in appliances is incomparable with a setting consisting of separate modules; such kitchens look modern, elegant and aesthetically pleasing.
- For housewives, a work triangle area is competently organized, ensuring the convenience of the cooking process and subsequent cleaning.
- Creating a single work surface that has no gaps helps get rid of excess dirt and makes cleaning easier.
- The oven and hob can be fixed at different, easy-to-use levels.
- In built-in modules, it becomes possible to combine the installation of equipment, a variety of equipment, with various storage systems.
Built-in oven
The use of built-in structures also has some disadvantages, which for some seem quite serious.
- An important point is that the cost of sets of such furniture is much higher than traditional versions of sets.
- The installation and dismantling of equipment built into furniture modules is quite labor-intensive. Therefore, if you want to rearrange or replace a failed device, problems may arise.
Material
It is important to determine what you are going to assemble the cabinet from. For the manufacture of kitchen furniture, laminated chipboard sheets (LDSP) are usually used. But I recommend taking MDF. This is somewhat more expensive than laminated chipboard, but the modified boards are covered with a more durable and heat-resistant film.
For side racks and drawers, a sheet thickness of 10–12 mm is quite suitable. For shelves, due to the high load, it is better to take 16 mm sheets. Having different thicknesses of material in your workshop will save money. Otherwise, it is better to purchase sheets with a cross section of 16 mm.
Advantages and disadvantages
Built-in oven for convenient and comfortable use in the kitchen
Let's take a closer look at the pros and cons of different types of oven boxes. To begin with, it is worth noting that the design of a separate built-in oven has the advantage of ease of use, design, and freedom of placement.
Kitchen with an original design with a built-in hob and oven
Location of the structure in the cabinet under the hob
Oven built into the cabinet in a classic location - under the hob
Pros:
– creating a common surface for cooking;
– suitable for people of any height;
– preserving the appearance of a standard stove with oven (for lovers of the classics).
Minuses:
– the need to constantly bend over while cooking;
– inconvenience when cleaning the oven;
– there is a high probability of damage to the electronic mechanism due to the ingress of large amounts of water from the stove during cooking.
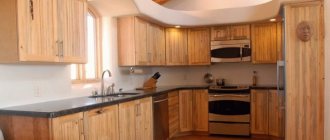
Wooden kitchen with stove and oven in the corner
Placing the oven in a pencil case also has its advantages and disadvantages
Built-in oven at a convenient height for the hostess, located in the cabinet-pencil case
Pros:
– location at chest level reduces the load on the back during work;
– ease of care due to location;
– the ability to choose sizes to suit any height;
– gives the kitchen a new modern look.
Flaws
The only drawback of this design is that, being quite high from the floor, it requires additional reinforcement. When installing, you must ensure that the lower horizon is firmly positioned. Otherwise, the oven may collapse on the housewife’s feet while preparing dinner.
Exquisite kitchen in English style with appliances built into the cabinet
Parts calculation
Based on the drawing, determine the dimensions of the furniture parts. Let's take a standard example:
| № | the name of detail | Quantity, pcs. | Size, mm | Material |
| 1 | Sidewalls | 2 | 704x560 | MDF |
| 2 | Bottom | 1 | 600x560 | — |
| 3 | Oven base | 1 | 568x560 | — |
| 4 | Tabletop | 1 | 600x560 | — |
| 5 | Back wall | 1 | 550x129 | LDVP |
Separately, we fix the dimensions of the box parts:
| № | Drawer parts | Quantity, pcs. | Size, mm | Material |
| 6 | Side bars | 2 | 560x90 | MDF |
| 7 | Cross members | 2 | 518x90 | — |
| 8 | Facade | 1 | 129x600 | — |
| 9 | Bottom | 1 | 560x518 | LDVP |
Marking, cutting
After laying the MDF sheet on a workbench or on a clean floor, transfer the markings from the drawing to the slab. To do this, it is better to use a measuring rod or a long ruler. Use a square to draw perpendicular lines with a pencil. Double-check all marking dimensions before cutting.
If you do not have experience with a jigsaw, then do not start cutting parts right away. Practice on unwanted pieces of chipboard. Achieve precision cutting and only then start cutting cabinet fragments. The work requires extreme precision, otherwise you can simply ruin the material and have to buy a new MDF sheet.
How to make it yourself
If you have free time, simple tools and skills in working with wood, it is quite possible to make an oven cabinet with your own hands. You can assemble a box from scratch in just a few hours, and this solution involves spending less money.
Before starting work, you need to prepare the necessary materials and tools. The walls can be made of simple plywood; for the bottom and tabletop it is better to choose a denser material, for example, MDF or natural wood. If the design is equipped with a drawer, you must immediately buy a set of guides that match the size. To increase the safety of using the oven, the drawer should not be placed on the floor, but on plastic furniture supports. You need to complete everything you need with self-tapping screws, a screwdriver, a saw, a tape measure, and a level.
First of all, you need to accurately calculate the dimensions and draw up a drawing. It is imperative to provide a place for ventilation so that the equipment does not get hot and does not create a danger for people and nearby furniture. At the next stage, plywood and wood are cut into pieces of the required size, the parts are twisted with screws and guides for the drawers are installed.
Tool
To assemble the oven cabinet you will need the following tools:
- jigsaw for smooth cutting of chipboard without burrs;
- clamp for fixing parts;
- tape measure and square for marking holes for fasteners;
- screwdriver;
- screwdrivers;
- confirmat drill (countersink) and driver for installing euroscrews (confirmat).
Countersink, Euroscrew, plug and knob
Preparatory work
To make furniture, it is advisable to have a workshop. You can use a large table in a free room. Make sure there is an outlet within walking distance to connect power tools and stock up on an extension cord. Organize your workplace lighting correctly.
If you are going to make a closet in a non-residential area, then take care of heating in winter and forced ventilation in hot summer. Large window openings will save energy consumption during the daytime. A workbench equipped with stops, sockets, vices and clamps will be a good help for assembling the cabinet.
Tips for choosing
Choosing an electric oven with dimensions for the box
When you decide to buy a built-in oven, you need to pay considerable attention to the cabinet in which it will be located. You can purchase it together with an oven, however, they are often sold without a box included. In this case, you will need to select it yourself. What to look for when purchasing?
First of all, you need to know the exact measurements of the oven. The height and depth of the box should be 15-20mm larger for normal air circulation. In this case, the difference should not be greater, otherwise difficulties will arise during mounting and installation.
Installation and connection of an electric oven
Take care of electrical wiring in advance. Where the oven is installed, a wire outlet must be provided in advance, because this type of design does not have a plug, but requires a direct connection to the electrical network.
When choosing a box, make sure there are strips that strengthen the horizon.
White kitchen with a ready-made box for built-in white appliances
It is also worth paying attention to the cabinet design and colors so that it fits harmoniously into the existing kitchen decor.
Kitchen with built-in appliances that are ideal in color and size
Step-by-step instructions for assembling an oven cabinet
When the pieces of the cabinet are cut, start making the cabinet:
- Glue the ends of the parts that will be visible with end tape using an iron.
- On the sidewalls, mark the holes for confirmations and dowels.
- Use a drill to drill holes for the dowels.
- Using a confirmation drill, make sockets at the junctions of the side posts with the horizontal panels.
- Attach ball retractable consoles to the sides.
- Screw in the confirmations with a crank, connecting all the fragments into a single body.
- Close the Euroscrew heads with plastic plugs.
- On the back side of the cabinet, nail the HDF strip into the drawer compartment.
- Screw the legs to the bottom of the cabinet.
Tabletop installation instructions
- Place the bottom of the hob on the top surface of the countertop and trace its perimeter with a pencil.
- Drill several holes along the edge of the marking so that they do not extend outside the contour. They are needed for the starting movement of the jigsaw blade.
- Use a jigsaw to cut out the opening for the hob console.
- Place the tabletop on top of the dowels at the ends of the sidewalls. Don't forget to pre-lubricate the wooden dowels with PVA glue.
Built-in oven dimensions
If you do not have the opportunity to install a full-fledged gas or electric stove, but you like to cook in the oven, you will definitely be interested in a built-in oven. But when choosing, in addition to the functions existing in it, you need to pay attention to its size. We will tell you in what range they are in this article.
Dimensions of built-in ovens
As with all built-in appliances, the size of the oven is not the least important, since a separate shelf or niche will be made for it in advance. Less often they look for equipment that already fits into the free space in the furniture. And since, unlike refrigerators, such a cabinet does not require wide gaps, this will help to significantly save space in the kitchen.
The standard dimensions for built-in gas and electric ovens are 60x60x60 cm. Anything smaller in width refers to narrow models, and anything wider refers to wide ones.
Which cabinet you should choose depends largely on the number of people for whom you will need to constantly prepare food. After all, models of standard sizes are quite enough for a family of 5-6 people. For a small family (2-4 people), an oven with a width of 45-55 cm is quite suitable. And if it has a microwave function, then it will replace your microwave. Models with a width of 60-90 cm are necessary for a large family. Cabinets with a width of over 90 cm are more suitable for restaurants and cafes.
There are also models with different heights of 45 cm and 60 cm. Due to this, you can also save space in the kitchen. After all, if you take a wider one, but with a smaller height, then you can still cook large dishes and make an additional shelf below or above.
When choosing the size of a built-in oven, it is better to take it the same size as the hob, then they will look more organic in your kitchen.
Preliminary points
Hobs and ovens are available in gas and electric. Connecting equipment to the gas supply network requires the permission of a professional gas technician. Therefore, we will only touch upon do-it-yourself installation of electrical equipment.
Installation of the electrical connection point
First of all, the outlet should be located in close proximity to the cabinet. The open rear opening of the cabinet allows you to easily install the electrical connector on the wall at the back of the furniture. Since two pieces of kitchen equipment are quite powerful, install a socket with two sockets and grounding.
Hobs and ovens are not equipped with plugs. Therefore, decide for yourself whether to make an outlet for them. At home, I connected the panel cable in parallel with the oven to the power supply from the entrance through the terminal blocks. There is a separate 32 A circuit breaker in the entrance panel for this line.
Preparing the wires
If the three-wire cables of the oven and hob are not equipped with connectors, then you need to connect plugs with grounding terminals to them. The length of the wires must be such that it is possible to connect the equipment before installation and check its functioning.
Oven and stove connection diagram
Narrow and wide
Models for domestic use with a standard height (60 cm) can vary significantly in width. The narrowest of them are 45 cm. Such stoves usually have only basic functions, but they can be placed in a compact vertical module, such as a side cabinet, at tabletop level. A convenient option, especially relevant for families with small baking needs.
Despite its small size, the Maunfeld MEOXN.376RCC.TA oven costs about 50 thousand rubles
Wide ovens (up to 90 cm) are powerful, expensive devices capable of operating in a wide range of modes (12 or more). To install such a stove at the level of the working area, you will need a fairly large frame. Therefore, they are most often located in floor cabinets, below the countertop, under the hob.
Hob installation
The manufacturer usually includes metal sealing springs, as well as heat-resistant double-sided tape or special plasticine in the delivery package. If there are none, then apply a line of silicone sealant along the edge of the opening in the countertop. Vyacheslav Gerasimov uses several layers of PVA glue instead of sealant. Watch the video for more details.
After this, thread the wire and plug into the opening and connect it to the outlet. Carefully lower the hob console. Use a damp cloth to remove any remaining silicone from the countertop. The stove is ready for use.
What should be the size of a niche for a built-in oven?
Hello.
This short article is an answer to frequently asked questions from beginners (such as how to attach the tabletop to the lower base, how to cut a hole in the tabletop for a sink, and so on).
Normal questions from people who want to understand the production of cabinet furniture.
So, what should be the niche (meaning its dimensions) for a built-in oven?
To answer this question, let’s highlight the main points related to designing a box for an oven:
- Such a box is designed only for a tabletop of a standard size, that is, the depth of which is 600 millimeters. Accordingly, the depth of the box itself should be in the range of 460-520 mm (do not forget that often a drawer is designed under (above) the oven, which, of course, is mounted on a guide having certain dimensions.
- The cabinet strip (if it is being designed... it is better, of course, to design it) should be shifted relative to the upper edge of the side of the box by 10mm downwards, since the hob often crashes into the countertop (above the oven). And it can be different in depth. And if, for example, it crashes into a 28mm thick tabletop, it can “protrude down” a little beyond the dimensions of this tabletop.
- The width of the box for the oven should be 600 millimeters (accordingly, the width of the opening itself is 568 mm).
- Well, the opening itself (in height) for the oven should be 600mm. Almost all ovens (you don’t need to take my word for it, of course, check the dimensions in the data sheet for this appliance) are built into a niche of this height (even the height of the opening can be 595mm, but I like to play it safe in this matter and always make it 600mm) .
In addition to all of the above, do not forget that the wall behind this appliance (or rather, the section of the wall (projection of the cabinet onto the wall) behind the oven must be clean (there should be no sockets, pipes, etc.).
Expert advice
To ensure that the cabinet sits against the wall, make cutouts for the baseboards at the bottom of the cabinet sides. Leave a few millimeters of clearance for natural ventilation of the cabinet interior.
If you can’t make an even cut of an MDF sheet with a jigsaw, then go to a construction hypermarket. There is usually a department for cutting chipboard and MDF panels. According to your drawing, they will cut the cabinet parts and glue the ends with polymer tape.
To store heavy kitchen utensils (frying pans, pot lids, etc.), it is better to assemble a box with a bottom made of more durable materials than HDF. Use a sheet of plastic or aluminum. Do not fasten it with screws. Use a router to cut grooves around the perimeter of the sides of the box and insert the bottom into them.
Types of oven cabinets
Built-in appliances are relevant for kitchens of any size. However, the dimensions of the kitchen influence the choice of furniture for household appliances. Regardless of the type of headset, all boxes, depending on the installation location, can have different shapes: standard (rectangular), corner (triangular, trapezoidal).
There are two main types of furniture modules for autonomous ovens: floor cabinets and pencil cases. The first option is the most common. In this case, the oven is located under the hob. The second model is more convenient to use and allows you to place the unit anywhere.
Cabinet
The floor cabinet allows you to position the oven in several ways. Many people prefer the standard version and install the unit under the kitchen countertop. This design allows you to create a common area for cooking, as in the case of using a freestanding stove. This option is most suitable for a compact kitchen where there is a shortage of work surfaces.
The box installed under the countertop can have a drawer located either below or on top of the unit. The distance from the floor on which the oven may be located should not exceed 20 cm. This statement does not apply to high cabinets, which are often installed on the edge of the kitchen unit. They may have doors, niches, shelves in which you can store various items and devices.
Among the main advantages of using bedside tables are the following:
- Saving free space.
- Easy access to equipment.
- Possibility to organize the interior in classic, vintage, country style. However, it all depends on the design of the box itself.
- The presence of drawers in which you can store various things.
- When the oven is located under the hob, an analogue of a classic stove is formed.
Flaws:
- Low location. It is inconvenient to use the oven; while cooking you will have to constantly squat and bend over.
- Difficult to clean.
- There is a possibility of failure of the electronic control due to accidental ingress of water.
Pencil case
This is the optimal solution, but only for spacious kitchens with high ceilings. In a cabinet-case, the oven can be located on one of the shelves, or in a specially equipped niche. The unit can be installed at a convenient height, which allows you to cook food more comfortably. However, to use the equipment safely, its top edge should not be above eye level.
Ovens are quite heavy, so when choosing furniture, special attention must be paid to its strength. The shelf on which the device will be placed must be reinforced, and it can also be further strengthened using metal or wooden planks, filling them from below. For more reliable use of the furniture module, it must be secured to the wall.
In addition to the oven, the cabinet-case can accommodate a dishwasher and microwave. Free compartments and shelves can be used to store various kitchen utensils, food, detergents, etc. The pencil case is a universal design that has the following advantages:
- allows you to place the oven at the optimal height;
- makes cooking comfortable;
- simplifies the cleaning process;
- technology becomes inaccessible to young children;
- gives the room an aesthetic appearance.
The disadvantages include:
- the need to purchase, manufacture reinforced structures, and securely fasten them;
- furniture cannot be installed in a small kitchen.
