Common assembly errors
To assemble furniture with your own hands, you need to pay attention to some secrets and nuances that will help you avoid frequent and serious mistakes.
It is these annoying mistakes that can reduce the quality of the product, its service life, appearance, and sometimes even ruin the items. It is important to consider the following:
The first aspect that no instruction will tell you about, but which all assemblers know about, is working with an assistant. An extra pair of hands and eyes will never be superfluous; Often computer furniture is made of MDF. This is a soft material and is easy to damage
Therefore, instead of a drill, it is better to use an ordinary screwdriver; When installing the cabinet frame and drawers, it is important to check the corners. They must be strictly 90 degrees
Furniture should not be skewed. This is easy to check by level; the loops must be tightly “planted”; when attaching the back wall to the box, it is best to use self-tapping screws instead of nails; The computer desk has holes that are covered with plugs. These small parts are easily lost, so it is recommended to glue them to the surface; When using a screwdriver, you can accidentally scratch the furniture. If there is a protective film on the elements, it is better to remove it after finishing work.
Assembling computer furniture requires leisure. Strict adherence to the instructions and accuracy will help to carry out the installation work efficiently.
Use a screwdriver instead of a drill
Glue the plugs
Work with a partner
Assembly features of the corner model
The assembly of the corner type of computer desk begins with laying out all the parts, after which they begin installing the box. By connecting the lower part with the side walls and the table top, it is possible to give stability to the entire structure. Before you begin assembling the box, you need to check whether there are guides on the frame along which the rollers of the retractable elements move. After assembling the frame, they begin to install shelves and drawers.
See also
Varieties and how to choose the right bathtub, the best manufacturers
When installing a corner model of furniture, you need to take into account additional features, which come down to a few simple rules. Including:
- Without a rigid frame fastening, the entire structure will fall apart. The corners need to be fixed at 90 degrees to ensure reliability.
- Supporting partitions must be installed simultaneously with the frame. In the absence of partitions, all long horizontal surfaces will sag, creating a risk of deformation.
- After assembling the structure, you need to check the reliability of all fasteners. Furniture should stand firmly in place and not wobble.
Materials used
You can use different materials to make your own round table. This should include:
Chipboard and fibreboard are well suited to make a budget option. Despite the cheapness of this design, with proper care it will last a long time.
Using a tablecloth, you can hide the material used, and it will look no worse than a product made from natural wood.
Coniferous wood provides the opportunity to make a high-quality product at minimal cost. Such wood is easy to process and can last for a long time.
Solid wood in the form of oak or beech will allow you to make a truly high-quality product that will become the real pride of any room.
Such a table will have a decent appearance; it amazes with its massiveness and grandeur. You will have to try a little when processing this solid wood, but the result will not be long in coming.
This design emphasizes the status of the owner and his family members.
There really are a lot of options. There are also modern solutions to the issue using plastic.
How to assemble a corner computer desk with your own hands: drawings and diagrams
Do-it-yourself assembly of a homemade corner computer desk is practically no different from the option described above. The difference lies in the presence of 1 or 2 cabinets with drawers, an add-on for a monitor or documents, a large tabletop with a curved cutout opposite the user’s chair and a retractable keyboard board.
Main dimensions of a corner computer desk made of laminated chipboard
Drawings of a computer desk with dimensions and cutting of parts
The dimensions shown in the figure are approximate (except for the height and depth of the cabinets) and you can change them in accordance with your requirements and preferences. It is best to mill the tabletop and fill it with a plastic “T”-shaped edge. It will protect the ends from moisture and deformation. Also do the detailing as in the previous version with a straight table.
Sketch of a computer desk for PC with dimensions
How to assemble a computer corner desk: step-by-step instructions
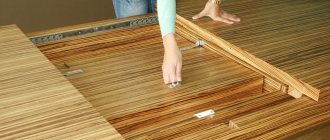
The most difficult and dusty work is cutting, sanding and milling the tabletop. First, we mark the outline taking into account the width and depth of the cabinet with drawers and the stand for the “system unit”. We make a hole in the corner of the tabletop for the cable channel. We stuff a “T”-shaped or regular PVC edge with a thickness of 2 mm around the perimeter.
Marking a corner table top
Once the tabletop is completely ready, we can begin marking and drilling the remaining parts. It is better to immediately number the parts in accordance with the detailing - this will make it much easier to assemble the table. Next we proceed according to the following algorithm:
- We assemble the drawers and install the halves of the guides on them.
Scheme for assembling drawers and installing guides - We assemble a cabinet for drawers, which consists of 2 sidewalls, a shelf, 4 ties (top and bottom) and a back wall made of fiberboard (filled last after installing the facades and connecting them into a single structure).
Dimensions for installation of roller guides - In the same way we assemble the section for the system unit.
- We make a corner support post, which we connect with wide drawers to two already assembled functional blocks.
- We attach furniture corners to the cabinets, supporting structure and drawers.
- We install the table frame at the place of use, taking into account the necessary gaps and deviations. We attach the tabletop to the structure, mark the place where the planks with guides for the keyboard board are attached, and mount it to the inner surface.
- We insert the drawers into the cabinet and check their movement. If the guides stick or knock, we check what the reason is; it may be a misalignment. We correct installation defects and if everything is fine, then we proceed to install the facades and countertops. Lastly, we fill the back wall of the cabinet with drawers.
- We assemble the monitor stand and add-ons (if provided). That's it, the table is ready and you can start using it.
Monitor stand
Drawings and diagrams
Before you start making a computer desk with your own hands, you need to make drawings and circuits. They will help you properly build a computer desk. You can make them yourself or take already prepared ones.
- How to assemble a transformer table yourself
Length
The necessary parameters of a future computer desk should be as convenient as possible for the owner of this product. The length should not be too short, but at the same time, too large a size for long furniture will be inconvenient.
Length dimensions depend on important factors:
- area of space for the owner. Many experts advise leaving a space of 60-70 cm for this;
- area for installing the system unit. A suitable solution would be to locate it in a niche, which will have a size of 22 to 25 cm. If this component element is installed along the table, then you will need spaces with dimensions of at least 26-30 cm;
- the presence of a rotating tabletop space for products with a corner design. If you do not have experience in constructing structures of this type, then it is better to focus on the recommended parameters - 55-60 cm;
- space for installing a cabinet. It is advisable to include this item in the design; its presence will ensure convenient use of this furniture. This item will free you from purchasing additional furniture to store various computer accessories; everything can be placed in the drawers of the cabinet. The cabinet will require about 30-40 cm, which will need to be added to the total length of the furniture.
On average, the total length for corner products will be 160-170 cm, a compact model can be laid at 130 cm, a straight model can be made with a length of 100 cm.
Depth
The dimensions of the computer desk depend on the depth of the product. Depth calculations are quite simple to perform. When calculating the parameter, it is worth considering several important factors:
- if there is no extension, then the permissible minimum should be 45 cm;
- if the table is equipped with an extension, then the depth should be at least 60-70 cm;
- if there are drawers - at least 65 cm;
- corner type models that have shelves at the bottom, the depth size should be at least 85 cm.
Height
Calculating the height parameters for a computer desk is simple; there should be no difficulties in this matter. The standard height is usually 75 cm from the floor.
If you are short and only you will use the table, then the height needs to be adjusted to your height parameters. The main condition is maximum convenience. In these cases, the height parameters are calculated according to the formula: height parameters * 75/175 cm. If the height is 1.82 cm, then the calculation will be 182 * 75/175 = 78 cm.
Monitor stand dimensions
Stands can be of several forms:
- rectangular elements are classic elements and can be placed in the center of the table or placed slightly to the side. The location of these elements can be chosen only to your taste, the main thing is that they provide the greatest ease of use of the computer. Suitable parameters for stands: height 120 mm, depth 300 mm, length 500 mm;
- corner type - stands of this type provide an original design for all designs, and also save countertop space. The main thing is that when constructing an element of this type, it is necessary to ensure its maximum stability so that the monitor does not unexpectedly roll off it. The size of the depth and height of the corner stand should be 400 mm, the height should be 120-130 cm.
Keyboard shelf
A special shelf for the keyboard is an integral part of this furniture. The presence of this element will provide positive aspects to the use of the design:
- How to assemble a corner cabinet: instructions for neophytes
- free space for the mouse and keyboard;
- additional free space on the countertop;
- the keyboard will be installed at the correct level, so there will be no feeling of fatigue or discomfort when working;
- constant free access to the keyboard and mouse.
All these positive qualities can only be achieved through the correct sizes. Computer desks have the following dimensions: depth – 400 mm, length – 650 mm, length of guides – 350 mm.
Shelf for system unit
Another important condition for the normal functioning of the computer is the provision of a shelf for installing the system unit. It is worth creating maximum conditions for this main component that will ensure the extension of the life of the computer.
The main conditions for the correct placement of the system unit are the following recommendations:
- there should be no heating devices nearby;
- There should be no source of high humidity near the system unit;
- It is mandatory to have a special shelf or niche in which this element is placed.
Thanks to the presence of stands, the following advantages are provided:
- There is virtually no dust accumulation in the system unit;
- least influence of humidity;
- the risk of damage to the system unit is reduced.
Requirements for a shelf for a system unit:
- rollers with guides or supports with an adjustable system should be used as supports;
- The shelf width should be 280 cm;
- height is 120 cm;
- length – 50 mm.
Finding out goals and objectives
You set the parameters of your computer desk yourself.
Tables are different. Large, small, empty, filled with different shelf compartments. A successful choice will depend on how clear you are about your goals. For example, are you planning to use a laptop, desktop computer with all its components? What will you do at your workplace (write articles, program, do accounting, model, do video editing, etc.). There can be a lot of tasks. And based on your list of needs, you should make a thoughtful choice of computer desk. Let's say the choice falls on a desktop computer. Its components include a system unit, monitor, keyboard, mouse, speakers, modem, printer and various other additional devices. Based on this, calculate the required number of shelves. Another important point is the materials for making a computer desk. The most common inexpensive working material is chipboard. Of course, there are also expensive options.
- https://housechief.ru/kompyuternyj-stol-svoimi-rukami.html
- https://hozzi.ru/sovety/kak-sobrat-kompyuternyj-stol
- https://novinkimebeli.ru/kompyuternyj-stol-svoimi-rukami/
- https://berkem.ru/stoly/kak-sdelat-kompjuternyj-stol-svoimi-rukami/
- https://mblx.ru/samostoyatelno/578-sborka-kompyuternoj-mebeli.html
- https://mebelindesign.ru/sborka-stola/
- https://thewalls.ru/mebel/razbiraem-poetapno-sborku-kompyuternogo-stola-svoimi-rukami.html
Computer desk in a modern home
Just 15-20 years ago, a computer desk was a fairly large piece of furniture, which was equipped with a pull-out shelf for the keyboard and a special place for the system unit.
Since that time, a real revolution has occurred among computer technology. Let's start with the fact that at that time monitors were similar to old TVs with picture tubes, and therefore took up a lot of space. You can see this if you look at the photo of a computer desk made with your own hands in those years.
System units have also changed, because now a personal computer can be no larger than old video cassette players, which most modern children have never even seen.
An old-style computer desk takes up a lot of space, which is a serious problem in an apartment.
A modern computer can be freely placed on a simple table, including the entire system unit, monitor, keyboard, and mouse.
Considering the fact that keyboards without number pads are gaining popularity, they take up even less space.
Keyboards and mice become wireless, which means that removing them when necessary is not at all difficult, thereby making the table a universal workplace. But then how to make a computer desk with your own hands?
Choosing a tabletop
Before making a desk with your own hands, you also need to decide on the configuration of the tabletop. Products are:
- Rectangular. This option has good capacity and fits into any interior. But it is not suitable for small rooms, as it takes up a lot of space.
- Radial. Such countertops are often installed in apartments where several children live. Their use is possible only if there is a large area.
- Corner. They allow you to use the entire space of the room. The outlines can be symmetrical or L-shaped.
Rectangular
Radial
Corner
As for the material of manufacture, there is also a choice here.
| Product type | Characteristic |
| Laminated chipboard | It is resistant to moisture, has a high degree of wear resistance, and cuts well. It can be cleaned with various household products. But despite its resistance to moisture, chipboard should not be exposed to it frequently, as the material may swell. |
| MDF | It can be used in children's rooms, as it is environmentally friendly, has a wide range of colors, is easy to process and durable. But if the surface is glossy, scratches will be clearly visible on it. |
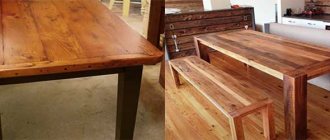
| Tree | The most durable and durable material that matches any design style and is environmentally friendly. But a wooden tabletop is expensive, has quite a lot of weight and requires restoration after some time of use. |
You can also make a design with a glass tabletop. This material is wear-resistant and makes the furniture original and light. However, the glass always leaves marks, so it has to be washed and polished frequently.
Laminated chipboard MDF
Tree
What are computer desks made of?
Laminated chipboard is most often used as a material for a computer desk. This material is most convenient for the manufacture of cabinet structures; it is not for nothing that it is called “furniture in rolls.” Laminated chipboard is easy to process; all necessary spare parts and accessories are sold for connecting or fastening various elements. In addition, there is a huge selection of color options, allowing you to choose the option that best suits the rest of the room’s interior or the user’s wishes.
Alternatively, you can use laminated MDF. Its properties are similar to laminated chipboard, but it has a smaller filler fraction, making it less fragile and not so prone to delamination when screwing fasteners. The principles of processing and assembly of these materials are almost the same.
Some craftsmen prefer more rigid, durable designs. They use metal parts that can withstand significant loads. At the same time, most often only the table frame is made of metal; the working surfaces are made of sheet materials (chipboard, LMDF, countertops for kitchen units, plywood, etc.).
In order to make a computer desk from metal with your own hands, you need to have some skill in working with the material and the appropriate tools. Steel pipes of round or rectangular cross-section, chrome-plated or untreated (needing painting), are used as a frame.
The most labor-intensive option is a DIY computer desk made of wood. Working with wood is easier than working with metal, but creating a finished product requires a large number of tools, materials, and consumables.
Cutting, grinding, planing and finishing work and other intermediate operations will be required. It is possible to perform these operations at home, but for family members such actions can be quite a serious test. In addition, finishing work involves the use of paints and varnishes that emit a considerable amount of volatile components with a pungent odor that are harmful to health. A computer desk made of solid wood will be quite expensive, since you will need to purchase a lot of expensive materials, tools, and consumables. If all the work is done at the proper level, then the result more than justifies all the effort and money spent.
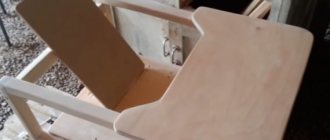
How to make a children's table with your own hands
A very simple option, with the help of these step-by-step photos you will learn how to easily make a children's table with your own hands. The dimensions are not indicated here, you can determine it yourself, let the child place his elbows on the table and reach his temples, the back should be straight. This will be the optimal height for your table.
If you want to approach the issue wisely, use the table. The manufacturing process is shown in some detail, so if you have the necessary tools it will not take much time.
Photo source www.woodgears.ca
How to make a children's table and chairs in pictures
Making your own children's table and chairs is not difficult if you have the appropriate tools and supplies. This article provides many examples with step-by-step photographs, but for greater clarity, I also present a master class with step-by-step pictures.
There is such a wonderful site WikiHow, here, like in comics, the process is depicted very colorfully.
Photo source www.wikihow.com/Make-a-Kids-Table-and-Chairs
Children's table with shelves
You can make such a table with shelves yourself, without particularly ruining the family budget. If your children love to draw and do crafts, shelves will be very useful. Therefore, the idea of building a table into a cabinet is very functional. How to make such a gift for children, look at the step-by-step photos with the indicated dimensions.
Photo source www.ana-white.com
How to make drawings of computer desks correctly
Of course, as a computer desk you can use a student’s desk or a standard office table, one of those that stood in offices 15-20 years ago. But taking into account the many additional devices, for example, a printer, MFP, and many gadgets that connect to the system unit or laptop, you will quickly understand that it is very difficult to fit into such a space for full-fledged work. In addition, the child will need to do his homework at the same table, that is, draw, read, write.
You need to make a table so that it has as much useful surface as possible, not occupied by equipment. And all devices - monitor, system unit, etc. - will be in their places, and at the same time will not interfere at all.
We will consider the option of a fully functional computer desk that you can make yourself without much expense.
First of all, you need to create a drawing that will take into account the dimensions of the entire structure. You can see a detailed drawing of the computer desk in the picture:
As you can see, this is the simplest, classic form of a table. Straight lines, conciseness, and at the same time full functionality. This table consists of a tabletop, a stand for the system unit, a retractable keyboard, cabinets and shelves.
Once you have decided on the required dimensions of your computer desk using the drawing, make a list of everything you need and start shopping.
Schemes and drawings for assembling computer furniture
How to assemble a computer desk with your own hands, diagram and step-by-step instructions.
These documents contain the order of fastening the elements, the general appearance of the furniture, dimensions and description of its parts. As a rule, the elements and the order of operation are indicated under the numbers. The drawing must show the furniture both in front and in profile, contain indications of the dimensions of parts and fasteners, and the distance between them. The diagram can show individual parts, as well as their groups, for example: sides, bottom, tabletop, facade, fittings.
Let's look at an example of installing a computer desk according to the following diagram:
- a box is assembled with markings for guides;
- the side walls are connected to the table top and the bottom stand;
- if the model assumes false panels on the lower stand, they are attached next;
- the back wall is attached to the box;
- the drawers are assembled according to a diagram in a certain sequence, guides are mounted on the side walls;
- the drawers are inserted into the grooves of the guides, the facade and fittings are attached to them;
- the tray for the system unit is made according to the same scheme as the box;
- if the model has supports, then they are usually attached to the tabletop according to the drawer pattern.
Drawing
Scheme
Checking the reliability of fastenings
DIY photo of computer desks
We make a computer desk add-on
In order to make a full-fledged multifunctional computer desk, the instructions provide for not only a tabletop and shelves for additional devices, but also an add-on that will also perform a decorative function.
- Mark and cut out the side elements of the structure, round the front upper sections with sandpaper. To ensure that the sides are evenly fixed to the tabletop, first make a template, the thickness of which will be 18 mm. Drill holes in its ends. Attach the manufactured ends to the tabletop and make markings for fasteners.
- The marked holes should be drilled according to the following pattern: through holes - in the tabletop, blind holes - in the lower ends of the side walls. At this stage you will need a square, it will help you maintain the correct angles. Install the side pieces onto the tabletop using a square for alignment.
- Screw in self-tapping screws under the tabletop, aligning the holes in the lid with the sockets in the ends of the sidewalls. After this, take a 400 X 2000 mm shield and cut it along the width. This way you will get a top shelf 315 mm wide and a securing cross-bar.
- The middle vertical wall needs to be cut out of a panel measuring 200 X 2000 mm. Attach it to the tabletop in the same way as the large side walls, using a square to control the joints. Screw the back panel to the sides and place the top shelf on the end of the central wall. Align and fasten with self-tapping screws.
- Now you need to make the left shelf. It will require a shield 200 mm wide. This shelf is intended for a printer or MFP, which means it must be strong enough and voluminous.
Rectangular table yourself
The instructions for assembling a rectangular table are about as simple as for a round one. For the countertop, I usually take either a ready-made sheet of plywood or several boards. The boards must be well prepared for assembly and cleaned.
Here, compared to the round model, you will need not only legs, but also a frame on which the entire structure will be supported. The frame is made slightly smaller than the tabletop. This is necessary so that it remains inside the structure and does not spoil the view.
Folding chair: main categories, features of creation and use in the interior (90 photos)- Computer chair - modern models, features of choice and the best ideas for use (85 photos)
Extendable table - features of application and methods of arrangement in the interior (80 photos)
After the frame is assembled, manufacturing of the legs begins. The next step is to fasten all the parts together.
The wood is covered with protective solutions and paints. And now, your rectangular table is ready. If you add a few parts during assembly, you get a computer desk.
With some experimentation you can create many unique tables. If imagination is not enough, you can look online at photos of assembling tables of various models.
The simplest table made from boards with your own hands: assembly with self-tapping screws
Let's analyze one of the easiest structures to work with: a rectangular table with four square legs, a drawer made of boards, without additional parts.
For a table measuring 80x120x70 cm you will need:
- timber 40x40x680 mm, 4 pcs;
- board 10...20x76 mm, 2 pcs. 650 mm long and 2 pcs. 1050 cm;
- 20mm board 1200mm long. Depending on the width of the board, the required quantity is selected to obtain a total tabletop width of 800 mm (8 pcs. 100 mm each, 4 pcs. 200 mm);
- board for strengthening the corner joints of the drawer, section 20x75 mm, 4 pcs. length 100...200 mm;
- wood screws 20...50 pcs.
Important: in this model, the parts are fastened using self-tapping screws screwed at an angle. To maintain a uniform angle for all drilled holes, it is convenient to use a simple device - a jig.
Assembly sequence:
After cutting the parts to size, the frame is assembled - drawer and legs. To do this, the parts are placed on a flat, smooth surface and temporarily secured with clamps (when working with an assistant, there is no such need). It is convenient to perform operations one by one - two drawers and a leg. It is necessary to maintain right angles between the drawers as accurately as possible. To connect the elements, drill holes at an angle and fasten the parts with self-tapping screws;
After assembling the frame, it is necessary to strengthen it in the corners. You can also use metal plates or, as already suggested, a board for this. If the second option is used, the edges of the board are cut at an angle of 45 degrees to fit tightly to the drawers, after which the board is screwed with self-tapping screws;
the prepared frame is checked for stability, and if necessary, the length of the legs is adjusted; arrange the tabletop by securing the boards to the frame
For this, as well as for attaching the legs to the drawers, self-tapping screws and holes drilled at an angle are used.
Important: the length of the screws is selected so that they do not go right through the tabletop! The completion of the work will be the treatment of wooden parts with varnish or paint.
How to make a round and oval tabletop
It is possible to make an oval or round tabletop at home if you have a circular saw. You will also need various additional materials, depending on the shape of the product. If you need to get a perfect circle, do the following:
- Determine the radius of the tabletop.
- Cut the board to the required length.
- The tabletop blank is secured to the workbench.
- A board is attached to its center with a self-tapping screw (but so that it can later be removed). It should rotate freely around its axis.
- The saw is attached to the free edge of the board.
- When rotating the board, a neat circle is cut out.
To get a neat oval-shaped tabletop, you will need a full-size template. It is drawn on a dense, lightweight material that is easy to process. It can be hardboard or thin plywood, thick cardboard and so on. The stages are as follows:
- On a rectangular sheet, draw two perpendicular lines, then two more, intersecting at an angle (you get a “snowflake”).
- On each of the 8 axes, mark the required length (radius of the table top).
- A compass set to the same length is placed on a point marked on one of the perpendicular axes, and an arc connects two inclined axes located next to each other.
- The same manipulations are performed on the second side.
- From a point on the vertical axis, a straight line is laid to the point of intersection of the inclined axis with the arc. The same actions are performed on the other side.
- The compass is installed at the intersection point of this straight line and the horizontal axis, and positioned so as to continue the arc.
This way you can draw a neat oval template according to which you can cut out the tabletop. Using these recommendations, you can easily make a table that fits perfectly into the interior, will last for many years, and will never cease to please with its functionality, durability, and beauty.
Cut boards to required length
Put them in the correct order
Fasten together Cut the tabletop Cover with a protective layer
Apply paint coating
Ready table
Calculating the size of a computer desk
It is more difficult to calculate the dimensions for a corner computer desk, so we will first consider this option.
Corner table dimensions
Factors that influence the size of the table:
- Tabletop width. The minimum tabletop width is 50 cm (500 mm). The optimal size is 60 cm (600 mm).
- The width of the sections (which are the table supports). Each table has a different section width. If this is a processor tray – 20–25 cm (200–250 mm). If the tray has drawers or a door – 45–60 cm (450–600 mm).
- Depth of the corner (where the person is located). The minimum size is 50 cm (500 mm), optimal is 60 cm (600 mm).
Common overlaps listed above -
- tabletop width – 50 cm;
- corner depth – 50 cm;
- section width – 20 cm and 45 cm;
- 5 cm + 20 cm + 35.4 cm + 50 cm = 110.4 cm – the length of one table wing;
- 5 cm + 45 cm + 35.4 cm + 50 cm = 135.4 cm – the length of the second wing.
Optimal table size
- tabletop width – 60 cm;
- corner depth – 60 cm;
- section width – 25 cm and 50 cm;
- 5 cm + 25 cm + 42.4 cm + 60 cm = 132.4 cm – the length of one table wing;
- 5 cm + 50 cm + 42.4 cm + 60 cm = 157.4 cm – the length of the second wing.
Optimal table size
- with one tray: 5 cm + 5 cm + 25 cm + 60 cm = 95 cm;
- with two trays: 5 cm + 5 cm + 25 cm + 50 cm + 60 cm = 145 cm.
Table height varies from 70 to 76 cm.
Note! It is not recommended to make the table higher or lower than the required dimensions, as this will lead to incorrect body position when working at the computer, the development and aggravation of back and spine diseases.
Drawing of a computer desk with dimensions
Choosing a computer desk for a child
If children will use the computer desk, then you should pay special attention to its convenience so that over time no health problems arise.
When choosing, try to adhere to some rules:
- It is not advisable to purchase a computer desk with a height of less than 70 cm, otherwise it will lead to back discomfort.
- To be able to install a large monitor without problems, the depth of the tabletop must be at least 80 cm.
- The computer should be more than 50 cm away from the eyes and at an angle of 30°.
- Do not choose a computer desk that is too small, otherwise your feet will rest against the partition and it will not be comfortable to work at it.
- Your hands should rest comfortably on the tabletop.
- It is advisable to purchase a footrest. This will help you relax and improve blood circulation.
If there is a laptop in the house
We've discussed how to make a computer desk yourself. But what to do if there is a laptop in the house instead of a computer? It would seem that the thing is quite mobile and does not require additional stands. But, as practice shows, lying in bed or on the sofa with a laptop in your hands is not always comfortable. Therefore, now we will make a laptop table with our own hands.
The easiest and free option
First of all, let's consider a design that does not require special construction skills and not a penny of financial investment. It’s tempting to make such a table for a laptop with your own hands. You can use parts of old furniture, remnants from renovations and other scraps of any building material.
You only need three parts: 2 side parts and a table top. Its size will depend on the size of the equipment. We will make a tabletop 270x660 mm. It’s easy to cut, the main thing is to measure it exactly.
It will be a little more difficult with the side strips: they must have a beveled side, which is attached to the tabletop. The dimensions of the side walls are 270×205×255×280 mm. it turns out that the back of our table will be raised by 280 mm, and the front will be lowered by 205 mm. Thus, a small DIY computer desk for a laptop will have a slope, which will make it very convenient for work.
The side parts are attached to the tabletop using self-tapping screws and are additionally reinforced with small corners. This enhances the strength and reliability of the structure. All that remains is to paint or finish it to your taste and preference. There is nothing difficult in such a design, and if a person likes to study or have fun while reclining, then why not think about how to make a laptop table with your own hands.
Another way: a folding table for a laptop
The folding design of the table is a little more difficult to make, but if you often move from place to place, it’s worth thinking about how to make a laptop table convenient and mobile. The following materials and components will be required:
- tabletop material;
- side wall material;
- screws or self-tapping screws;
- 4 folding fasteners with a lock.
You can use any material that is available. We cut out the tabletop 600x400 mm, the side legs - 400x310 mm. Using a ruler and pencil, mark the installation locations for the leg fasteners on the inside of the tabletop. We make holes for the screws, fasten everything securely and that’s it - our DIY computer desk, the photo of which you see, is ready.
As you can see, there are a lot of ways to make a computer desk with your own hands. The article discussed only the most accessible and simple ones. But there are craftsmen who are able to create furniture that you cannot find in any store.
Well, for clarity, watch the video on how to quickly and easily make a computer desk with your own hands, using the information from which you will cope with the problem easily and naturally.
Video:
Video:
Video:
Video:
Video:
Materials and tools you will need for your work
How to assemble a polycarbonate greenhouse quickly and without errors
Having studied the computer desk diagram that we offer you, you probably noticed that to make such a piece of furniture you will need many components. The materials that will be required are indicated specifically for the dimensions in the drawing:
- Board size 12 X 120 mm – 6.2 m;
- Sandpaper of various grain sizes;
- ½ sheet of plywood measuring 6 X 1525 X 1525 mm;
- Furniture panel 18 X 600 X 2000 mm, pine – 2.5 pcs;
- Furniture panel 18 X 400 X 2000 mm - 3 pcs;
- Furniture panel 18 X 200 X 2000 mm – 2 pcs;
- Varnish matte or glossy.
- 1 set of guides for pull-out shelves, 400 mm long;
- 50 self-tapping screws 5 X 60 mm;
- Dowels;
- Handles for drawers.
You will also need 3 sets of ball or roller guides for drawers, 500 mm long. It is these details that determine the quality, durability and strength of the original structure, so their choice should be taken responsibly.
In addition to materials, immediately stock up on all the necessary tools:
- Meter ruler or tape measure;
- Square;
- Pencil;
- Chisel;
- Hacksaw;
- Screwdriver;
- Drill and drill bits for it;
- Sander;
- You may need a dust bag if you are going to be working indoors.
Once you have stocked up on everything you need to make your own computer desk, it’s time to get to work.
Choosing a place
The table can occupy a corner of the room or stand along the wall.
The comfort of the room will depend on the correct location of the table. If the room is small, of course, it would be unreasonable to place a large table here. If the room can accommodate large furniture, a small computer desk may not seem like the most functional furniture option. It is worth focusing on the following aspects before placing furniture in the room:
A computer desk serves as a carrier for computer equipment, which naturally requires power supply
This means that it is important to place the table next to an outlet. It is advisable to work at the table during the consecration. There is no better light for work than daylight. Therefore, it is worth organizing the location of the table in such a way that the light from the windows falls on the left side of the computer area. Computer equipment on the table already obliges you to get rid of unnecessary heating objects in advance, which can cause a short circuit or fire. It is extremely unwise to place a table near a radiator, fireplace, or electric heater. It is recommended to free the occupied space from other various objects (paintings, shelves and decorative elements).
You can choose a hanging table model, which, if necessary, can be raised and free up space.
Tables are divided into several types: straight, corner and combined. Let's look at each option in order.
Even a simple table can look elegant.
Shelves can be either above or below the table.