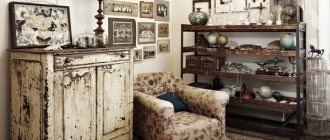
A table is an important interior detail that is used at home for many purposes. You can gather the whole family behind it for dinner, have a candlelit evening, or use it for work. There are also tourist tables or tables for small apartments that can be folded when necessary and removed when not needed. This is achieved thanks to a special mechanism, quite simple. That is why you can easily assemble a folding table with your own hands. Let's see clearly how this can be done.
DIY folding table
Where is a folding table useful?
Folding tables are structures constructed from several independent parts. All of them are connected to each other using fasteners and a number of parts that make it possible to fold/unfold/disassemble the table. A folding table is also called a table with a sliding tabletop, in the middle of which you can additionally install another bar. This creates a structure with a larger area. This option is suitable for those who have invited many guests home and do not know how to place everyone at one table.
The advantage of a folding table is its compactness
Where might you need a folding table? In fact, this is a multifunctional and useful thing that does not take up much space, but in some situations can serve a useful purpose.
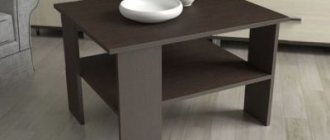
Transformable coffee table
For example, a folding table is ideal for a picnic or a tourist trip . You can fold it and pack it in the trunk of your car, and when you arrive at your vacation spot, you can take it out and comfortably have lunch or dinner without sitting on the ground. Of course, carrying such a device on hikes is not an option, but for car travelers this is an excellent solution to problems with comfort.
Folding table for outdoor recreation
A folding table will also come in handy at home . Especially in a small apartment. You can take it out as needed and use it for work, placing some things, a quick snack during repairs, and so on.
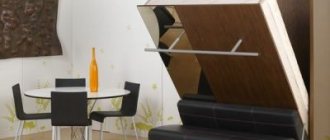
On a note! There are also so-called folding tables. They are mounted against the wall, fixed to it, and if necessary, they are simply installed on special supports and used for their purposes. This is an excellent solution for those who live in a room or studio and do not want to take up a lot of the already limited space with a large dining table.
Folding table on the balcony
Nice balcony table
The table will also come in handy in the country , especially in a small house. You can take it away for the winter so as not to worry about the fact that intruders or people without a fixed place of residence will use it in the winter, when the dacha is empty.
DIY table made from pallets
Advantages of a folding table:
- functionality . Any folding table can be assembled or disassembled, that is, its size can be increased or decreased for convenient use or storage. Functionality will vary depending on the type of table;
- compactness . Any folding table can be folded so that it does not take up space in the house. It can be put away for storage, for example, behind a closet;
- practicality _ The product is suitable for use in any conditions and any room, be it a kitchen, a picnic, a workroom or something else;
- ease . Now we are not talking about heavy Soviet folding tables. We are talking specifically about small folding options. They really most often have very little weight. Even women and children can carry them.
Folding tables are compact and practical
Advantages of manufacturing
Some of the benefits of working independently are obvious. The products are unique in their kind. Moreover, the design can be thought through to the smallest detail to get the perfect product in all aspects at once. Fans of handmade work will be able to realize their potential, learn something new, or make another piece of furniture while maintaining some common features between them. Not least on the list of advantages is the ability to control the manufacturing process, namely the quality and other features of the model. The master will constantly have access to information about the features of the place or room for which the table is intended. As a result, both the appearance and useful characteristics will be better than those offered by the market. As for monetary benefits, homemade tables have an advantage here too.
Among the disadvantages, the following nuances are noted:
- Manufacturing will take much longer than purchasing.
- There is a good chance that the product will break.
- You will have to first learn some of the nuances of carpentry.
Types of folding tables
The design of a folding table can be different, and various materials can be used for its manufacture. If we talk about the latter, then most often it is wood and plastic with metal elements.
DIY folding camp table
Tables may differ in type of assembly, size, shape, purpose of use, and so on. The simpler the design, the easier it is to make such a table with your own hands.
Homemade folding table in a car
Depending on the way they are folded, tables can be of the following types:
- with cross-shaped legs;
- folding table;
- completely collapsible (in this case, the legs are separated from the tabletop);
- transformable dining table;
- table-book;
- suitcase table.
Book table with metal legs
Intricate transformable table
On a note! The most difficult thing is to make a suitcase table with your own hands. This is the most complex, but also very comfortable design, ideal for travel.
Drawing of a folding picnic table
Articles on the topic
Table with wireless phone charging
DIY epoxy resin table
Countertop material
Often, the dimensions and designs of handmade folding tables are determined by the material of the tabletop.
If we talk about tables located indoors, then most often the tabletop material is furniture laminated chipboard.
And the size of such a tabletop largely depends on the physical space that is allocated to this table. Moreover, there can be one tabletop, or you can make it a composite one, then the table takes up much less space when assembled.
For tables that will be located outdoors, the tabletops are usually made from:
- Natural wood, preferably coniferous, so that it is not so susceptible to rotting.
- Or artificial materials such as fiberglass or getinax, since they are not afraid of moisture or temperature changes.
- Of course, you can use moisture-resistant plywood or OSB board.
What are the advantages of a homemade item?
In this article we study not only the theory of folding tables, but also learn how to make them with your own hands. Why not buy the product in a store? Of course, it is much simpler, but a homemade folding table has several advantages that a table from a store does not have. The advantages of a handmade product look like this.
An example of an original folding table
- Uniqueness and originality . All tables, handmade for ourselves, have no analogues in nature. In any case, they will be individual in all respects. Only factory models can be absolutely identical to each other.
- Reliability . Homemade tables are made conscientiously, “for yourself,” so they will definitely be durable and will not break very quickly. They will likely last for decades. The main thing is to choose good materials for manufacturing and reliable fittings.
- Cheap . A high-quality, reliable folding table in a store is expensive (we’re not talking about cheap, fragile structures). Making a reliable product with your own hands will be much cheaper. You just have to spend time.
- Design . When creating a homemade table, you can use your imagination and come up with an original design that no other product will have. Even the shape of the tabletop or its decoration and coating can be anything you want.
Table transformation mechanisms
Folding kitchen table
Finishing touches
Simple folding table with chrome legs
A kitchen table of this design can become a gathering place for a large family in the evenings or the center of a festive event (birthday, wedding anniversary, etc.). However, the old laminate itself is unlikely to inspire people to a long feast. It's a different matter if you decorate it slightly. It turns out that laminated surfaces, after some processing, can be painted and even drawn on them. Very little is needed to achieve the desired effect. Cover the end of the tabletop with edging tape, no matter what color, as long as you cover the unsightly end. Sand the surface with sandpaper, treat the dents with putty and cover with acrylic paint. The paint can be any color: from white to black. An image of flowers in the style of Zhostovo trays is applied to the black background of the table, turning the extendable table, an ordinary utilitarian thing, into a work of art. Handmade always risks becoming art; the master who creates it is always a creator.
Examples of painting in the Zhostovo style “Flowers” on a black background
How to choose a design and construction
A folding table can have any shape, design and size. How to choose the option that is right for you?
Decide what kind of table you need
- First, decide for what purpose the table will be used . For tourist trips, it should be as light as possible, compact, without unnecessary decoration. A folding kitchen table can be quite heavy and have a beautiful lacquered top.
- Determine why you need such a table . If for a home or cottage, then you can choose the simplest design. In a small apartment, make a folding option. A suitcase table is suitable for tourists.
- Decide what material you will make the product from . The easiest way is to use wood or its analogues. But you can also use metal and plastic if you have the tools and skills for this.
- Choose a countertop . The best option is a regular rectangle. But you can come up with a round folding table. The square is also in demand. Try to understand which table will be most convenient for you to use.
- Draw a drawing of the table how you would like it to be . Immediately indicate the dimensions. This will help make adjustments to the design at the planning stage.
Drawing of a folding picnic table
What will you need for the job?
Most often, folding tables are made of wood and its derivatives, plastic, or combined, that is, using several materials at once. In the table we have described several types. By the way, its quality, reliability, durability, and ease of use depend on what the transforming table is made of.
Table. Materials for making a folding table.
| Material | Description |
| Tree | The best material. Durable, reliable, durable, does not lose its beauty if varnished, and is absolutely safe for human health. In short, an excellent solution for making a homemade table. Wood is pleasant and easy to work with. And depending on the type of wood, you can choose a table color that matches the interior. |
| Chipboard | This is a strong and durable material, and inexpensive, so it is chosen quite often. But he is afraid of water and has considerable weight. A table made of chipboard will not always be convenient when traveling. There is also laminated chipboard - the same thing, only with a beautiful outer coating. |
| Plywood | A durable material that is rarely used as the main material in the manufacture of tables. Usually additional supports, boxes, walls, etc. are made from plywood. |
| Fiberboard | Something reminiscent of chipboard. But this material is lighter, easier to work with (it’s easier to saw and process), but a table made of fiberboard is not always reliable. Much will depend on the design of the product as a whole. |
| Metal | Folding tables are rarely assembled completely from metal, despite its durability and strength. But the legs for them are made from this material very often. This table is easy to fold, it is stable and can withstand moderately heavy loads. |
Advice! If you are making a table with your own hands for the first time, stop with wood. It's easier and more convenient to work with.
What might be needed to make a table? In fact, the list of materials, tools, and accessories is quite extensive. In general, these could be:
- hammer or screwdriver;
- nails or screws;
- awnings;
- washers, bolts and nuts;
- sandpaper;
- jigsaw or hacksaw.
Choosing a jigsaw by power
Advice! Do not use blanks that are too thick. In this case, the table can turn out to be bulky and uncomfortable. For example, bars for legs should not exceed a thickness of 2x4 cm.
Required Tools
You will need a lot of fasteners. Including self-tapping screws 20x4 and 16x3 mm, M4 screws, furniture locks, telescopic guides of approximately 500 mm and aluminum corners 50x50 mm. The legs may require 4 thick metal tubes - 710 mm in diameter. For installation work, hot melt adhesive is used, applied to the edges of PVC, plastic or wood boards. During work, protect your hands with household gloves. Among the auxiliary devices you will also need a marker, a long ruler, a thick pencil, a tape measure and a building level. A heat gun and a hair dryer will ensure the reliability of the glue connection. Chipboard sheets are cut with clamps. For cutting, you may also need a small-tooth file, a jigsaw, a circular saw and a router. A screwdriver is used to work with hardware. The holes are made with a drill using 4.2 mm drill bits.
How to make a folding table with your own hands?
Where to start? First you need to decide on the design. That is, decide whether it will be a folding table for the kitchen, a light tourist one, or an option for the home, which can be stronger and heavier.
Table-book in the living room
After this, you need to create a drawing, preferably as detailed as possible, indicating the dimensions. This will help you decide how much material you need to purchase and what accessories. And it’s much easier to assemble blanks into a full-fledged table according to the drawing.
Immediately think about the materials. For a beginner, we recommend choosing regular wood, bars and plywood. By the way, buy blanks a little larger than needed. If necessary, it will be easier to adjust them to the required parameters.
DIY rotary and folding table
Now let's get acquainted with detailed instructions for creating various folding tables. All stages are described step by step with visual examples, and if desired, they will be easy to repeat.
Option #1. DIY suitcase table
Step 1. To create this table you need to buy a couple of sheets of plywood and 12 blocks. You can simply buy a long beam or one large sheet of plywood and cut it with a jigsaw to the required size.
Plywood and bars for making a suitcase table
Step 2. You also need to purchase long bolts with a round head, shorter bolts for the legs, wings, wood screws, metal corners and a piano hinge.
Consumables
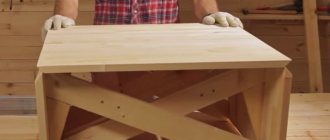
Step 3. Next you need to start assembling the body. It will consist of two tabletops that are connected to each other by a piano hinge. That is, it will allow you to open/close the table. All holes must be drilled before screwing fasteners into them. Holes for self-tapping screws are made here. In order to create a tabletop, you need to screw bars around the perimeter to one side of the plywood sheet. The steps must be repeated for each of the countertops.
Assembling the table body
Step 4. It turned out to be two halves of the tabletop. At the place where the piano loop connecting them will be attached, you need to make a recess for it. You should mark it with a pencil. The hinge parts will fit into this recess when unfolding the table so that it can open freely.
Two halves of the tabletop
Step 5. Next you need to make the recess for the loop itself, as shown in the figure.
Recess for hinge
Step 6. After this, the two halves of the tabletop need to be placed on a flat surface, aligned with each other and then a piano hinge must be screwed into the recesses.
The tabletop parts are connected with a piano hinge
Step 7. After this, you need to further strengthen the structure with self-tapping screws by screwing them in, as shown in the figure. It is also recommended to strengthen the corners of the tabletops by screwing metal corners to them.
The structure is reinforced with self-tapping screws
Step 8. Next, you can begin installing the legs. First you need to drill a small hole as thick as bolts for fastening in the leg itself and the tabletop. It is best to temporarily place marks on the leg itself and the tabletop next to the holes, so as not to confuse them later and not have to worry about selecting them.
Hole in the leg
Hole in the table top
Step 9. After all the holes are ready, you need to check how everything turned out. To do this, you need to screw the legs to the table, securing the bolts with screws. The table is almost ready.
The leg is screwed to the table
Step 10. To prevent the wood from losing its appearance and the table to acquire a beautiful color, it is best to treat it with something. In this case, the surface is coated with Neomid 400 wood antiseptic, and a day later - with varnish.
Parts of the table are treated with antiseptic and varnish
Step 11. When all the coatings are dry, all that remains is to screw the carrying handle and latch to the outside of the tabletop.
The suitcase table is ready
Table-suitcase unfolded
On a note! This table is convenient to take with you anywhere. By the way, it can really be used as a suitcase for carrying some things: for example, a thermos, kitchen utensils, and so on.
You can really store something in this suitcase
Kitchen folding table
Video - How to make a suitcase table
Option #2. Tourist folding table
Now let's see how to make a different type of table that is suitable for tourist trips.
Step 1. First you need to create a drawing of the table and calculate the dimensions. You need to decide how high the table will be - for example, 600 mm. Correctly calculating the dimensions of the parts for the legs is easy. The jumper (indicated by the letter C in the image) will be equal to A + A, where A is the length of one half of the tabletop. Next, the lengths of the legs located under the jumper (letter D) are calculated. D = C + 100 (150) . The leg should be 100-150 mm longer than the jumper. Next you need to determine the distance M (from the upper hinge to the lower - the crosshairs of the two legs). M is equal to the distance from the corner of the tabletop to the intersection point of a perpendicular line drawn from the center of the tabletop downwards with the leg.
Drawing and dimensions of the tourist table
Step 2. Next you can start making the table. You should start by creating blanks for it. You will need plywood, wooden blocks (4 legs and 4 jumpers). For convenience, they can be designated by numbers - jumpers, legs, and so on; 4 things. Of all the blanks, the lintels should be the same length as the table top, and the legs should be 100 mm longer.
Blanks for the table
The bars can be signed
Step 3. On the jumpers, on one side, a semicircular cut and a hole are made in the center, on the other side, a quarter of a semicircle is made for two on the right side and for two on the left. On the legs, a semicircular cut is made on all sides, and the distance of intersection of the two legs is also marked. First you need to mark the distance of intersection of the legs - in this case it turned out to be 500 mm. The centers of the semicircle of jumpers are also marked on the side where the full semicircle will be, and on the legs where the upper hinge will be located.
The distance of intersection of the legs is marked
The centers of the semicircle are marked
Step 4. Next, you need to take a washer of the same diameter as the width of the blanks for the legs and jumpers, and use it to mark the semicircles and quarters of the circle.
Marking with a washer
Step 5: The edges of the legs and bridges are then filed down to create a half circle or quarter circle shape. The most convenient way to do this is with a machine. You need to cut off the excess to the mark made with the washer.
Turning of legs and jumpers
Result of work
Step 6. The table blanks must be processed so that they become smooth.
Sanding workpieces
Step 7. The blanks will be connected to each other with a hinge (for example, you can take a furniture tie 30 mm long). Next, you need to calculate the drilling depth and drill the workpiece to the required depth, making a special recess. To calculate the drilling depth, you need to put two legs together, measure their thickness with a caliper, then subtract 30 mm of furniture screed from the resulting value, and divide the remainder by 2. In this case, the result is 3.5 mm.
Furniture screed
Holes are drilled in the workpieces
Step 8. After this, using an ordinary drill, you need to complete the previously obtained recess, making it a hole.
Hole ready
Advice! The assembly of the table will now begin. If you want to varnish the product, it is better to do this before the table is assembled. Varnish can make the workpiece thicker.
Step 9. Now you need to take the jumper that has a quarter circle on one side, not a semicircle. The lid will be screwed to it. The jumpers must be screwed in with self-tapping screws. Another jumper on one side and the other should be located at a distance from the first, equal to the width of the block - it is needed for the second leg, which will be screwed on the other side.
Screw the jumper from 1/4 circle
Screw the second jumper
Another photo of the process
Step 10. Next you need to assemble the hinge system. You need to align the hole at the screwed jumper and one of the legs, connect them with a furniture tie. Repeat the operation on all legs.
The holes of the leg and jumper are aligned
The parts are connected with a furniture tie
Step 11. Then you need to connect the centers of the legs also using ties.
The centers of the legs are connected
Step 12. Next you need to make the legs and screw them at the bottom between the folded legs, connecting them together. The edges should first be coated with glue.
Glue is applied
The legs are screwed on
The legs are screwed
Step 13. The table is ready. Here's what it looks like from the inside and when folded.
The tourist table is ready
This is what a folded folding table looks like
Video – Folding travel table
Assembling the frame with legs
The end parts and strips are attached between the sides of the frame. End - it is clear that they are flush with the edges of the sidewalls. We screw the planks almost in the center of the resulting frame, flush with the bottom edge, at a distance of 100-120 mm from each other. The removable fragment of the tabletop will hold normally on the platform formed by them, but in order to pull it out, you will have to tilt one side, so we keep the distance between the planks to a minimum.
We attach the legs to the frame from the inside and screw them through the frame from the outside with 4x50 mm self-tapping screws. Additionally, we place the corners on the frame-leg plane. Be sure to check the stability of the table at this stage and, if necessary, adjust the length of the legs.
Option #3. DIY wall table
Let's look at an example of how to make a small wall-mounted folding table. It will be useful in the country house, in the garage, in a small kitchen.
Step 1. In order to make a folding folding table, you will need wooden blanks, door and piano hinges. In this case, plywood is also used for the tabletop.
The table top will be made of plywood
Step 2. First you need to decide on the size of the tabletop and make markings on the blanks.
Marking is being applied
Step 3. Then you need to saw off a piece of plywood - the future tabletop - along the marked mark.
Cutting plywood
The future tabletop is being trimmed
Step 4. Next, the surface of the countertop needs to be sanded.
Sanding the table top
Step 5. After this, you need to make blanks for supports under the tabletop. Each of them will have three parts.
Blanks for supports are made
The supports consist of three parts
Step 6. The support parts need to be connected to each other using self-tapping screws and corners.
Support parts are connected
Step 7. In the selected location near the wall, you need to attach the tabletop supports at the same height. They must turn, so they need to be secured using piano hinges. A wooden block is attached above them, to which the tabletop itself must then be attached.
Supports are fixed to the wall
The supports must turn
Step 8. The tabletop is attached to the block using hinges. The table is ready. You can see how it looks when folded in the photographs. If desired, the table can be varnished or painted.
Countertop installed
Folded wall table