DIY children's desk drawings
Category: Furniture
DIY children's desk, drawings, description and order of its assembly. The proposed model will be able to serve your child for a long time until high school.
If your child has gone to school, then you are faced with the acute question of choosing a desktop or desk for his normal development. Correct posture and reducing eye strain require an individual approach when choosing a workplace that can adapt to the growth of each student.
Side view (maximum table extension)
Side view (minimum table extension with table top rotation)
The presented model allows:
- adjust table height from 570 to 720 (mm), adjustment step is 50 (mm)
- adjust the table tilt angle from 0° to 90° (the maximum angle is set theoretically), the adjustment step is 5°
Recommended tilt angle settings: - drawing from 0° to 5° - writing from 10° to 15° - reading from 20° to 30°
Components of a children's desk:
- base
- table top lifting mechanism
- table top
BASE
We will make it from planed boards. From the inside of the guide board, at the end we mill a groove measuring 10x10 (mm). The sharp edges of the parts are rounded. We fasten the parts of the legs together using:
- threaded rods GOST 22042-76;
- enlarged washers GOST 6958-78;
- wing nuts GOST 3032-76
for M8 thread.
We attach the top shelf and footrest to the legs with wood screws
or confirmations.
LIFTING MECHANISM
We will make it from planed boards. From the outer sides of the guide board, at the end we mill grooves along the edges measuring 10x10 (mm). We drill through holes with a diameter of 20 (mm) in the center.
TABLETOP
We will make it from laminated wood or plywood.
We will make the rotating mechanism from sheet metal 2 (mm) thick and attach it to the tabletop with wood screws. Alternatively, it can be made from wooden blocks.
Assembly order:
1. We insert the lifting mechanism into the grooves of the base.
2. Secure the tabletop to the lifting mechanism using pins, washers and M8 nuts.
DIY children's desk assembled. Using the proposed concept for designing and constructing a structure, you can modify and supplement the model yourself with various shelves, pencil cases and glasses for stationery.
Order a drawing
Share with your friends!
Types of transformers
Furniture that most often acts as a transformer:
A few examples of transformable tables:
- Transformable coffee table
- Transformable computer desk
Important! When choosing a transformer, special attention should be paid to the safety of the product in order to eliminate any possibility of injury during assembly and disassembly of the structure. Sharp edges and protruding metal elements are not allowed.
What can you make a transforming table from?
- Wood The most advantageous and simplest to make are tables made of wood. For this, simple solid wood and sheet wood panels (plywood, chipboard, MDF, fiberboard) are used. Plastic Possible for a transforming table, but not a very aesthetic option. Metal Tables are strong and durable, have various decor options, and are made of hollow structures. Glass More complex An option would be to use tempered glass to make transformable tables. Such tables are aesthetically pleasing, safe and have an original appearance.
To make a small chest of drawers (4 drawers), you need the following:
Materials and accessories
- pull handles for all drawers (including two false ones) - 6 pieces; furniture wheels - 8 pieces; supports for wheels - 8 pieces; card hinges - 4 pieces; hinges and hinges for the table top; ball guides (400 - 2 sets, 450 - 4 sets); wooden dark-colored slabs for the table top, external side legs (on wheels), internal side legs, the middle wall (between the drawers), the bottom of the chest of drawers, the walls of the drawers and 2 long walls along which the upper false drawers will slide to the sides; light-colored wood slabs for the front of the drawers (+ 4 fake drawers on both sides) and the back of the chest of drawers. The length of the back wall is equal to the length of two drawers. The remaining space on both sides of the chest of drawers is occupied by a long wall along which false drawers move; a thin piece of wood for the bottom of all the drawers.
- pencil, square, tape measure; electric jigsaw or hacksaw; screwdriver or screwdriver; hexagons; drill with various attachments (including a 15 mm Faustner cutter); minifixes (for eccentric couplers) - 40–50 pieces; Euro-confirmed screws - 50–60 pieces; self-tapping screws (14 mm – 20 pieces, 30 mm – 50 pieces);
Stages of work
Step 1. We draw out and cut out all the details of the future chest of drawers.
Step 2. We draw and attach retractable ball guides (400) on the side walls. On the middle wall we screw the guides on both sides.
Step 3. Screw the middle wall exactly to the middle of the bottom of the chest.
Step 4. We fasten the side internal walls, the back wall and the bottom of the chest.
Step 5. We assemble all the walls of the drawers, screw the handles-brackets to the front sides (including false ones).
Step 6. We attach 2 balls from the guides (on which our drawers will roll) to the inner (which will be inside the chest of drawers) two corners of all drawers.
Step 7. Screw the guides (450) onto the wall for the false drawers and onto the back side of the false drawers. We attach the long walls to the side inner walls.
Step 8. Screw the furniture wheels to the bottom of the chest of drawers and to the side outer legs.
Step 9. Attach the outer side of the false drawers to the outer legs of the chest of drawers and push them into the folded position (place them next to the functional drawers).
Step 10. We proceed to the tabletop. We fasten the three parts together using hinges.
For a dining table, this design is quite complex. Most often, a chest of drawers is used when it is not possible to purchase a kitchen or dining table or when making a huge transforming table (more than 2 meters long).
The second version of the chest of drawers differs not only in size (700 x 900 cm when folded, 2100 x 900 cm when unfolded) and the number of drawers, but also in the transformation mechanism.
The inner side walls are maximally folded out to the distance of the length of the false drawers.
The tabletop, when unfolded, consists of 3 parts - left, middle and right. When folded, the left side rests on the middle one.
The tabletop rotates 90 degrees. The right part is lowered onto the back wall of the chest of drawers (hangs parallel), and the parts stacked on top of each other form the top surface of the chest of drawers.
Wheels are attached to make our chest of drawers easy to move, but they are not required. When the table top is rotated into working condition, it fits into positioning pins, which completely prevent its further rotation.
An interesting idea for a portable folding transforming table - an ironing board built into a closet - is presented in this video:
- Author: Svetlana K. Print
To solve the lack of space, we resort to various tricks. In particular, multifunctional furniture serves this purpose. In this article we will look at how to make a transforming table with your own hands.
The task, frankly speaking, is not the easiest, but we managed to find some interesting options. You may be interested in picnic tables; this is perhaps the easiest thing to do yourself. Also presented are several transformable coffee tables, a dining table, a computer table, a transformable bed table and even a stepladder. In general, if you want to save space, you can always come up with something.
Various transformable table
This table is also called a folding table. It is classified according to its functions:
- coffee table; coffee table - workplace; table - storage system.
The coffee-dining option can be found most often, because the number of friends and acquaintances who come to visit increases over the years, but the living space does not.
The transformable dining table is unnoticeable and does not detract from valuable space.
On ordinary days it plays the role of a coffee table, and on holidays it turns into a real dining table. In order to seat 5-7 people, a few simple manipulations are enough. This is suitable ergonomic furniture for a studio apartment, when the entire space is combined into one.
When creating a coffee table - a workplace, a different type of tabletop is used. There is no need for it to unfold completely or change shape.
This version of the transforming table turns into a desk, taking on the required height. Additionally, the furniture is equipped with drawers to store office supplies. Depending on the fastening system, the table can be given several positions.
Models with smooth adjustment mechanisms are more convenient to use. With their help, you can organize a workplace in any corner of the apartment.
The table storage system has an original design. It consists of two or three drawers and a tabletop. The table opens by rotating around its axis.
Table frame
The duration of operation depends on its strength. Frames come in different materials:
- wooden; metal; with plastic parts.
Structures made of metal and wood are considered the most reliable.
They withstand repeated unfolding and folding cycles well. Frames with plastic components are cheaper, but do not withstand long-term use. But if the table is rarely transformed, this option can be considered.
They serve as a support, so they must withstand a large load, which increases when the table is unfolded.
Thick glass supports have proven themselves to be quite good. They themselves are quite heavy and can withstand considerable weight. Glass legs are perfect if you need a transformable table for the living room.
Wooden supports also cope well with the load. This option is suitable for classic interiors.
Additionally, you should familiarize yourself with the types of countertops. The appearance of the product depends on the material from which the top is made.
Project cost:
- Transformation mechanism – from 3 thousand rubles. Chipboard panels for table tops and legs – from 500 rubles. Fasteners – from 50 rubles. Set of screws and self-tapping screws – from 200 rubles.
It’s possible to make a folding table for $100.
Manufacturing consists of several stages:
- Selecting a folding mechanism. Creating a project. Cutting out parts from a chipboard panel. Initial fitting of parts. Installing the frame. Installing table supports. Installing the table top.
To make a high-quality transforming table, it is better to create drawings in special computer programs. They not only draw a layout of the future furniture, but also calculate how much materials are needed and create a cutting map. The programs are quite simple to manage, so creating a project will take one or two days.
The number of parts and their sizes can be ordered in the same store where chipboard panels are sold. The cut planks only need to be connected with bolts, after which the transformation mechanism is installed. For smooth installation, it is necessary to make markings with a pencil before drilling holes for the screws.
The finished table will be no different from store exhibits if you select a high-quality transformation mechanism and materials for the frame. You should choose this kind of furniture if you don’t know how to create a functional design for a one-room apartment for a family with a child. When folded, the table will occupy a minimum of space, leaving room for children's games.
Sources:
- 6sotok-dom.com
- novamett.ru
- usamodelkina.ru
- www.weareart.ru
There are no similar posts, but there are more interesting ones.
We make a table for a child with our own hands
Taking into account the fact that the baby is growing up and has new needs, you need to carefully consider every piece of furniture that is in the children's room. The children's table is no exception. After all, your child will continue to explore the world around him, draw, sculpt, read and make various crafts.
Materials for work
If you decide to make this piece of furniture yourself, then you will need the following tools and materials:
- Solid wood sheet 60x40 centimeters;
- Beams for the frame 4 pcs.;
- Legs with a section of 4x4 centimeters 4 pcs.;
- Electric drill;
- End mill set;
- Clamp;
- Hammer;
- Wood hacksaw;
- Carpenter's knife;
- Sandpaper;
- Furniture varnish;
- Wood glue;
- Ruler;
- Furniture pins.
Important! If you have an old table, then you can use its parts to make a children's table with your own hands.
Before starting work, it is very important to determine the height of the future table. The most comfortable height is the one at which your child sits with a straight back, placing his elbow on the tabletop and easily touching his temple with his finger.
Important! In order to choose the desired table height as correctly as possible, you can use special tables that indicate the recommended standards for the manufacture of tables and chairs for children of different ages.
Work execution algorithm
When creating a children's table with your own hands, you can take ready-made drawings and diagrams. You can find them on construction sites or forums.
We offer you a general scheme for completing the work:
- Taking into account the height, saw off the legs. If they taper towards the bottom, then you can file them. This must be done in such a way that the future table is strong enough and stable.
- The prepared legs are attached to the elements of the load-bearing frame using end mills. During assembly, it is necessary to mark the locations for the grooves, and then combine the paired elements.
- Next, in the marked place you need to drill a non-through hole.
Important! The depth of the hole should be one third of the thickness of the workpiece, and the diameter should be the thickness of the future groove.
- The leg blanks must be clamped one by one in a clamp and the wood must be selected as much as possible using an end mill. This must be done carefully until you get a smooth groove of the desired size. As a result, you will have 8 grooves on 4 legs.
- Using a ruler, you need to measure the dimensions of the groove and make appropriate markings on the bars for the load-bearing frame.
- Using a carpenter's knife and a hacksaw, you need to adjust the ends of the power frame, while creating “tenons” that will easily fit into the grooves of the legs.
- At the end, a test assembly of all elements should be done.
Important! During the check assembly, you have the opportunity to make changes and adjustments to ensure that the table does not become unstable.
- The final assembly must be carried out similarly to the control one, only pre-coating the fastening points with special furniture glue.
- After everything has dried, you should secure the tabletop. To do this, you need to drill a hole in the center of the legs for a furniture pin. And on the back side of the tabletop there are blind holes.
- Coat the pins with glue and connect them into a single structure.
- The finished table must be sanded using fine sandpaper and coated with several layers of varnish.
Thorough preparation is the key to quick and efficient assembly.
It can be done in just 4 steps.
If the final testing showed that the height of the furniture was not 100% correct, the excess can be corrected with the help of a suitable chair.
DIY assembled tables and chairs for children
You should buy a chair with adjustable height and raise the seat to the desired level.
Children's chair, height adjustable
The elbows of a sitting child should be freely placed on the tabletop, the legs should reach the floor (another support), and the knees should be bent at an angle of 90-100 degrees.
Correct seating at a desk
Follow sanitary standards, and then you will keep the student’s posture healthy!
Homemade adjustable desk for a schoolchild
Table with lifting lid
Once you have made a simple model of a children's table, it is ready for use. But if you want to make a more functional option, we suggest you equip it with a lid. Thus, the child will have additional space to store his stationery and other small items.
To make such a table:
- Take a wooden tabletop. Its dimensions should be 90x45 centimeters.
- You need to build a frame from bars measuring 5x5 centimeters.
- Take two pieces of length 8 and 4 centimeters. Fasten them together with nails.
- Insert another piece in the middle.
- The tabletop must be attached to the front of the frame using hinge-type furniture hinges.
Important! You can replace furniture hinges with regular door hinges.
- To create a lifting and adjusting mechanism, it is necessary to fix bars measuring 20 and 40 centimeters in a vertical position on the lid. They should be placed on the opposite side.
- In order for the lid to be fixed in different positions, it is necessary to nail 2-4 furniture hooks to the bars. Next, insert one bolt at a time into the base of the frame so that they partially protrude.
- All parts are processed with sandpaper and varnished.
We make a folding wooden table for children with our own hands
To create such a table model you will need the following materials:
- 4 boards measuring 6x2 centimeters and lengths 72 and 32 centimeters;
- Tabletop made of 2 parts;
- Wood glue;
- Electric drill;
- Furniture pins;
- Sandpaper;
- Dowels.
Important! This model does not take up much space and is suitable for small apartments.
The sequence of manufacturing a folding wooden table is as follows:
- Make 2 frames from the boards. They will “play” the role of legs.
- Using a stencil, drill holes for future fastening in the end sections of the boards.
Important! It is necessary that the lower crossbar of the frames be raised above the floor by 5 centimeters.
- The parts should be connected into frames with pins.
- Pour wood glue into the hole and connect the parts into frames. Fasten them together with loops.
- Drill a hole in the wall for the dowel.
- Attach the first part of the tabletop to the wall. A vertical folding frame must be placed underneath it.
- The second part of the tabletop needs to be attached with hinges to the first and laid out on top of the support frame.
Important! At any time you can lift the second part of the tabletop and fold the frames. Then the movable element of the tabletop is lowered, and the table will take up less space.
Manufacturing process
Let's consider what set of parts will be needed to make a transformer for feeding (high chair - high chair with table), and in what sequence it is assembled.
You need to prepare the following details:
- from timber with a section of 35x20, cut into 4 legs 38 cm high for a chair and 45 cm for a table, 8 crossbars 30 cm wide (length) for the frame of a chair, 6 40 cm wide, and 4 50 cm long for a table;
- From chipboard or plywood, cut out a table top 40x40, the back of a chair 29x20, a seat 29x29 and a shelf table of a convenient length for you, approximately 40-45 cm wide, so that it protrudes slightly beyond the sides of the chair.
All parts are carefully sanded, the corners of plywood, chipboard and the upper outer parts of the legs are rounded. The bars are connected with 5 cm self-tapping screws, you can also use dowels, first the assembly is carried out live, and after checking the corners, the tenons are coated with glue and hammered in more tightly. All joints are treated with putty.
First, the sides of the chair are assembled, 2 horizontal slats are installed between pairs of legs, the upper ones serve as armrests, and crossbars will be attached between the lower ones - a seat support.
Then they are connected to each other by the remaining 4 bars to create such a structure with a frame for the seat and backrest.
When assembling the sides of the table, the legs are connected in pairs with long horizontal strips, the bottom one is located at a short distance from the floor. The lower and upper planks are connected by short crossbars; they are installed at a distance of 40 cm from each other; the tabletop will be mounted between the upper ones. One pair of legs is connected by another pair of crossbars; a chair placed on top will rest on them. The tabletop can be secured with self-tapping screws at the ends and additionally attached with glue. The assembled wooden frames are painted and/or varnished.
In the back, seat and corresponding places of the crossbars to which they will be attached, holes are marked and drilled for furniture bolts, 2 in each crossbar. The bolts must be installed in place before tightening begins; their heads will be hidden under the foam rubber and upholstery. The finished seat and backrest are installed in place, the nuts are tightened, the tabletop-shelf is also screwed to the armrests with 2 bolts.
We make a children's table from furniture board with our own hands
This model is very simple and consists of a table top and legs.
Important! To make the legs, you can use bars measuring 4x4 centimeters.
The tabletop will be a furniture panel measuring 40x80 centimeters. This is already a whole preparation. In order to attach future table legs to the tabletop:
- You mark up future auxiliary elements.
- You need to make an indent of about 5-6 centimeters from the end of the tabletop.
- From the block you make blanks of the required size by sawing.
- Using wood glue and self-tapping screws, connect the bars according to the markings.
- We attach the finished legs to the tabletop using the same pattern.
Important! To ensure that the self-tapping screw that secures the leg does not “break through” the wood, it is necessary to install a metal corner.
- The finished product is opened with varnish.
To increase the strength of the product
If the table is intended to be installed in the kitchen, or to be used by a teenager, it is better to ensure in advance that the product is as resistant to physical impact as possible. To do this, it makes sense to coat all joining seams with glue before fastening, and strengthen the corners from the inside with metal furniture spacers and corners.
The final finish of the table affects the overall impression
Making a table out of cardboard
If you don't like working with wood, you can make a table out of cardboard. For this you will need:
- Box for furniture or household appliances;
- Cardboard tubes - they remain after the foil or cling film runs out;
- Stationery knife;
- Glue.
Operating procedure:
- Cut the box.
- Measure 5 pieces with rounded edges and a size of 55x35 centimeters.
- On 4 parts, make circle marks taking into account the diameter of the tubes. Cut them out.
- Fasten these elements together.
Important! In order for the glue to “grab” well, the workpiece must be pressed down with a press and left until completely dry.
- Try on the tubes to the workpiece. They should fit fairly tightly, so adjust the hole if necessary.
- Glue the 5th part to the workpiece. Place it under the press again.
- Spread the edges of the tubes with glue and glue them to the finished tabletop. Leave until completely dry.
Important! Decorate with self-adhesive paper and various applications.
Making a children's high chair
It is very important to make a set of table and chair at once. Such a set will not only please your baby, but will also be functional, which is important for a loving parent. We have already told you how to make a children’s table, but for the high chair you will need the following tools and materials:
- Solid wood;
Important! It is best to use beech, birch or pine. They are quite hard, but easy to process.
- Bars 2x2 or 5x5 centimeters;
- Boards 2.5 centimeters thick;
- Furniture panel - for this you can use a sheet of plywood or chipboard;
- Dowels;
- Wood hacksaw;
- Screwdriver;
- Sandpaper or sanding machine;
- Hammer;
- Brushes;
- Varnish or paint.
Important! Before you start making a high chair, you need to make sure that you have taken the measurements correctly. If not, then you need to increase or decrease them proportionally, since the stability of the future product depends entirely on the ratio of height and width.
Making a drawing
In order for the baby to be not only comfortable and comfortable, but at the same time to develop correct posture, it is necessary to make a table that will fully correspond to the physical parameters of the child. You can measure it as follows:
- Measure the distance from the bend of your knee to your heel. This parameter shows you the seat height of the future chair.
- Next, for a test, you should sit the baby on some object that is equal to the height of the chair.
- In this position, measure the distance between the floor surface and the child’s elbow. This will be the height of your table.
Important! Taking into account the fact that children grow very quickly and in order for the future table to last for several years, you should add a few centimeters to the current height parameter.
As for drawings and diagrams, you can find them on the Internet. But it’s best to make the drawings yourself, since you will be making a high chair taking into account the individual parameters of your baby.
Important! If you doubt the correctness of the drawing, you need to test it by making a cardboard model of the high chair.
Selection of fasteners
It is best to use dowels to secure a child's highchair. The advantage is that they can also be made from wood.
Manufacturing of parts
Before starting work, it is better to leave the wood for a day in a dry room to dry. Further:
- In order to make the legs of the future product, it is necessary to cut the bars into several pieces of the required size and sand them with sandpaper.
- The upper and lower crossbars are made using the same pattern of bars as the legs.
- To make crossbars, it is necessary to cut the bars on a flat surface in a vice. This is necessary to ensure that the cutting angle is 90 degrees.
- Curves should be cut from the board.
Important! During cutting, it is necessary that the wood fibers are perpendicular to the bend angle.
- Cut a seat out of wood.
Assembling the product:
- We make holes in the parts of the future chair for dowels. They must first be made with a drill with a small diameter (up to 6 mm), and then expanded with a chisel.
- We attach the parts with wood glue.
- In order for the fastening to be as strong as possible, all elements need to be placed on a dowel, and then secured to a clamp and left for a day.
Chair finishing
It can be produced using water-based varnish or acrylic paint. As for the back and seat, they can be made of foam rubber with a cover made of colored and durable fabric.
In order to make a children's table and chair with your own hands, you will need to spend a certain amount of time and physical effort. But as a result, you will receive furniture that is made with love and is ideal for your child. Using the above tips and recommendations, you will do everything right, and the finished product will delight you and your baby!
As the child grows up, new needs appear. In a children's room, every piece of furniture should be thought out to the smallest detail. There comes a time when the baby needs a children's table at which he will play, draw, eat, and learn new knowledge and skills. Of course, the easiest way is to purchase the necessary furniture attribute in the store, but it’s so nice to do something for your child yourself. In addition, only by making the table yourself can you adjust it exactly to the child’s size. Therefore, many parents are faced with the question: how to make a children’s table with their own hands?
Preparation, assembly
Diagram of a small children's table and chair
The first step after determining the design and construction is to search for the appropriate assembly diagram, drawing on the Internet. Having selected the necessary documentation for making a desk with your own hands, prepare the necessary materials, components, and fittings.
Detailing drawing for an older student's desk
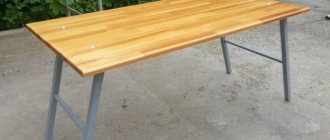
It's time to start the assembly process. An example is a desk consisting of four parts. Advantages: simplicity of design, strength, stability, significant savings in materials.
A simple non-adjustable desk for a student
It can be assembled from sheets of laminated chipboard, MDF or solid wood.
Having determined the material, prepare the tools. You will need:
- finishing for the ends, special glue (when using chipboard);
- screwdriver;
- furniture screws, decorative masking of screws;
- electric drill, set with drills;
- yardstick;
- sandpaper/sanding machine (when working with natural wood);
- paint, painting machine (MDF/solid).
Tools for making furniture at home
Tools and materials for work
When choosing raw materials for a children's table, the first thing you need to be guided by is that it is completely safe. It is best to make a table with your own hands from wood, as it is a completely environmentally friendly material that will not harm the baby’s health. When starting to prepare the material, you need to understand that it will be very difficult to make a completely children’s table with your own hands, since this requires a complex tool. It is best to develop a design and order the necessary parts from a carpentry workshop.
To make a children's table from wood you will need the following materials:
- Directly wooden tabletop. Regarding the size, it is necessary to rely on the age of the child.
- Wooden legs for a table. Remember that the height of the table depends on their size.
- Blanks that will serve as support bars for the table frame.
- As for the tools, the list may vary depending on the characteristics of the material and the design of the future table.
As a rule, a standard set of tools for making a wooden table with your own hands includes:
- Drill with various attachments.
- Hacksaw.
- Carpenter's knife.
- Hammer.
- Measuring tape.
- Sandpaper.
- Adhesive substance.
Making a desk chair at home
If you are making a children's desk with your own hands, have figured out the drawings and made the entire structure, then you can start making a chair. Moreover, this accessory is present in the schemes for making furniture for schoolchildren.
- At the first stage, you need to cut out the parts for the children's chair according to the drawing.
- Then smooth out all the rough edges and round the corners.
- We assemble the chair according to the sketch.
- We fasten all the parts to each other using a screwdriver and confirmations. We advise you to secure all the parts as best as possible, especially the backrest and the crossbar under the seat, since all children love to ride on the legs of the chair.
Important! If desired, you can give a unique design to the chair. For example, cut out a particular shape on the back of a chair. For example, a heart, a circle or a flower. This must be done using a jigsaw.
- The final stage in making a desk for a schoolchild with your own hands along with a chair is varnishing.