When renovating a small bathroom, you don’t want to lose its usable space. A plasterboard countertop in the bathroom will not only help you make the most of the available space, but also save on the purchase of a vanity unit. The same design can be done in the kitchen, saving money on buying countertops from other materials. The finished structure is necessarily tiled, so no one will guess that gypsum board was used to create it.
Preparatory work
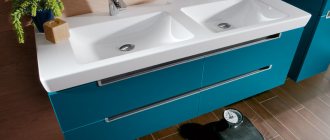
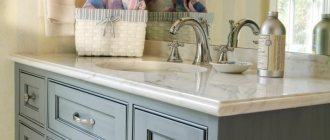
Typical view of a countertop under a sink
Although the plasterboard countertop being created in the bathroom is a small structure, it will still require all the standard materials and tools for working with plasterboard. The following materials will be required:
- moisture-resistant drywall of any size;
- metal profile for the frame;
- self-tapping screws 3.5x35mm for fastening;
- dowels for fastening the frame;
- moisture-proof putty and tile adhesive;
- reinforcing mesh;
- facing tiles.
The list of tools is also standard. It includes a drill, screwdriver, jigsaw, metal scissors, level, tape measure, spatula and brush. It is clear that this list is not complete and can be supplemented as necessary.
The tools and fasteners are the same for all cases, but everyone must decide on the location for themselves. If the hoses for the faucets have already been routed, then a plasterboard countertop under the sink is made in this place. You can arbitrarily choose a place for the countertop only if you change the position of the washbasin in the bathroom. But for this you need to do your own hose routing.
The tabletop should be installed at a height of 70-90 cm from the floor. In this case, it will be most convenient to use a washbasin. Also, the sink should be 10 cm away from the wall, so it’s worth taking these dimensions into account when choosing a location and calculating the size of a plasterboard countertop.
You need to buy a sink to know what its dimensions are. Then it will be possible to think where and at what distance from the floor and walls it can be installed. This will help determine the size of the tabletop and frame.
It wouldn’t hurt to make a drawing of the future design
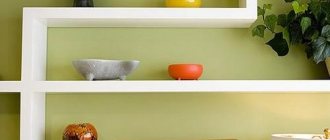
A niche in the bathroom made of plasterboard is a convenient decorative element
Niches have been used since ancient times. This is a convenient structural element, which is an opening in the wall and serves as a place to store things. A niche allows you to relieve free space, make it more functional and convenient. In addition to its main purpose, a niche can serve as a place to place spotlights, making the interior more romantic and mysterious.
A niche allows you to hide communications elements that make the appearance of the bathroom less presentable. For example, water or sewer pipes can be hidden behind a wall.
To avoid that the usable space is not wasted, you should build a niche that can be used as a place to store household chemicals or hygiene items. If you do not want the niche to stand out from the overall stylistic design of the bathroom, it should be lined with materials that were used to decorate the walls. If you plan to highlight a niche, then bright colors and textured materials will be excellent assistants in this matter.
Before you start creating a niche in the wall, you need to pay great attention to its appearance, size and configuration.
Niches are:
- Round;
- Oval;
- Square;
- Rectangular;
- Trapezoidal.
If the width of the wall allows, it is better to organize 2-3 small ones rather than create one wide one. The free space in the niche can be filled with shelves made of glass or mirror. This way you can give the room a spectacular appearance.
When you plan to place a niche near a water source, then it needs to be designed at a slight slope. Splashes of water entering the recess will drain freely, which will prevent the occurrence of mold and unpleasant odors.
Creating a frame for a table top
When making a plasterboard countertop in a bathroom with your own hands, it is very important to take care of its reliability. This requires a strong frame. Theoretically, it is possible to make a tabletop hanging in the air (supported only by the wall). But due to the large weight of the sink, it is better to abandon this idea and create a frame supported by the floor.
Two profiles connected by a box are strong enough to support the frame
- We mark lines on the wall and floor where the profiles for the frame will be attached.
- We attach the profile vertically to the wall. We also attach them to the floor. To do this, holes for dowels are made in the profile in increments of 20 cm. Similar holes are made in the floor and wall with a drill. The number of vertical profile strips depends on the size of the tabletop.
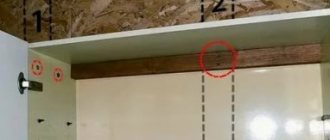
- Another profile is mounted horizontally on the wall. It marks the top of the tabletop and serves as additional support.
- Then two more profiles are attached parallel to the profiles on the floor and on the wall so that rectangles are created. The metal profiles are fastened to each other using metal screws. The result should be a parallelepiped, but without the near lower profile.
- It is better to make all racks that rest on the floor from double profile for greater reliability.
- The lintels in the upper plane of the frame are made of double profile so that they serve as a support for the washbasin. You need to know the size of the washbasin. The same jumpers are inserted into the side walls of the frame.
This method of creating a frame is also suitable for those who are interested in how to make a table for a bathtub from plasterboard.
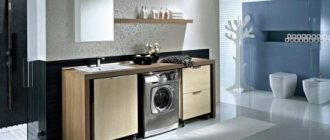
Types of sink cabinets
Depending on the location, the cabinets are divided into:
- hanging;
- floor;
- corner.
There are many options for making a bathroom vanity.
Finally, the product can be decorated using self-adhesive film, enamel, varnish, or veneer.
Hanging models look light and do not burden the interior with dimensions. This design is applicable in any situation, even when the location of the plumbing ducts does not allow the installation of large floor furniture options. Hanging cabinets require walls to meet increased strength requirements. Installation is more difficult than floor structures. When choosing, you will need to take into account the weight of the product and future contents. Hanging versions do not require storing heavy objects. Such cabinets are not afraid of puddles on the floor. Subject to operating conditions (avoiding overuse), they last a long time.
It is advisable to select parameters based on financial capabilities, expected functions of the item, style, dimensions of the bathroom, personal preferences of the owners
Floor variations are especially popular. They are stable and allow you to store quite heavy items (washing powder, household chemicals). Bedside tables are made on legs and monolithic plinths. To ensure better stability and safety, additional fixation of the cabinet to the wall is allowed. The versatility of the item makes it in demand.
Hanging models look light and do not burden the interior with dimensions.
Depending on the method of attaching the sink, it is necessary to make a countertop: an overhead sink or a panel with a hole for the washbasin.
Corner models characterize the location of the cabinet. They are made suspended or floor-mounted. Corner models do not “eat up” a lot of space by occupying space that is poorly used in any interior. The use of corner cabinets is preferable for small spaces. The nature of the location allows for profitable use of valuable square meters. The spacious shelves of the corner bedside table can significantly expand the possibilities of the storage system in the bathroom.
When choosing, you will need to take into account the weight of the product and future contents.
Based on the method of installing the sink, cabinets are divided into the following types.
| Washbasin type | a brief description of |
| Consolidated | Consolidated modifications of washbasins are manufactured connected to the body of the cabinet. In most cases, it is impossible to make such a model with your own hands. The tabletop, which is an inseparable part of the bedside table, initially contains the washbasin. |
| Overhead | It is easiest to make cabinets with an overhead type of sink mounting yourself. The bowl is placed on top of the furniture box instead of the tabletop, secured, and sealed if necessary. |
| Mortise | Cabinets with a mortise method for installing a sink when made independently will require skill. The bowl is placed in a hole cut out for it on the top wall of the furniture section. The opening must exactly match the parameters of the sink, otherwise the finished cabinet can simply be ruined. |
Subject to operating conditions, they last a long time.
Sheathing with plasterboard
Only now we need to take measurements and cut the gypsum board. Some people advise immediately cutting a hole for the sink, but this is very inconvenient to do while hanging, and even with two sheets of drywall. Moreover, their sizes are different (one is sewn on top of the frame, and the second on the bottom).
Making a countertop for a rectangular sink is much easier
A sheet of plasterboard is screwed onto the top of the frame, which will be the front part of the tabletop. Then a contour for the washbasin is drawn on it. To do this, you can attach the washbasin itself or use a special model that usually comes with it. Don’t forget about the lintels, because they serve as additional support for the sink.
When the top plasterboard countertop in the bathroom is screwed in place, we attach the bottom sheet (its size will be slightly smaller than the top one due to the profiles). Now, using the existing contours, you can cut out a hole for the sink using a jigsaw. Moreover, it is cut through two sheets at once.
The sink is installed only after all finishing work has been completed
Next, all parts of the frame are covered with plasterboard so that the profiles are not visible at all. Do not forget to grab the gypsum board not only around the perimeter, but also in those places where jumpers are installed. Externally, the finished structure will be very similar to a plasterboard table.
It has probably already become clear that you don’t have to limit yourself to just one tabletop. And in its design it is very similar to a cabinet. You can make a plasterboard cabinet under the sink yourself using the same principle as a countertop. It will only be necessary to provide several shelves in the design, if necessary.
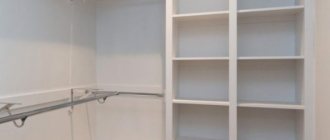
Shelf under the sink
Usually it is made in the form of a floor cabinet, but it can also be wall-mounted or built-in (it all depends on the washbasin itself and its type).
Usually the design has a purely decorative function - to hide the plumbing connections of the sink. On the other hand, it is convenient to store household chemicals on such shelves.
In principle, you can make them with your own hands and under the bathtub. There is practically nothing complicated. You just need to correctly calculate the dimensions and select the material for manufacturing.
The entire work process takes place in 2 steps:
- Frame production;
- Installing shelves
The frame can be wooden, or made of plastic or metal profile. This shelf is usually placed behind the bathroom screen. Therefore, there is no need to make additional doors. It is enough to make a frame and hang shelves from any material on it. You can even use plastic or glass.
When making a shelf for a bathroom sink, it is also necessary to make a countertop. Sheets of moisture-resistant plasterboard, plastic or wooden lining boards are sewn onto a frame made from a profile. Horizontalness is checked with a level.
Thus, the entire process of making a shelf for a bathroom can be divided into several stages:
- Planning;
- Preparation;
- Installation.
It is important to have a working tool and a sufficient number of consumables so as not to abandon the production of a structure due to a banal lack of screws or a broken drill.
It is also necessary to remember that all wooden and metal surfaces must be coated with a special antiseptic composition that prevents rotting, mold and rust.
Finishing
The finishing plays a very important role due to the fact that the countertop will be in constant contact with water. Moisture-resistant drywall alone will not be enough. The first step is to cover the heads of the screws with enamel so that they do not rust. There is a lot of debate on this topic, because black screws should not rust, but practice shows that in this case additional protection will not be superfluous.
Plasterboard countertop in bathroom covered with tiles
All gypsum board joints and screw heads are puttied. You need to choose a moisture-resistant putty. Also, a special reinforcing mesh will need to be laid at the joints to make the entire structure more durable. You can use tile adhesive instead of putty. After this, you need to apply silicone sealant over all joints to prevent moisture from penetrating into them. This is especially true if the countertop is made of plasterboard in the kitchen, where dishes are constantly washed and splashes fly in all directions.
If the tabletop has rounded edges, then to cover them you need to use mosaic tiles that will go around all the contours.
In the vast majority of cases, finishing cladding is carried out using tiles, ceramic or mosaic. There are usually a lot of problems with ceramic tiles, because the countertop is not that big, so the tiles will have to be trimmed. But mosaic tiles are just well suited for tiling small areas.
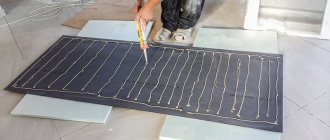
The entire surface is primed before laying the tiles. After the primer has dried, tile adhesive is applied with a notched trowel, and then the tile itself is laid out. Then you will need to sand the seams. For this, a special grout mixture is used. You can find out how much of this mixture you will need depending on the size of the tile and the width of the joint from the table.
Table of grout mixture consumption for ceramic tiles
Another question arises. How to hang a sink on drywall? If everything was done as described in the article, then you won’t have to hang it anywhere, because you can insert it directly into the tabletop. To do this, the shell is inserted into the previously made hole and placed on silicone glue. This way it won’t wobble and water won’t seep through the cracks.
Manufacturing technology
Making furniture from plasterboard with your own hands is not difficult, just strictly follow the installation instructions. The algorithm for performing the work is as follows:
- Make a diagram of the future piece of furniture, draw a drawing;
- Make markings on the surface;
- Cut the material to the required size;
- Assemble the frame for the structure;
- Cover the sheathing with plasterboard;
- Perform final finishing.
If you follow this action plan, then furniture made from gypsum boards will be the pride of the apartment owner.
Schemes and drawings
Before you start making furniture from plasterboard, you need to determine the location of the structure. This will help you accurately determine the dimensions of the furniture and make accurate material calculations. First of all, you need to create a schematic drawing of the future piece of furniture. You need to try to make the design harmonious so that it fits into the interior of the room.
Once the sketch is ready, you can begin marking the surface. This is done as follows:
- We mark the installation locations of the guide elements. To do this, we make marks on the floor and ceiling, using a plumb line we check their parallelism relative to each other;
- We set the beating cord according to the marks, pull it tight and release it sharply. This results in a straight line on which the profile will be installed;
- Then you need to mark the installation locations of the rack profile, depending on the load on the structure, the pitch of the profile element will be 40-60 cm;
- If the design requires this, we mark the installation locations of the hangers that will hold the wall profile;
- We check all lines by level and plumb;
- If you plan to install shelves, immediately mark on the wall where they will be located and how thick they should be made.
At this point, the surface marking stage can be considered completed and you can proceed to the next step - cutting out the material. Before you start cutting out parts from drywall, you need to correctly mark the slab so that there is as little waste as possible. To do this, use a tape measure and a pencil to make marks on the material. Then take the rule and draw the drywall based on the required parameters.
Making the marking of the rack profile
Making the markings of the guides
Marking the places of suspensions
Cutting out parts
In order for the furniture construction work to proceed quickly, you need to prepare all the details of the plasterboard construction:
- Using metal scissors, cut the guide profile to the required length. If the elements are of different sizes, they should be signed with a marker;
- Cut out the rack elements using scissors;
- Prepare jumpers. To do this, take a wall profile and cut it into pieces that will be 5 cm larger than the expected distance between the posts. This is necessary to form the ears that will be attached to the profile;
- Cut the drywall into slabs of the required size. This can be done with a simple construction knife. Draw a straight line on the slab along the level. Attach a rule or a long ruler to it and cut through the cardboard layer. Then carefully bend the sheet strictly in a straight line and cut the second layer of cardboard;
- All cut out parts must be signed with a pencil or marker so that during the installation process you understand which part to screw where.
Once all the parts are ready and signed, you can begin installation.
Preparing rack elements
Cutting sheets of drywall
Guides need to be cut
Assembly
One of the most important stages of installation is the assembly of the frame from profiles. Not only the appearance of plasterboard furniture, but also its reliability depends on this. Instructions for performing the work are as follows:
- Install guide elements on the floor and ceiling. To do this, place the profile on the marking line and, using a hammer drill, make holes for the dowel-nail, in increments of 25-30 cm, depending on the required rigidity of the structure;
- Once the outline of the structure is ready, you can begin installing the wall profile. To do this, we insert the racks into the guide element and secure them together with special “seed” self-tapping screws. Two fasteners per one edge of the profile are sufficient;
- If you plan to install shelves, then it is worth mounting the crossbars in the places where they will be located;
- Install jumpers throughout the entire structure; they will make plasterboard furniture more stable and give it rigidity. The jumpers are secured with small screws on both sides.
There is another way to assemble furniture from gypsum plasterboard, which is used by professionals. First, individual parts are assembled, which are then screwed to guide profiles installed around the perimeter.
At this stage, you need to install the electrical wiring if you plan to install backlighting. All communications are hidden under the panels, and holes of the required diameter are drilled to attach the lamps. If you plan to install an LED strip, you need to think about where the heat sink profile will go. The electrical wire must be corrugated for safety.
Installing guides
We mount the wall profile
Making shelves
We mount jumpers
Now it's the drywall's turn:
- First of all, whole slabs of material are mounted to the frame - assembly starts from the corner. Attach drywall to the sheathing and fasten it with black self-tapping screws. The fastener pitch along the edge will be 15 cm, along the slab itself 25 cm;
- Then the second element is mounted in a checkerboard pattern. The joints between the materials should not exceed 2 mm;
- The smallest gypsum board elements are installed last.
Work on making furniture from plasterboard must be done carefully, constantly checking the installation of parts at the level. When constructing complex, curved structures, you need to install gypsum board slabs immediately after cutting them, so as not to make a mistake.
Installing solid sheets
We fasten the panels in a checkerboard pattern
Finishing
Once the structure is ready and sheathed, you can begin finishing, which is done in the following way:
- Sew the seams between the sheets of material at an angle of 450. To do this, take a stationery knife and cut through the edge of the material;
- Apply deep penetration primer using a brush;
- Mix the putty solution;
- Use a small spatula to hammer the mortar into the seams, and use a large spatula to level the surface;
- While the putty has not dried, stick the serpyanka and apply a second layer of mortar, so as to hide the reinforcement at the joint and leave to dry;
- At the corners you need to install perforated elements with putty. To do this, coat the corners with the solution, press the perforated profile, check the level and coat it on all sides, trying to make the surface as even as possible;
- Apply primer to the entire structure in two layers, allowing each subsequent layer to dry;
- Apply a base layer of putty; to do this, take a wide spatula, on which you apply a little putty composition and, starting from the corner, stretch the composition along the wall. The process should be continued until the process is completed;
- As soon as the first layer of putty has dried, you can apply the finishing compound and let it dry well;
- After this, the entire structure should be sanded to perfect smoothness and primed.
The last stage will be finishing, depending on the material with which you plan to finish the plasterboard furniture with your own hands. There are a great many design options for interior items, for example, you can:
- Paste wallpaper;
- Apply decorative plaster;
- Paint with water-based paint to match the overall interior;
- Decorate with decorative stone;
- Use PVC or MDF panels.
Despite the fact that plasterboard is an inexpensive material, it can be used to construct various interior items that will amaze with their beauty and originality. In the photo you can see the interior design, which contains furniture from gypsum plasterboard.
Prime the surface
Drywall was originally created to level surfaces, but craftsmen gave it a new life in the manufacture of cabinets, kitchen countertops and other structures.
Furniture made from plasterboard can harmoniously fill the space of any room, because the correct use of installation technologies allows you to give it different shapes and dimensions. The material can be easily adjusted to any size and installed manually.
What does a room decorated with plasterboard sheets look like?
Drywall is a find for every designer. With its help, any fantasies can be realized, and thanks to dyes with a rich palette of colors and modern decorative elements, they make the idea unique. Attracted by the affordable price, quick and easy installation without unnecessary pollution, low weight and the possibility of reconstructing damaged elements.
The kitchen is the main room in every home. Various delicacies are prepared here, guests are received, a significant amount of time is spent here, and therefore every owner wants to furnish it as comfortably as possible.
Furniture made from plasterboard is practical, durable and hardy. Tables, pencil cases, various niches and shelves, bar counters, cabinets, kitchen units or even beautiful arched structures can be built with your own hands.
Assembly does not require special skills, the main thing is to adhere to the dimensions in the drawing, be able to work with a hammer drill, screwdriver and metal scissors, and initially take correct measurements using a tape measure and ruler. Shelves (open or closed) are a simple and practical option. The basis is a metal frame on which the gypsum board is attached.
Durable table made of gypsum board and metal frame
It’s not difficult to make a table for tea drinking with your own hands. Sequence of stages of table manufacturing:
- select material for a stable frame - wood, steel;
- steel guides are connected with self-tapping screws;
- trim the frame with plasterboard sheets, measured in advance in size and carefully cut;
- cover the seams and screws with putty, and then sand them with sandpaper;
- The last stage is decorative finishing - painting and drawing of your choice.
Making a bar counter with your own hands will not take much time:
- The size of the finished structure must correspond to the dimensions of the kitchen. Having made calculations and measurements, a frame of metal strips is mounted. To make it stronger, fix a solid bar in the corners.
- Having made the perimeter of the rack, transverse profiles are placed in it. Then fix it to the surface of the walls and floor using a level.
- If the frame has successfully passed the strength test, gypsum plasterboard is attached to it. Self-tapping screws with corresponding caps are screwed in with a screwdriver (the distance between them is maintained at 15-20 cm) so that the sheets are held tightly.
- Then the seams are puttied and sanded. When the structure is ready, decorative surface treatment begins.
Bar counter
Installation of plasterboard sheets
Now you need to start cutting drywall fragments, taking into account the required dimensions. At this stage, it is very important to observe all the necessary dimensions so that two adjacent fragments form an even line. Edges and protrusions are not allowed.
Installation of drywall sheets
After this, the cut pieces of material should be secured to the profiles installed on the wall. To create a three-dimensional effect and to increase the strength of the structure, it is necessary to install additional profiles along the edges of the niche, the size of which must correspond to the size of the guide profiles.
Before installing all the plasterboard fragments, it is better to carry out the necessary communication networks in advance:
- cable for connecting a TV;
- if you plan to install the backlight, then the cable for its power also needs to be laid in advance;
- Particular attention should be paid to sockets, which should be located in convenient places, since you will need to connect several devices at once.
After laying all the cables and wires, you can begin installing fragments of drywall, which need to cover the entire front panel of the structure, after which you can begin cladding.