Any furniture should combine the beauty of design and ease of use. In small apartments, where every square centimeter is worth its weight in gold, the compactness of furniture plays a huge role. In this case, the ideal solution would be to install a corner cabinet, which, despite its large capacity, will not take up much space. Having ordered the furniture he likes, the buyer is faced with the issue of installation. There are two options for getting out of the situation - entrust the assembly to strangers and overpay an impressive amount of money for it, or solve this problem yourself.
The advantage of corner cabinets is that they take up little space, but they can accommodate a lot of things.
Try to accurately align all the holes, do not force them together by inserting a tie when the holes do not yet line up completely.
Specialists know exactly how to assemble the product correctly and quickly.
DIY assembly
Assembling a corner cabinet with your own hands has a number of advantages.
- Firstly, it saves money.
- Secondly, by assembling furniture yourself, you will be able to do everything efficiently, because you cannot always rely on the conscientiousness of hired workers.
Also, despite the fact that this activity is labor-intensive and painstaking, it is also interesting and useful, because after completing this work, you gain new experience. It is important to understand that this process does not have significant difficulties and does not require special professional skills; the buyer receives a kind of large construction set with assembly instructions. Even if the parts kit does not contain instructions, you can always turn to the Internet for help.
This is an ideal option for people living in small apartments, where every centimeter is valuable.
When a corner wardrobe is installed in combination with a compartment model, it is possible that the door of the former will hit the compartment.
At least two workers go to assemble furniture and can competently help each other.
Features of the corner design
Typically, in rooms with non-standard dimensions or a small area, corner-type structures are installed. Such furniture is designed to provide comfort and add originality to the interior. Corner cabinets have design features, among which there are pros and cons.
To assemble this cabinet yourself, without installers, you need to highlight the product features:
- The cabinet has 4 walls, unlike standard models: 2 of them are pressed against the wall, the rest serve as support strips on the sides of the cabinet;
- Dimensions must be accurate - before choosing a model that will fit the room, it is necessary to accurately measure all dimensions: depth, height, width of the furniture;
- Patterns can have different shapes: g-shaped, pentagonal, triangular and trapezoidal;
- The corner wardrobe is equipped with hinged or sliding doors.
For self-assembly, it is best to buy corner models with folding wings. They are hinged and screwed to the body.
Each product usually comes with installation instructions—some companies insist on calling assemblers rather than completing models with diagrams. If this is the case, this should be reported to the dealer at the time of purchase.
Installing hinges on glass doors
Four-hinged hinges for glass doors are distinguished by the presence of a special tab for attaching the cup and a cover for masking the device from the outside.
If you have no experience working with glass, it is better to turn to specialists to drill holes. Before this, you need to establish preliminary markings of the locations of the loop cups. At the same time, they also take into account the hole where the handle will be hung.
Overhead hinges are also used for glass doors, which can be hung without drilling glass.
You need to place and secure the cup in the drilled holes using a tab, and attach the counter plate to the box with self-tapping screws. Afterwards the door is aligned along three planes.
For glass doors, overhead hinges are also used, which can be hung and fastened without drilling the glass. They are mounted inside the box; accordingly, all shelves in the closet must be recessed inward. Suitable for light sashes only. For example, for the bookcase department.
Four-hinged hinges come in different modifications, which can be selected depending on the location of the panel relative to the box and the cabinet itself in the room.
Invoice
The canvas attached to this loop is completely perpendicular to the body and covers the stand. Used when the door overlaps the side rail of the cabinet.
Invoice
Half waybill
Insert
The door leaf is perpendicular to the post, but does not overlap its end.
Insert
Transformer
Used to create composite facades from several doors or in cabinets with drawers that are hidden
Eight-joint
It has all the characteristics of a four-hinged hinge, only without inserting the cup into the facade body. It is attached with self-tapping screws, so it is only suitable for fabrics with a dense texture.
Eight-joint
Instructions for assembling the corner cabinet body
Place the base on the legs, insert the vertical inner panels into the top. Part 61 is attached to the center, and part 71 is attached to the rear edge. They are attached to each other with a corner piece.
Next side panel 07. Close the locks. Hold this part.
Position the upper corner 01, secure the part with all vertical panels. Installation is carried out using a ladder.
Secure the left vertical panel and secure the locks.
Place shelves 02 and 03 on small rods. Rear wall 20 and 19. Add shelves 21.
Step by step installation
Step one: Assembling the corner frame of the cabinet (plinth), which is located at the base. This is an important part of the frame, since if it is missing, the doors of the swing closet will hit the floor. As a rule, the base is located at a distance of about 5-10 cm from the floor. The main material is chipboard. It has the shape of the cabinet frame itself, but does not stand out outside of it (compact).
The parts of the base are connected to each other with self-tapping screws or Euro-screws. Sometimes this additional element is made high, which allows you to create a lower shelf for storage.
Installation of skirting boards
Step two: assemble the body parts. At this stage it is necessary to connect the side, top and bottom parts of the entire structure. They are attached using Euro screws, plastic and metal corners. The place where the parts overlap each other is additionally reinforced with wooden wedges. In addition, at this stage, partitions must be fixed to provide stability to the fence.
If the design includes a base, all elements of the housing are attached to it. If there is no plinth, then the cabinet is installed on a flat floor, then the cabinet is raised and fixed in a vertical position.
Installation of housing parts
Step three: installation of the back wall. This is an important part of the cabinet design, which not only serves to limit the internal space, but also provides stability. Typically, sheets of durable plywood or fiberboard are used to make this part. The first option is more expensive, and the second is cheaper (less durable).
Attach the back piece so that the sides form a single piece. Secure it with self-tapping screws around the edges. This part can only be connected to the internal partitions if they are securely fastened.
Rear wall installation
Step four: installing shelves and rails. If desired, you can securely attach the shelves or leave them movable. The second option allows you to delete them and exchange them in the future. Reliable fastening involves installing parts using corners and screws directly on the cabinet walls. In another case, the supports are attached to the walls of the structure, and then the shelves are installed.
Guides must be installed in cases where the structure includes moving doors (cabinet). This will require aluminum profiles fixed at the top and bottom. They will be invisible in the finished structure. Sometimes, if there are boxes, additional rails are installed so that they slide smoothly.
Installation of shelves and rails
Step five: installing doors. After installing the guides, you need to secure the sliding gate. They are installed first from the top and then from the bottom edge. Door leaves should be positioned relative to each other so that they can be easily separated.
Hinged doors hang on furniture hinges. The hinges are pre-set with a shaped groove. At the same time, they will be secured inside using Euro screws.
door installation
Step six: door installation. Thanks to the presence of hinges, swing doors can be moved slightly. Screw #1 allows you to move the door horizontally in different directions. Screw #3 allows you to move the door as close to the cabinet as possible. The remaining screws are not adjustable; they are only needed during installation.
Door installation
Cabinet model doors can be adjusted by pressing or loosening the bottom wheel. This is done using the screw at the bottom.
Lower wheel adjustment
Step Seven: Cover the connections with end caps. If after installation the fasteners are visible from the outside, they can be covered with special furniture caps. They are available in various colors at any furniture store.
conclusions
Types of hinges for furniture
The following types of hinges are used for cabinet doors:
Types of hinges: hinged (left) and four-hinged (right)
Furniture hinges are divided into several subtypes, depending on the method of application and, accordingly, the area of application. Let's look at them in more detail:
Types of furniture hinges depending on the method of application
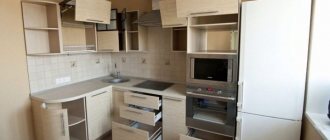
Assembling corner cabinets in the kitchen
If there is a free corner in the kitchen, then you can install a corner cabinet there. This will save a lot of space for storing small household appliances or kitchen utensils. Supplied as standard:
- on the left and right side;
- Organ table and back panel;
- upstairs;
- at the bottom.
A set of internal elements - shelves, rods, built-in baskets. From these parts it will be easy to assemble a corner kitchen cabinet according to the instructions:
- Familiarize yourself with the furniture design, place all furniture components on the floor.
- Assemble the large parts - the base and the bottom.
- Install the side panels, then the top panel.
- Start attaching the interior shelves, which will also hold the frame in place.
- The finished body is upholstered on the reverse side.
- Install the doors. There are 2 options here. If the design is a coupe, then the rails are attached to the roof and bottom. If the model is wall-mounted, then the hinges must be attached to the walls, and the doors must be suspended on hinges.
- Place accessories inside: racks, pull-out baskets, shelves, etc.
- Finally, all visible self-tapping screws should be covered with colored caps.
Tip: Pass-through drawers, pull-out baskets and rails should be installed using a spirit level.
Let's sum it up
Before you begin the process of assembling furniture with your own hands, you should assess the possible risks. It is recommended to entrust expensive or complex cabinets to professional assemblers. But if assembling furniture gives a person pleasure, then this is a great opportunity to save money.
In a special article, we will look at the advantages of sliding wardrobes, the main nuances of their installation, and give detailed instructions on how to independently assemble a spacious wardrobe for a small hallway.
Source
Features and differences of assembly for the IKEA model
Assembling IKEA furniture is a great way to test family relationships. After all, it takes a lot of patience to assemble a stylish corner cabinet for the kitchen or hallway so that it looks like in the catalog. Let's look at the assembly features and differences of this brand.
Tip: To assemble an IKEA corner cabinet, do not do it on a bare floor. The product is made from medium density fiberboard, also called “chipboard”. The material has excellent strength and is resistant to damage, but chipboard is susceptible to chips and scratches.
Therefore, experts recommend installing the IKEA cabinet on cardboard (the box in which it was delivered) or on an old blanket or other fabric.
- The difference between IKEA furniture and other brands is that they put a lot of resources into developing their products. Therefore, if parts somehow do not fit during the assembly process, it is most likely due to an error in a previous assembly step.
- Another feature when assembling IKEA furniture is that the use of a drill is prohibited, as drilling to insert bolts and screws often damages the parts. Ikea furniture already comes with pre-drilled holes.
- An interesting feature of IKEA wall blocks. When installing them, brand employees recommend attaching them not to the wall itself, but to hanging rails. This will make it easier to keep the cabinets at the same level. Ikea products will be able to move on the sides before attaching them to each other.
Types of hinges for furniture
Metal parts are made of durable alloys that are resistant to corrosion and mechanical deformation.
Furniture hinges are divided into several types, depending on how they are attached:
Types of furniture hinges.
For cabinets, overhead structures with cup bases are often used, which are connected to the panel using self-tapping screws. Mechanical inserts with a “shoulder” are inserted into these bases and fixed to the door and side panel.
Such fasteners are quite reliable and durable, since they have a reinforced connection to the planes.
For installation on the doors, it is necessary to use certified industrial products - this guarantees the strength and long service life of the furniture and its individual parts.
Corner cabinet made of plasterboard
Before manufacturing and assembling a plasterboard cabinet, it is necessary to prepare the following materials and tools:
- plasterboard sheets of the required sizes;
- metal profiles (racks and guides);
- Accessories;
- yardstick;
- Scissors for metal and drywall;
- corners for fixing protrusions;
- self-tapping screws (for drywall);
- set of dowels;
- Construction level;
- Screwdriver;
- plaster;
- putty knife;
- sandpaper;
- jigsaw (for cutting sheets);
- additional articles;
- punch (for screw holes);
- decorative plaster for finishing.
If you have the materials and tools listed above, you can begin the construction process.
Frame installation
Step by step instructions.
Step 1: You need to make markings on the walls. At this stage, you need to use a pencil to mark the installation points of the structure on the wall. You may want to double check these values several times to be sure.
Wall markings
Step 2: Start attaching the metal profiles to the wall with self-tapping screws. Accuracy is especially important at this stage, so there is no need to rush. Each element must be securely fastened, since the metal structure will bear the entire load. The screws are tightened in increments of no more than 100 millimeters, so the entire structure is stable.
Each element must be secured
Step 3: The post profiles should be inserted into the guides. Self-tapping screws or European screws are used for this. Since this is a corner cabinet, the profiles must be bent so that they fit into the structure without obstruction. To do this, a notch is made on the beams with metal scissors. This will allow you to quickly bend any profile.
Installing profiles
Step 4: If you are planning to install a large cabinet, you may want to further strengthen the profile structure. This can be done with the remaining profiles that are used to form the cross members.
Reinforcement of structures
Step 5: Before you begin the process of covering the structure with plasterboard, you need to secure the corners. They are made from fragments of the remaining profiles, but if desired, they can be purchased at any hardware store.
Locking corners
Important point! Instead of metal profiles, sometimes wooden beams are used to make the frame, but this is not the best solution. After all, wood tends to shrink, which means drywall construction can warp, causing the plaster to crack.
Sheathing of the structure
Once the frame is ready, the coating process can begin. It's pretty easy to do if you follow the instructions.
Step by step instructions.
Step 1: Attach the drywall to the inside of the cabinet using self-tapping screws. After this, you should completely cover this part with the sheets. It is important to remember that the distance between self-tapping screws should be more than 150 millimeters. At the same time, deepen them into the sheet by 1.5 millimeters so that the fasteners do not peek out. You can read more detailed information on how to make shelf mounts with your own hands in our article.
Fix the sheet
Step 2. Then the outside of the structure should be finished with plasterboard. This must be done with extreme care to avoid mistakes.
Exterior finishing of the structure
Installation of fasteners
The cabinet doors are first fitted to the sides to make precise markings. The initial stage of installing the hinges is drilling holes for attaching the cups.
Making hinges in a vertical position of the door is not always convenient. This will potentially reduce the accuracy of the connection.
Place the sash on a flat surface, securing it. Drill holes for the cup using a drill and cutter. It is important not to make too large recesses, 1.2 cm is enough. Insert the cups into the holes and screw the screws into the door part of the mount.
It is necessary that they fit into the grooves evenly, without distortion, otherwise the door will not be secured correctly.
READ Samsung 500t how to install windows
To install the connecting parts, place the drill vertically - any tilt will make the work poor quality, and chips may appear, due to which the fastening will not hold securely. The strike plate on the side of the product can also be installed in a vertical position of the panel, having previously marked the joints.
When drilling, the drill must also be held very level.
If overhead parts are used, they are made “blind” so that they do not fall apart during connection and assembly. Such fastenings should not have gaps or distortions. Use help when connecting the sash and side frame.
Together, the work process will be more convenient, better and more accurate.
Installing connecting parts on glass doors requires special care and attention. For such sashes, special fasteners are purchased. On the side of the side you will need holes that are drilled using a drill.
The glass sheet is fixed with clamps.
Advantages and disadvantages of a corner cabinet
Each design has its own advantages and disadvantages. The corner cabinet is very popular due to its many advantages.
Corner furniture has many advantages.
The benefits of a corner cabinet include:
- Compact design.
- Space saving.
- Thanks to a well-thought-out layout, cabinets of this design are large in size.
- Capacity.
- Convenient storage of all things and their location.
- If the design is done independently, then additional storage space is specially installed.
- Versatility.
- Great design choice.
- Practicality.
Furniture installation is carried out directly at the installation site.
The disadvantages of the project can be taken into account:
- The cabinet is not movable.
- To order, you will need to purchase a large number of spare parts.
Specialists know exactly how to assemble the product correctly and quickly.
Assembling a corner cabinet yourself is a process that requires time and concentration. Any wrong action can lead to serious re-alignment of the structure. It is important to observe all the nuances and follow clear instructions for assembling a corner cabinet.
Installation of fasteners
Marking
First of all, you need to decide on the number of hinges that need to be installed on the door. This characteristic depends on the size and weight of the product. For small wall cabinets, two hinges are enough, for large furniture - from three. Compliance with the recommendations below regarding the number of fasteners will allow you to securely fasten the doors:
READ How to establish the relationship between a grandmother and granddaughter
Installation of furniture hinges: how much is needed
For marking you will need a pencil, level and tape measure. At this stage, you should adhere to the following tips:
Marking the cabinet door for the hole for the hinges
Drilling and installing hinges
After marking, you should proceed directly to installation. Installing hinges on a cabinet door consists of several stages. In order to do it yourself, you should follow the following instructions:
Attaching the hinge to the cabinet door
Mounting the strike plate
Before installing furniture hinges on the cabinet, you should take into account the nuances of the process. The fasteners must be on the same axis; this is the only way they will last a long time. Otherwise, the load on the hinges will be uneven, and some of them will quickly fail.
To mark holes for screws, you can use ready-made templates, which will facilitate the process of marking future fasteners and allow you to do it as accurately as possible.
Adjustment
The furniture hinge can be adjusted in a vertical, horizontal plane or in depth. This depends, first of all, on the characteristics of the use of furniture in the future and other nuances. Let's take a closer look at each type of adjustment:
Adjusting and securing furniture hinges
To make an adjustment, you must first diagnose the problem that has arisen. Once its cause has been determined, you will need to tighten it more tightly or, conversely, slightly loosen the bolt on the fastener body.
Installing a hinge on a glass cabinet door
Before installing hinges on a cabinet, you need to consider the material from which the furniture is made. The technology for installing a glass facade will have some features. Here are the main ones:
Kit for installing furniture hinges on glass surfaces
It is advisable to install the glass facade on the cabinet without drilling the surface. Working with thin material requires attention and if you move it carelessly, the door may break.
Installing hinges on a cabinet is required when assembling furniture yourself or in case of a broken part. The process does not take much time and is quite feasible even for inexperienced craftsmen. The only thing you should pay attention to is the correct and clear marking. The success of all subsequent actions and the positive result of the work depends on this stage.
You can clearly see the process of installing hinges on a cabinet in the following video.
Follow the recommendations, and you can do all the work of assembling furnishings for your living room, bedroom or hallway yourself.
The hinges must withstand regulatory loads.