Every girl dreams of a magical house for her favorite dolls, and parents want to make these dreams come true. Some people buy in stores, while others prefer to make a home with beautiful furniture for their child unique, but on a budget. This is what we suggest you do today, namely, make furniture for Barbie with your own hands.
At first glance, this may seem very complicated, but it’s enough just to use a little imagination. And if you also involve a child in this process, you will get an exciting and educational game.
Material for creativity can be found in every home: plywood, matches, matchboxes, various boxes, scraps of fabric, jars and much more. We bring to your attention several ideas for furniture made from cardboard and cardboard boxes, as well as detailed master classes with drawings and patterns.
Method for making a bed for a doll from cardboard
When making toy furniture, you need to choose high-quality, safe materials, since this design will be used by a child.
Materials for any toy furniture must be safe. Cardboard is most often used as a base, as it is easy to use and quite cheap.
Cardboard is often used as materials for toy furniture. Beds can be:
- simple;
- double;
- rocking bed;
- two-tier.
In addition to the doll's crib, you can make bedside tables and other elements of doll decor. It must be large enough to support the weight of the toy.
The cardboard bed should be such that it can support the weight of the toy.
Preparation of tools and materials
The first stage of manufacturing is the preparation of materials. You will need:
- Cardboard. It is better to choose the densest one for greater reliability. For example, store-bought or out of the box.
- Covering materials: fabric, colored paper, self-adhesive paper, leatherette, paint or something else.
- Scissors.
- Wire.
- Stationery knife.
- Pencil or marker.
- A4 size paper.
You can also involve a child in making a toy bed. You can also involve a child in the work, as this is a simple process, and the little one will be interested in participating in the assembly.
Step-by-step instruction
Let's take a closer look at how to make a bed for dolls with your own hands. First you need to create a drawing: draw patterns on a sheet of paper. For toy furniture you will need:
- Two backs: for the head and for the legs;
- Two side parts;
- Base.
An example of a drawing of a toy crib. Transfer the patterns to cardboard and cut out using scissors and a utility knife.
Measure the height of the toy, since the size of the product will depend on this parameter. Based on these dimensions, it is worth calculating the dimensions of the parts.
Glue the cut sides together, using wire (about 50 centimeters long) to create a base. To do this, you need to lay two pieces of wire on top of the side edges, secure with tape, and then fill with quick-drying glue.
The cut out cardboard parts are connected using tape and glue. Next you need to pierce the headboard and footboard with an awl and thread the wire into the resulting holes. Lubricate the puncture sites with glue so that the structure is as reliable as possible. The ends of the wire must be cut so that the child does not get hurt. Connect the resulting structure with the side edges and fasten securely. Ready.
Be sure to consider the size of the toy. The next step is decoration. Using glue and tape you need to trim the resulting box.
You can sew blankets and pillows from ordinary foam rubber for a toy crib. You can make a pillow with your own hands from foam rubber, and a blanket and sheet from fabric.
You can decorate the finished bed according to your taste and desire.
What material is best to make it from?
The material from which a doll's crib is made can be absolutely anything. It all depends on what is currently available at home, and on the imagination of the parents and child.
Wooden shields
If you approach the issue thoroughly, then such furniture can be made from wooden panels no more than 2 cm thick, so that the product is not too bulky. The advantage of wood is that the resulting bed looks neat and beautiful and is likely to last a long time. Panels are sold on any construction market at a very reasonable price.
Plywood
If it is not possible to purchase a wooden shield or you do not have the skills to work with wood, you can make a sleeping place from plywood. Plywood is affordable and easy to cut and glue. The resulting furniture can be quickly painted in absolutely any shade or decorated with inserts made of beads, beads or shells.
Step-by-step instructions for creating a doll bed from plywood can be seen in the video:
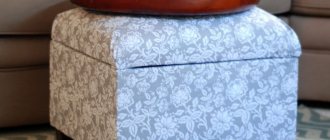
Cardboard box
Cardboard is a universal material for children's crafts, since it is accessible to everyone. It can be easily obtained from common household items: shoe boxes, appliances, and even groceries. You can often get cardboard boxes for free from the supermarket.
It’s easy to make a doll’s crib from a box, but it will also be easy to break. For a bunk bed, it is better to use both cardboard and plywood.
Matchboxes
It is easy to make a frame from matchboxes: to do this, simply glue them together step by step using PVA glue. Externally, the structure will not look very beautiful, but it can be covered with fabric or covered with self-adhesive paper. Before you start assembling, it is better to take used boxes and draw a diagram.
Polystyrene
If you recently bought household appliances, you might have saved a box from the store along with polystyrene foam, which can be used to make a sofa bed for a baby doll. Polystyrene is not very durable, but due to its solid structure, it makes interesting products without glued parts.
Foam rubber
Foam rubber is best used only as a component, since it is too soft for a frame. But if there is no alternative, it can be used for the entire product. By the way, for such a soft sofa bed, ordinary dishwashing sponges, pre-covered with fabric, are ideal.
How to make a bunk bed
Making a bunk bed for dolls with your own hands is more difficult, as it will require some skills.
Making such a bed yourself will be a little more difficult than a regular single bed. You will need the following materials: plywood, screws, bamboo sticks, glue. It is also necessary to prepare the finishing material.
A bunk bed for a doll can be made from plywood. At the first stage of making a bunk bed for Barbie, you need to cut the sticks into 12 parts so that 4 of them are long (the support of the entire structure), and 8 parts need to be cut in half. Treat long sticks with finishing material.
At the end, the doll's crib can be decorated. Screw the screws into the places where the tiers are fixed, to enhance the effect you can apply glue. The bottom is attached using self-tapping screws. Cover the structure with fabric or something else. Do-it-yourself bunk bed for dolls is ready.
This plywood crib will greatly please your child.
Making a bunk bed for dolls
I recently gave my niece a dollhouse.
The child's favorite dolls are Peppa Pig's family. And here’s the problem: in the house there is a bedroom for adults with a large bed and a children’s room with a very small crib, which, even if they wanted to, would not fit Peppa and George. Therefore, the idea came up to make the necessary bunk bed from plastic canvas. The dimensions of the crib depend on the dolls for which we will make this very structure. Based on the kids: Peppa Pig and George. The figures are quite small, so the crib turned out to be small. Base 11 x 7 cm. Height - 13.5 cm.
We start the pattern by determining the dimensions of the bottom. Then we make the sides.
For convenience, initially, I make a sketch on checkered paper, and then I cut out the pattern from plastic canvas. Some people draw with a marker directly on the canvas, but I like the option with a checkered pattern better.
The pattern is quite simple and there is no need to give its exact dimensions. We produce all parts in 2 copies, except for the stairs.
Do not forget to take into account that the toy must fit on the lower level, so the distance between the upper and lower floors must be sufficient for the child to put it down and get it out.
In the cartoon, the crib does not look very interesting, purple, smooth. To make it more interesting, we make teeth along the edge of the sides.
We embroider the details with an openwork cross.
This allows you to add volume to the embroidery. For those who don’t know: an openwork cross stitch consists of six or eight stitches. First, a regular cross is made with the letter “X”, and then additional stitches are made, like “+”.
The main thing is that the sequence of stitches remains the same, then the reverse side will turn out interesting and patterned.
Next, we assemble our parts into a single whole using white thread. It's simple. We sew the edge tightly so that the plastic canvas is not visible. Sew on the ladder.
This is what happened in the end.
It seemed to me that something was missing. And I decided to improve the crib a little. To ennoble, so to speak. Let's make a bed.
To make it, I took vinyl canvas (it is more flexible, but the pillow needs to be given volume), lace and a little padding polyester.
We take one blank, embroider a simple pattern on the cushion, and stitch the edge with white thread. We make two such parts. We sew lace to one from the wrong side.
Now we connect the two halves. I crocheted small blankets from the same thread. Since George's favorite color is green, and Peppa's is red, I also made the beds multi-colored. This is what happened as a result.
Source
Step-by-step making of a sofa for a doll
Let's prepare the necessary materials: foam rubber (cotton wool or padding polyester), fabric or other finishing material, scissors, thread, needle, ruler, tape, glue, cardboard box.
You can also make a sofa for dolls from cardboard. On a piece of paper, create a sketch of the sofa, where the exact dimensions will be indicated. You will need a base, a back wall and two side walls.
Such a sofa will consist of a base, a back wall and two side walls. Transfer the drawing to cardboard and cut it out using scissors and a utility knife. Connect the resulting parts together using glue and a stapler.
An example of a sketch of a doll sofa. Cover the resulting structure with foam rubber.
The resulting structure can be covered with foam rubber and sheathed with fabric. You don't need much to please your child. Assembling a crib for baby toys will not take much time and effort. You just need a little patience and strictly follow the instructions.
Material selection
Children's toys must meet the following requirements: safety, durability, attractive appearance. Proper doll furniture, made by yourself, must be well processed and not have sharp, protruding elements or small parts. Select the material for doll furniture, taking into account your skills in working with tools, the size of the doll, and the age of the child.
Tree
Ideal option: environmentally friendly, durable, aesthetic.
However, not everyone can make such furniture. To make it you will need furniture boards up to 1 cm thick, a jigsaw, and a screwdriver. And, of course, woodworking skills. Here you won’t be able to do it “by eye”: first you need to make a pattern from cardboard, adjust the parts to size, and then transfer the drawing to wood.
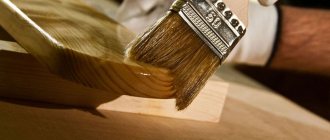
Attention! The wooden product must be carefully sanded so that the child does not plant a splinter.
Unfinished furniture is beautiful in its own right.
You can varnish it or paint it.
The shape of the furniture depends on the needs of the owner: it is interesting to place the baby doll in a cradle to rock him to sleep.
If there are several dolls and little space, a bunk bed will come in handy.
And not only your children, but also your grandchildren will put dolls in a durable wooden crib.
Plywood
Plywood cribs are inferior to wooden cribs in strength, but they are lighter and easier to manufacture.
Parts of doll furniture made of plywood, including beds, can be joined into a groove. To do this, you need to develop a diagram of the product, carefully observe all dimensions and cut it out to the nearest millimeter. But independently assembling such furniture will captivate the child no less than playing.
It is easier to place the parts on self-tapping screws.
Photo ideas of beds and sofas for dolls
Modeling principles
Advice: no matter what material is chosen for production, you need to understand that children need maximum realism.
The crib for your favorite doll should be similar to the real one, but only smaller in size. When modeling, it is better to discuss with the girl what kind of furniture she wants to see. She might want to recreate her own sleeping space or her parents' bed. This point needs to be discussed before construction begins.
All parts for the crib are made by hand and carefully processed (with the exception of one-piece products). When creating toy furniture, it is necessary to apply the principles characteristic of the design of “adult” objects - in this case, the resulting product will meet all the girl’s expectations.