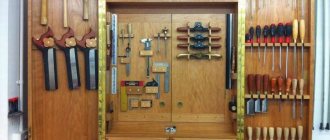
Manufacturing of shelving
Garage shelving design
Details
Everyone adjusts the height, depth and size of the garage shelving shelves at their own discretion, taking into account how many things will be stored on the shelves.
The main thing is not to forget to adjust the size of the spans between the sectional racks. The main criterion is the hardness of the material; the shelves should not bend under the weight of objects.
The lower shelf is placed at a height of 50-70 cm from the floor. Heavy objects are usually placed here. It is most convenient to place the remaining shelves at a height of at least 35 cm. Wooden shelves are lighter in weight and cheaper than metal ones, but they cannot be fully loaded.
Considering the fact that metal is not cheap, and buying all the material on the market, a garage rack will cost you the same price as a ready-made one in a store. The best way out is to buy everything you need at a metal warehouse, in sheets of 6 or 12 mm, and then cut to the required size.
Wood is cheaper than metal, but if you want a high-quality shelving without knots, you will have to buy high-quality material.
In addition, the wood must be treated with an antiseptic.
Also, the garage does not create very favorable conditions for wooden shelves - low temperatures, humidity, sudden temperature changes.
In order to protect the tree from damage, you need to treat it with protective substances and then dry it. To fasten the shelves and the rack itself, metal plates or corners are used using self-tapping screws.
A cheaper option for creating garage shelving is plywood and board. Laminated chipboard is much more expensive; it does not need to be painted or treated with protective substances. The only thing is that silicone must be applied to the side cuts that remain open to prevent moisture from entering.
Metal shelving frame for garage
To create a shelving frame you need:
- metal corners 3-4 mm thick;
- profile pipe with a rectangular cross-section.
The racks are made from profiled pipes, and the crossbars are made from angles. The thickness of the metal is 2-3 mm, the width of the shelf is 25 mm or more. Turn the corner so that the flooring is in the recess. The flooring for the shelves is made from plywood, boards, chipboard, OSB. board, plywood, OSB, chipboard.
First of all, the side elements are assembled, then the cross members are secured.
Crab systems are also a good way to assemble shelving for a garage. These are metal plates with special recesses for the profile. Pipes are inserted into the grooves, then the plates are tightened using M6 or M8 bolts.
First, holes are drilled under them with a thin drill, then expanded with a thick one. Such designs are designed for low weight. There is another way - special crab systems. These are metal plates with recesses molded to fit the profile. Pipes are placed into the grooves, then the two plates are bolted together.
Types of garage shelving
- Prefabricated racks can be assembled and disassembled independently.
- Stationary ones are firmly attached to the wall
- Mobile – can be moved from place to place.
- Rotating ones are used for small objects (bolts, self-tapping screws, nails, nuts, keys, screwdrivers, small hand tools).
How to make a shelving unit in the garage
In order to make a shelving unit in the garage with your own hands, you must first create a project, measure the room, and decide on the dimensions. Calculate the required number of shelves and their depth.
The best solution is a shelving unit that extends the entire length and height of the free wall.
The width of the shelves is about 1 m. This is the best option for placing bulky and heavy items.
Depth - approximately 50-60 cm. There is no need to do more, otherwise it will be difficult to reach the necessary things.
The height of the shelves is within 25-60 cm, the bottom one should be the highest (for large items).
You need to assemble the rack horizontally, and only then lift it.
Selection of materials
The most common:
- wooden structures;
- metal;
- plastic.
The advantage of metal is its durability and resistance to damage and deterioration in appearance. However, it must be remembered that high humidity has a negative effect on this material. Metal elements are easy to care for. But they have a minus - high cost. The performance, however, will be better.
Beautiful and functional multi-level systems are made from wood. Birch, pine and oak are used as raw materials. The advantage of wood is its aesthetics, but the disadvantages lie in its natural properties - it can rot, darken, and gets dirty easily. Special impregnations will help simplify its care. Fastening is done using metal bolts. Small accessories can be stored on plastic shelves. Such structures are lightweight, but do not support much weight. An ordinary plastic shelf is designed for a weight of up to 70-75 kg. If handled carelessly, the material can quickly deteriorate. Combined versions of several materials are also sold.
It is worth paying attention to combined options, for example, made of wood and metal - the product may turn out to be more useful and of higher quality than others.
Advantages and disadvantages of metal shelving
They are suitable for placing any items, thereby saving space inside the garage. Another plus is the wide range of models: there are options for all occasions. Long service life is the main argument for many buyers. And the relatively high price in this case is compensated by the above advantage. In addition, metal racks are resistant to deformation. You don’t have to be a specialist to assemble a system from metal parts. It won't be difficult to take it apart either. However, the first problem that may appear is incorrect installation. Metal structures must be assembled (installed) carefully and scrupulously, otherwise breakdowns are possible. This happens sometimes, and as a result it causes a lot of problems. The quality of a metal product is more difficult to check - another disadvantage.
Pros and cons of wooden shelving
The service life of wooden racks and structures with wooden shelves is 10 years. This is what the manufacturers say. This is a fairly long period, but in order for the properties of the product not to be lost, the room must be heated and not leak when it rains. Wooden shelving looks better in the interior, both those made entirely of wood and those with only shelves made of this material. If the shelves are cut out of plywood, they will lose their rigidity over time. In addition, the tree is vulnerable to insects. In the worst case, both the condition of the boards and general hygiene will deteriorate. If the wood is not sufficiently processed, then upon contact with it, splinters may remain in the fingers. You need to keep in mind that shelving made from noble types of wood is much more expensive. Another nuance is the large amount of waste materials when constructing a wooden rack yourself.
Shelves for storing heavy items
Do-it-yourself wooden hangers and shelves in the bathhouse
How to make a doghouse with your own hands: arrangement of housing in the yard and in the apartment. Drawings, dimensions and original ideas (55+ Photos & Videos) + Reviews
Metal shelving
Typically, metal shelves are used to store very heavy items or items with large dimensions. To securely store things on them, it will be better if they are made as stationary structures.
This approach immediately eliminates bolts as a connecting element. You can buy stationary metal products, the connections of which are provided using various grooves and guides, but this will no longer be an independent production, in addition, such structures are very expensive.
Therefore, it is recommended to use welding to create entirely metal shelves. The use of bolts is allowed in non-critical joints, or where they are assigned the role of fastening light elements.
Metal rack
- As usual, manufacturing begins with the creation of a drawing or sketch. In this case, their location plays an important role. It is advisable to place such products near strong, solid walls. It is possible that a significant part of the load when attaching the rack to the wall will fall on the wall, and if it is of a decorative nature, unpleasant incidents are possible.
- For such shelves, it is best to choose not square profiles as frame elements, but ordinary corners, but with dimensions of at least 50 mm. Often the creation of such products is made not from a frame, but from a wall mount.
- The frame elements are first marked and cut out using a grinder, and then welded into a single structure using a welding machine. At all stages, you should check the right angles of the rack elements: between the racks, crossbars and fasteners.
Frame for metal shelves
- The shelves themselves are made of perforated or rolled steel with a thickness of 1 to 5 mm. Its thickness is determined solely by the desire of the owner.
- At the same time, one should not forget about the weight of the structure. A sheet of rolled steel with dimensions of 50x100 cm and a thickness of 3 mm weighs almost 12 kg, and a sheet with the same dimensions and a thickness of 5 mm weighs almost 20 kg. In addition, do not forget about the cost: a sheet measuring 1000x500x3 mm will cost about 2-3 dollars.
- An alternative would be to use wooden shelves. In this case, you should choose wood with a thickness of 2.5 to 3 cm, which will first need to be treated with a fire retardant to increase its fire resistance.
- These boards can be connected to the frame using bolts. Metal sheets are also attached to the boards with bolts or self-tapping screws. In this case, it is better not to use welding so as not to destroy the wooden elements.
Upon completion of the work, the entire structure must be cleaned of rust and painted.
Manufacturing process: step-by-step instructions
Preparing the work site. Making a rack is a dusty job. Need a lot of space. To do this, it is better to remove the car from the garage. Tools and expensive items should be covered with film. Next, you need to prepare the tools and put them nearby. It is advisable to enlist the help of a friend. Together, the work will be completed as quickly as possible.
Preparing a plan. For ease of work, it is better to draw a plan of the rack in advance on a simple piece of paper. You should also note the measurements of each shelf there. When preparing a plan, you need to take into account the specific things that will be stored on the shelves. It is not necessary to make a standard design. Several different elements can be combined in one system.
Holders and mesh shelves
Installing mesh shelves on the side wall of the garage is a quick option for light items
Purchase of basic raw materials. It can be wood, metal, plastic. When choosing, you should take into account the characteristics of the material, its maximum load, and practicality. When purchasing, you should not save money by choosing low-quality raw materials. It will not last long and will bring a lot of problems during operation.
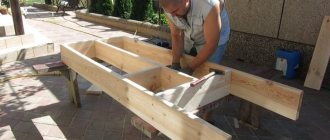
Cutting frame elements. The main elements can be made of a wooden block, a steel angle, or an ordinary pipe. Racks, amplifiers, crossbars are cut using a jigsaw or circular saw.
We start making the rack from the base
Applying markings to racks. Vertical elements need to be marked. This will help in the further installation of the crossbars.
Making grooves for shelves using a router
Drilling holes. Using a drill, make neat holes on the markings. This is typical when using bolted fasteners. When choosing a welded frame, all elements are joined with seams. Without proper experience, the seams may turn out unsightly.
It is also important to follow safety precautions when working with welding. You should read more about this in the instructions for the welding machine.
We install the shelf in the grooves and additionally fasten it with self-tapping screws
Making the shelves themselves
For them, plywood, boards, and chipboard are usually chosen. It is important to follow the measurements exactly.
Assembling the frame, fixing the shelves on the frame. The frame is assembled gradually: first the side posts, then the crossbars, then the amplifiers. Only then the shelves. They are fastened with bolts and self-tapping screws. The fastening must be strong.
Installing the rack on the base
Giving an attractive appearance. The finished rack can be painted, decorated with designer forging, or covered with film. The choice of designer accessories is purely individual. At the same time, you just need to remember about practicality.
Making a rack
DIY cellar in the garage
Once the type of future rack has been selected, you need to select the necessary tools and materials.
To make a garage rack with your own hands, you will need the following materials:
- metal corner;
- reinforcing wire;
- rectangular profile;
- sheet iron;
- wooden beam;
- boards;
- plywood;
- wheels (if necessary).
Depending on the available materials, the tools necessary to work with them are selected. Making a wooden shelving unit is simpler and does not require a large set of tools.
But the load-bearing capacity of wood is much lower than that of metal. In addition, wooden shelves can be susceptible to rotting. But if the things that you plan to store on such a rack are not heavy, then you can get by with them.
Necessary tools for woodworking:
- hacksaw;
- drill;
- screwdriver;
- sanding machine or sandpaper.
Making a metal rack is somewhat more complicated. This is justified by the fact that such a rack is much more durable than wooden shelves.
In addition, it is unlikely to break under the weight loaded on it.
To make a homemade metal rack, you will need the following tools:
- Bulgarian;
- perforator;
- welding machine;
- building level.
Before work, you need to measure the free space and prepare an approximate drawing of the desired rack. You also need to calculate the height of the shelves.
Some shelves should be high enough to accommodate spare tires, fuel and lubricant cans, and large spare parts.
Other shelves intended for storing small items should be smaller in height. To save usable space, they can be made 30–40 cm high.
Video:
The length of the rack can be arbitrary, up to the location of the entire wall. If the rack is located along the entire length of the wall, then it is recommended to make additional fastenings every meter or one and a half - this will ensure the strength of the structure.
The depth of the shelves is also important. For convenience, it should not exceed 60 cm
If the shelves are deeper, then it will be inconvenient to get the desired item from it. For small items, the depth of the shelf can be 30 - 50 cm.
Making a rack with your own hands, of course, will take more time than assembling a ready-made store structure. However, a homemade rack is not inferior in quality to a store-bought one, and even surpasses it.
You can make shelves of the desired size with your own hands, without adjusting to the height and length of the finished rack.
When building shelves yourself, the space will be used more productively, and the structure itself will be made with soul. Happy garage renovation!
Designs and sizes
Structurally, garage racks consist of racks, crossbars and shelves. Sometimes, to increase rigidity, transverse ties are also made on the back side - two steel strips welded/screwed to the outer posts diagonally. They compensate for lateral loads, increasing overall stability and reliability.
Garage shelving can be made according to this drawing (dimensions are approximate)
The dimensions - the height and depth of the shelves - are chosen almost arbitrarily, depending on what you intend to store. The only thing that needs to be selected carefully is the span length - the distance between the racks in one section. It depends on the rigidity of the material that you decide to use: the shelves, even under full load, should not bend. For heavy things/objects, the span is about 1.5 meters; if the load is not too large, the distance can be increased to 2 meters, but it’s definitely not worth doing more. If you need a longer garage rack, install intermediate racks, the distance between which still cannot be more than 2 meters.
A few words about the height of the shelves in the rack. The lowest shelf can be raised from the floor level by 50-70 cm (even more if desired). The heaviest items are usually placed here. The remaining shelves can be made at different heights; 30 cm is inconvenient and impractical. In general, a 1.5 liter plastic bottle should optimally fit on the shelf, which is 35-37 cm. This distance is convenient for use.
Which shelves to choose and where to install
It is best to equip the wall for shelving that is farthest from the entrance to the garage, since this is where it is convenient to place tools, machines, workbenches and much more.
This way, you will have everything at hand, but at the same time nothing will interfere with your free movement around the room.
Everyone chooses the material for the shelving according to their own taste, using such criteria as: lightness and strength (wood, aluminum, metal profile, plastic, steel).
Of the above, wood ranks first in popularity.
If the garage is located in the basement, then such a structure, due to the influence of external factors, will last from 3 to 5 years, and then it should be repaired or replaced with a new one.
The second place in demand should be given to aluminum. The material is very light, so this design is not difficult to move to the right place. Its main disadvantage is its high cost.
Third place goes to steel, which, although heavy, is strong and durable, allowing you to store heavy tools and parts.
Having lots of shelves and racks in your garage is a huge plus, but you should think about where to hang your work clothes and put away some specific items.
Therefore, do not forget to purchase or make one small regular cabinet.
Photos of shelving for the garage with your own hands
Metal rack
Such a design will differ little in the principle of creation from a wooden one. The instructions that describe how to properly make a wooden rack describe almost the same process, the material with which you need to work just changes.
In this regard, if you decide to do everything completely from scratch, then it will be much more difficult for you. You will need a metal drill, just like a hacksaw. You can use simple steel angles, but it is better to take a metal profile, or angle.
Next you need to make drawings and prepare the parts based on them. Drill the required holes in them and assemble the frame itself. Next you need to select shelves - either continue in the same style and make them from metal, or use wood, which is more practical.
Wooden shelves with metal frame
Rack with metal frame
An alternative design option, which is a more expensive, but at the same time more durable and durable solution. The racks in these shelves are made of metal, and the surface of the shelves itself is made of wood or any materials of wood origin.
Such a rack has a higher resistance to moisture and mold. It is more resistant to heat and fire. Moreover, by using metal parts, they can be made dismountable, which will allow you to change the appearance of the structure according to any desire of the garage owner.
Materials and tools needed for work
Corners for shelving in the garage
The racks of such a rack are made from rectangular pipes or from a profile with a width of one of the sides of 5 cm. A 30 mm corner is best suited as crossbars.
The frame is made from a corner, and the thickness of the shelf should be from 1.5 to 3 cm (along the height of the corner). Crossbars made from angles can be attached to the guides in different ways - by welding or using bolts. It all depends on the wishes of the owner.
If you need a durable structure, then welding is preferable; if you require the versatility of the product with the possibility of its further modernization, you should use bolts. The use of bolts allows, for example, to change the height of each level.
Shelves can traditionally be made from any material on hand - from pine to OSB. For reasons of strength, their thickness should not be less than 12-15 mm.
For work you will need the following set of tools:
- drill (screwdriver)
- Bulgarian
- wood hacksaw
- corner
- level
- welding machine (optional)
Manufacturing procedure
Do-it-yourself drip irrigation device in a greenhouse: from a barrel, a plastic bottle, or even an automatic system. For tomatoes and other crops (Photo & Video)+Reviews
Corner shelving frame
It is best to assemble the rack in a free room, and it is advisable to empty the garage of unnecessary things and remove the car from it.
After assembling the frame, it should be screwed to the wall. The assembly sequence is as follows:
Based on the finished measurements, the material of the racks and corners for the shelves is cut using a grinder. The racks are marked in those places where shelves will be attached to them. The corners are screwed to the racks using bolts (or welded in the case of a stationary structure)
In this case, it is extremely important to maintain a connection angle of 90°, otherwise the structure will turn out skewed. Similarly, the racks are connected to each other using crossbars, but at the same time, right angles must be maintained not only between the racks and crossbars, but between the crossbars and the previously attached corners. The assembled structure is installed on its place and screwed to the walls and floor. This can be done, for example, using anchor bolts. The metal frame is sanded using a grinder with an appropriate brush attachment and coated with a primer or paint containing a primer
At this stage, in order to facilitate the labor-intensive process of mechanically cleaning the frame from rust, you can use a chemical rust converter. Typically, converters require a day to dissolve the rust; after which it is possible to paint the surfaces without any mechanical or chemical treatment. After the paint has dried, shelves are cut out of wood or wooden materials and adjusted in size to the finished frame structure. The shelves are sanded, painted or varnished, and then attached to the frame using bolts or self-tapping screws
We do everything ourselves
To make your own storage system, you will need:
- rectangular pipes or metal profiles, no more than 5 centimeters wide;
- corners, take 30 mm;
- transverse metal puffs;
- metal shelves or chipboard;
- bolts, self-tapping screws:
- welding machine;
- screwdriver (drill);
- Bulgarian;
- level;
- hacksaw for metal.
Build process:
- draw a drawing with the main dimensions. Think through all the nuances in advance, this will help save material and your time;
- we cut the profile into the blanks we need;
- on the racks we mark the places where the shelves are attached;
- we attach corners for shelves;
- we cover the entire structure with an anti-corrosion compound or paint;
- if chipboard shelves are used, then we fasten them with self-tapping screws. In wooden shelves, make several holes throughout the entire area, thus ensuring normal air circulation and preventing excess moisture from appearing on things stored in the garage.
Well, we hope that our article has helped you at least a little in understanding the choice of storage system for things in the garage. As you can see, the choice is quite large. Go for it!
Types of garage shelving
Before you go to the store and purchase a garage rack for storing utensils or try to put together a structure yourself, you need to decide what type of shelf you need.
To do this, you need to analyze the size of the garage space, the financial resources that you can spend on purchasing materials to create a shelf with your own hands or purchasing a ready-made structure, and the goals that you need to achieve by installing a rack in the garage.
The main function of a rack or shelf in a garage is to store tools or parts of different sizes. For example, a wheel rack in the garage will allow you to store wheels and tires with rubber.
According to their design features, shelves are divided into:
- open (wall-mounted or vertical shelves). Convenient quick access to the things you need;
- closed (prevent the loss of various tools);
- removable (convenient because it is possible to move or place the rack in the place that is needed in each specific case);
- a shelf divided into cells (makes it possible to distribute things according to their need).
Photo:
Depending on the design, garage racks are:
- stationary. They are constructed from vertical posts and horizontal crossbars, onto which the shelves themselves are then directly attached. In such racks, the shelves are tightly attached, as they are designed for heavy loads;
- mobile. They are equipped with wheels to facilitate the task of moving the structure from one place to another, having first freed it from tools and other things. It is easier to purchase such racks ready-made or a set of parts, which you can then assemble yourself, like a designer;
- rotating around its axis. Designed for storing small items. In appearance and functionality they resemble a CD rack. This design can be used to store nails, screws, bolts, self-tapping screws, nuts, etc. The advantages of this type of shelves are that it saves time on finding the right part, element or tool: by scrolling through the rack, access to any item opens;
- collapsible. With the help of certain tools (bolts, nuts) you can fasten at any height. This is one of the most popular options on the modern car market.
Features of different types of racks
Before you start building the rack, you need to make drawings. To do this, you need to measure the height and width of the walls, the distance between them, and take into account the free space.
To ensure that in a stocked garage nothing threatens the car standing in it, you need to provide free passages on each side of the car.
The most convenient passage width is about a meter. If the garage area does not allow, then you can leave less space.
However, if there is less than 60 cm left for passage, then it makes sense to make shelving on only one wall of the garage - this way you can save free space.
Stationary garage racks are shelves firmly fixed to the walls.
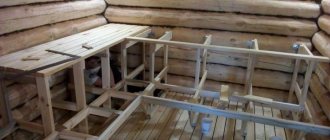
A stationary shelving is a metal or wooden frame along the surface of the wall on which shelves are attached.
So that the structure can withstand more weight, the shelves are firmly fixed to the racks. The racks themselves are attached to the wall to avoid possible overturning of the structure.
If you plan to store very heavy objects on the shelves, then it is better to make the frame metal.
A rack with removable shelves is not much different from a stationary one. It also consists of a metal frame tightly screwed to the wall.
Photo:
Only in this case the frame is made of a perforated metal corner. The shelves should also be made of metal.
To facilitate the design, you can make a frame from a corner, and the shelf area itself from a board.
Such shelves can be screwed to the frame at the desired height, changing their position if necessary. It is most convenient to use bolts for fastening.
Another option for stationary shelving is hanging shelves. The installation of such shelves will help save space in a small garage. This option is only suitable if the ceiling height exceeds 2 m.
To ensure that nothing falls from the shelves during operation, they must be equipped with limiters on both sides.
When installing hanging shelves, special attention should be paid to the fastenings on which the beams will be held. They must be very durable and can withstand a lot of weight
It is better to use reinforcement bars or other light metal elements as load-bearing supports.
The quality of the materials used and experience in performing such work will protect the structure from unexpected collapse.
How to make wall shelves and racks
When creating hanging shelves, you should again create a drawing, select a place to fix such shelves and prepare all the necessary materials. Wall shelves can be either open or closed.
Open wall shelves
In the photo: a storage system in the form of open hanging shelves from GarageTek
In order to hang an open wall shelf, you will need to prepare the garage walls by plastering. Plaster will prevent condensation from forming on the walls, which will maintain the strength and durability of the shelf in the garage workshop.
Having decided on the location for fixing the open shelves, you need to drill holes in the wall using a hammer drill or drill and clean the holes from dust.
A plastic plug is inserted into such holes. The cork must be fixed tightly, otherwise the shelf will not hold. Next, use hardware to secure the lugs to the wall, on which the open shelf will be fixed. At the final stage, secure the shelf to the eyes using a dowel or self-tapping screw.
It should be noted that open shelves are not intended for storing heavy tools and things.
Closed wall shelves
In the photo: a storage system in the form of closed hanging shelves from GarageTek
At the initial stage of fixing a closed wall shelf, it is also necessary to determine the location of such a shelf in the garage. Installing a closed shelf will be slightly different from installing an open shelf, because... a closed shelf can store heavier objects; accordingly, such a structure should be made more stable so that the closed shelf does not simply collapse.
In this case, an adjustable furniture canopy will help. A profile strip is fixed to the wall with anchor bolts, and a hinged closed shelf is attached to the profile strip using a furniture canopy, which in turn is fixed to the upper inner corners of the closed shelf. This design will withstand heavy loads and create an orderly effect in the garage.
Mounted panels
In the photo: a storage system in the form of a tool shield from GarageTek
Another solution in the fight for order in the garage can be a stand or hanging panel for tools. On such a tool board you can store both construction tools and garden accessories by equipping the stand with various hooks and latches.
Installing such a stand will be even easier than installing hanging shelves. To fix the stand, you will need to drill holes in the wall with a puncher or drill and clean the holes from dust. Again, it is better to attach the stand to a plastered wall.
Next, the tool shield is screwed to the wall with four screws and a wrench head. This stand, like an open wall shelf, is not intended for storing heavy items.
Shelving
In the photo: storage system in the form of racks from GarageTek
Having shelving will also help keep your garage organized. Shelving can be made of metal or wood. For a metal structure, welding work may be required, and this requires additional equipment and, accordingly, welding skills, because the rack will be made entirely of rolled angle iron.
Wooden shelving does not require any special skills, but the wood will definitely need to be treated with special coatings to protect it from rot and pests. After processing wooden blocks and boards, be sure to wait until the coating is completely dry. Next, the rack of boards and bars is secured with nails or self-tapping screws.
Racks can be made more stable by attaching them to the wall or made mobile by installing wheels on the legs of the rack. The structure on wheels can be moved around the garage, but for this you need to have a flat floor.
You can attach the rack to the wall in the same way as hanging shelves. In addition, hanging racks solve the problem of several individual shelves - this design is holistic and is additionally fixed for stability.
In cases where there is no opportunity or desire to do manual work, and order in the garage is mandatory, then you can entrust such work to the GarageTek company. GarageTek provides a full range of professional services for arranging a garage and organizing garage space, taking into account the wishes of the customer.
Helpful tips for efficient tool storage
And a few more tips, a kind of instruction on how to ensure convenient storage of the tool:
If the room is made of bricks or blocks, then it is best to place a shelf for storing tools on a plastered wall to avoid the accumulation of condensation between the back wall of the shelf and the wall of the house.
The height of the shelf - shield is calculated based on the height of the garage owner. This calculation will allow you to easily access any tool.
For maximum comfortable use, it is better to make all shelves open.
Combining a shelf-board with pegboard elements, i.e. boards with perforations, will provide additional fastening for tools.
After reading this article, all that remains is to grab the tools and start creating the desired shelf. In this process, you can completely rely on your imagination and experience, or you can use photos of shelves and tool holders. The main thing is to believe in yourself and the result will certainly be achieved.
