Beautiful and original kitchen, assembled with your own hands
You bought a new kitchen set and brought it home, but you don’t want to give ten percent of its cost to the assemblers from the store? Installing a kitchen unit with your own hands is not such a difficult process. Do it yourself if you have the necessary skills and are not afraid of difficulties. Want to know how to assemble a kitchen set? Use our tips.
Sealed kitchen set
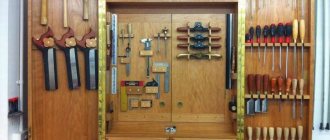
Required tools for assembly
First you should collect the tools that will be useful in your work. Even assembling an IKEA kitchen will be faster and easier if you prepare everything in advance.
To work you will need:
- Screwdrivers of different sizes;
- Drill with several drills;
- For fastening, a hex key may be included in the kit;
- Level;
- Ruler;
- Pencil.
You can use a screwdriver, which will replace several tools at once.
Comments
No comments yet
I'm going to start professionally assembling kitchens (before that I assembled office furniture). Question for the professionals: what tools are needed for this (electric and manual)? The question is very important to me, so I kindly ask you to respond.
Now we have a screwdriver and hand tools (hammer, screwdrivers, etc.)
I plan to buy: 1) A jigsaw. So far I've settled on Makita 4324, but is it suitable for my purposes, i.e. make cuts in the countertop for the sink, stove...? 2) Hammer. Or an impact drill will be enough (for drilling holes for the tire)
From email The tool seems to be all right, if it’s wrong, correct it.
Hand tools and accessories: 1) Jigsaw files. I looked at the table. Very large selection. Am I doing the right thing if I buy universal files, or should I take one for the tabletop, another for the chipboard, and another for the baseboard? Which ones are needed? 2) “Crown” for cutting out holes for spotlights. What size/dimensions are needed? 3) Level 4) Stepladder (is it necessary or can you do without it)
What else from your experience may be useful for assembling kitchen furniture. I would be very grateful to hear your advice. Thank you
In fact, you don’t have to make any serious investments in tools for assembling furniture. Of course, if you do not immediately decide to open a powerful furniture production.
To assemble one sliding wardrobe, computer desk or kitchen, it is quite possible to get by with a limited set of the most necessary tools for the manufacture of cabinet furniture, the list of which we will discuss below.
Assembly of kitchen cabinets
The kitchen set comes from the manufacturer in the form of flat panels of different sizes. The kit also includes fasteners and accessories. From the presented forms, you should assemble cabinets that stand on the floor and hang on the wall.
Where to start is up to you to decide. You can install pieces of furniture in pairs. Or do the upper ones first, and then assemble the lower cabinets. Kitchen assembly instructions are a great help in your work.
Fastening and installing countertops and installing wall panels
- First, you should mark the tabletop, making an overlap of 1 cm from the edges in advance. Try to attach the tabletop directly to the wall. Even if a gap remains, it can be easily hidden with a plinth;
- Using a jigsaw with fine teeth, saw off unnecessary edges and adjust the tabletop to size;
- If your kitchen is corner, a special metal strip is used to attach the countertops, which is attached to the end of the countertop and closes the gap between the tables;
- The ends that remain “bare” near the stove should also be covered with a metal film, and in places isolated from heat, you can use furniture edges.
- The tabletop itself is attached using self-tapping screws. Basically, it is attached with a protrusion of 3 cm from the edges of the furniture, but this is done entirely at your discretion.
Today, many people use glass covering, mosaic or tiles on the wall between fittings to protect against smoke, soot and grease. If you are not one of these “many”, then use wall panels that will reliably protect the surface of your kitchen. They are attached very simply - on running dowels, which are located 1 cm from the edge. The only drawback and difficulty in installing such coverings is the need to cut holes for sockets, which can only be done using a crown attachment.
To maximize the service life and proper operation of your kitchen, you should treat the cracks in the furniture with silicone sealant, which will prevent moisture penetration.
Locker assembly plan
To obtain the correct collected item, you must follow a certain algorithm:
- There are already holes on the side walls to attach cross-shaped parts for hanging the doors (you will need 2 self-tapping screws);
- Rails are immediately screwed to the drawers, since it will be more difficult to do this later;
- Dowels are inserted into the existing holes, this will make the base stronger;
- Then, after making sure that the cabinet walls are even, screw in the tightening bolts;
- Caps are placed on each screw to match the color of the furniture;
- Next, the legs are installed, the height of the cabinet is set;
- A plywood sheet is nailed to the back wall;
- If the cabinet is wall-mounted, then parts are screwed to it that will hold it on the wall.
Rules for assembling a wall cabinet
After preliminary preparation, you can proceed to the main work. If you start with wall cabinets, then the set usually includes 2 side panels, 1 top panel, 1 bottom panel, two doors, and a fiberboard back.
You can see in detail how the Leroy Merlin kitchen is assembled:
- First you need to install the hinges that will hold the doors on. They can be overhead or mortise. The second option is considered the best. Where to attach these parts is already marked at the factory. Therefore, you need to fold the door and side panel correctly (it is better to do the work on a flat surface).
- The bottom and top are then attached to the sides. Fastening parts are supplied with the kitchen. To work you will need a hexagon. You can use a screwdriver if you have the right bit. The sides of the cabinet already have marks for installing fasteners. After screwing the holders, you need to turn the cabinet face down. The back wall will be made of fiberboard, laminated on one side. It must be laid evenly so that there are no distortions. The sheet is nailed to the cabinet with small nails and staples, alternating them.
- Mounting corners and shelf holders. Holes for metal stops are already drilled on the inside of the sides. Basically they just need to be inserted into the holes. But there are plastic choppers that require a lot of hammering into the holes. There are hinges attached to the back that will hold the cabinet on the wall.
This kitchen assembly scheme is also suitable for floor cabinets. Only some need to have legs screwed on.
How to install a kitchen unit
As already mentioned, the order in which the lockers are installed is arbitrary. You can hang the top ones first, then the bottom ones, or vice versa. It doesn't matter. The installation order is important: always start from the corner. How smooth this first cabinet will be will determine how easy the subsequent installation will be.
The installation height of wall cabinets depends on the height of the “users”, but not lower than 45 cm from the level of the countertop. When hanging cabinets on the wall, mark a horizontal line. It can be drawn using a bubble or water level, but the easiest way is to expand the plane to the required height using a level or plane builder. The upper edge of the mounting strip is installed along this line or the cabinets are aligned when installed on conventional canopies.
The task is both simple and difficult at the same time - to arrange the cabinets so that they are on the same level, and their walls are vertical and horizontal. In this case, there will be no problems during operation.
Furniture intersection ties
Since kitchen furniture consists of separate cabinets, they are fastened together. There are two options - install, then fasten, or first fasten, then hang. The second option is possible if you have helpers - hanging even two fastened cabinets alone is not an easy task.
The cabinets are fastened together using intersectional ties. They are of different diameters and different lengths - under laminated chipboards of different thicknesses. At least two ties are needed for one wall. They are placed in the area of the loops - a little lower or a little higher. Two cabinets are placed in the same plane, their walls are fastened with clamps, a through hole is made - along the diameter of the tie, into which the fasteners are installed, tightened with a screwdriver or screwdriver.
Cabinets with drawers
As in previous cases, you must first assemble a frame of three components. A fiberboard sheet is inserted into the bottom. Next, you should fix the outer side with ties. Screws are screwed into the sides of the facade.
The means for fastening the eccentric bushings is inserted into specially designated places that are already prepared at the factory and turned. This is how fastening occurs.
The roller guides are screwed onto the back of the bottom. Their work is then checked.
Nuances when assembling corner cabinets
The cabinets are assembled according to the same principle as a regular kitchen set. But assembling a corner kitchen has one small feature.
In cheap options, the bottom has two parts to reduce the cost of the product. If the cabinet is used to install a sink, then it has almost no wall at the back. But there are collet ties, which adds rigidity to the structure.
Types of canopies for cabinets
Cabinets that are hung on the wall require reliable hinges. They come in different types, differing in design and shape.
- Simple hanging hinges are a metal plate with 2 small holes and 1 large one. The canopies are screwed onto the ends of the left and right sidewalls. The disadvantage of this type is that under heavy load the hinges will simply come off.
- A more reliable option is the corners, because one screw will stand on the cabinet lid. In this case, the load will be distributed over a larger area. Screw the corners, stepping back from the edge by 5-10 centimeters. For reliability, you can put a larger number of corners. The disadvantage of simple designs is that they are not adjustable. As they hung, so will they hang.
- Adjustable canopies are complex in design and are more expensive. They consist of a metal canopy and a plastic body. There is an adjustment system with which you can move it in different directions. Fastening occurs inside on the side panels. A small opening is cut out in the back wall. The mounting plate is screwed onto the wall. The upper ledge serves as a holder for cabinet hooks. The cabinets are easy to install and remove. They can withstand loads of up to fifty kilograms.
Assembling a kitchen with your own hands is not so difficult if you follow the attached instructions and take into account all the subtleties of the work.
Design and construction are two sides of the same coin
Sketch of a corner modular kitchen
Give preference to modular furniture, as well as designs that provide for simplified assembly of the kitchen set. Before purchasing, draw up a detailed floor plan, on which you must indicate (preferably in millimeters):
- the height, width and length of the room in different parts of the kitchen - they will probably vary;
- location and dimensions of the door;
- exact position of electrical wiring, sewerage, water and gas pipelines;
- precise location of ventilation;
- the height of the window sill and the distance from the window opening to the corners of the kitchen.
Detailed kitchen design project with exact dimensions and arrangement of furniture and appliances
Now feel free to go to a workshop or furniture store. Experienced specialists, using 3D computer modeling programs, will select a suitable design and give advice on how to assemble a kitchen set. When choosing, follow the rules.
- The kitchen is divided into zones for cooking, cutting food with a sink and storing food with a refrigerator. The transition between them takes place along the shortest path - the “golden triangle”.
- The sink, hob and refrigerator should be placed at least half a meter apart from each other - splashes of water can cause the cooker to fail, and a refrigerator in a high temperature zone will consume more electricity.
- Place the washing machine and dishwasher closer to the water supply and sewage system.
The design of the set depends on the size of the kitchen. Options for arranging the headset elements with the letters G and P are used in small rooms. The island option is suitable for spacious rooms.
Possible kitchen layout options